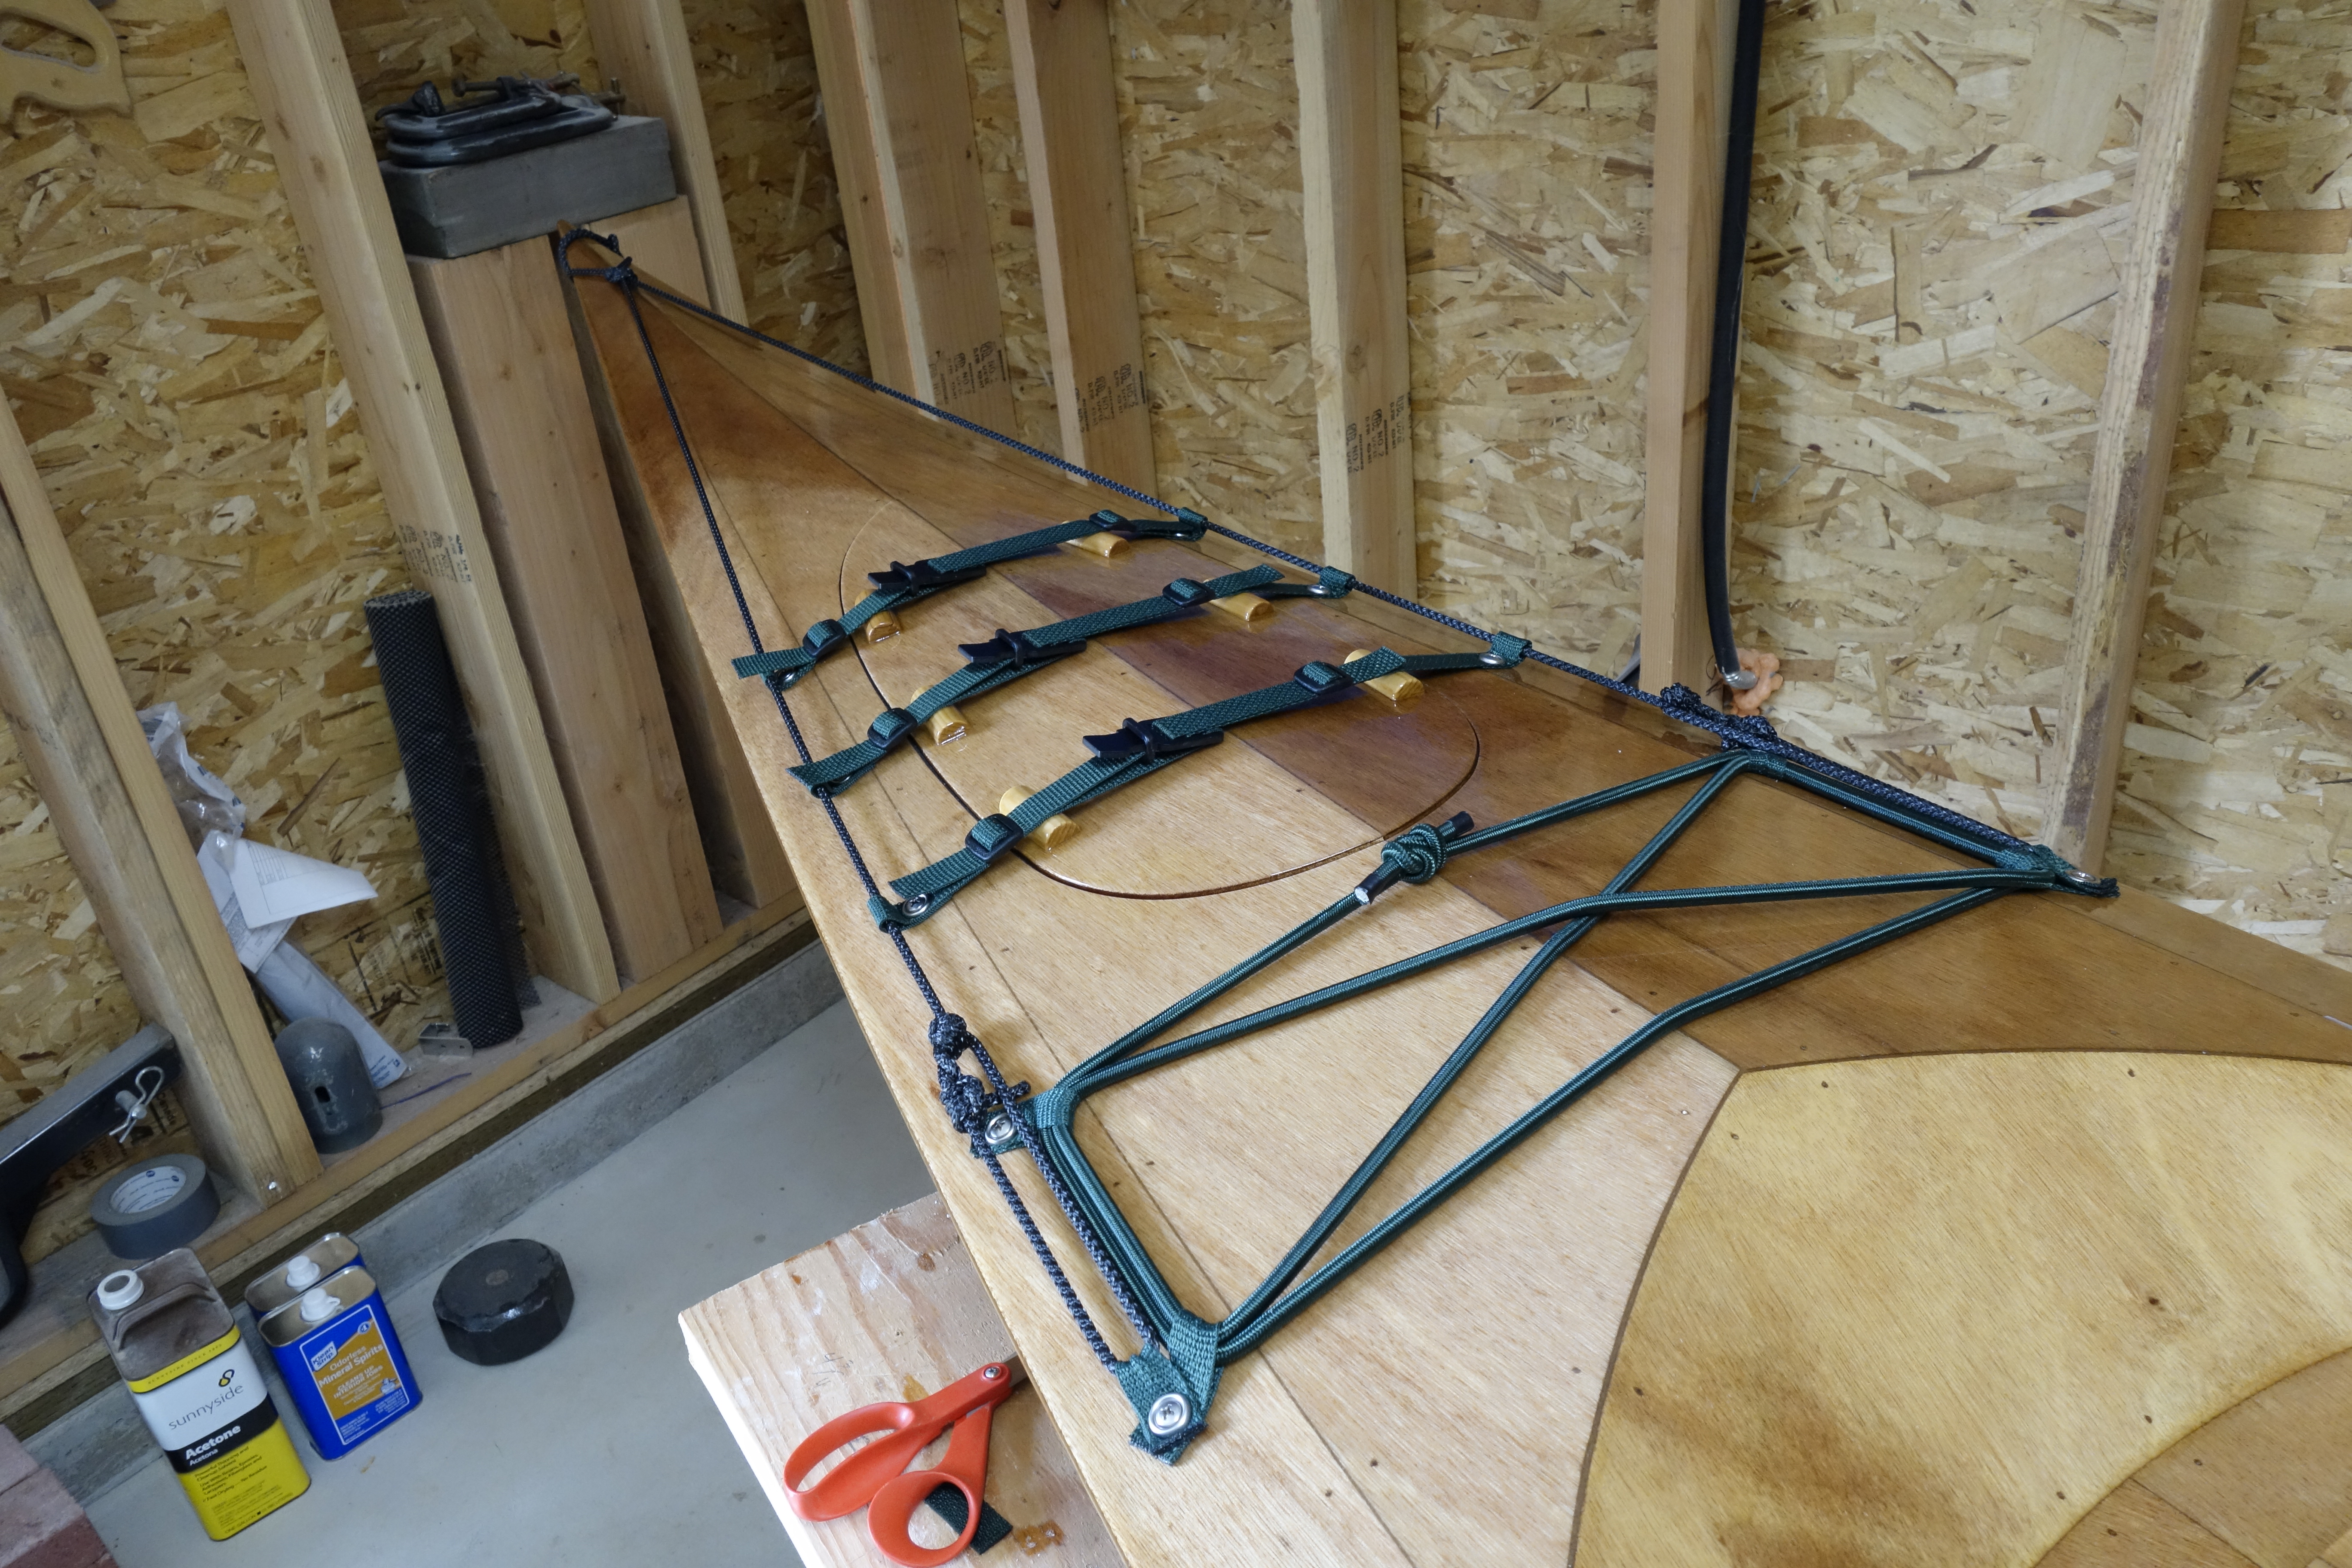
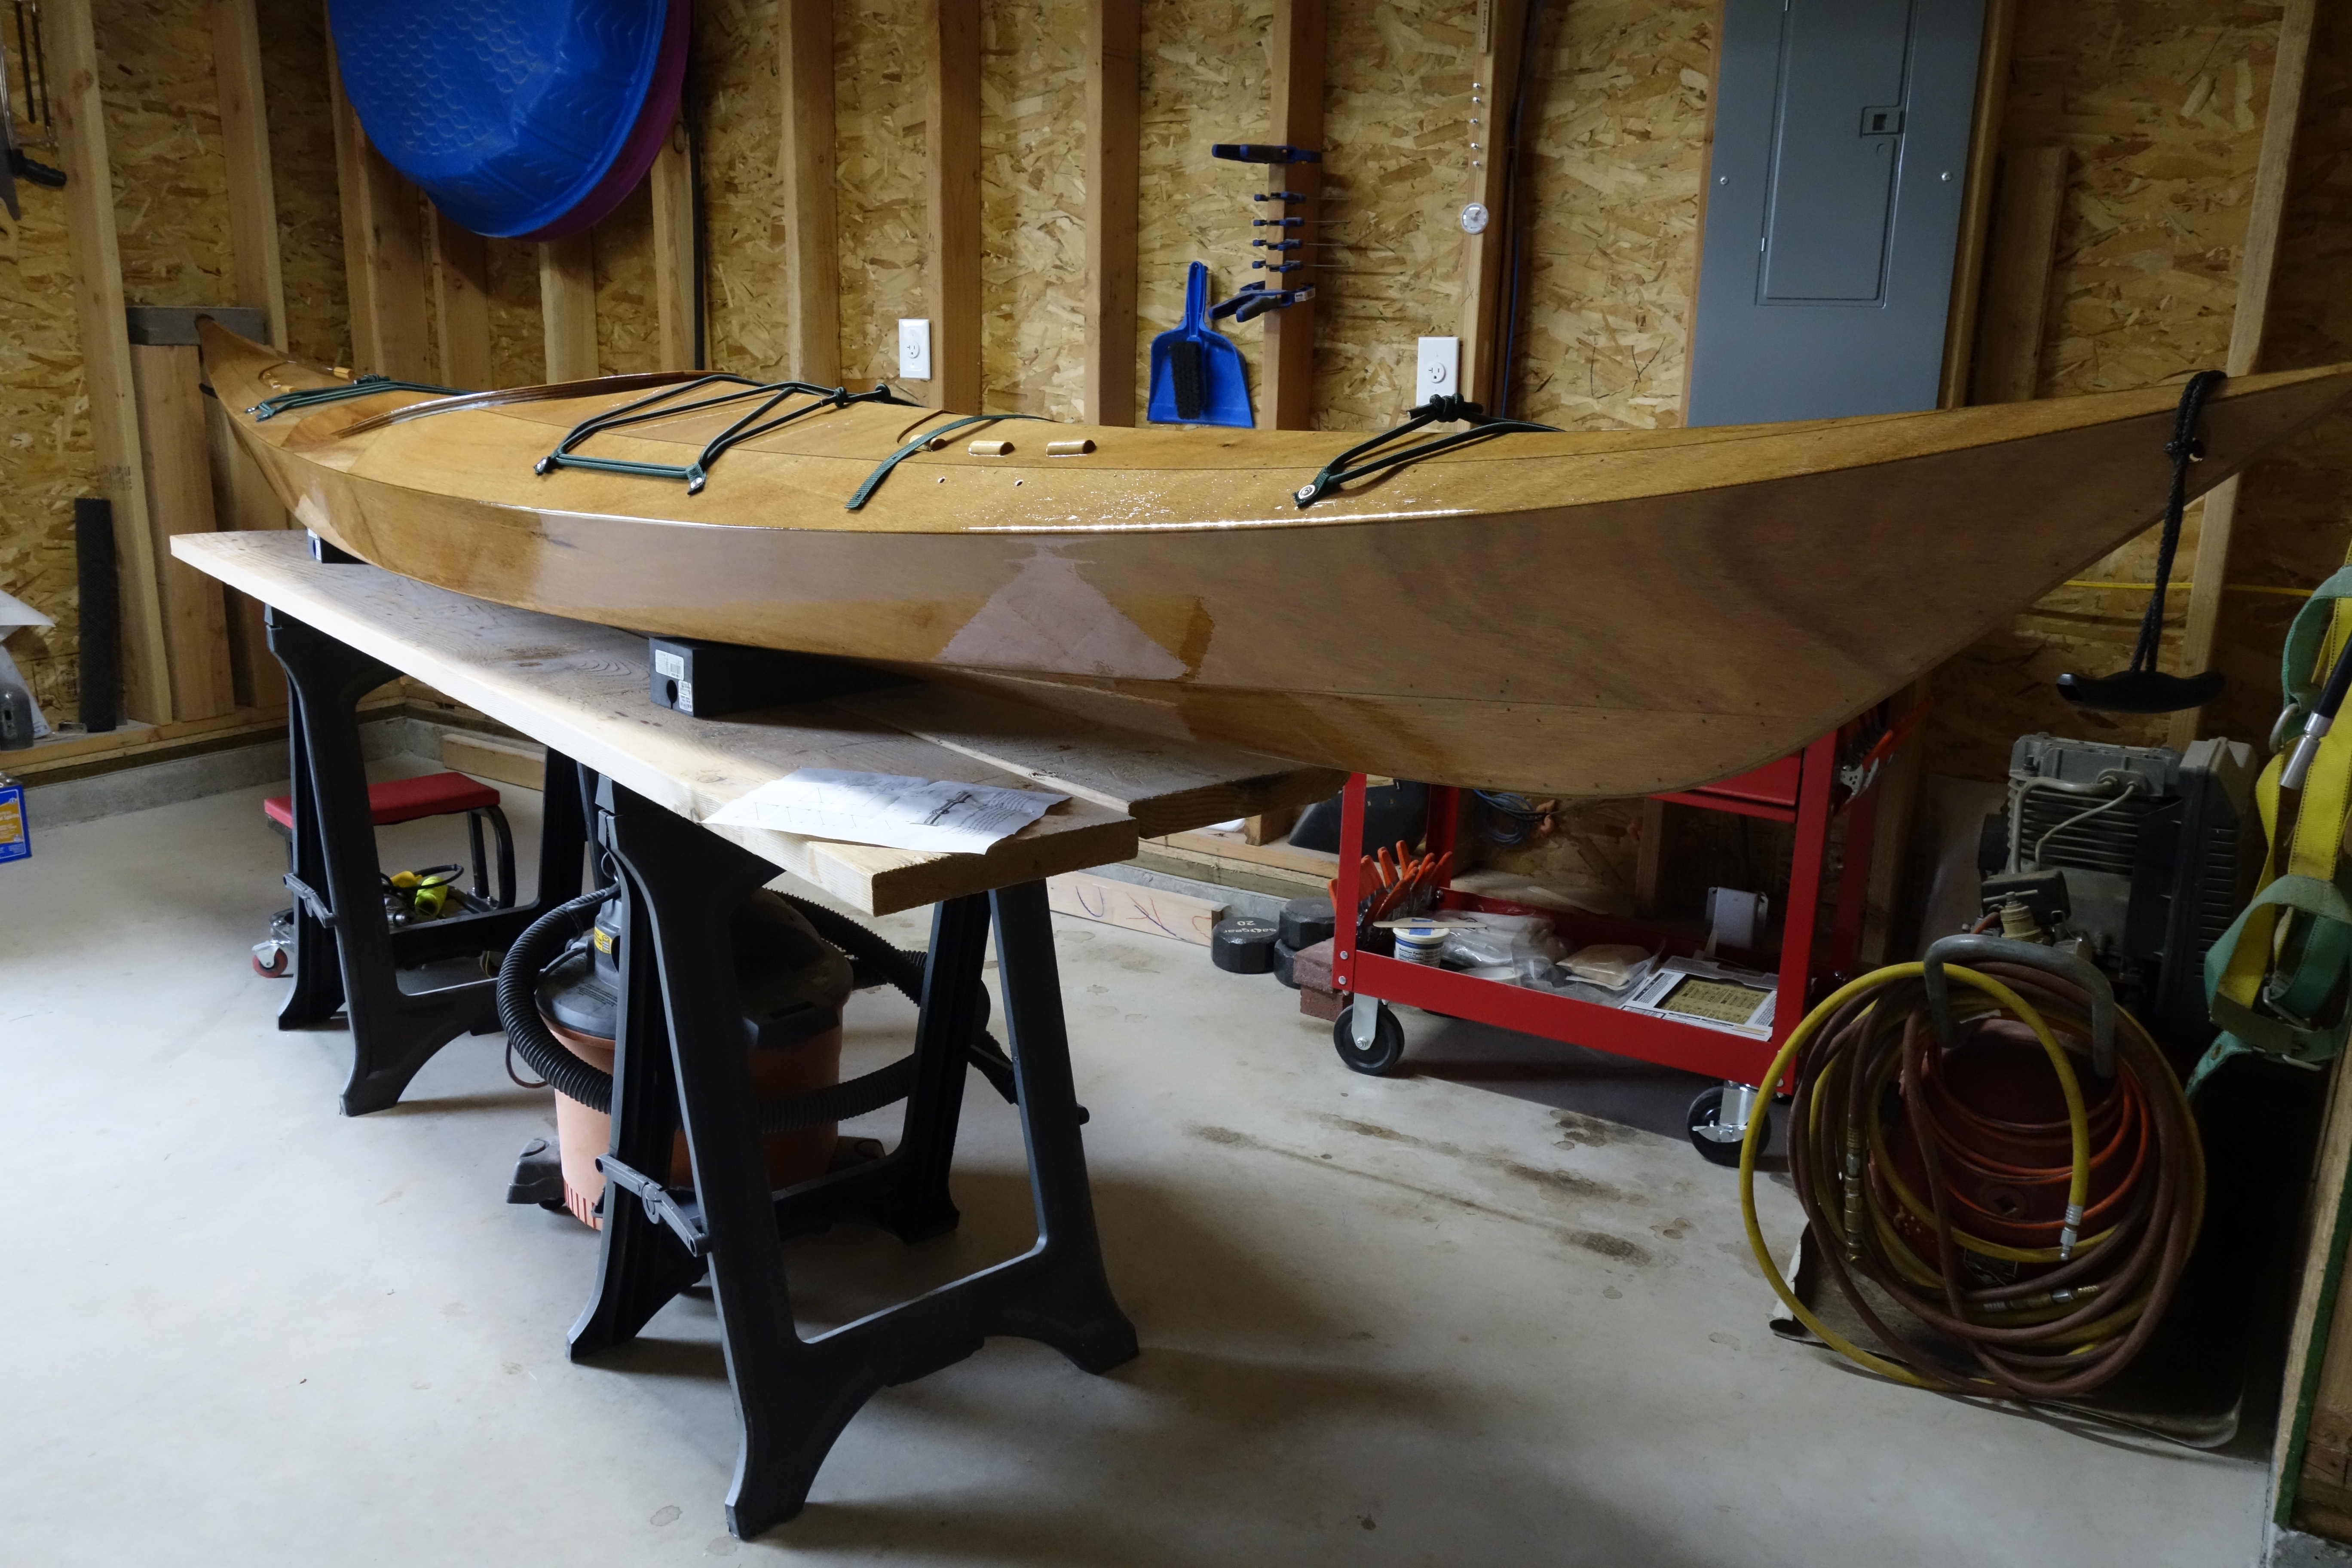
During my lunch hour today I was able to finish the deck rigging. All that remains is the seat installation, after which the Ronan is finished and ready for her maiden voyage! I still have to make the removable thigh braces, but those are an accessory to help me roll, and I can certainly paddle without them. I can finish those anytime.
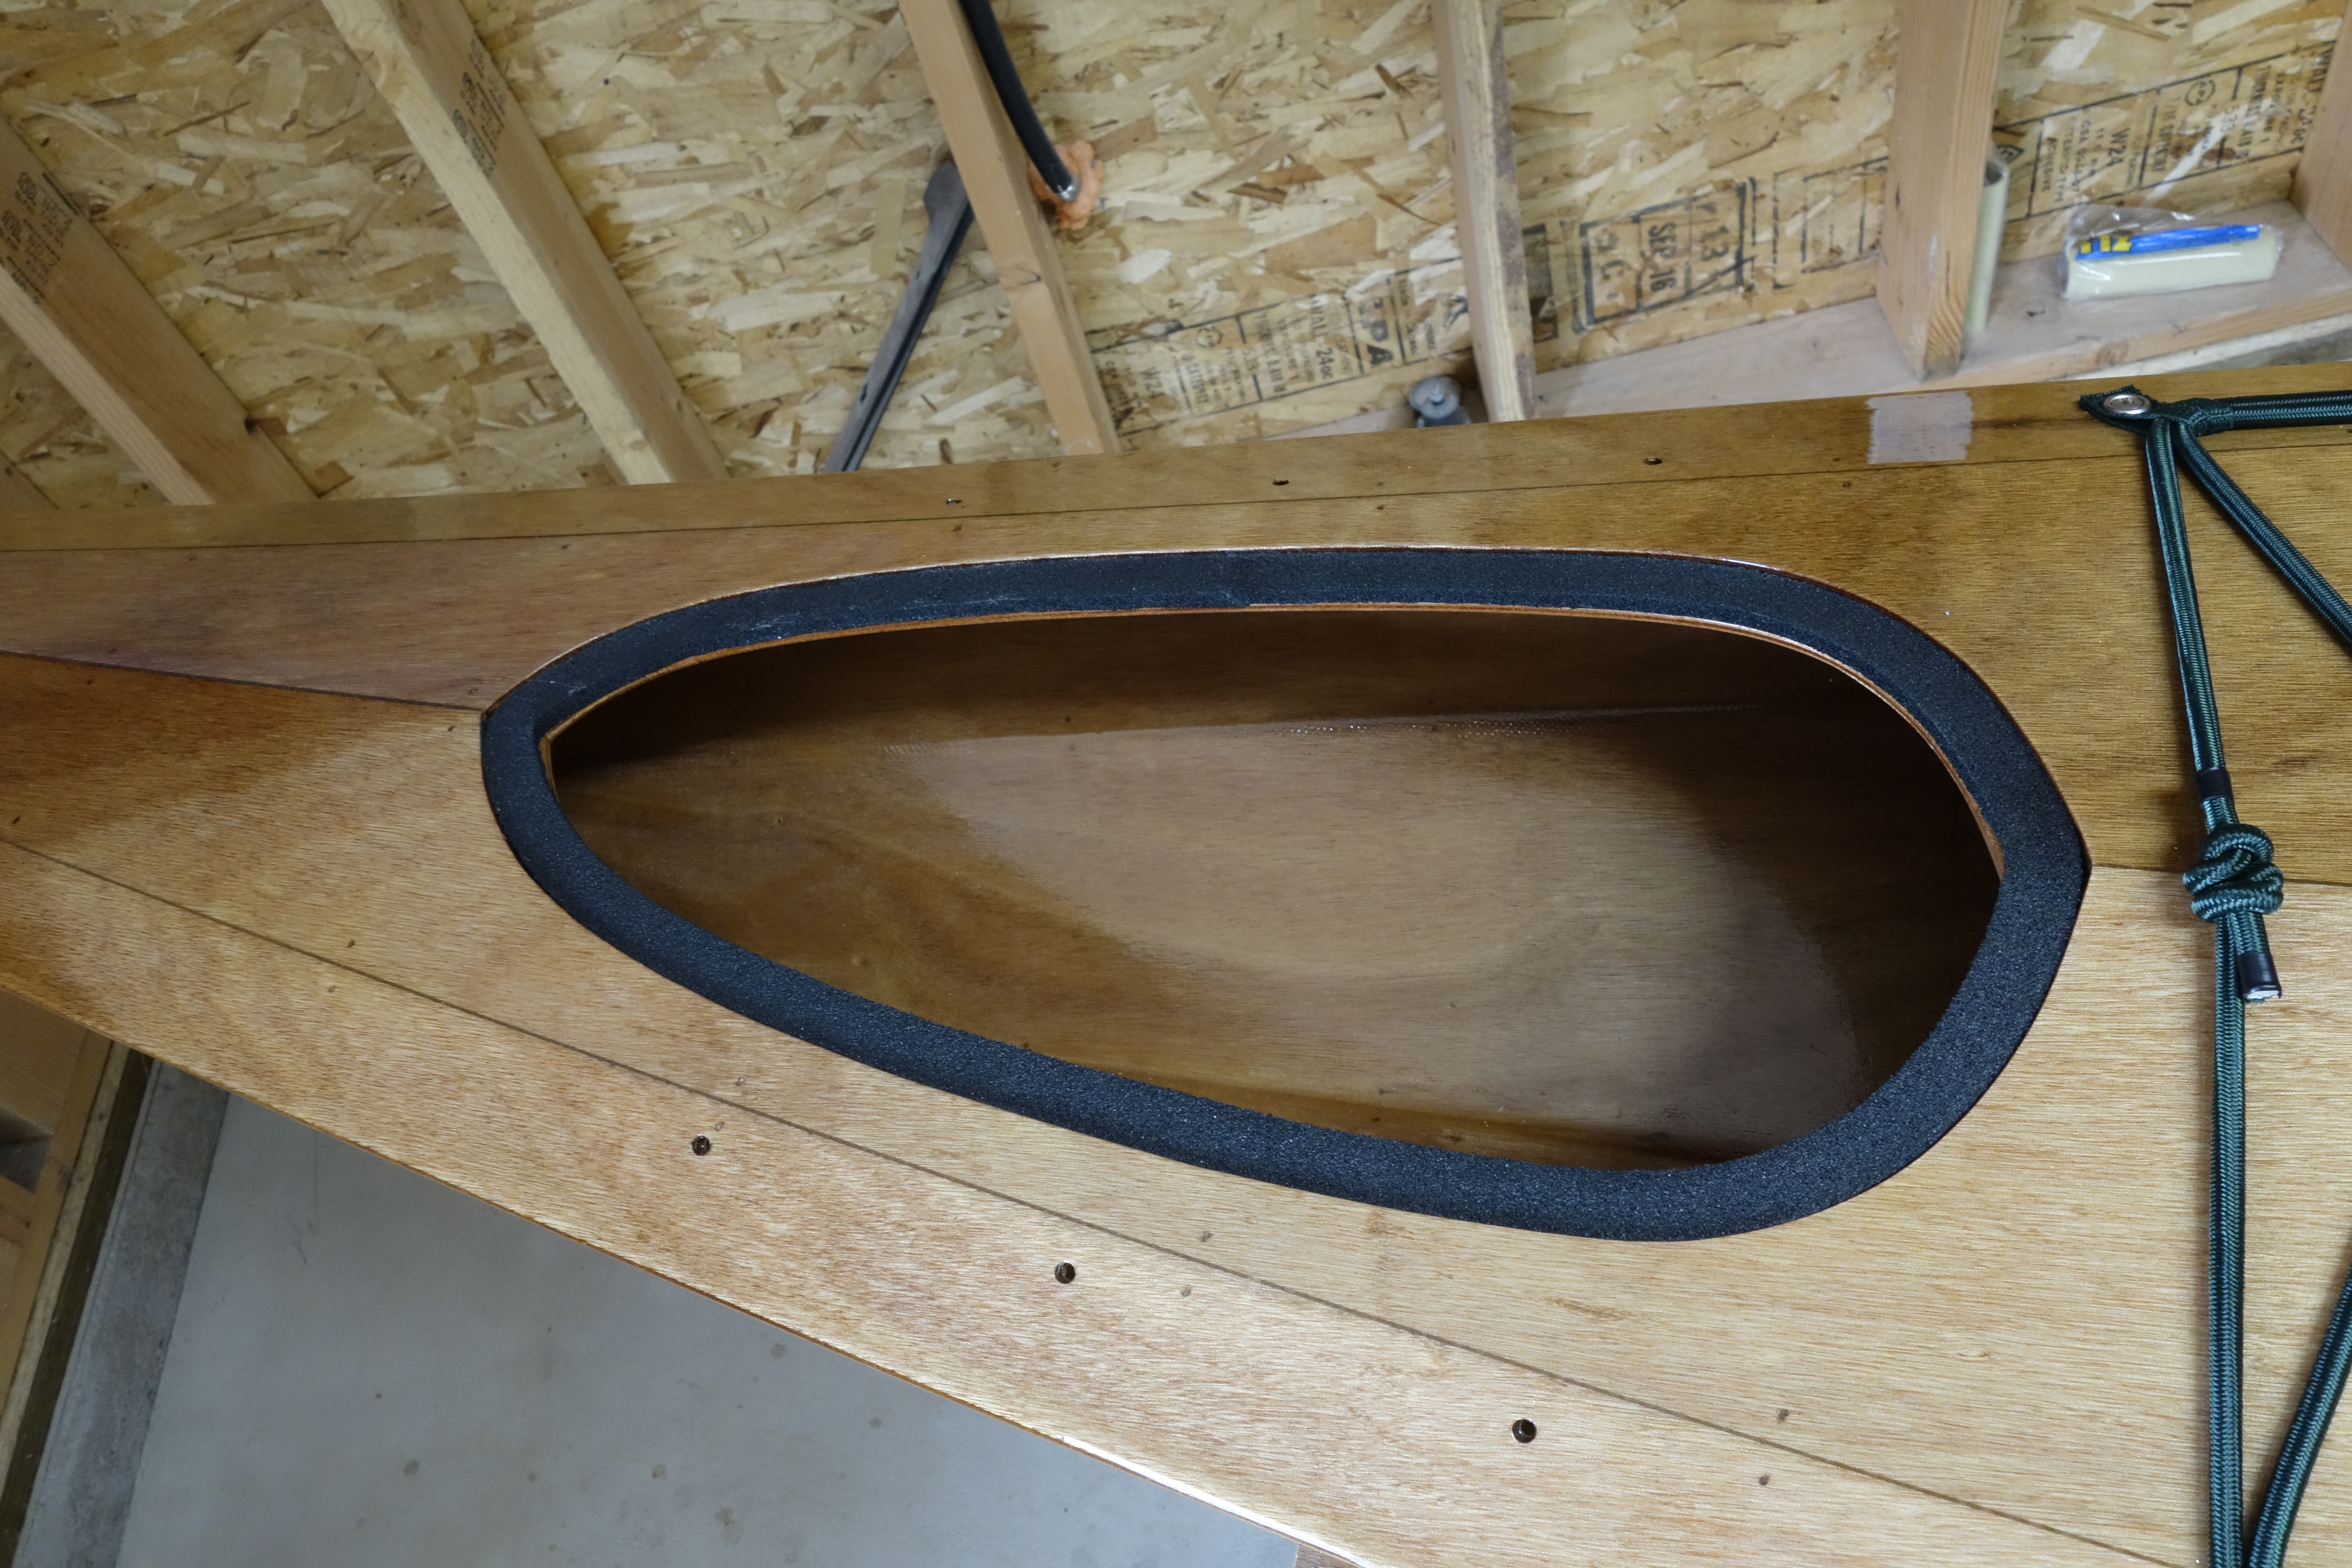
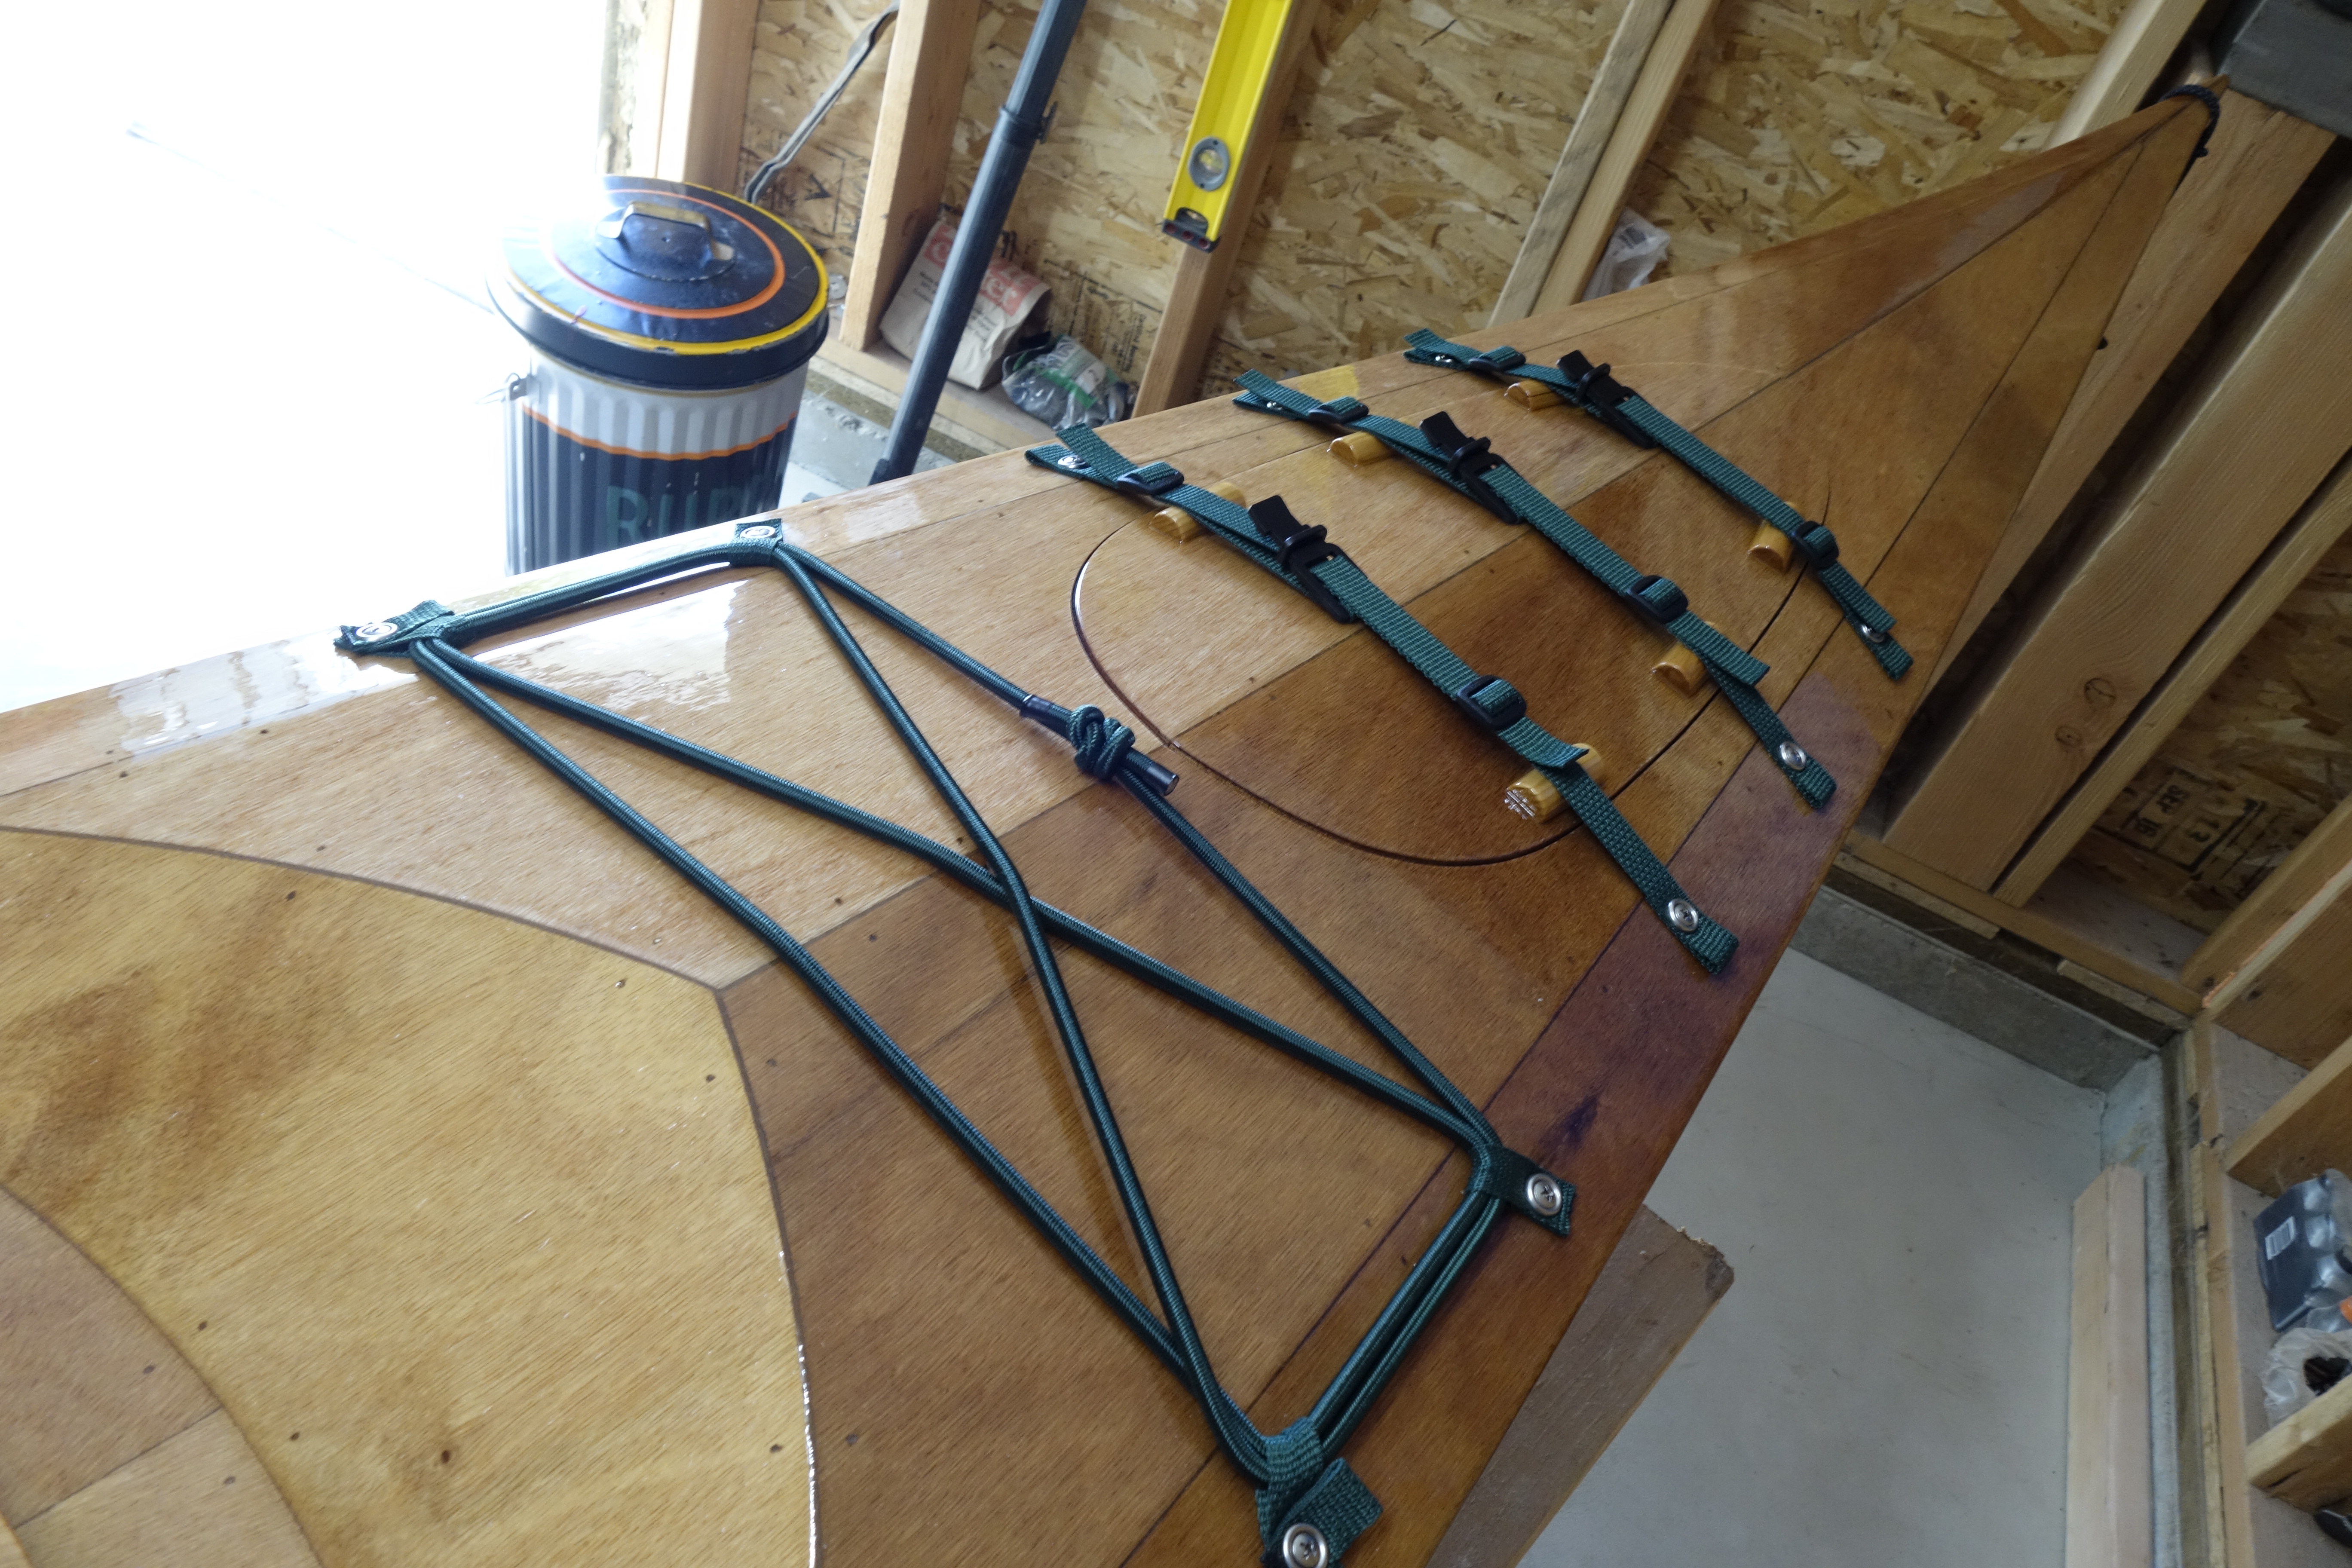
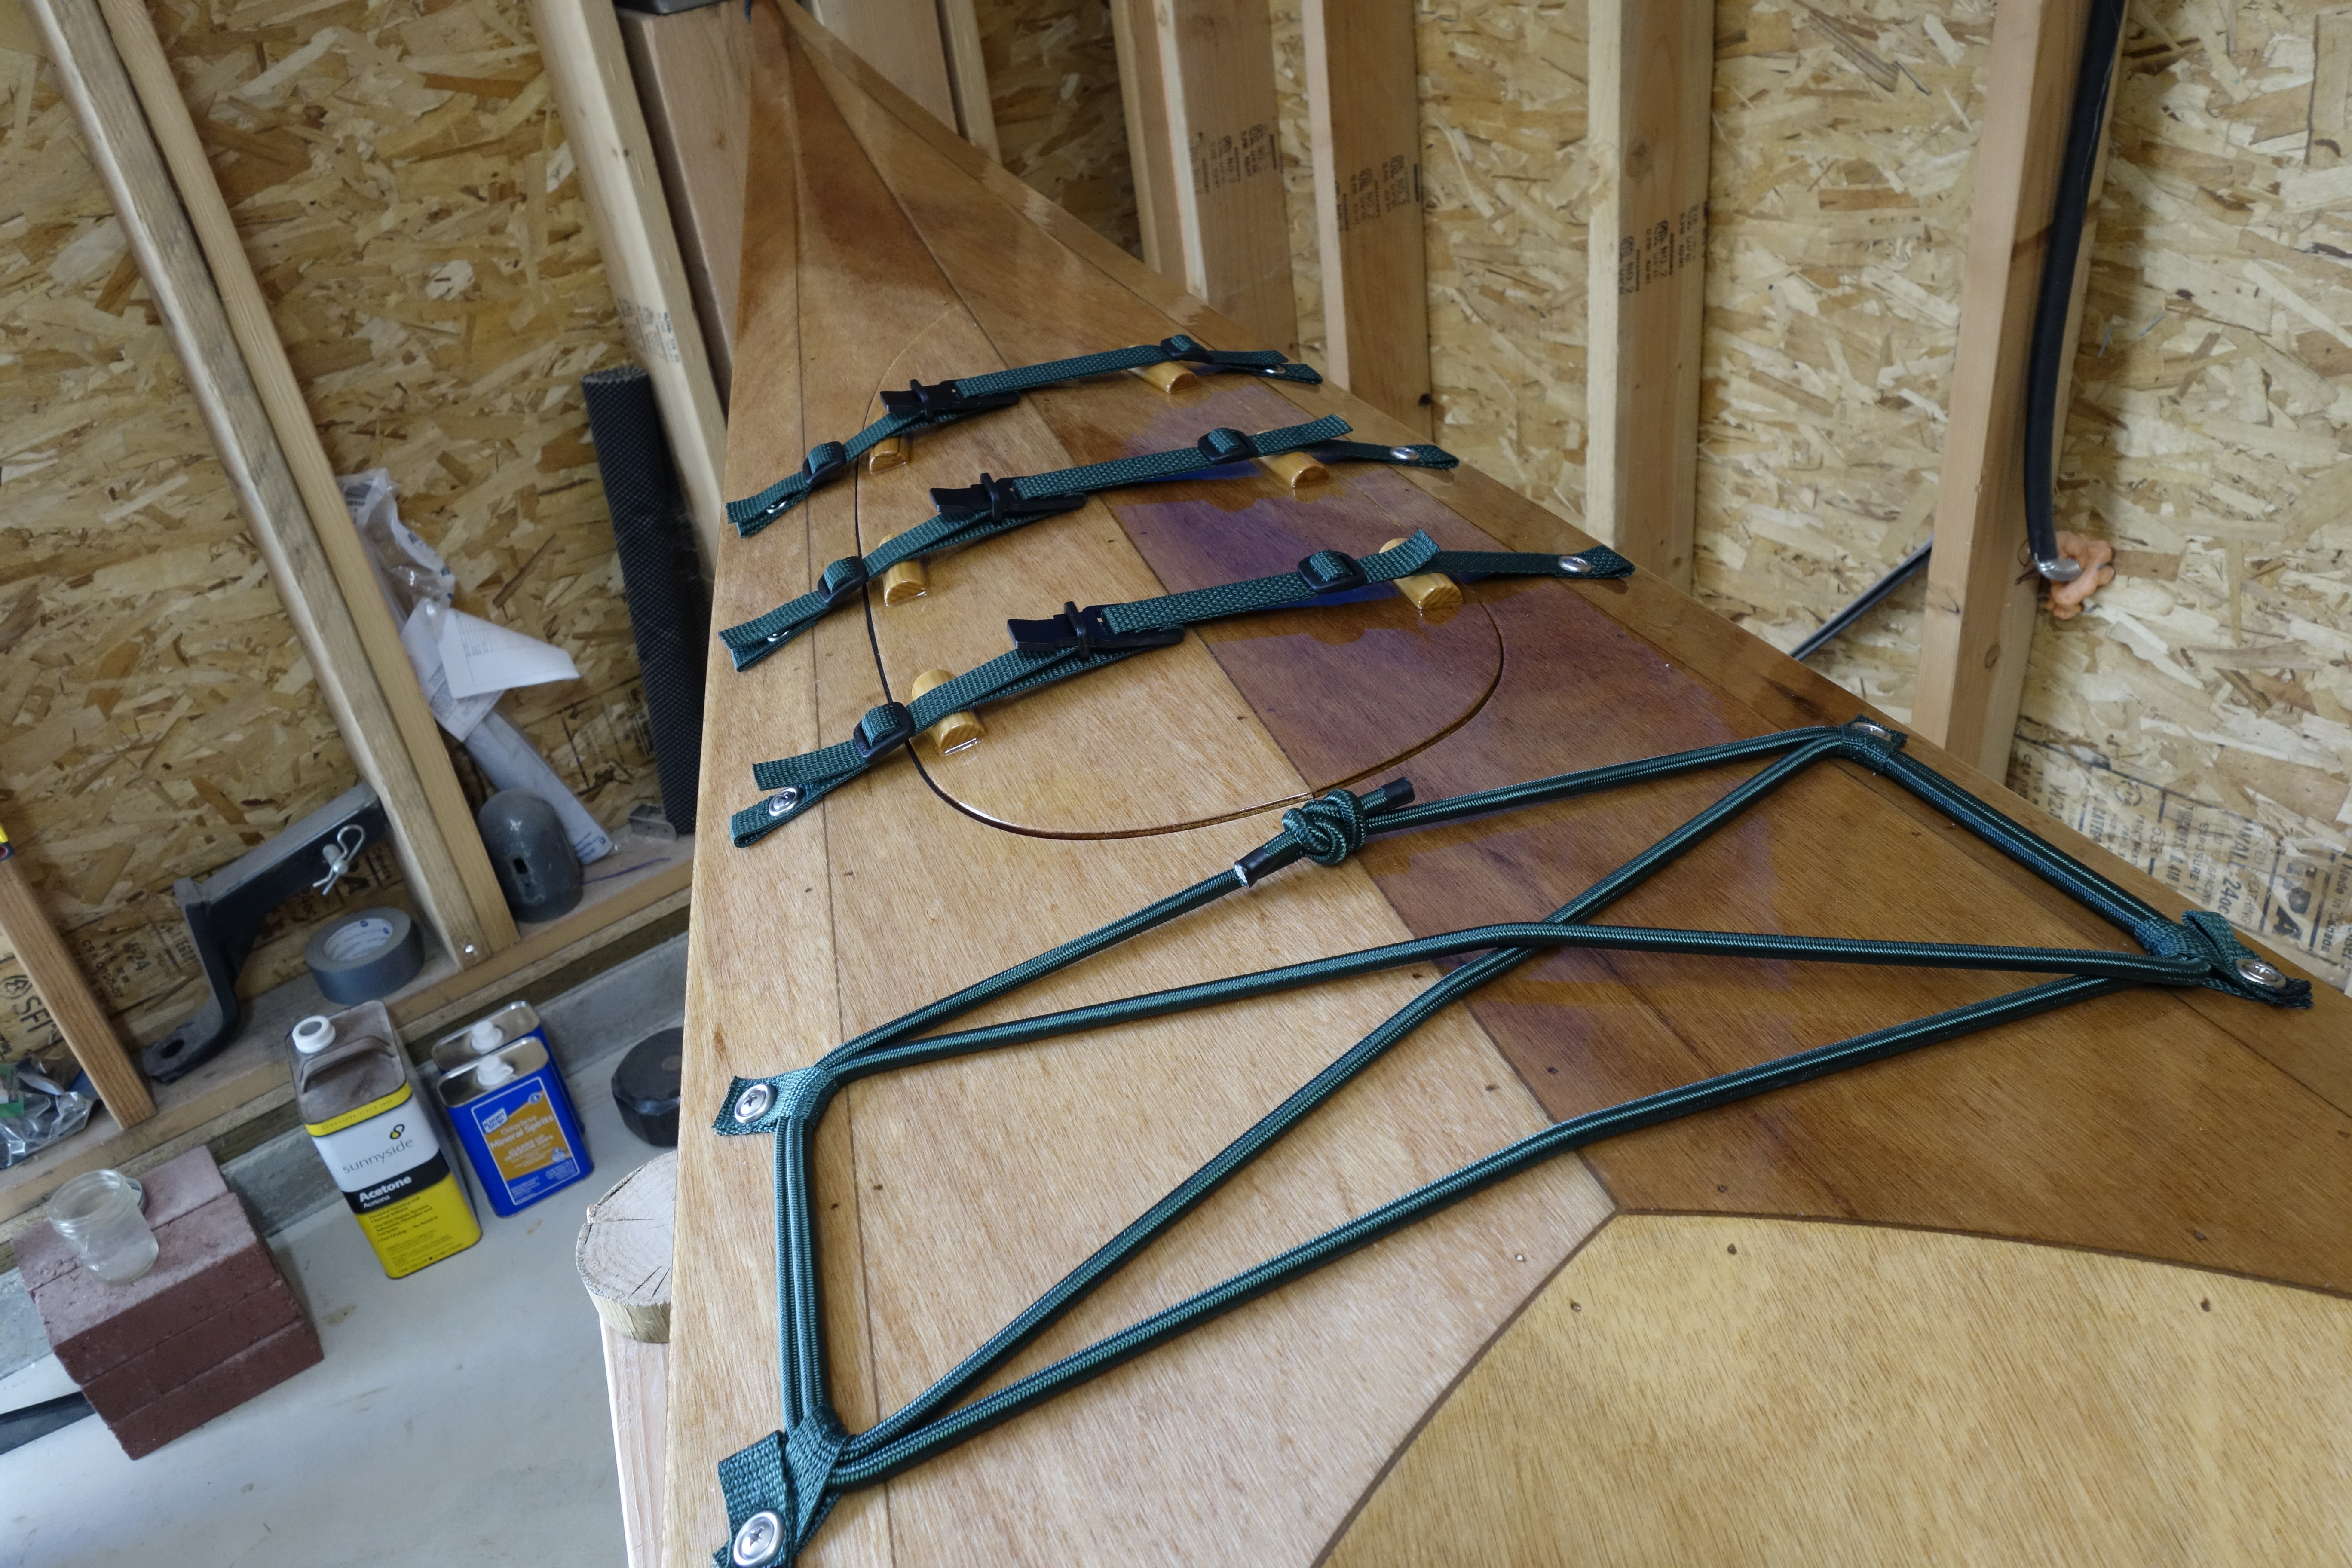
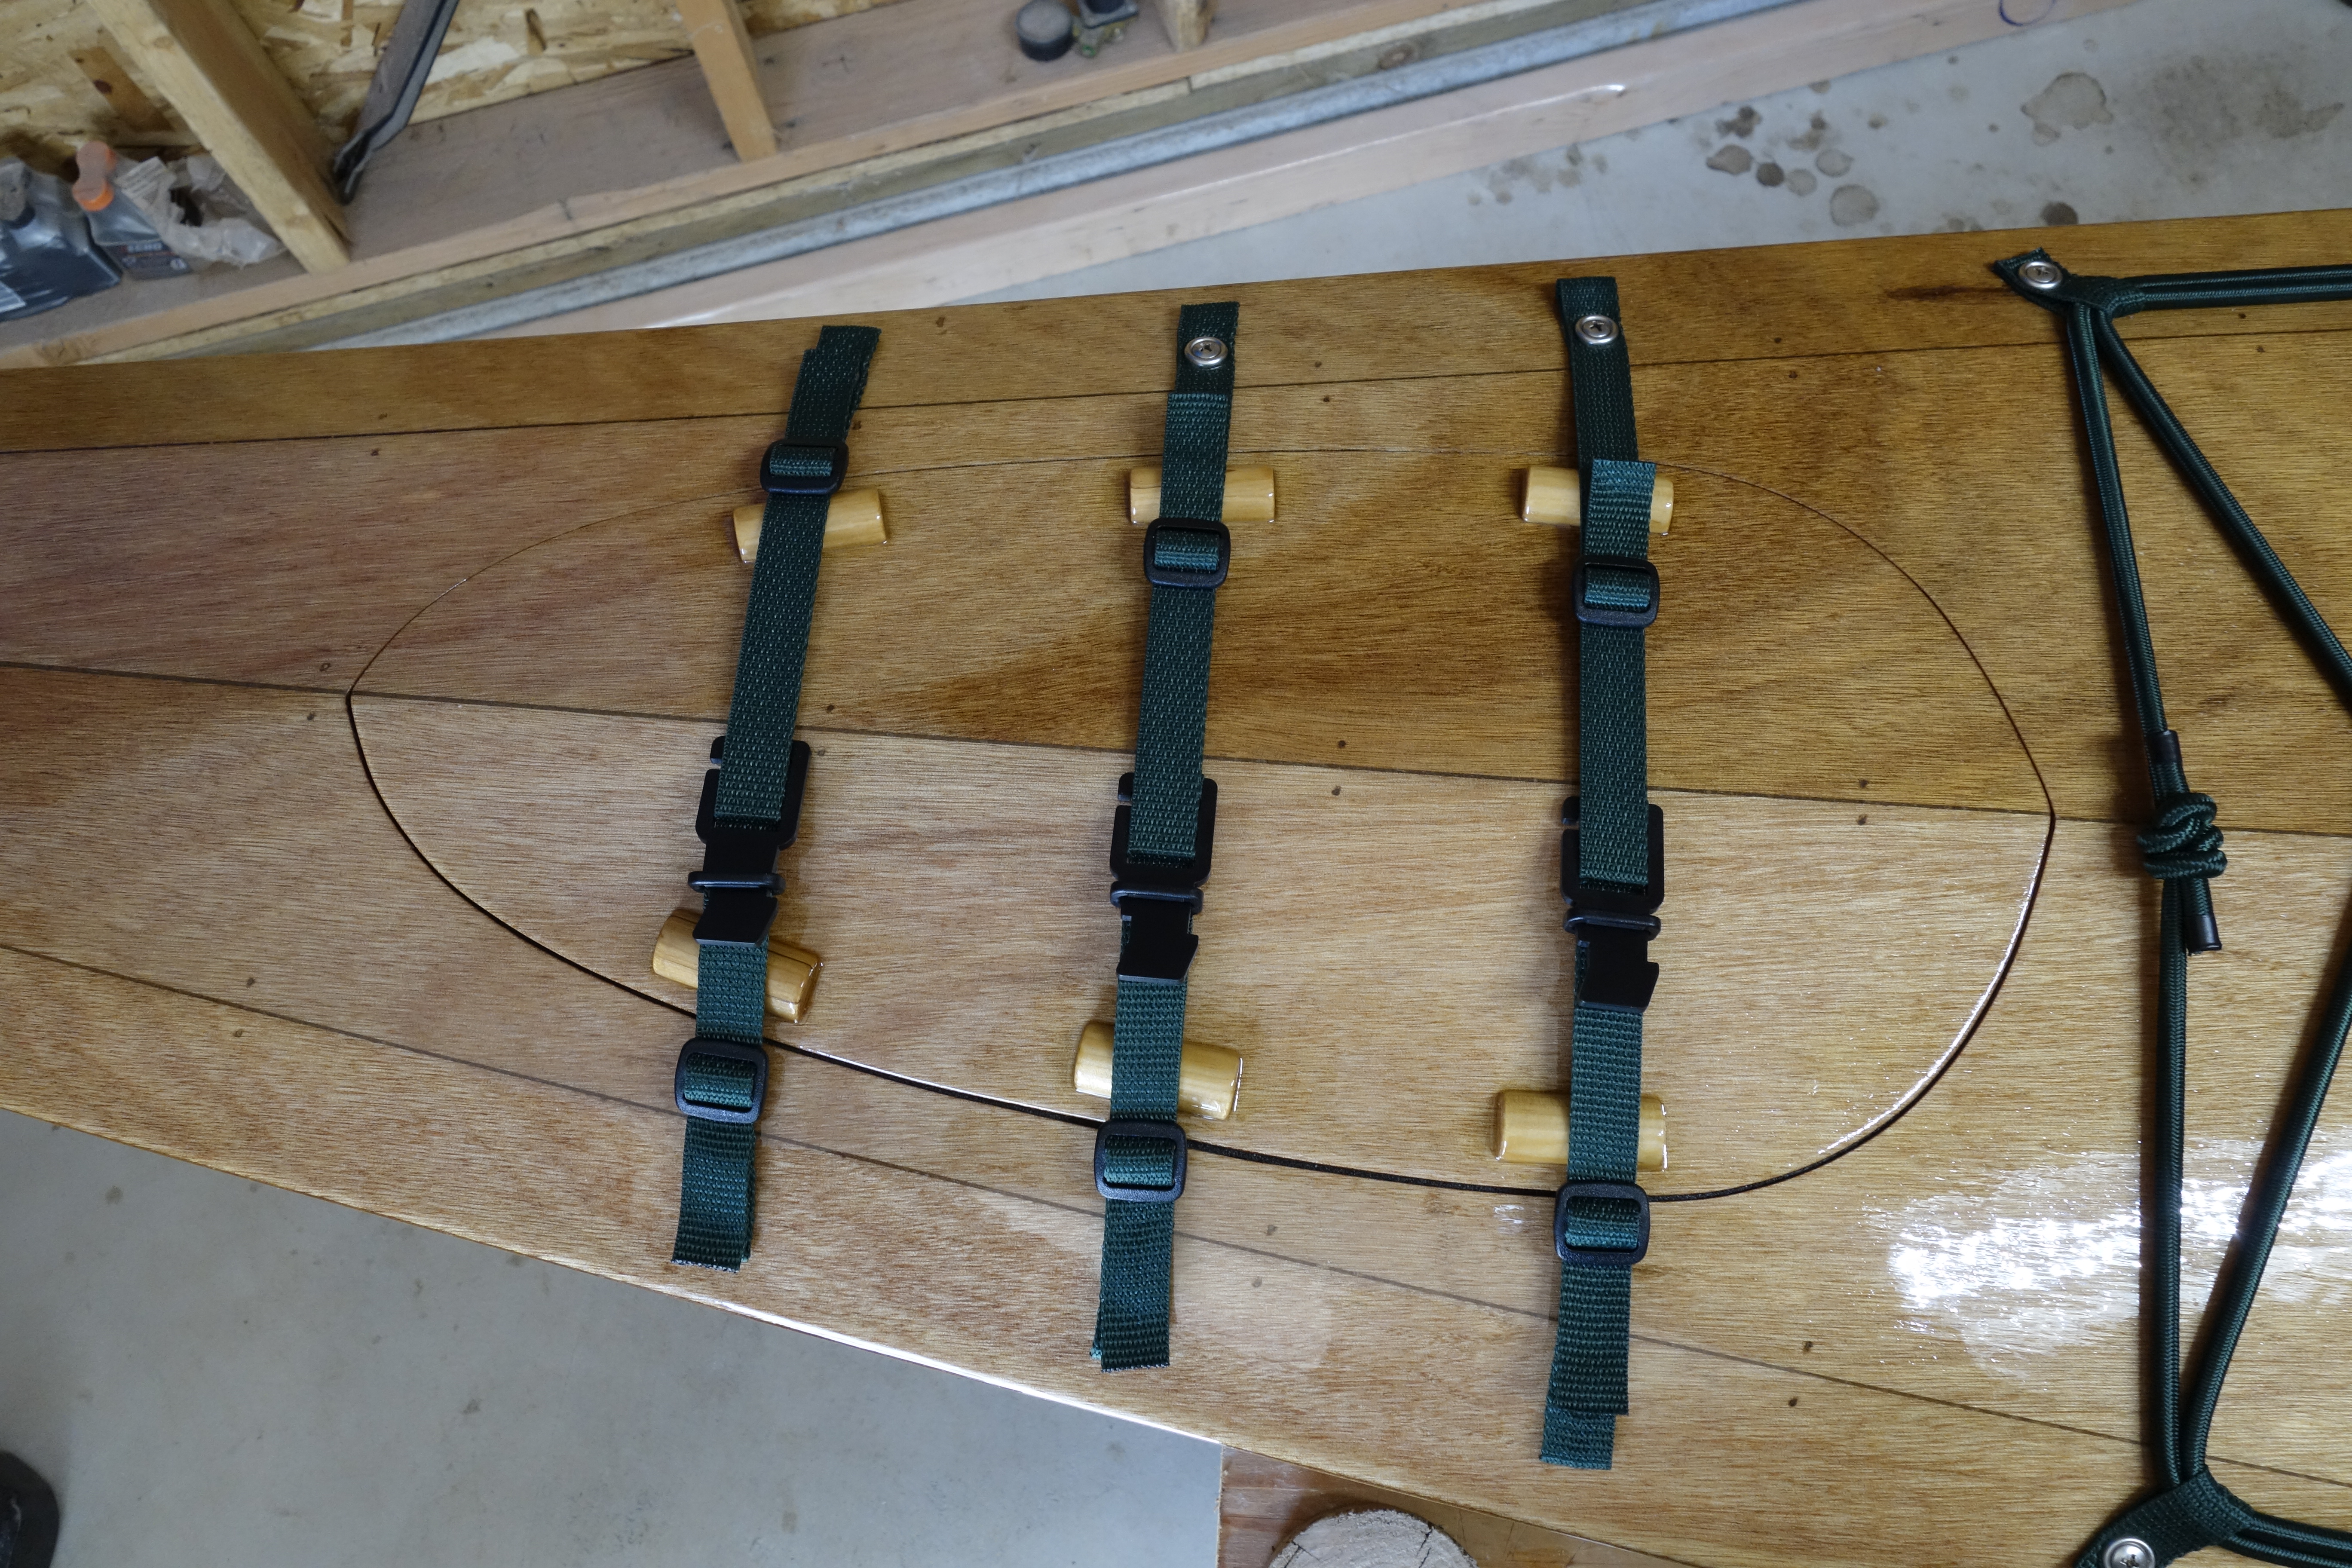
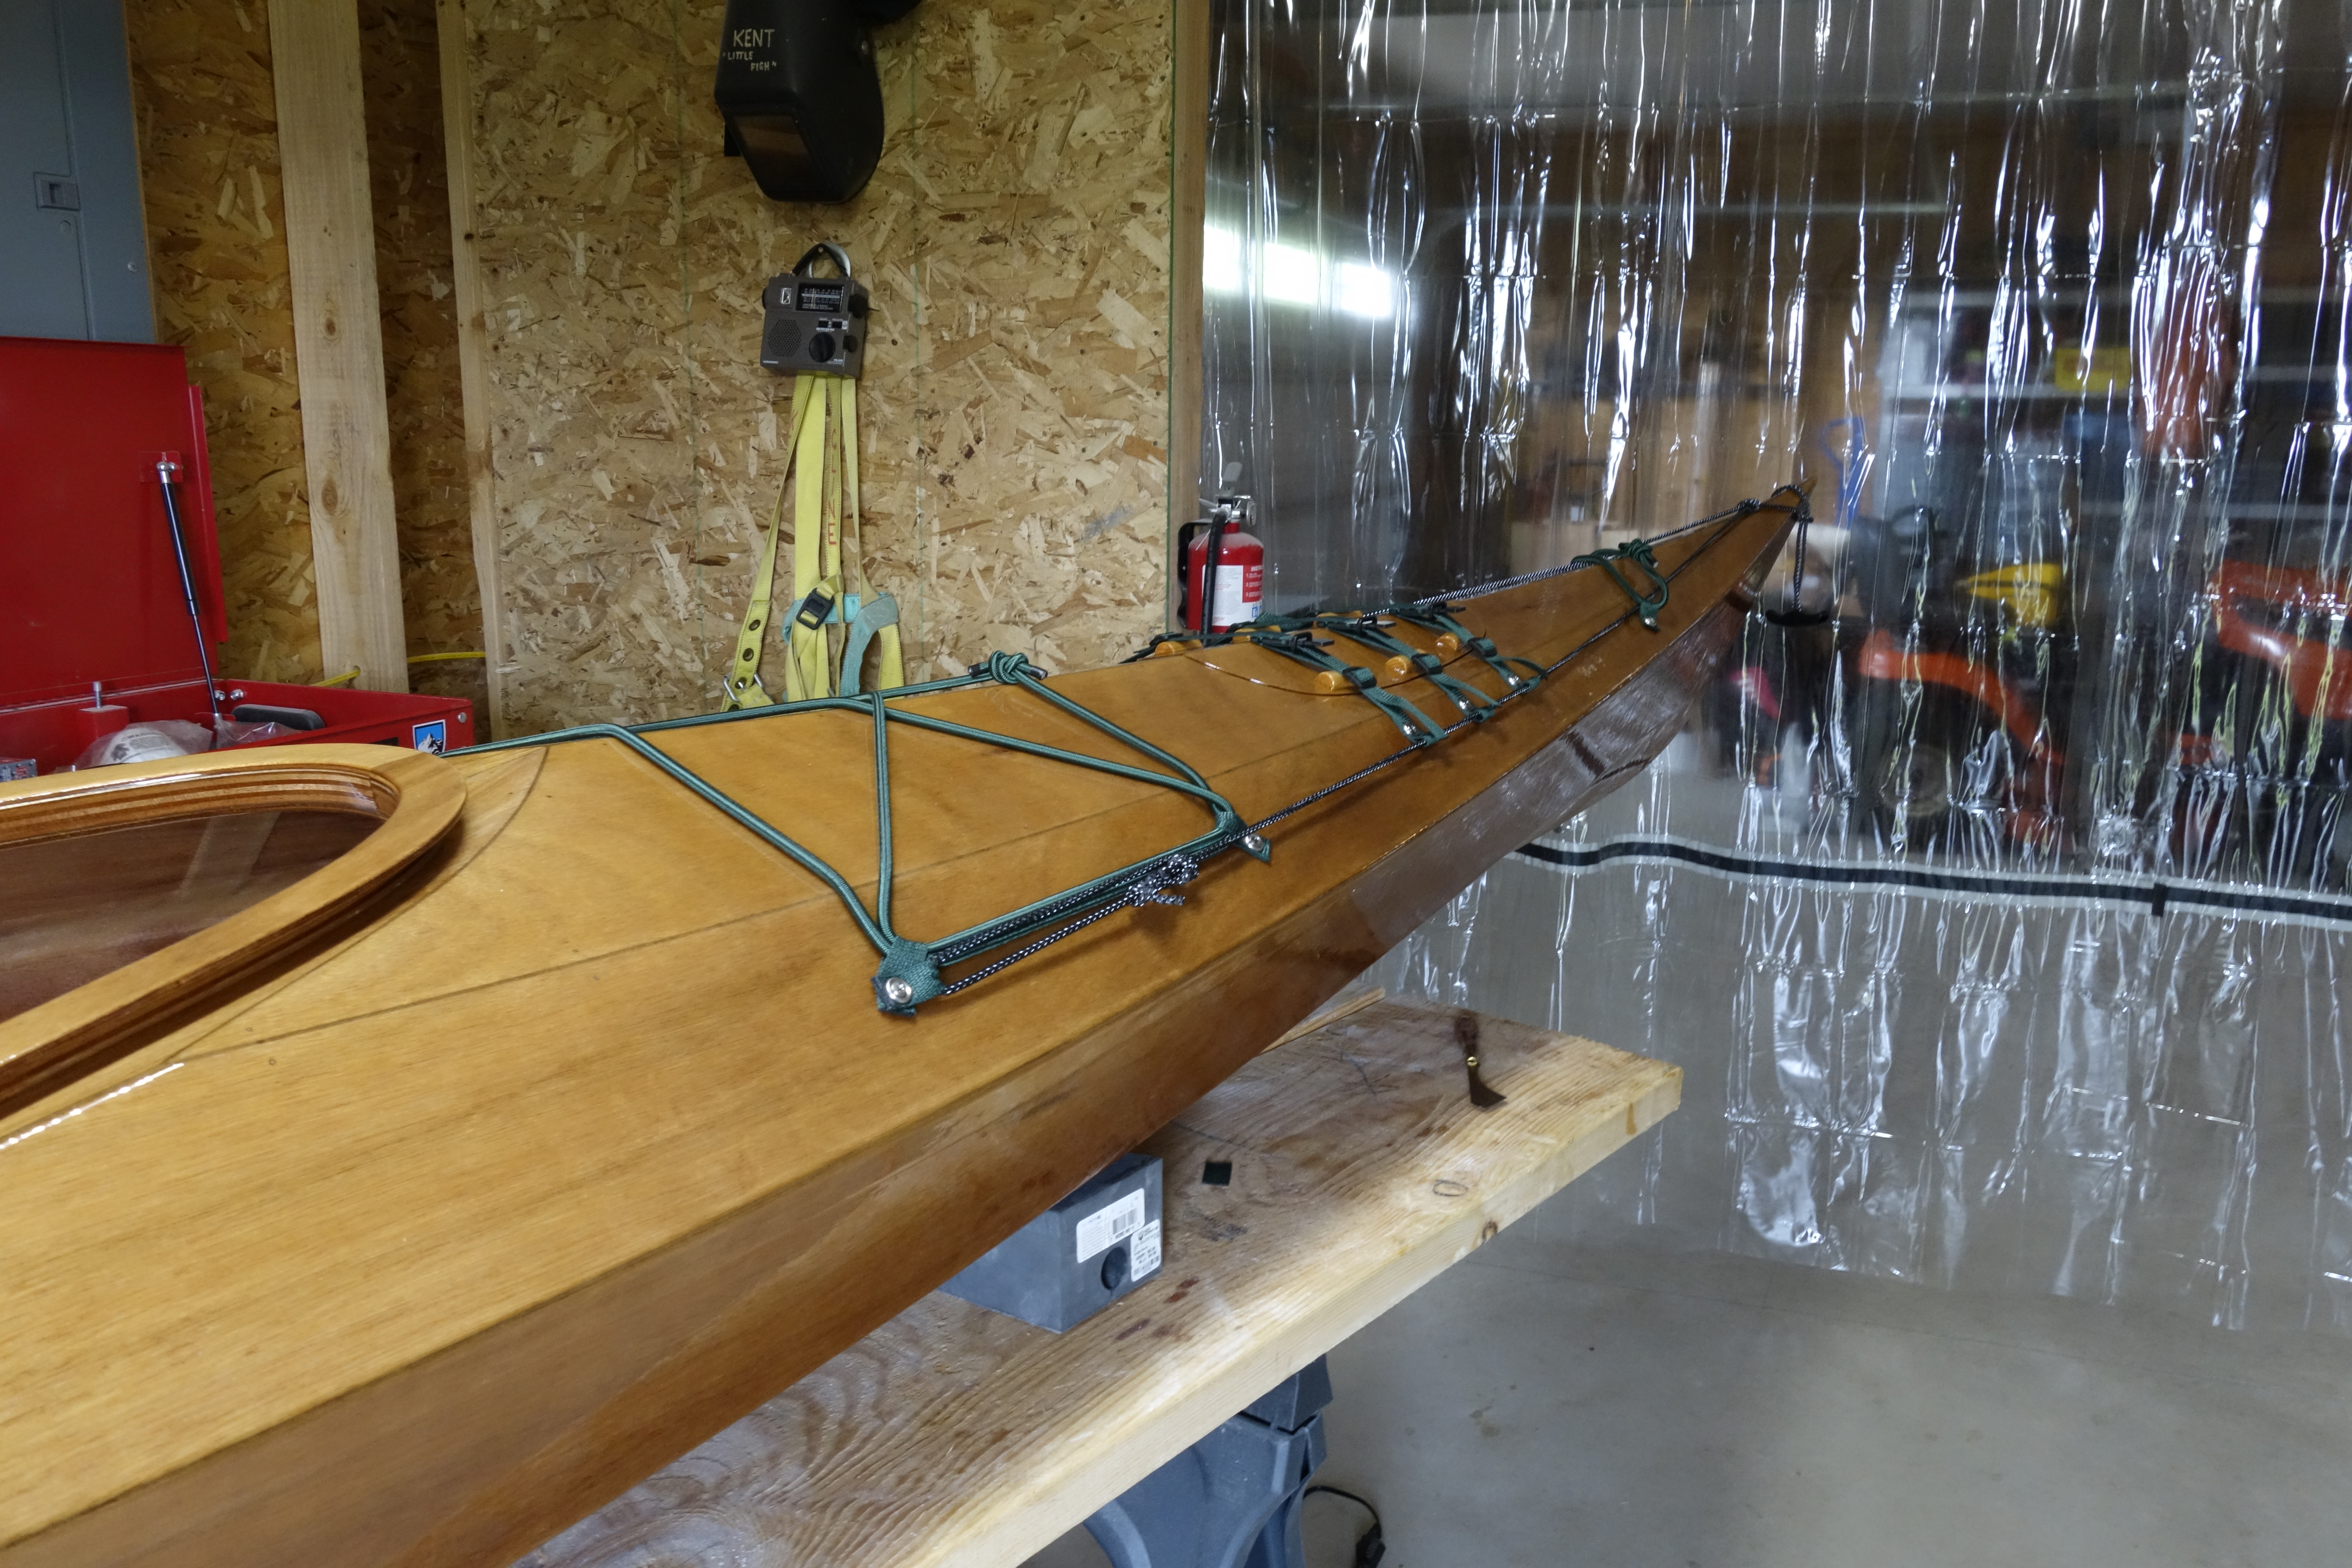
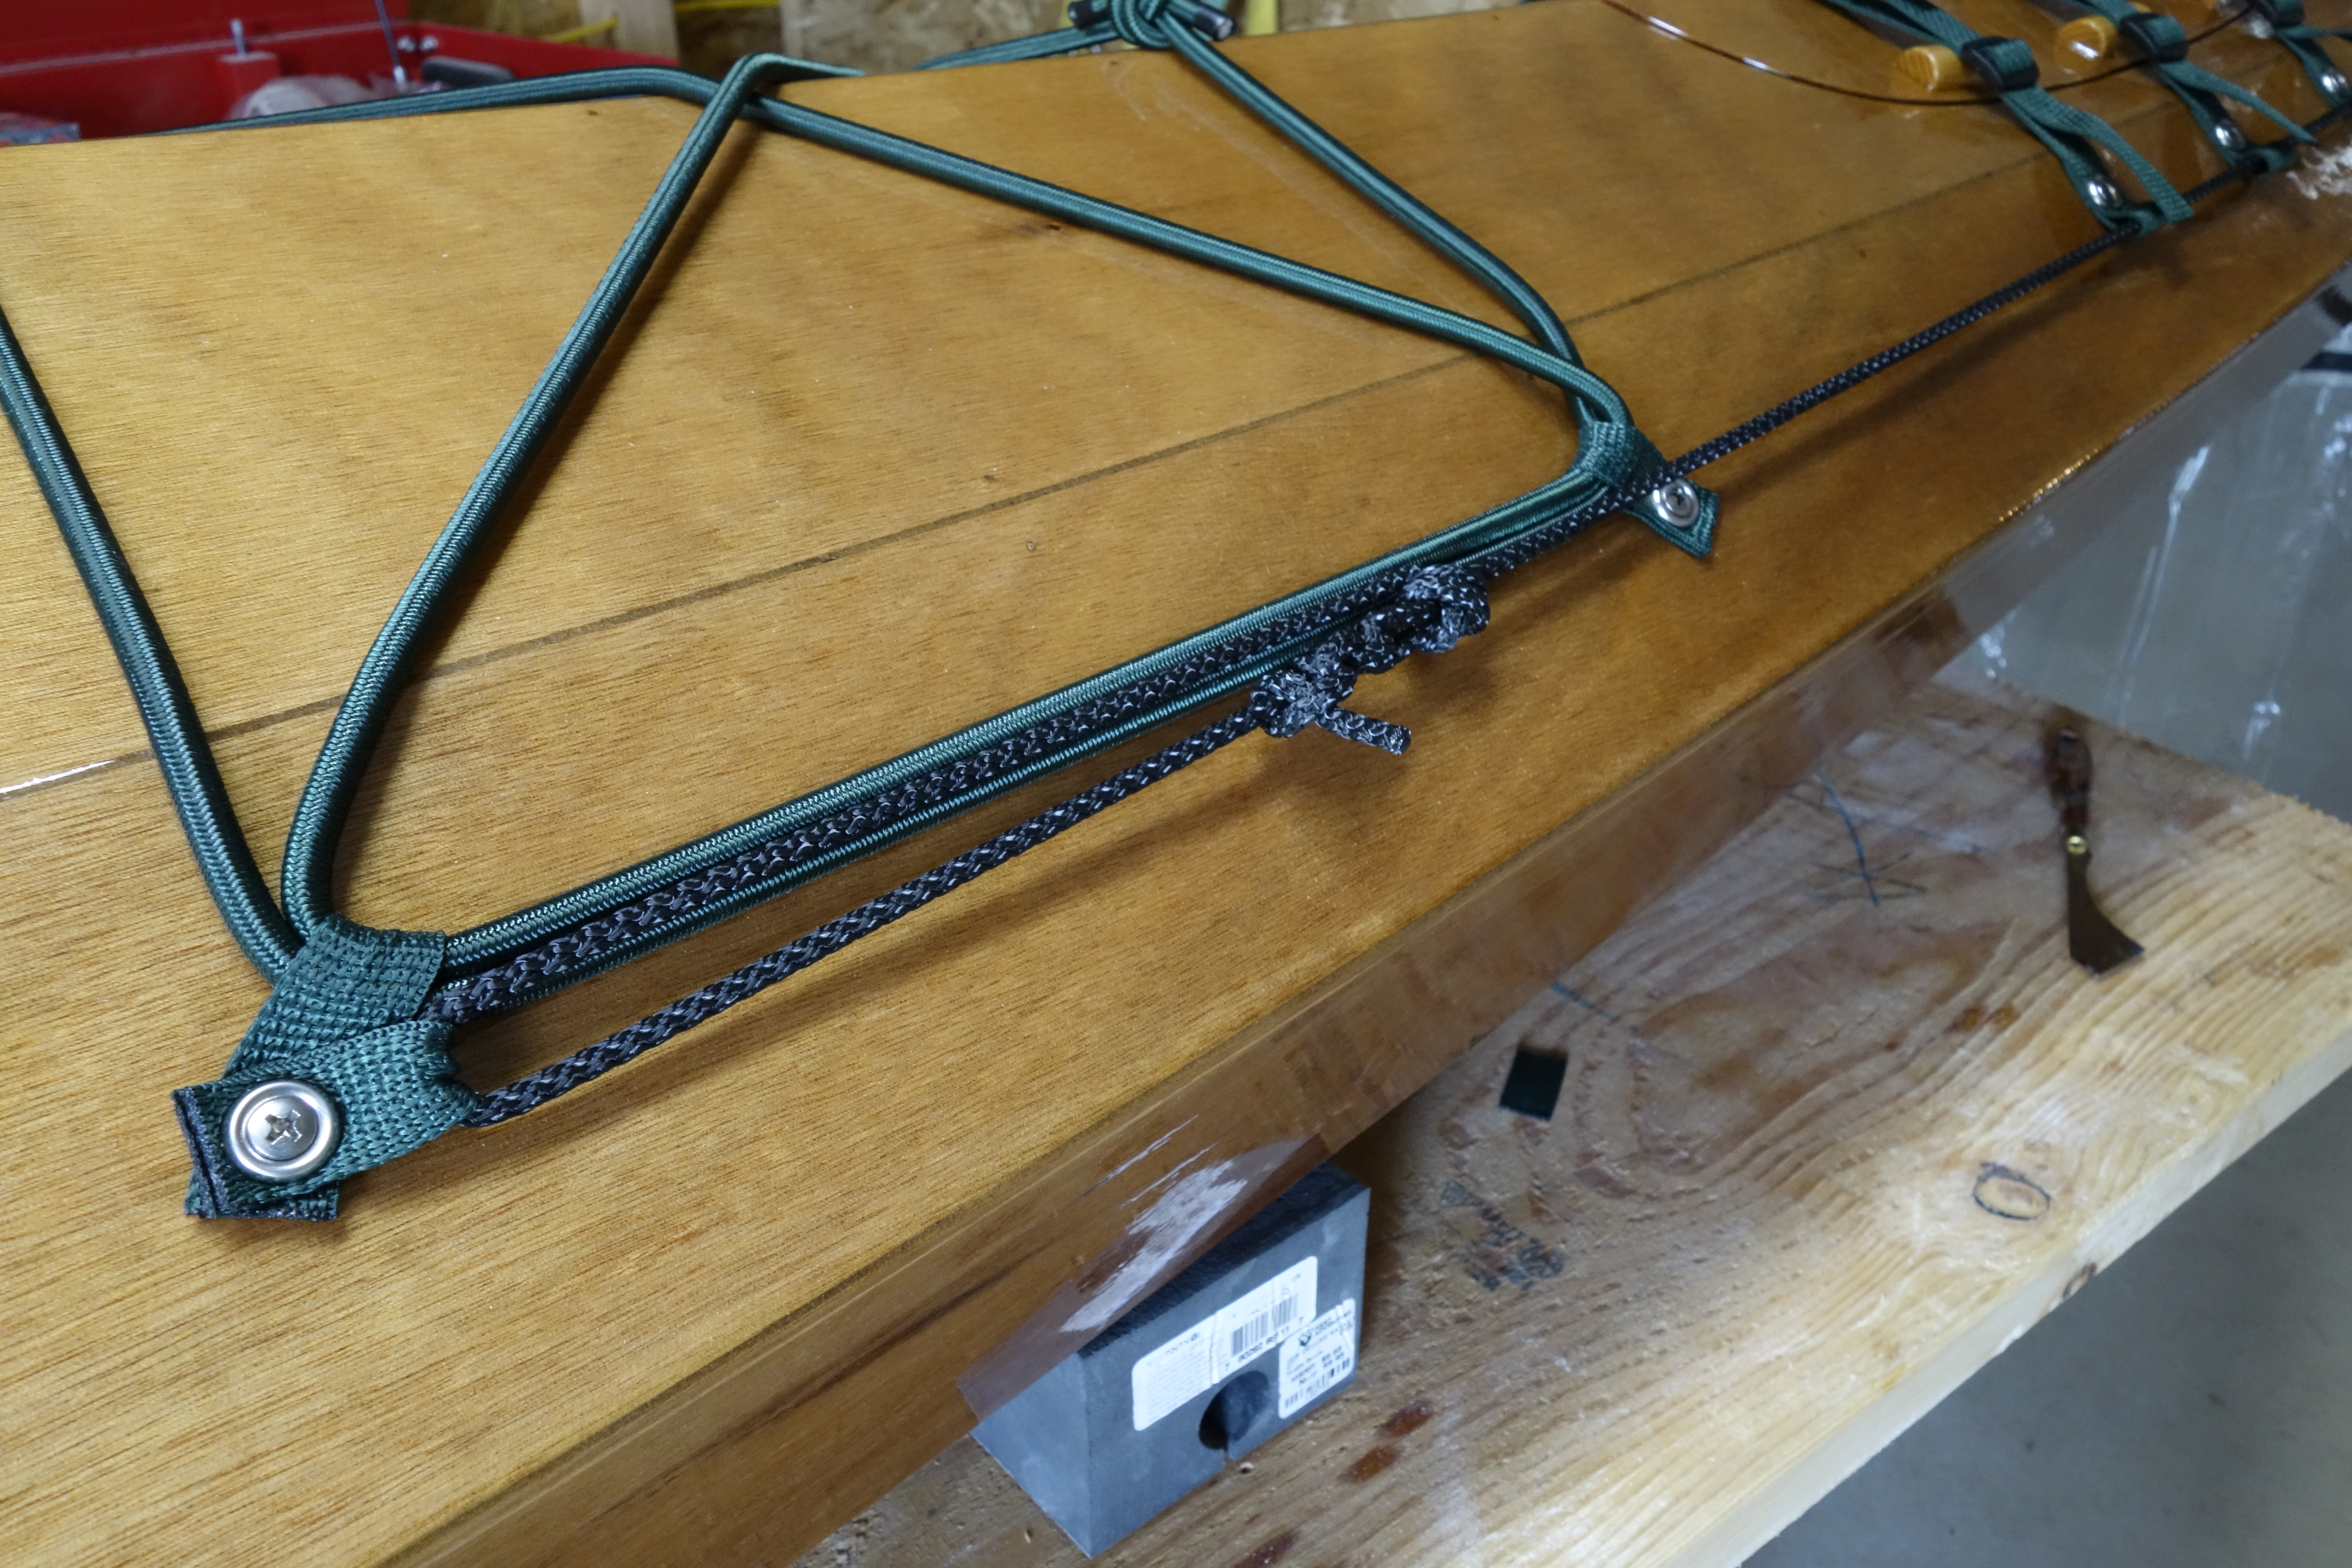
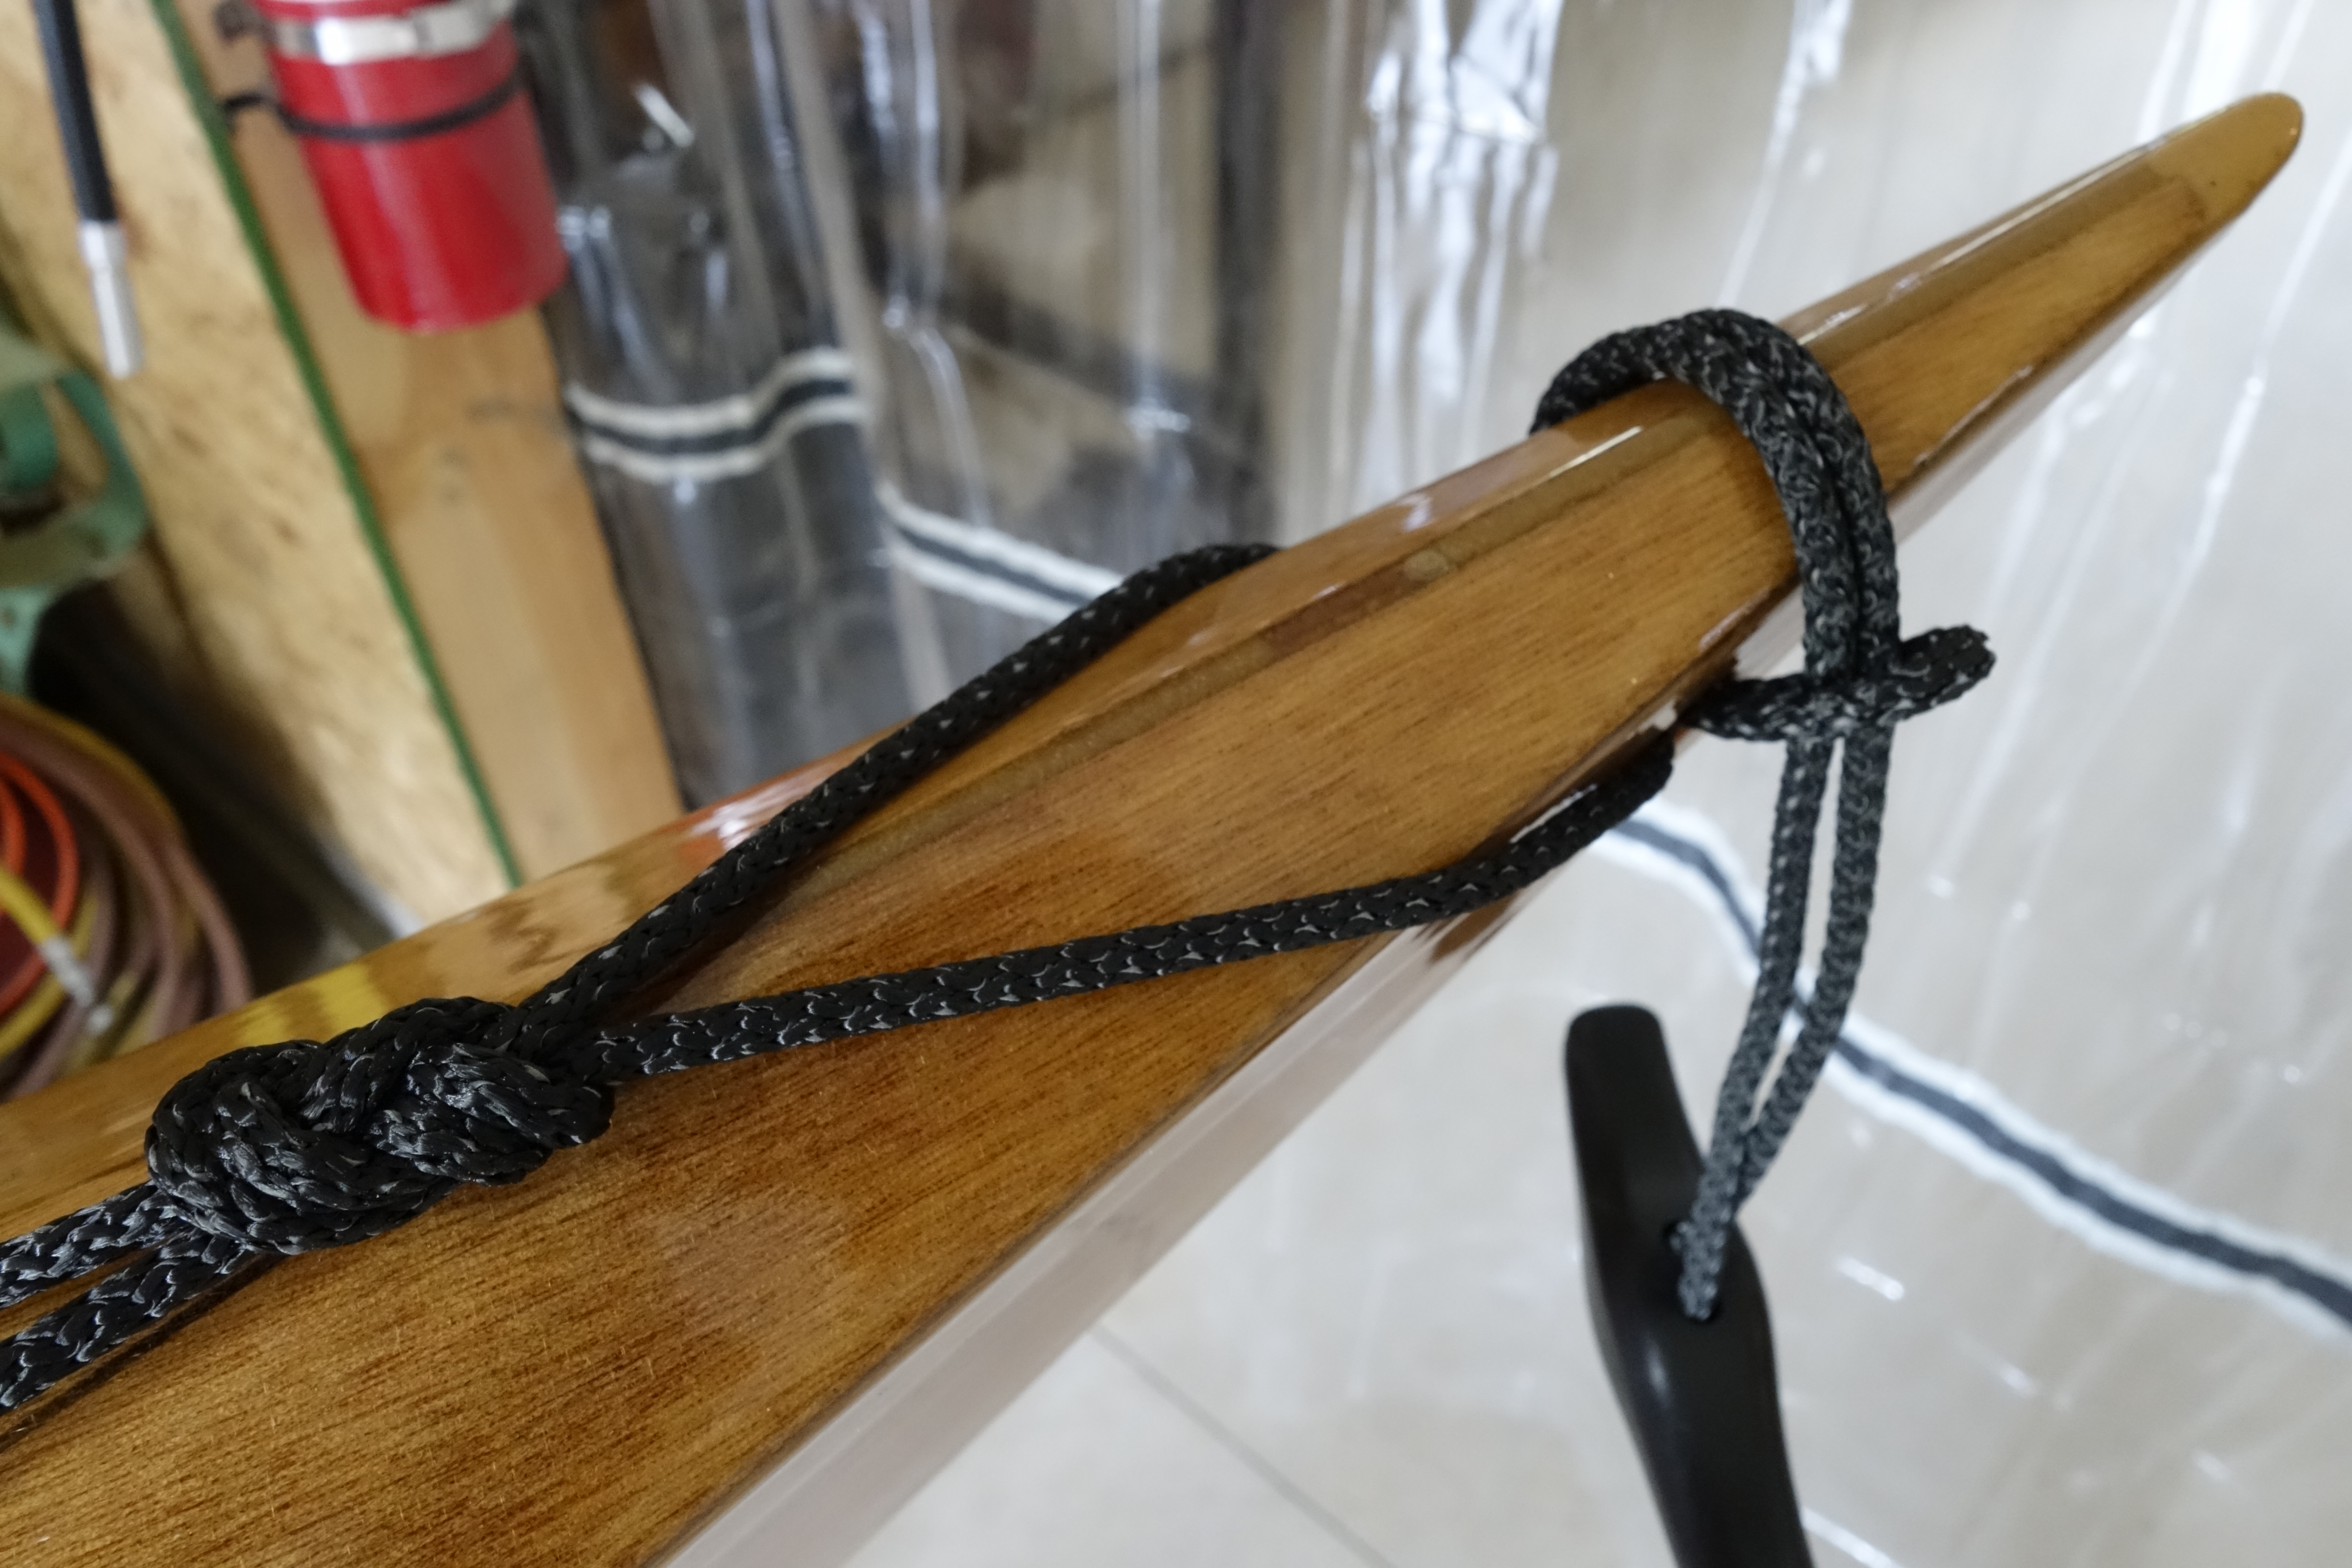
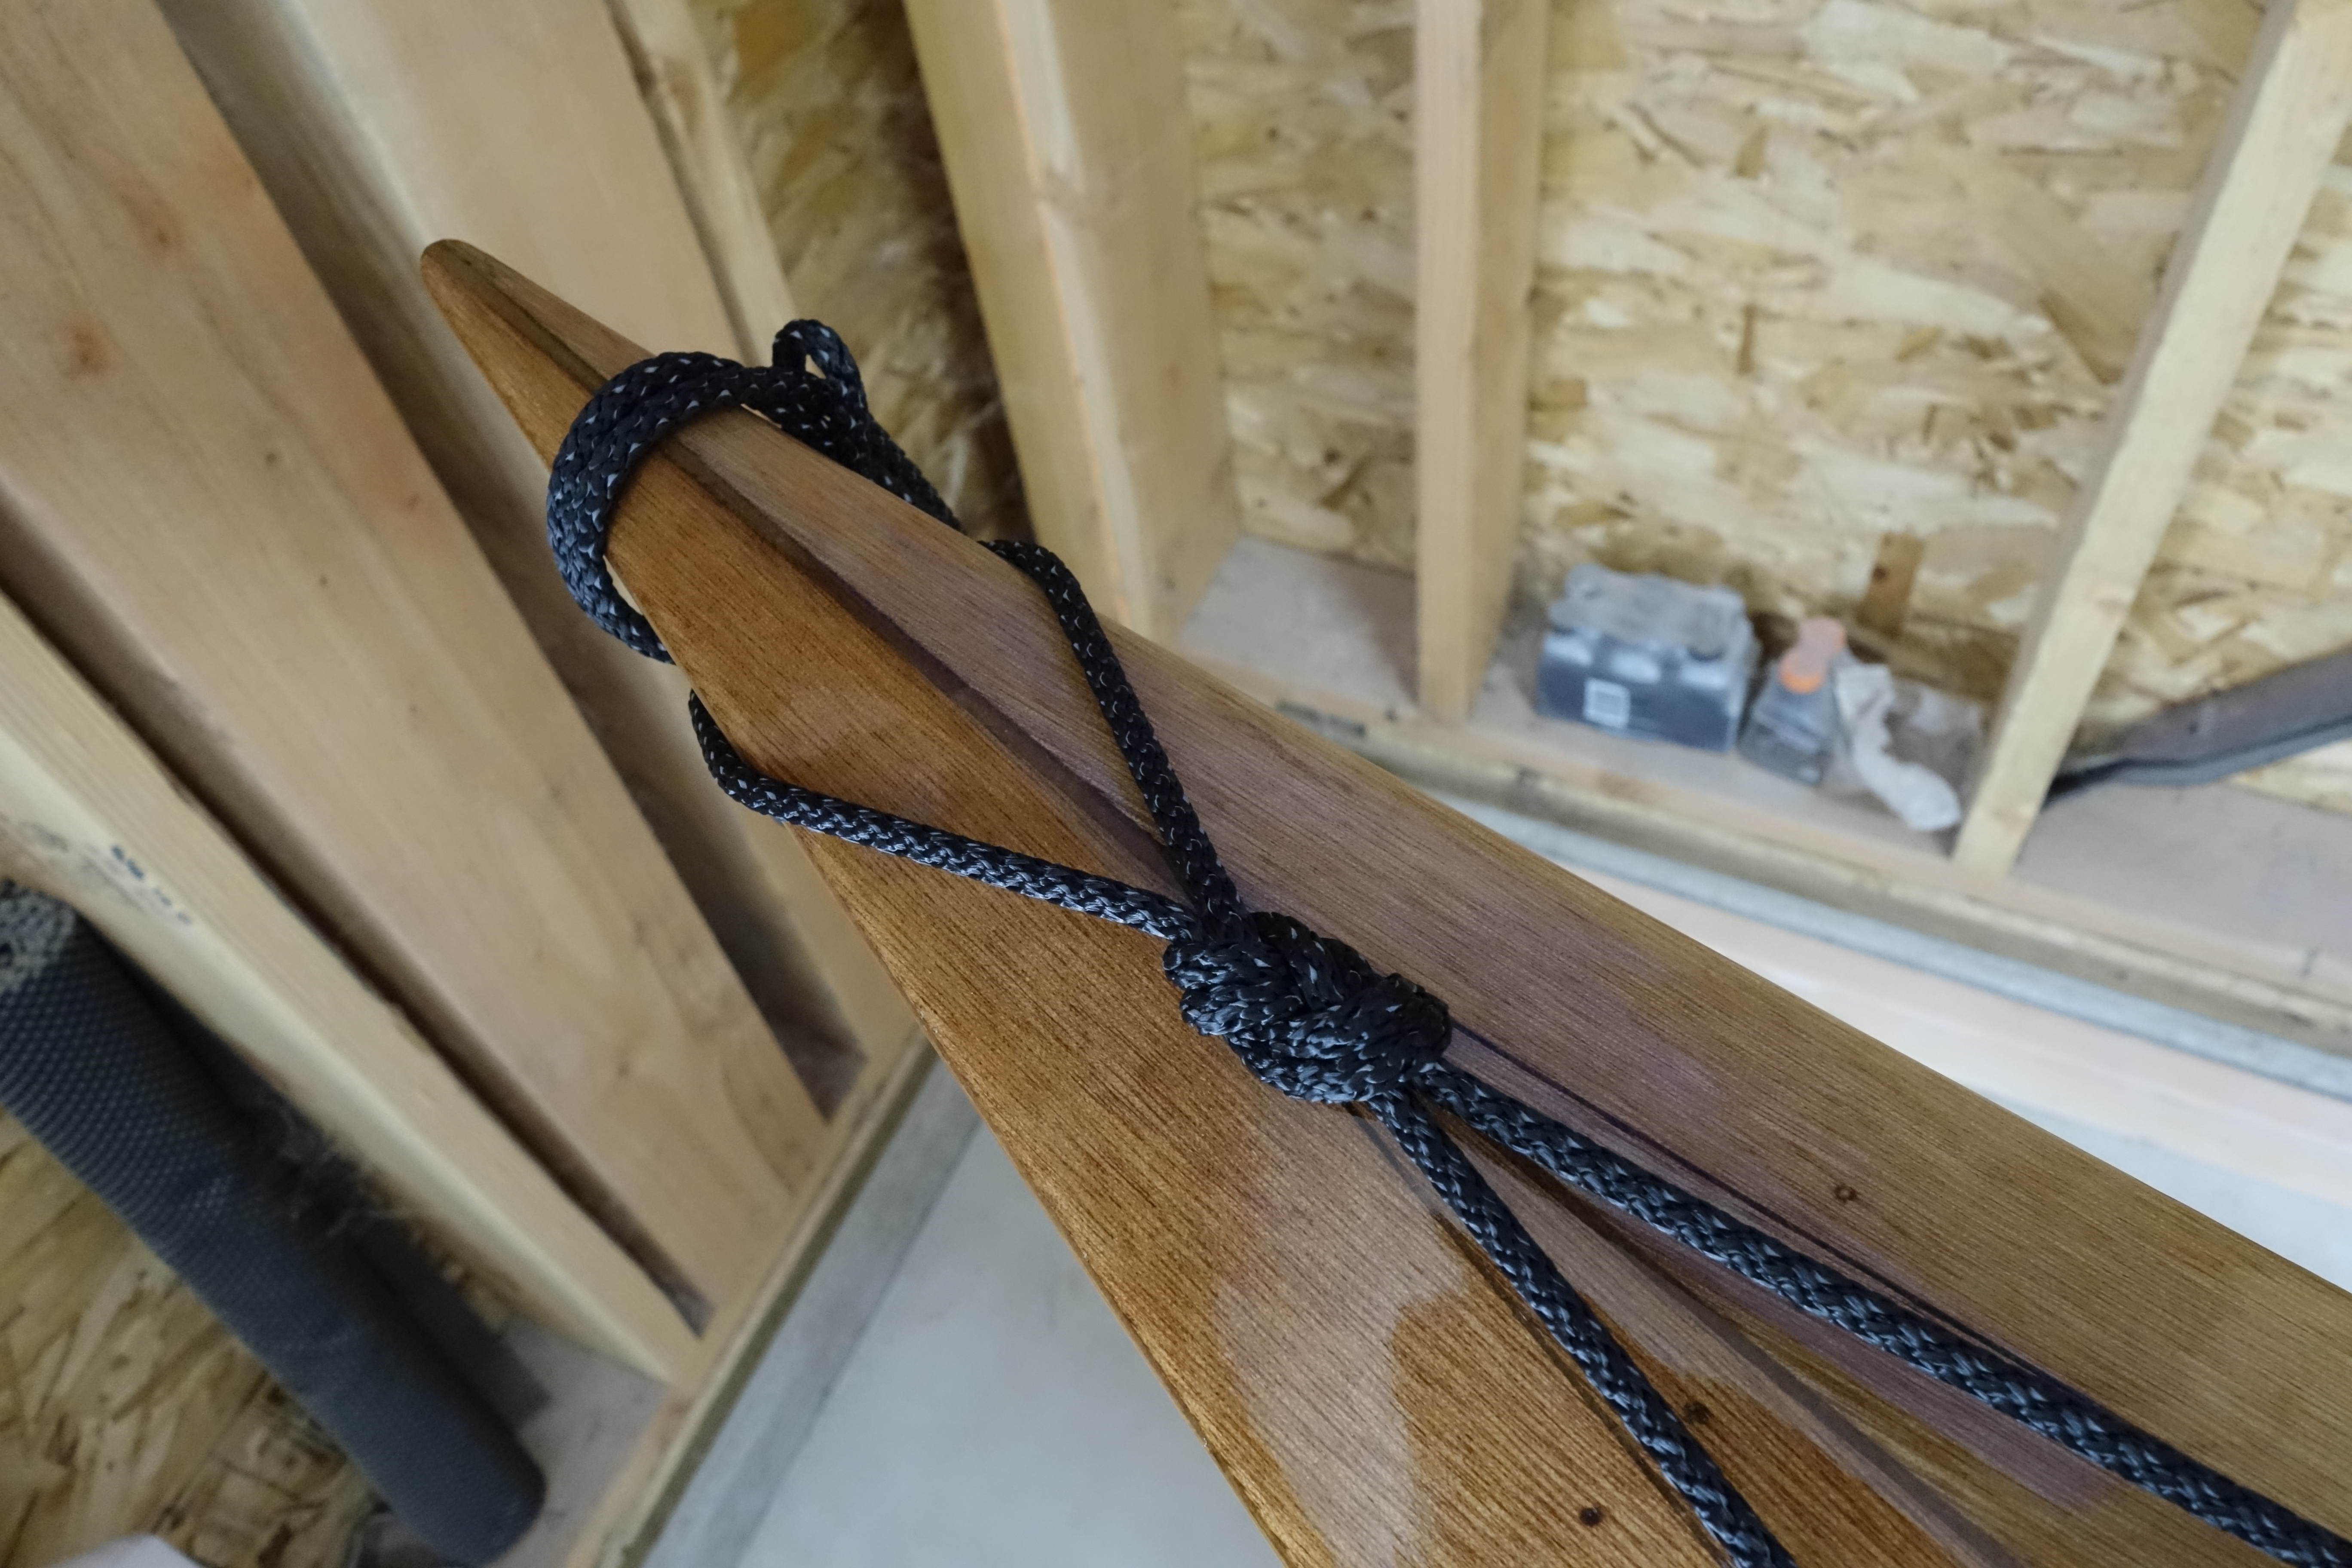
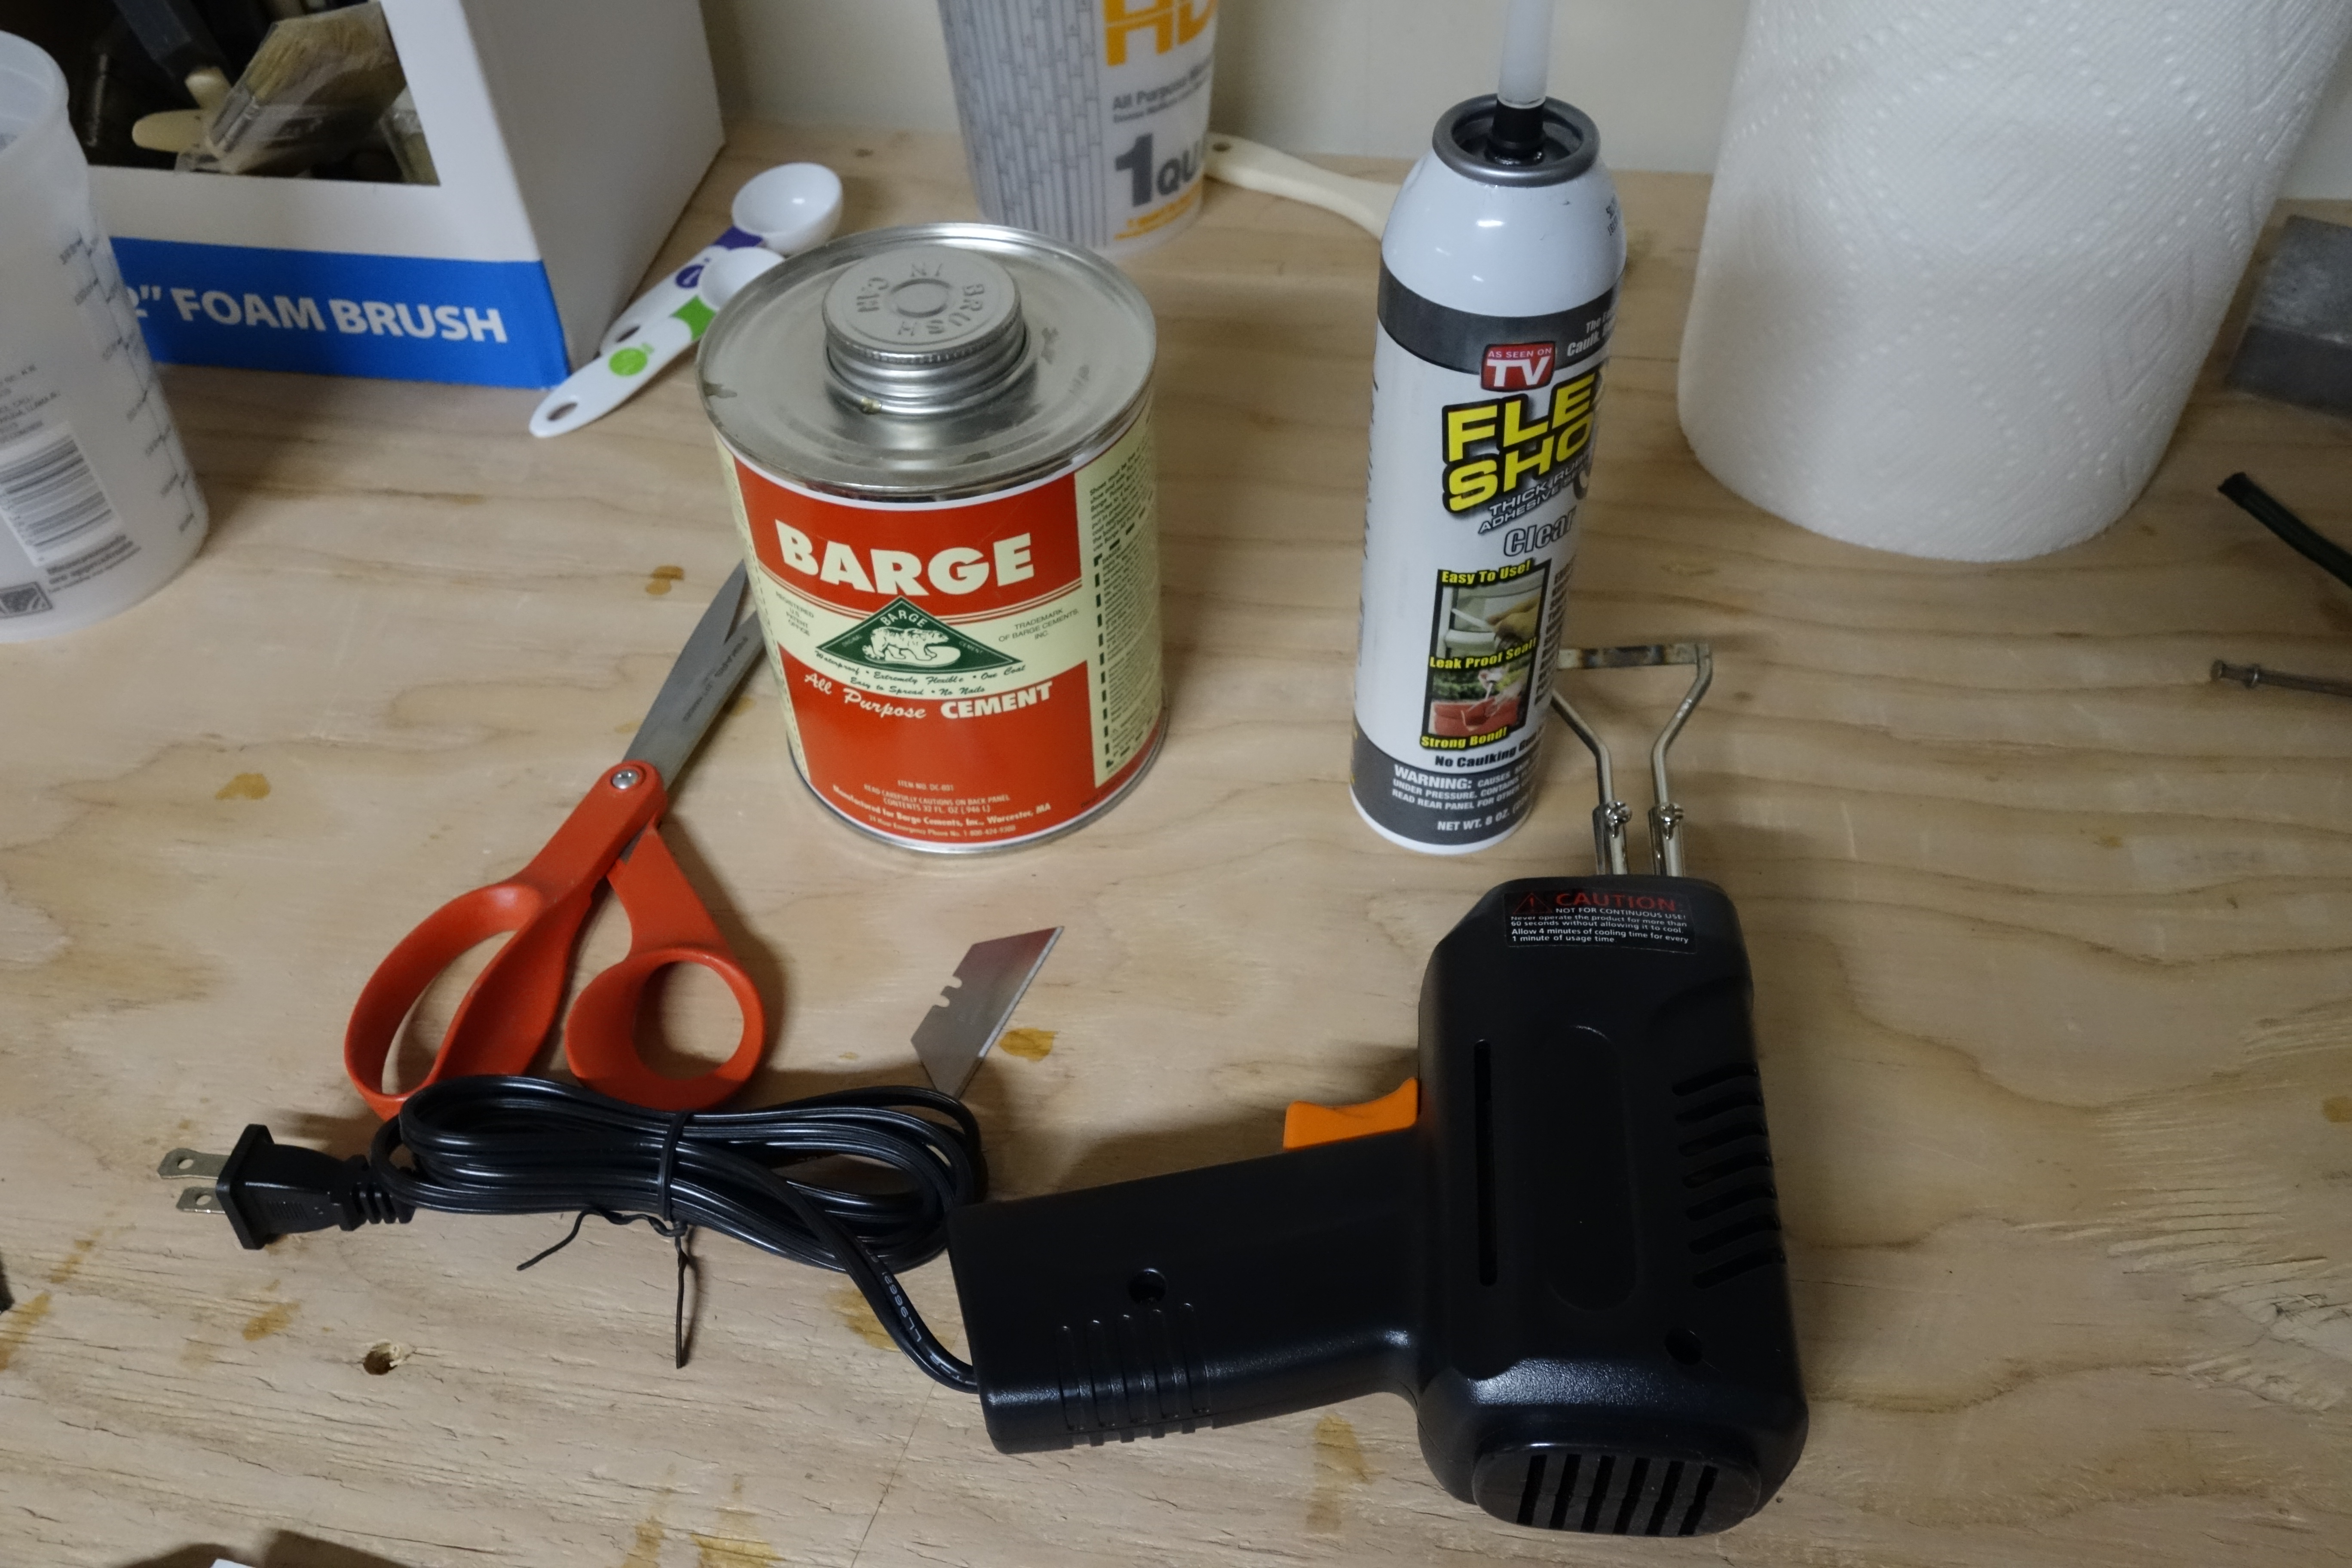
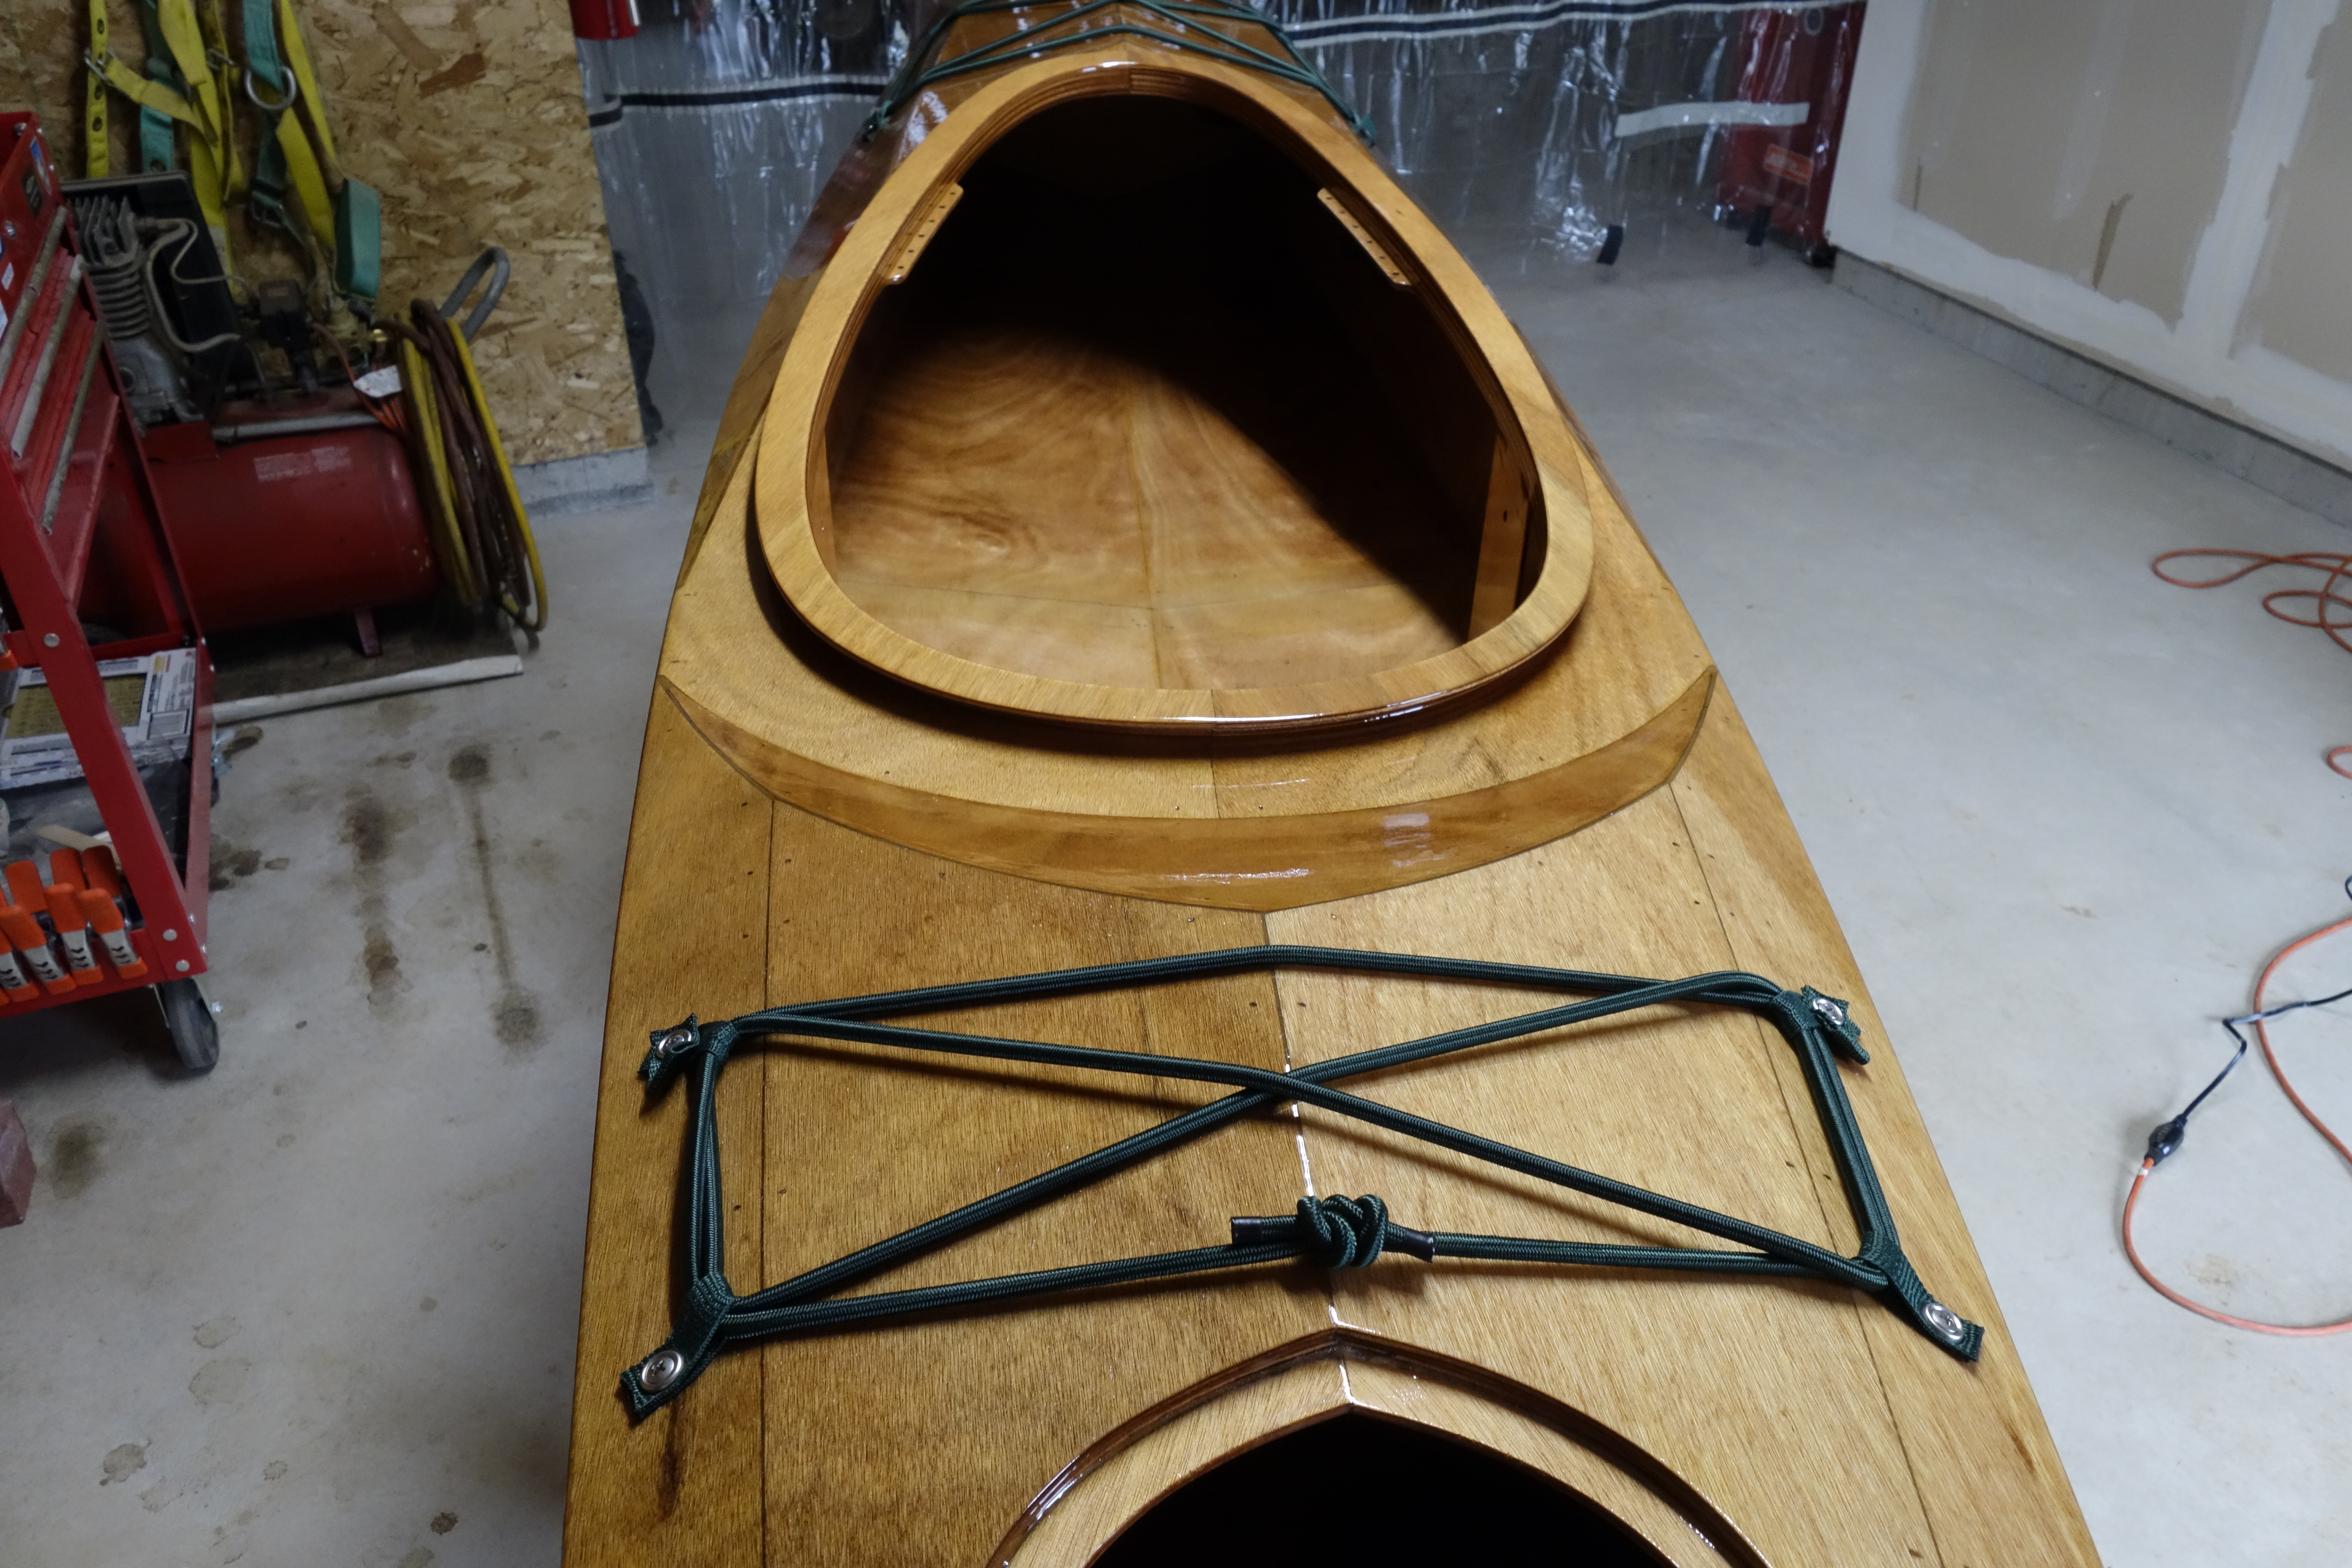
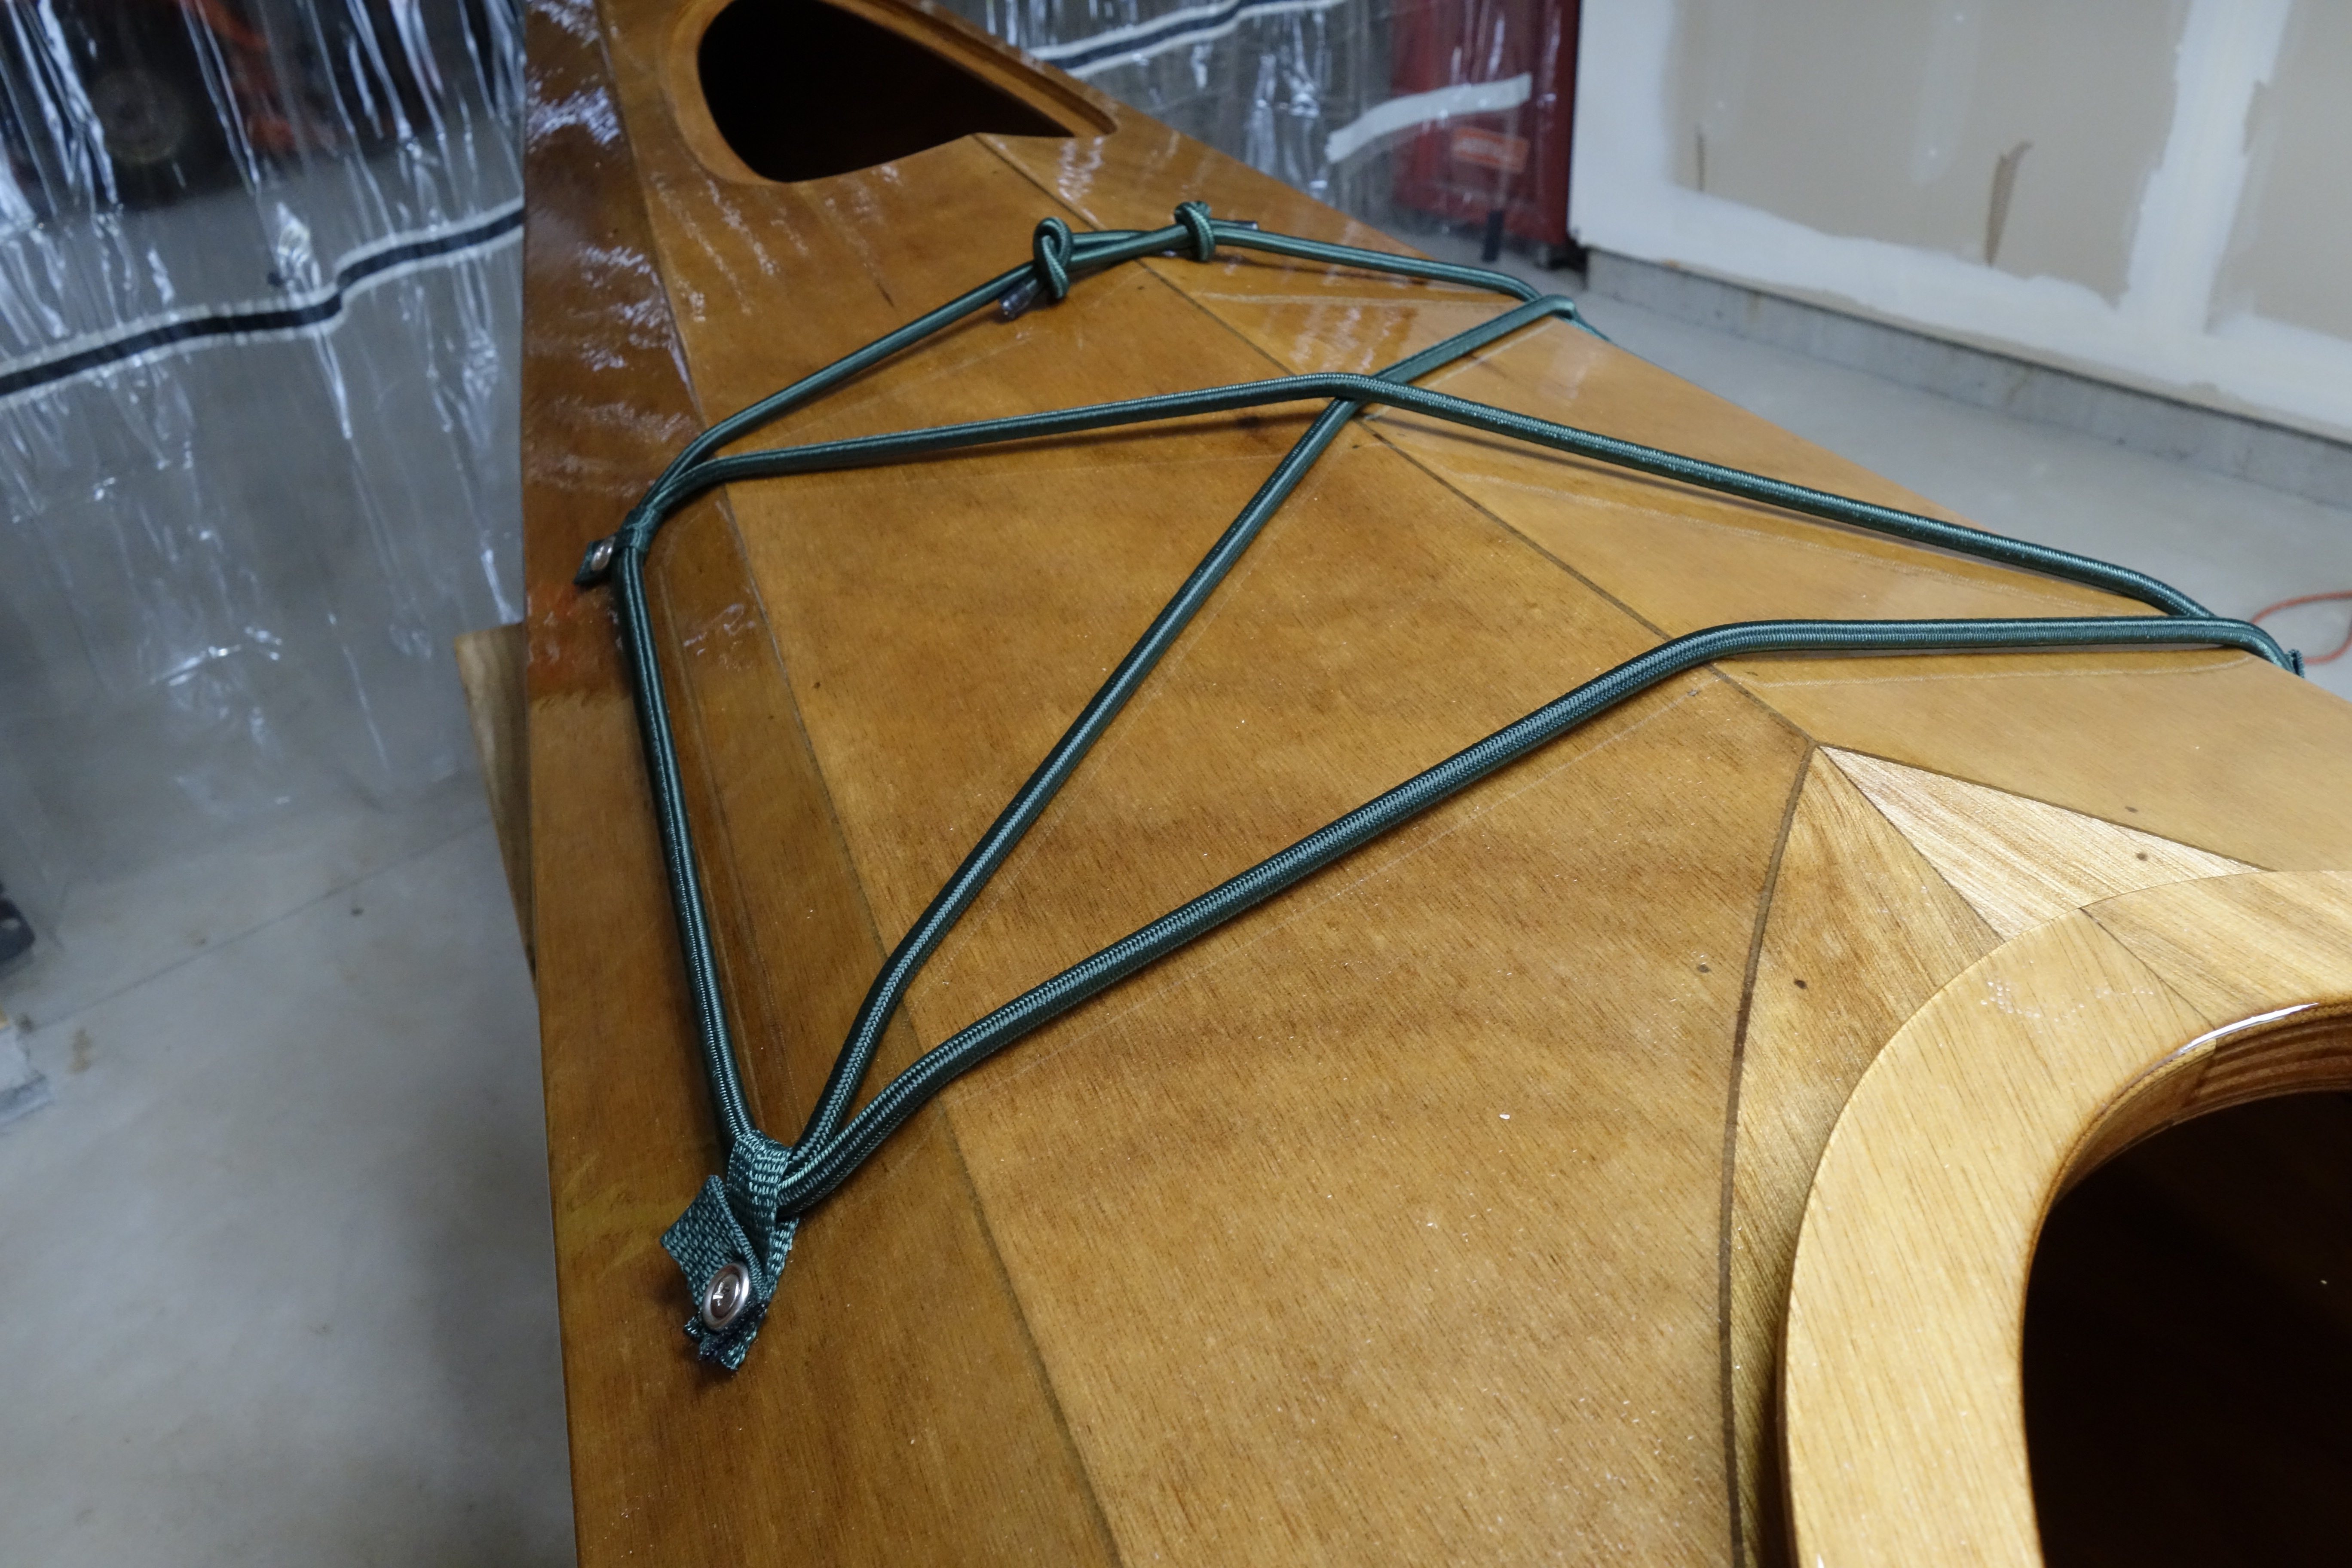
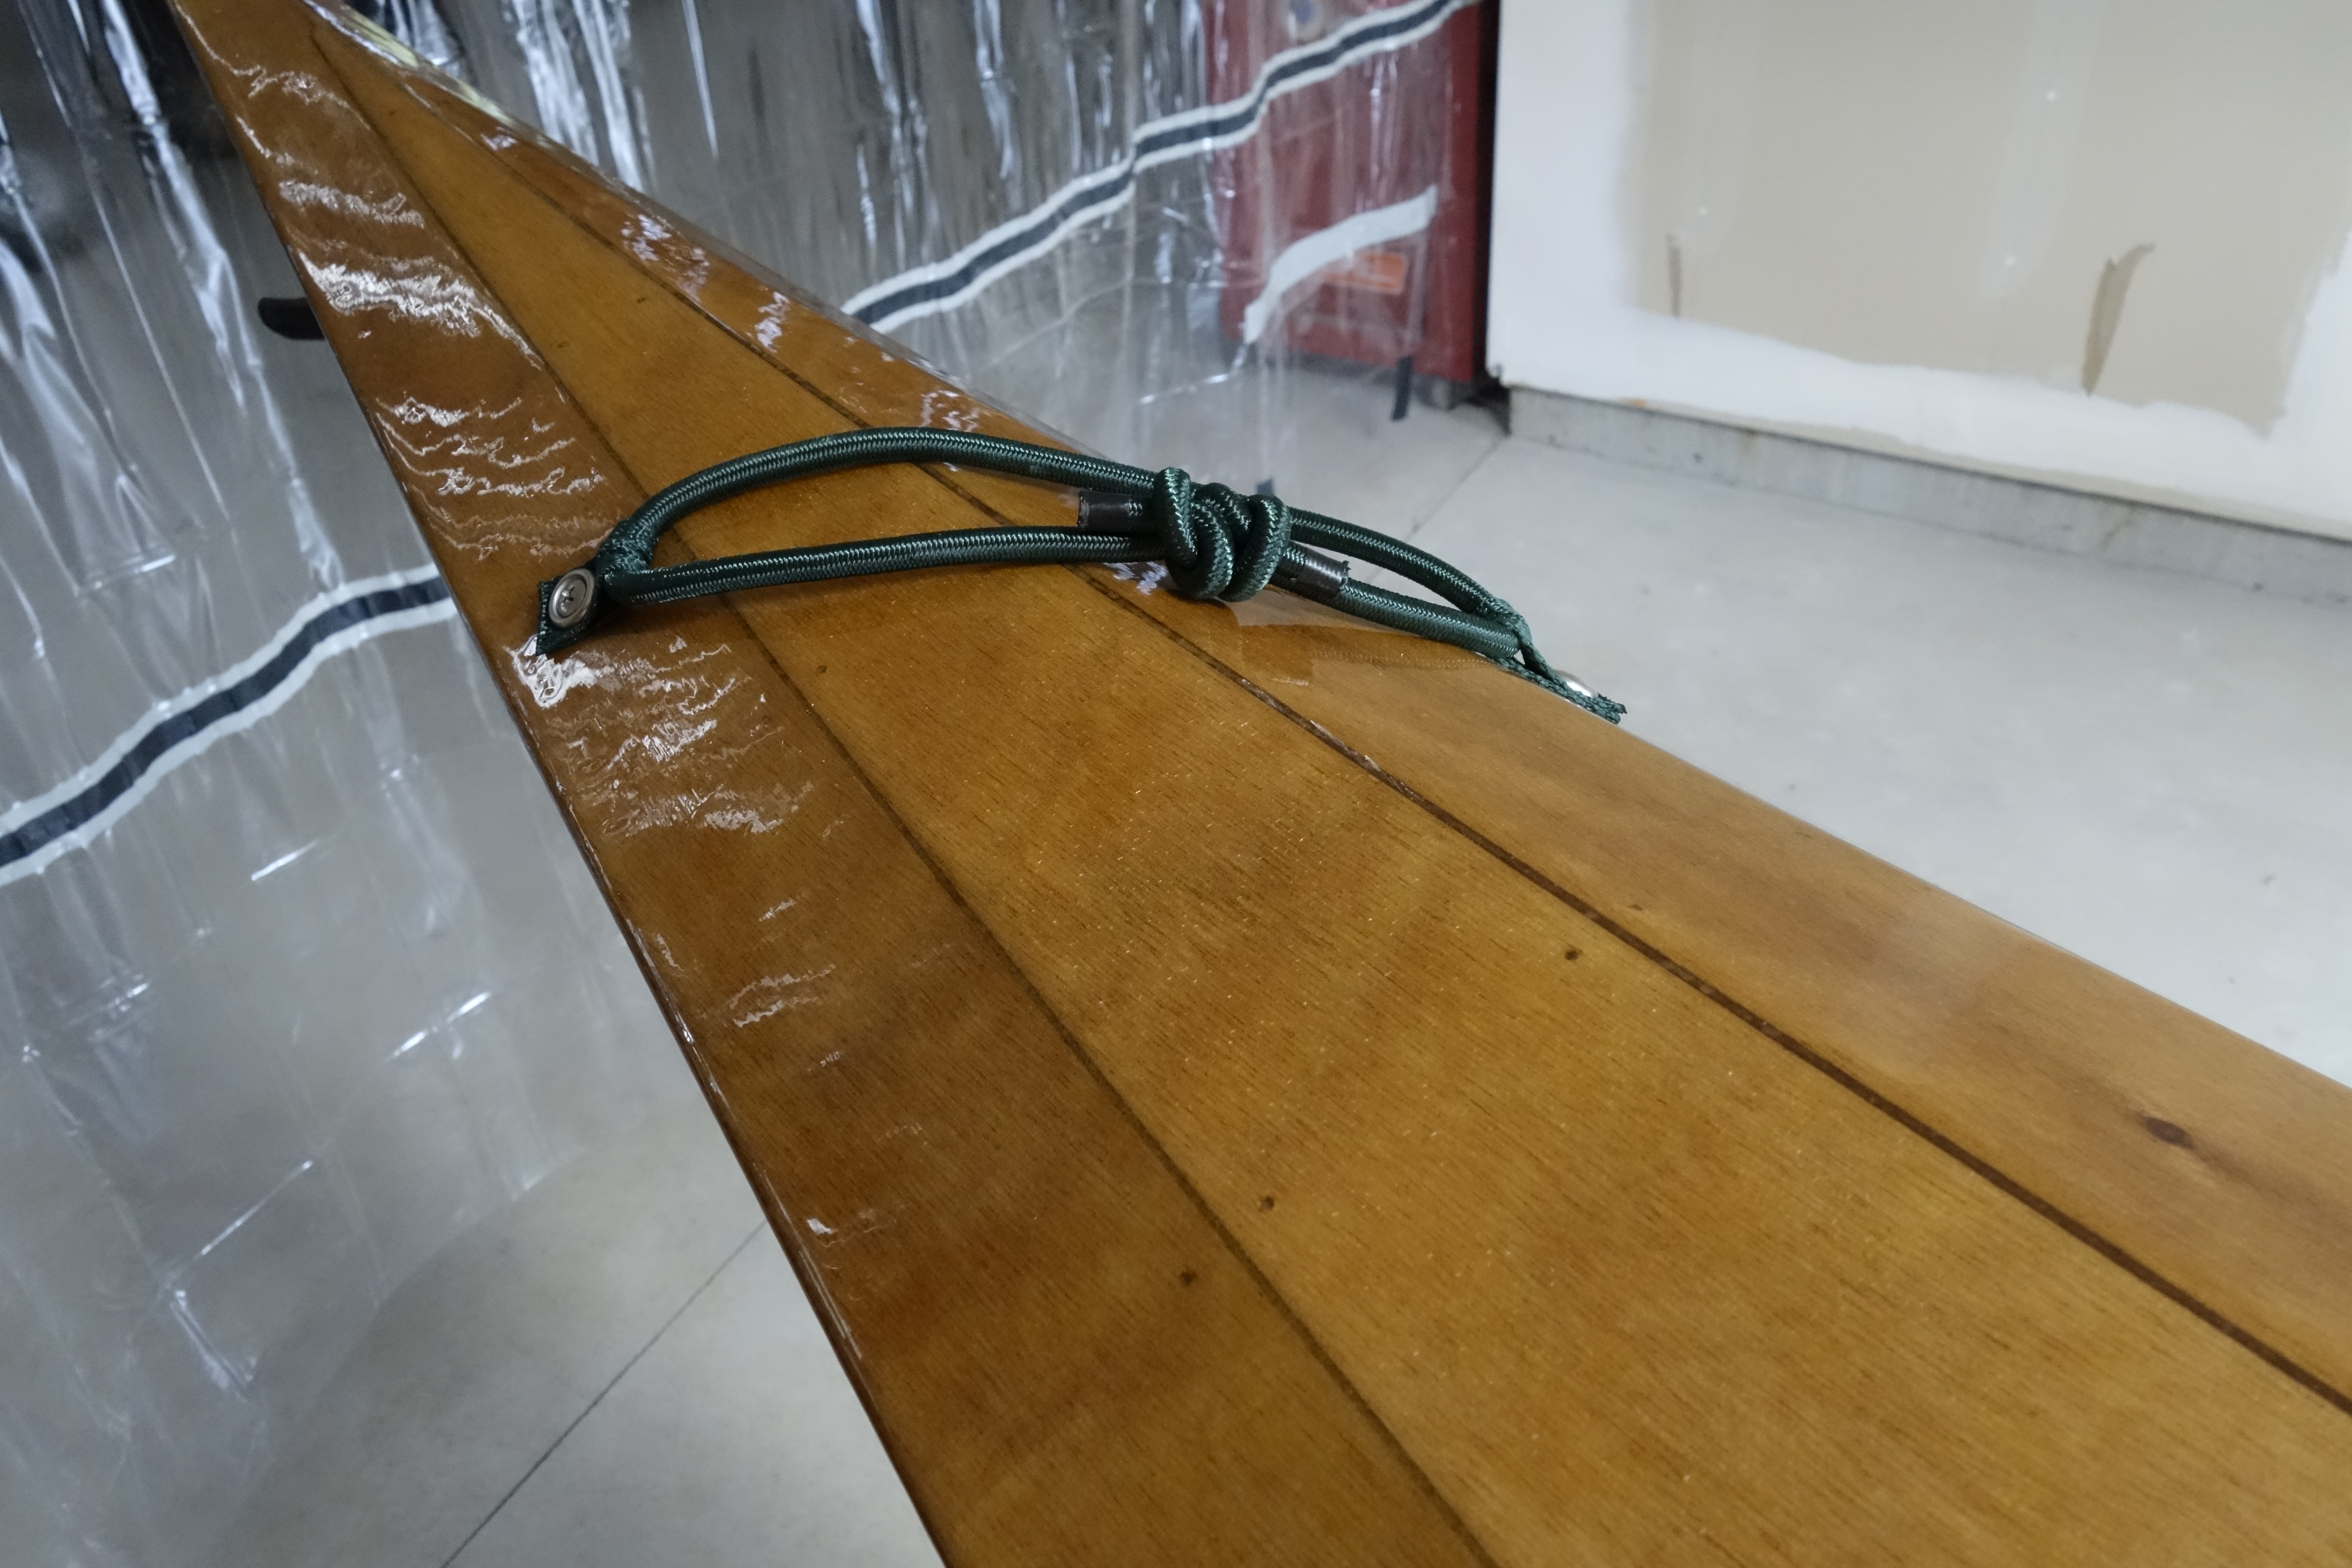
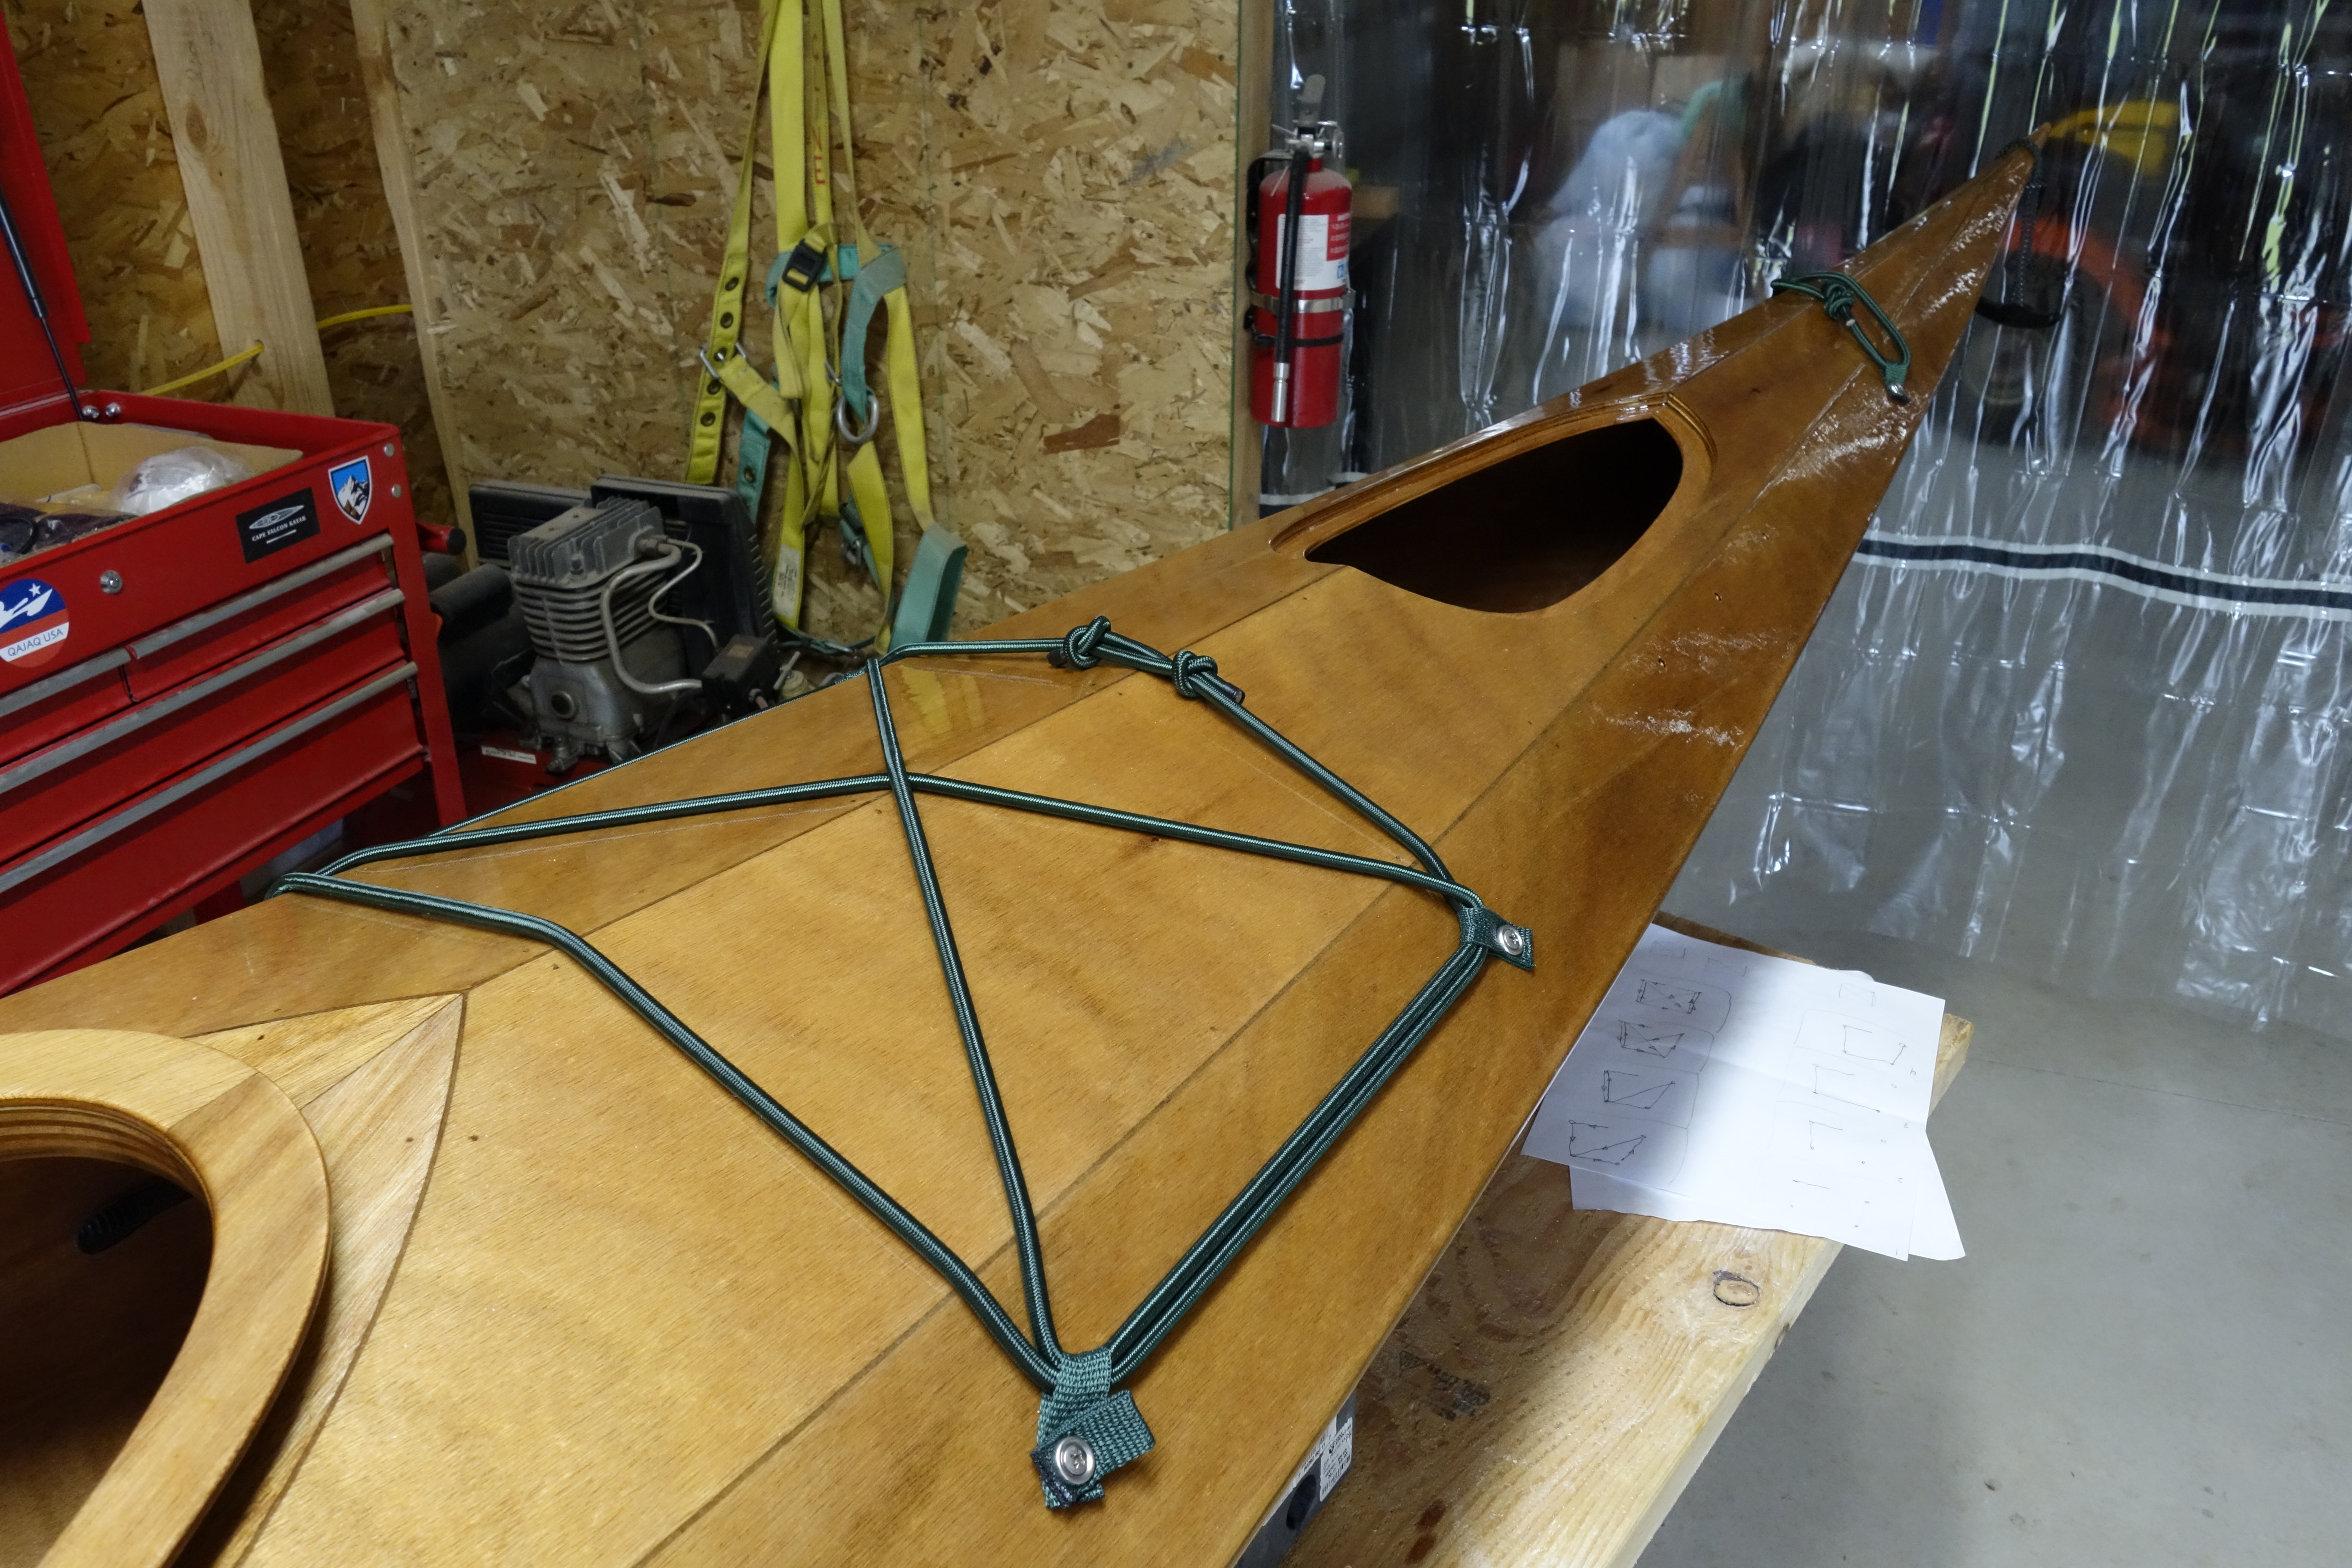
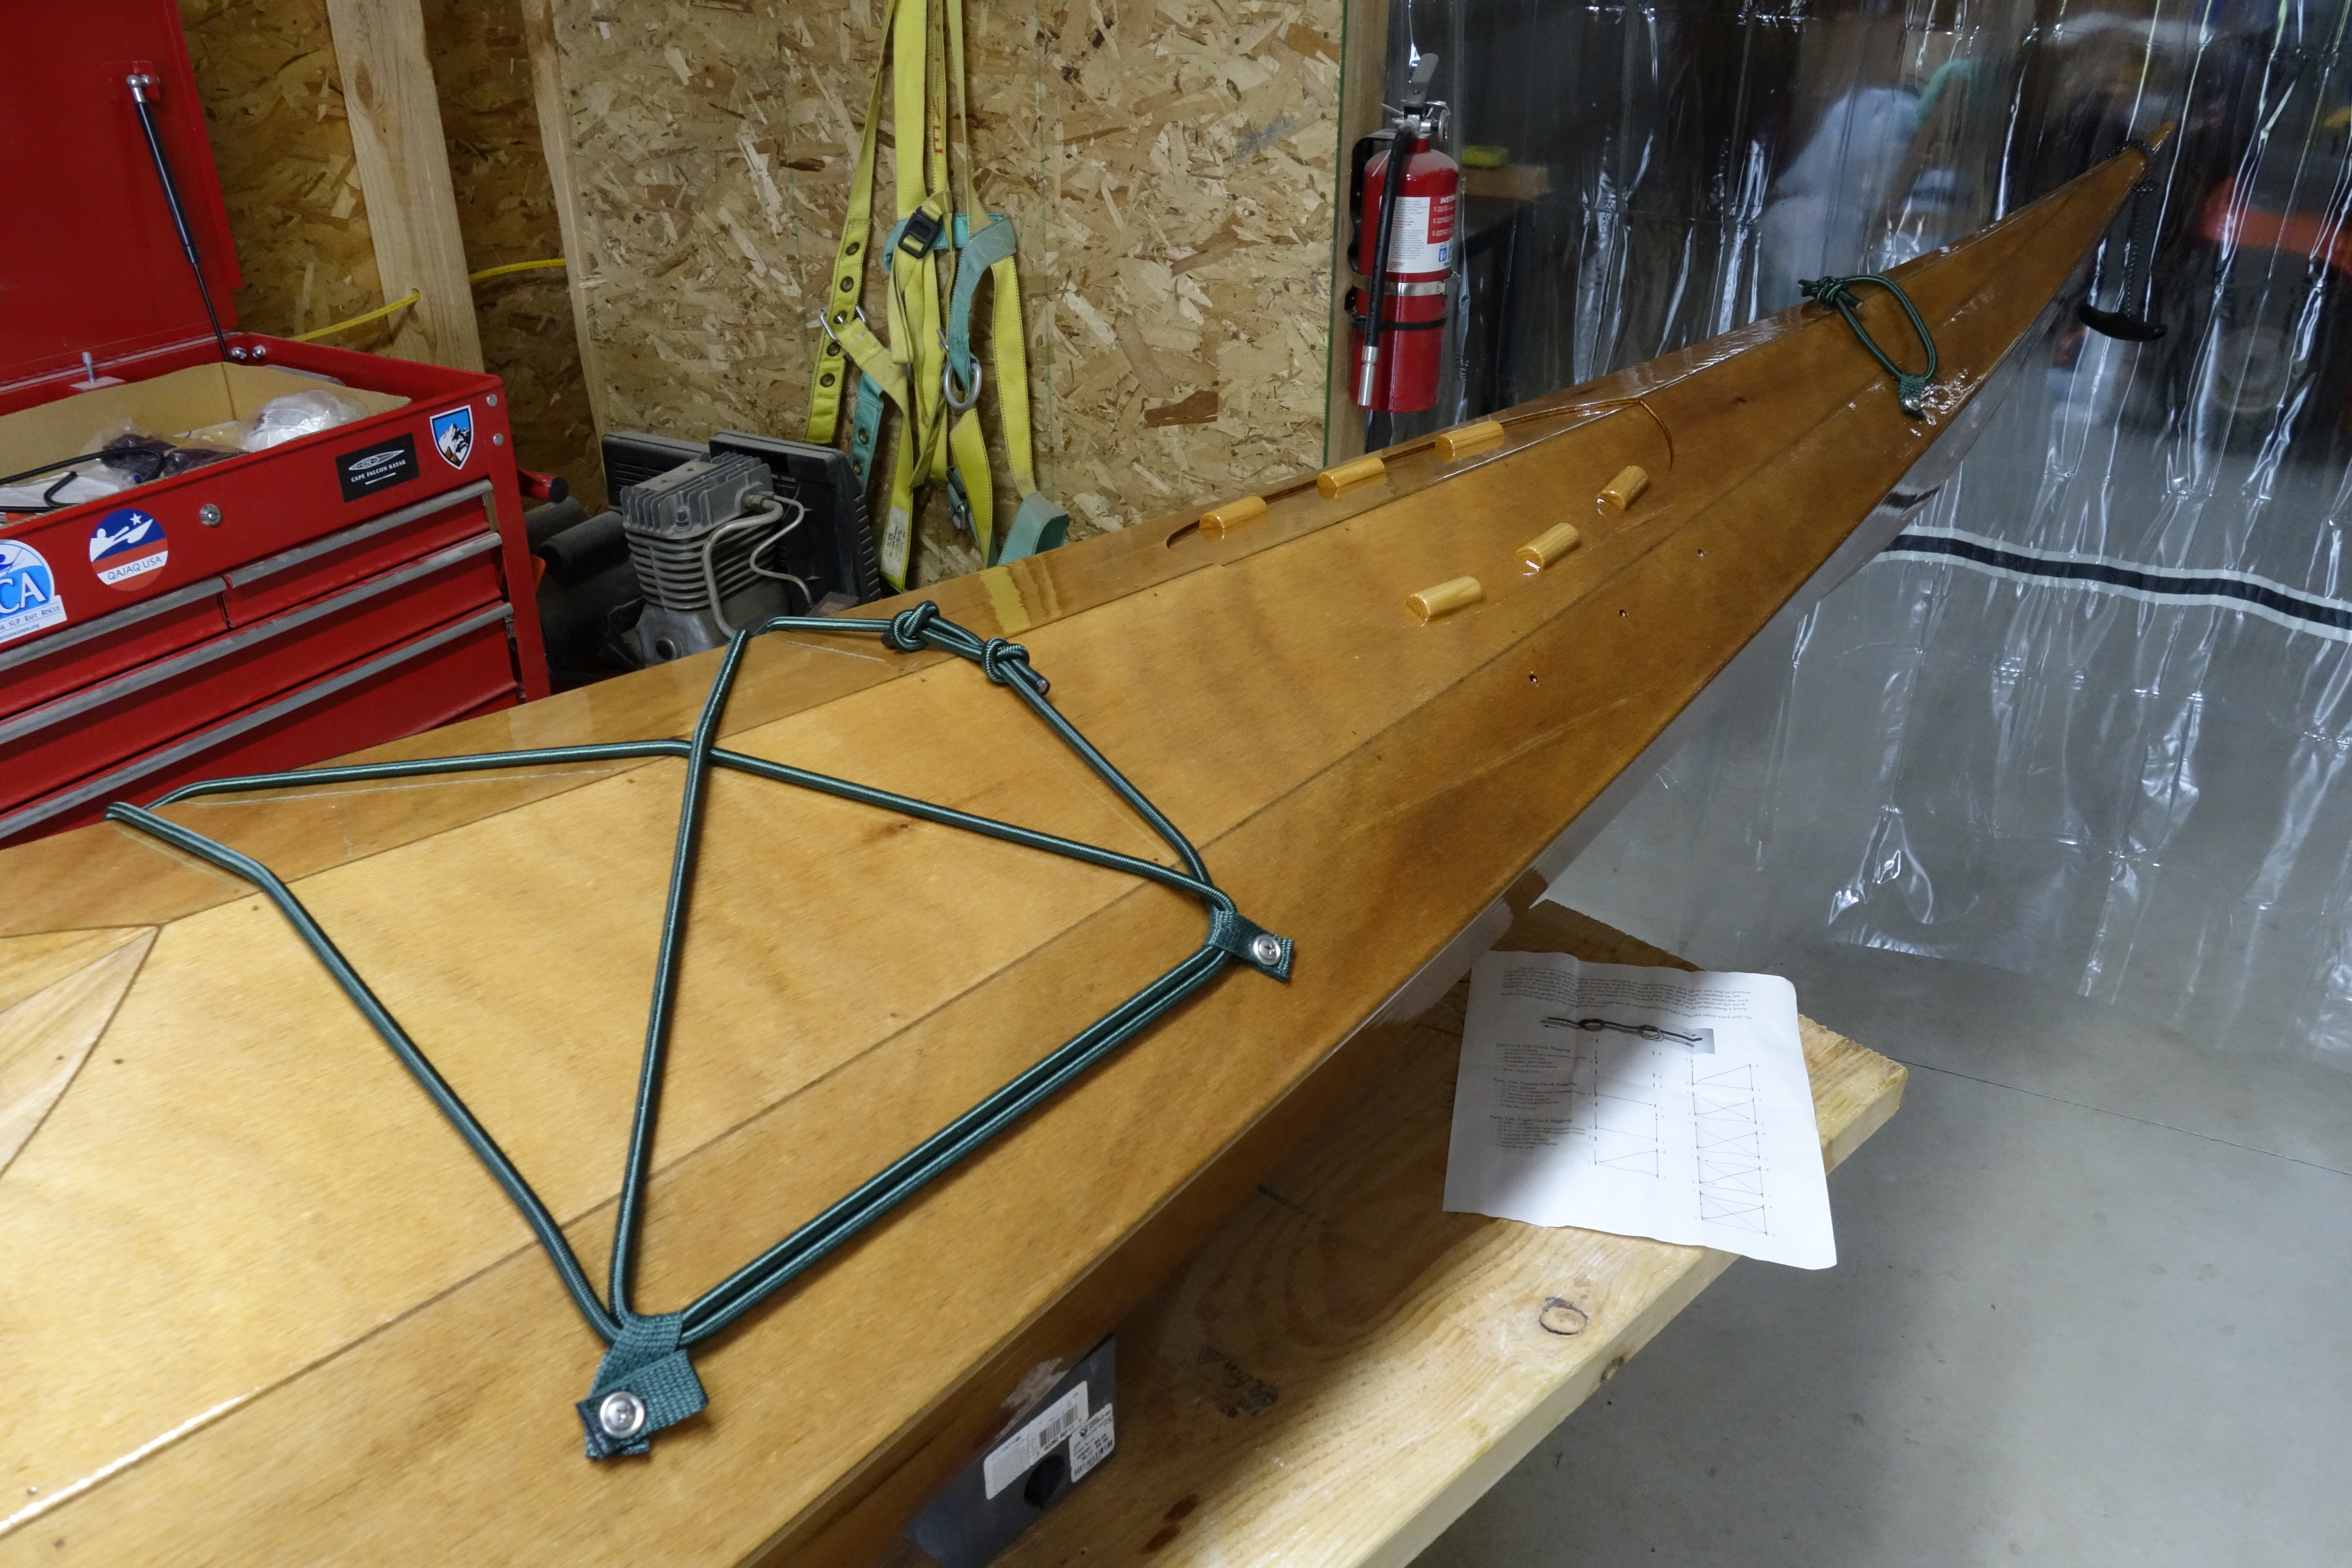
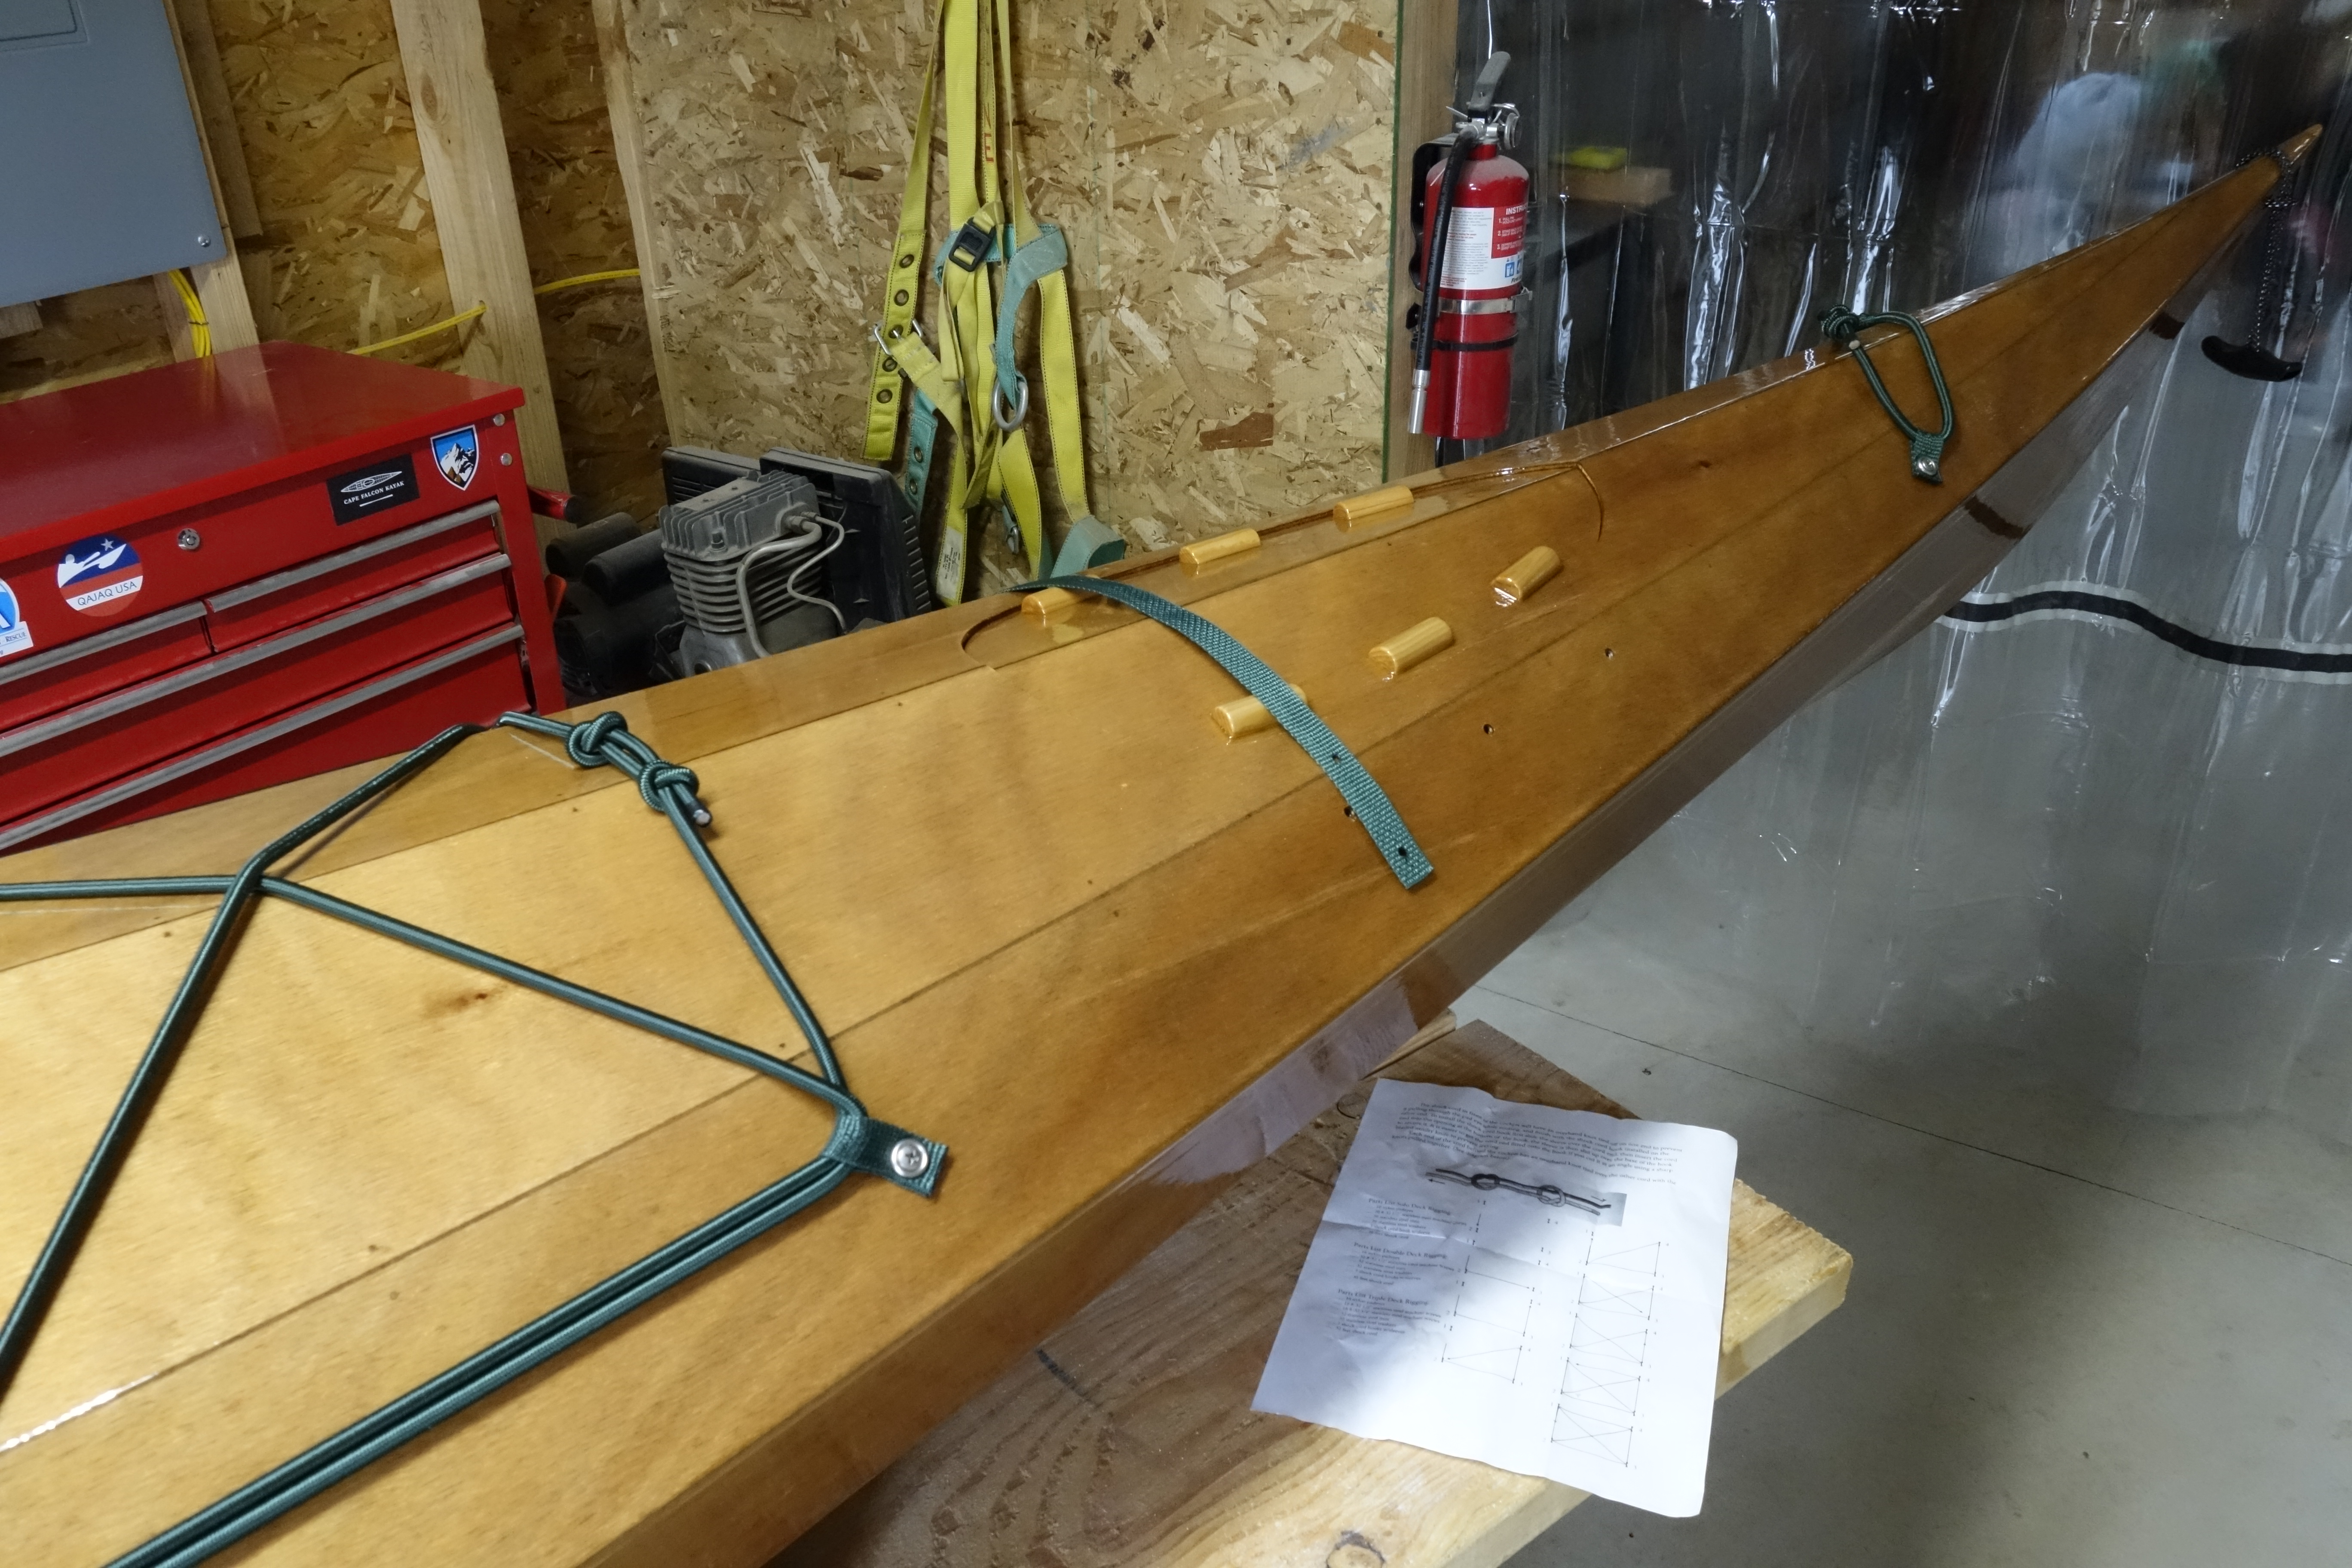
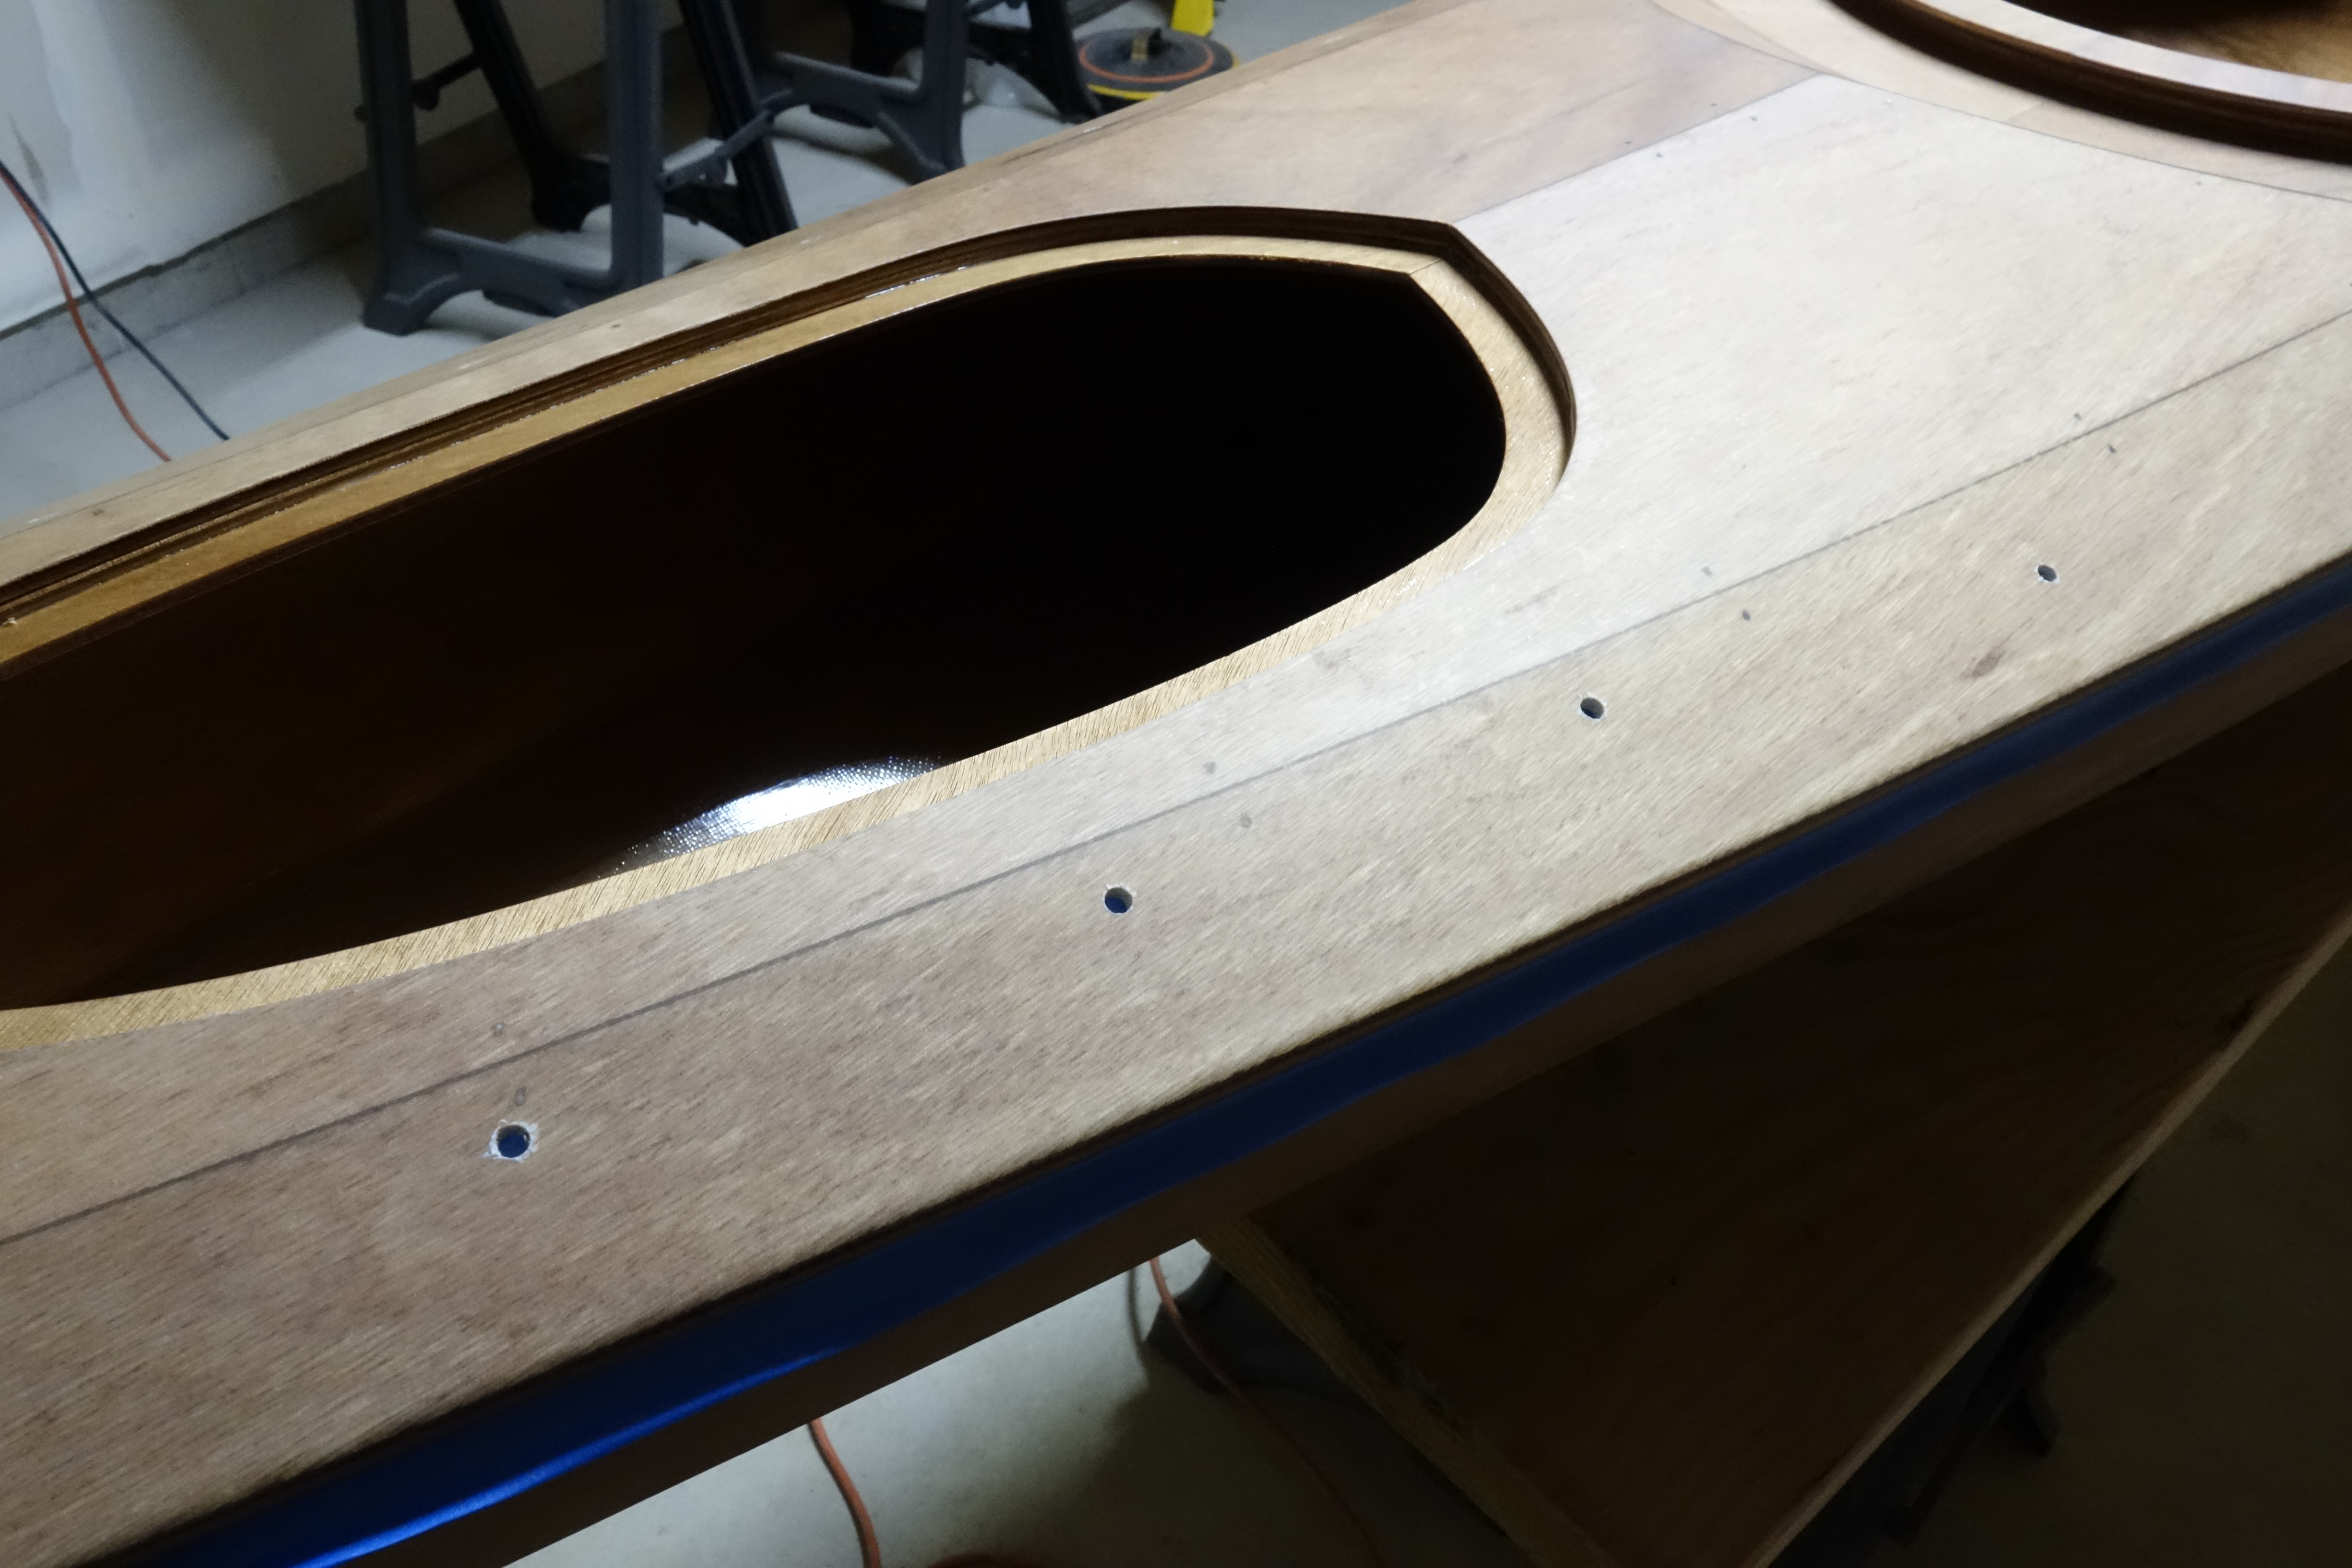
I didn’t make a photo of the foam on the bow hatch. Not sure why. But they both look the same, so you’re not missing anything.The perimeter line is the fancy, retro-reflective stuff that Pygmy sells as an option. I really like it. It looks black until light hits it, and then it is super reflective and bright! If you click on the above photo to zoom in you can see that even in ambient light it reflects brightly. I had plenty left over so I used it to make my hand toggles too. :^)Figure eight knot in the bow perimeter line.Figure eight knot in the aft perimeter line.Above: Deck rigging complete! Today’s tools. The Barge Cement was used to glue the foam to the hatch lips, and even though I made sure to get epoxy and varnish in all the holes that I drilled through the deck for the deck rigging, I also put a tiny blob of the Flex Shot silicone goop in each hole, around the base of each of the machine screws that went through the deck. Just a little added insurance against water infiltration. I think that any silicone caulk or adhesive would have worked fine. I just used the Flex Shot stuff because that’s what I had on hand. YMMV. The line cutting gun makes a very clean cut on nylon webbing and seals the ends so that they don’t need any further attention. Well worth the money in my opinion.
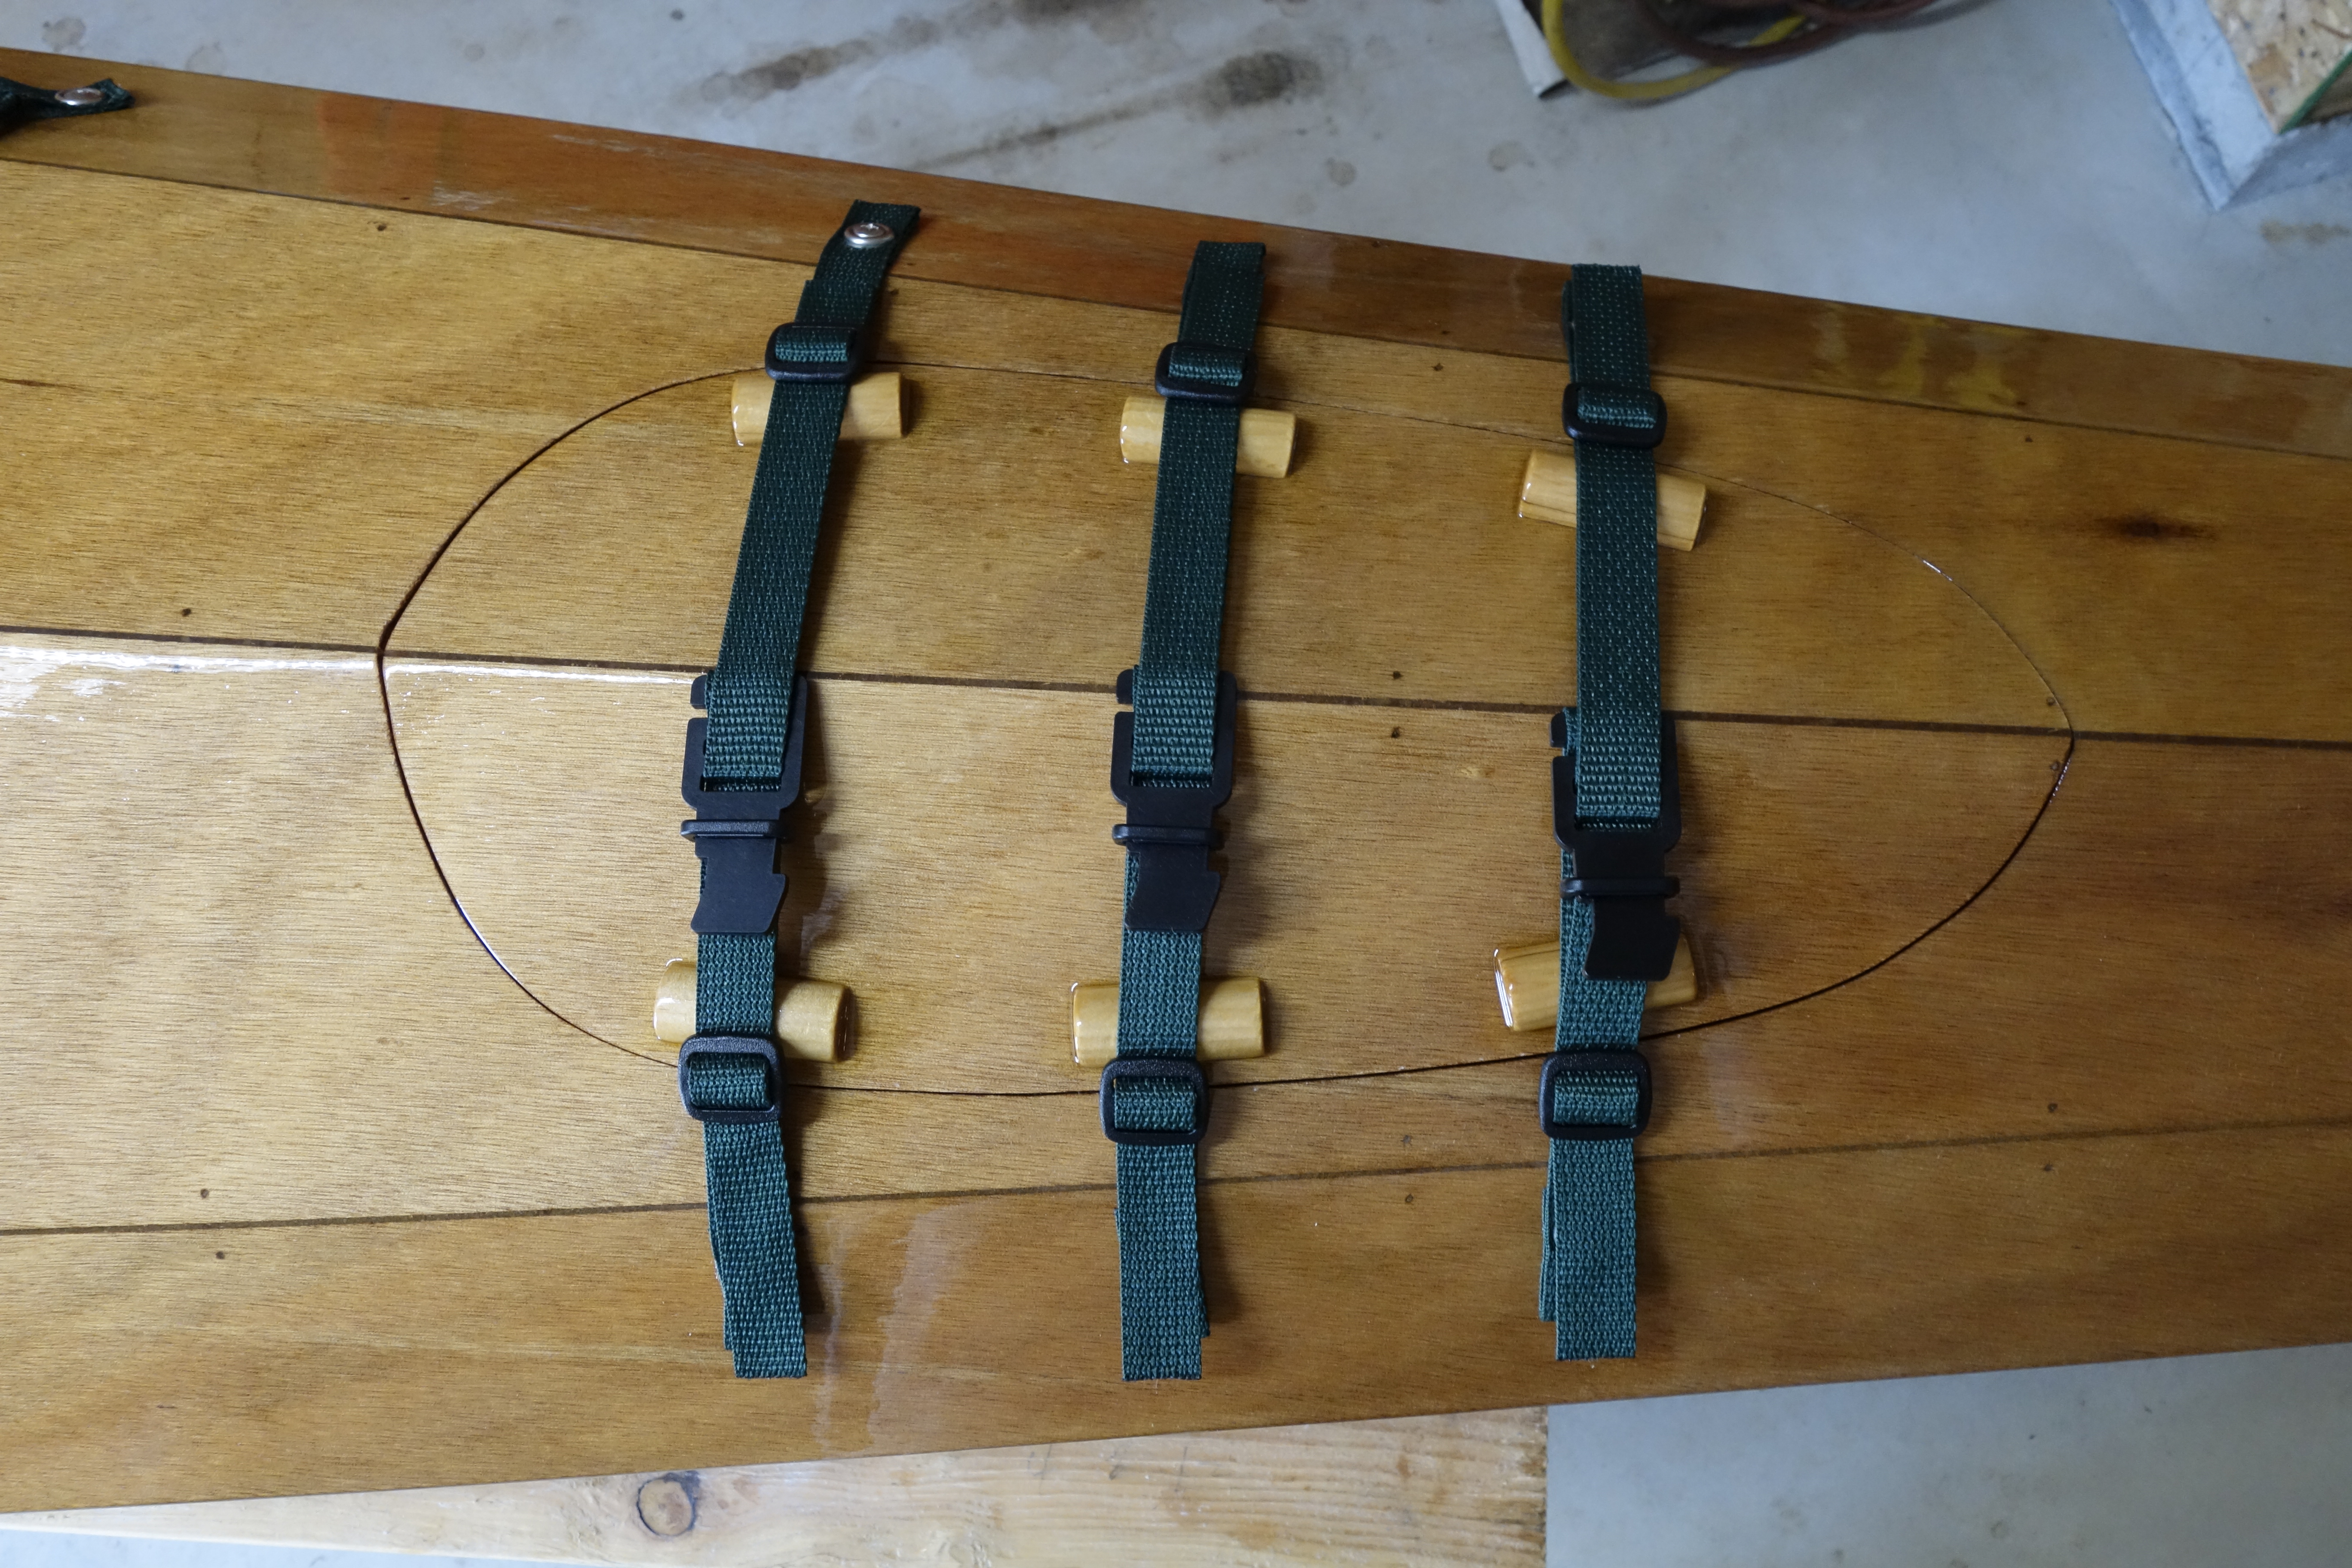
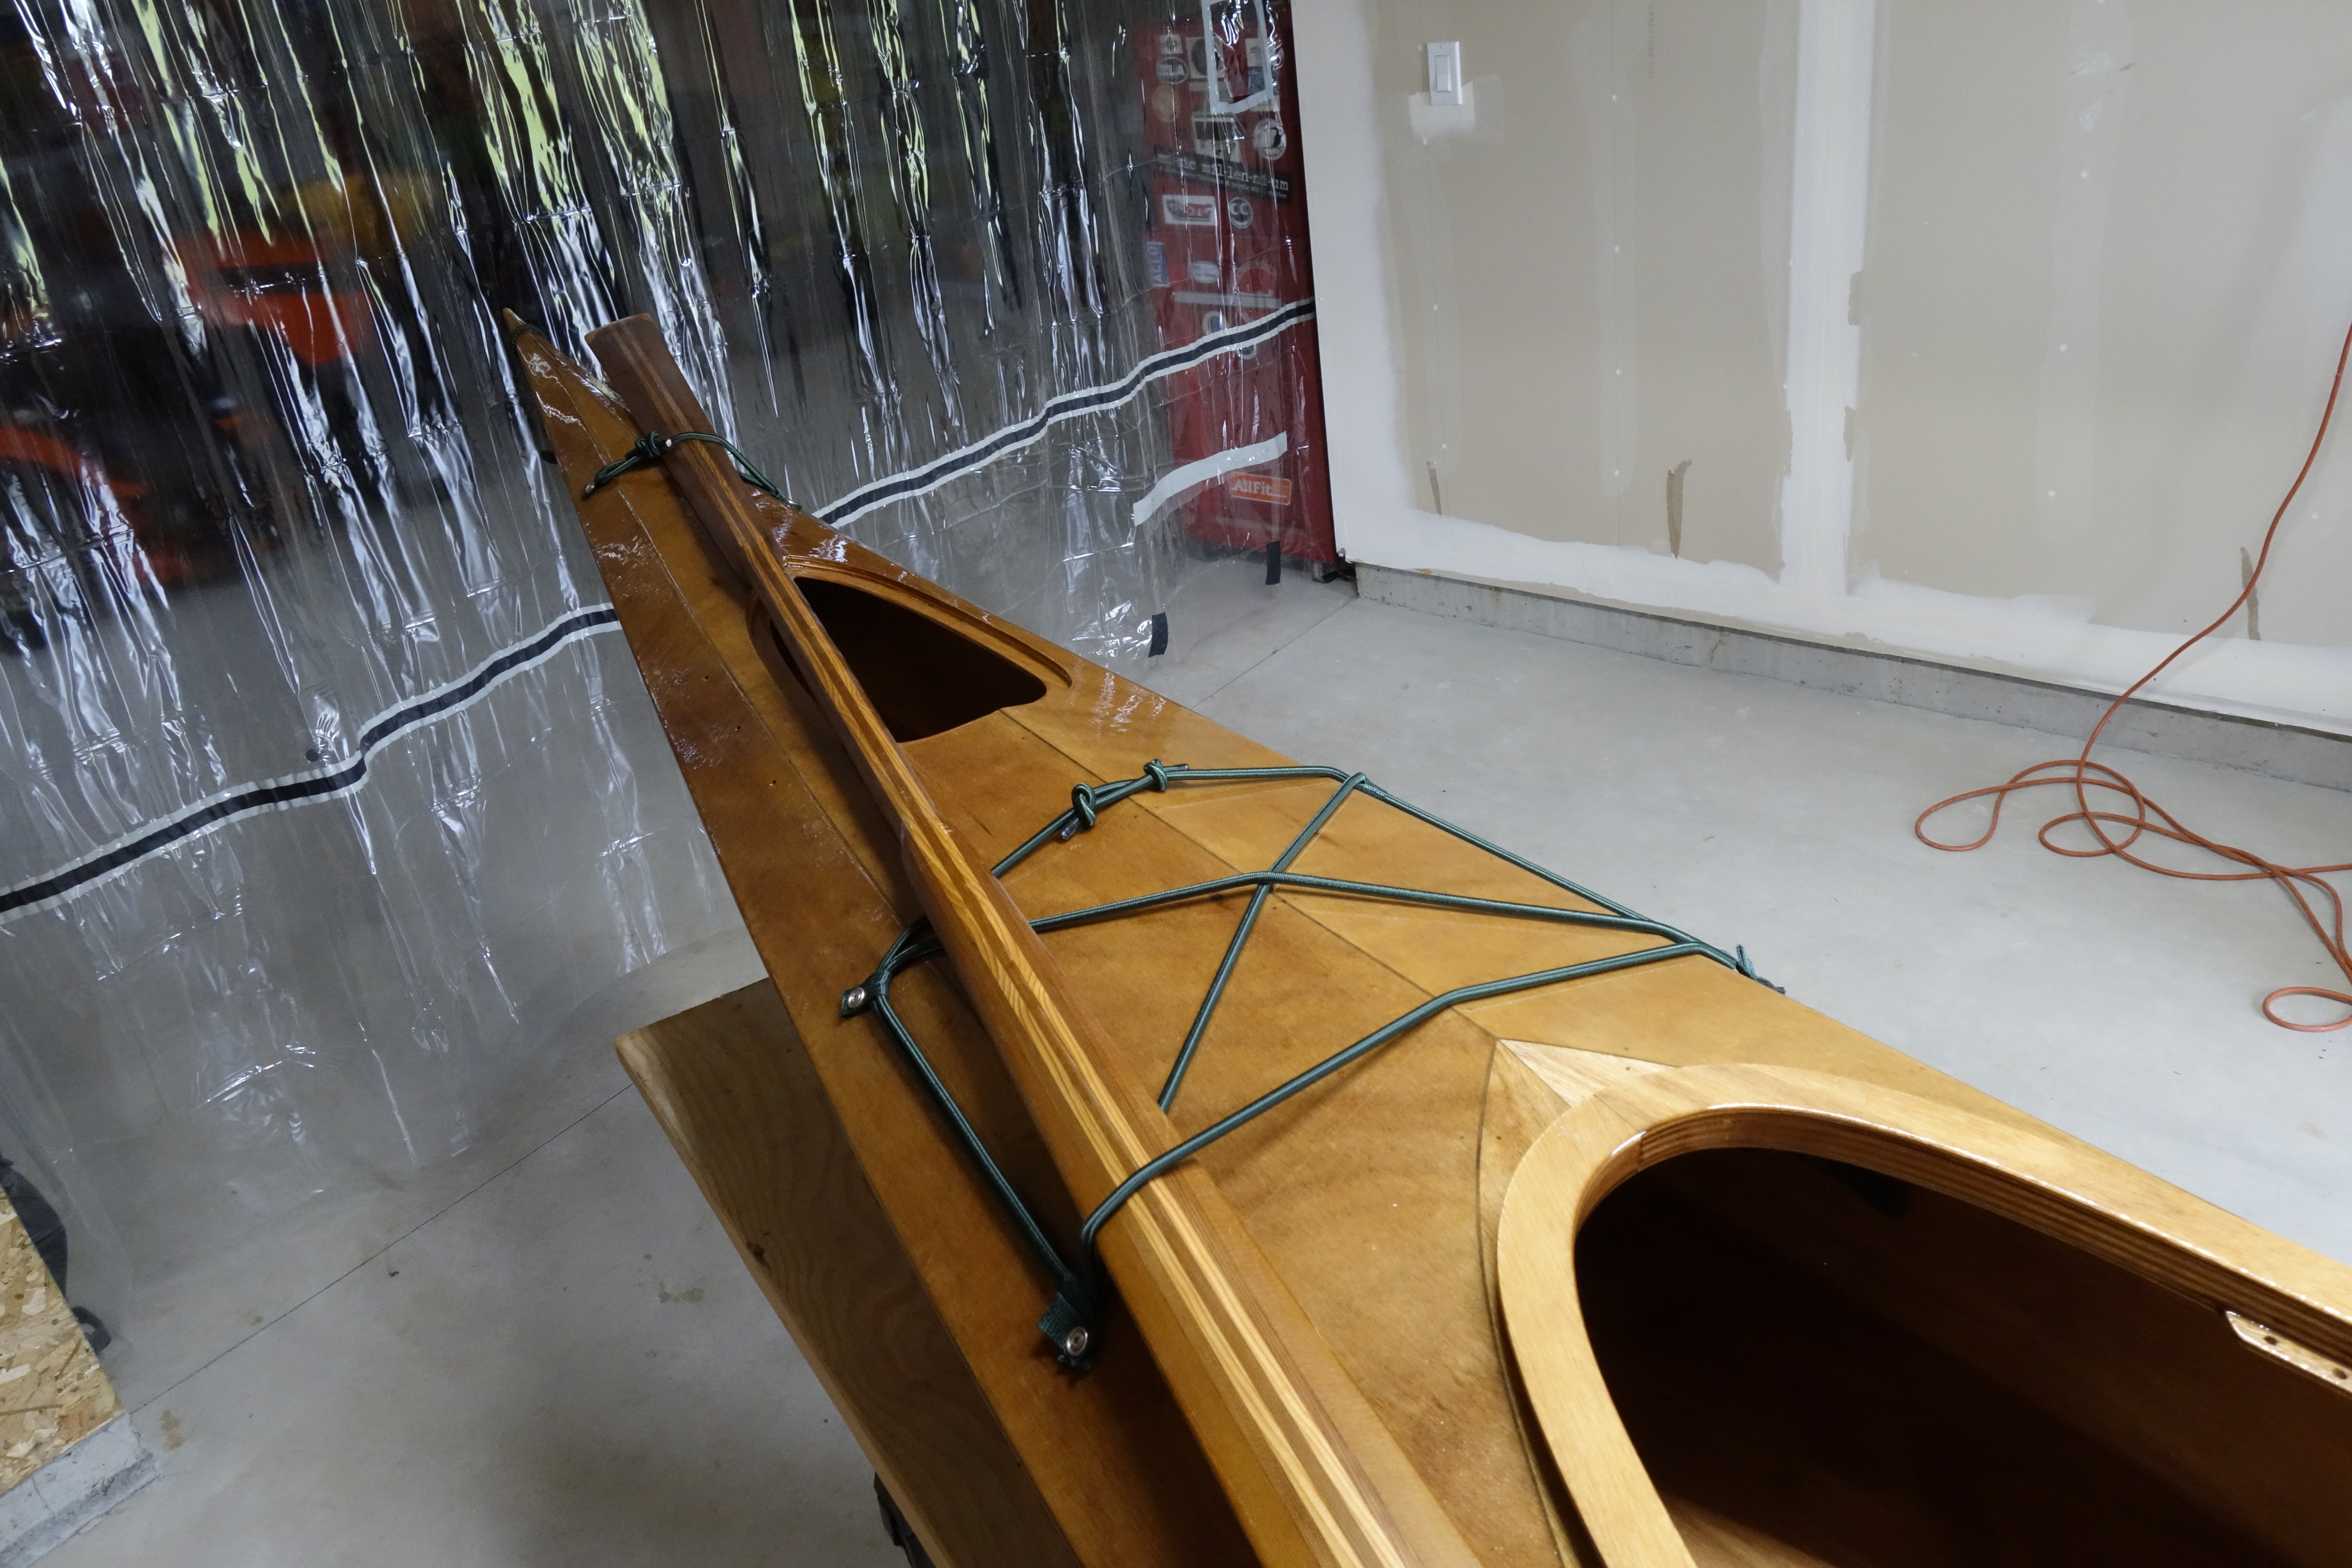
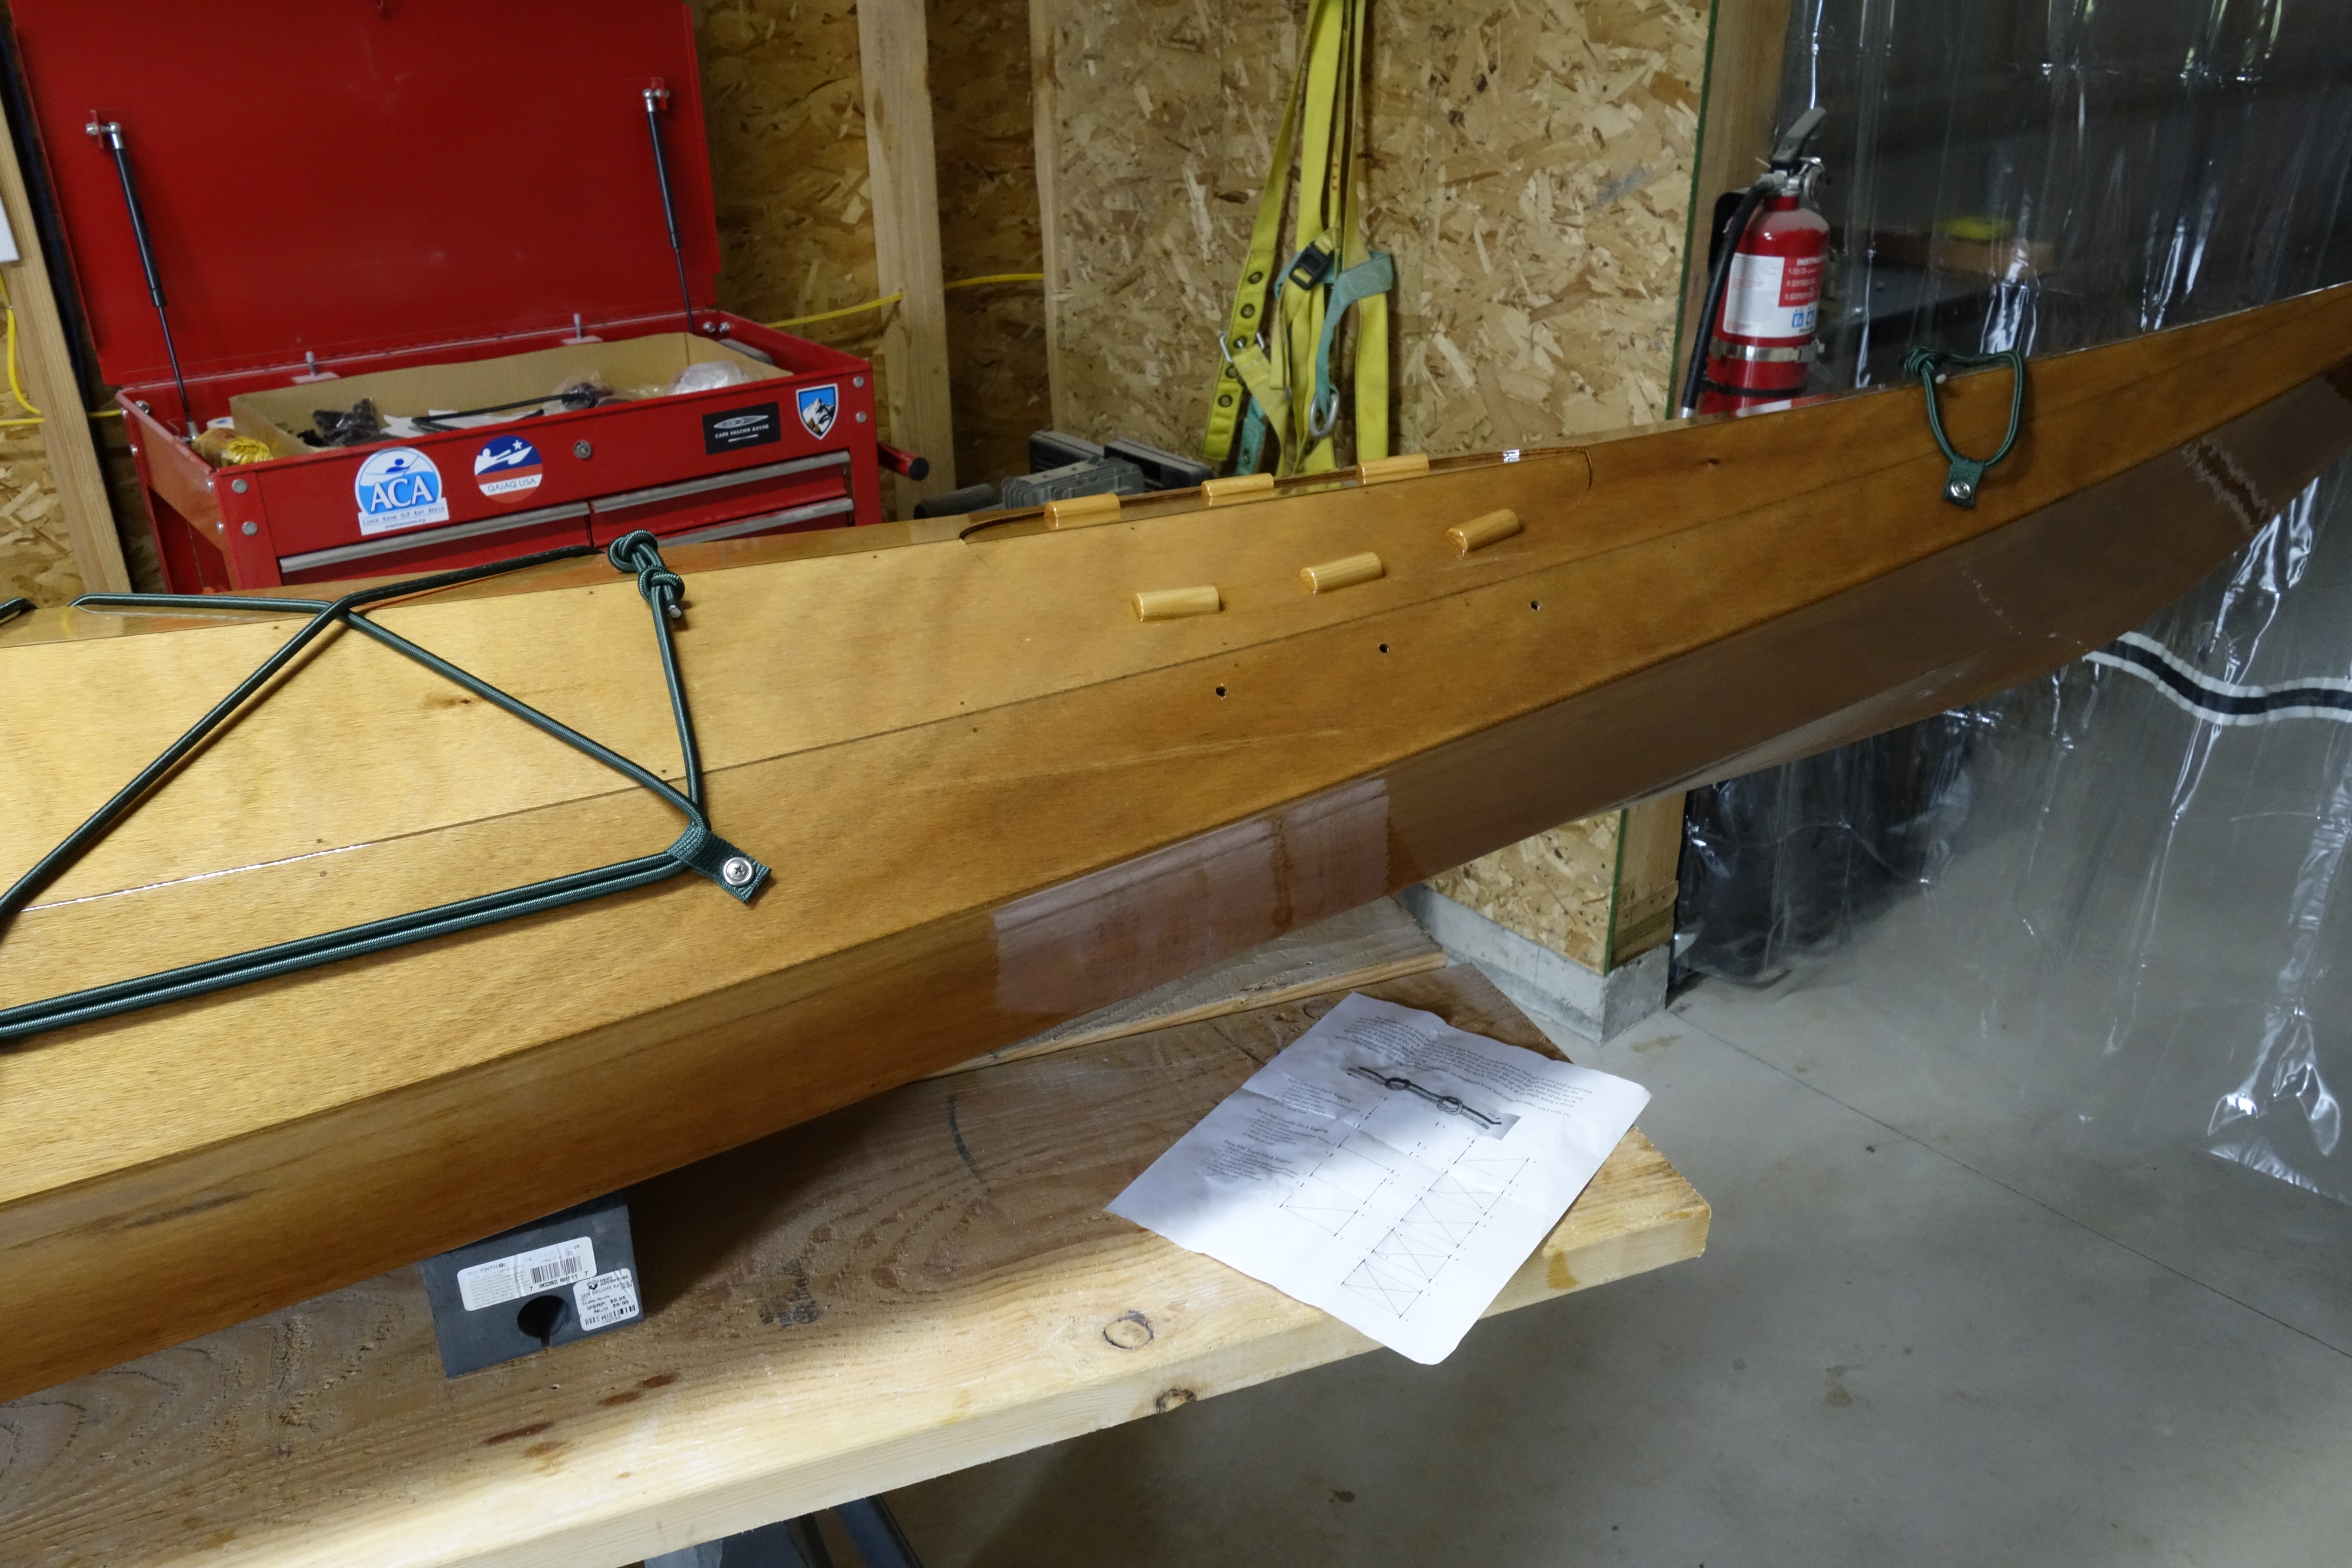
Yesterday evening, and this morning I had some time to start the deck rigging. I was able to get the soft pad eyes installed, and get the shock cord installed fore and aft. I also made a paddle park. Pygmy provided plastic pad eyes, but I chose to make soft, polypropylene pad eyes as I have seen on some Pygmy Boats. As you can see in the photos, I did not use the black nylon webbing or the shock cord provided with the kit. Nylon/polypropylene webbing is available in almost any size and color you can imagine, and it’s surprisingly inexpensive. One bit of advice: If you are going to buy your own nylon webbing, be sure to order “lightweight” 3/4″ webbing. I first bought the heavyweight webbing, but had to send it back as it is too thick to go through the hardware. I bought 50 feet of the webbing for less than $15.00 shipped, and 25 yards of shock cord cost about the same. I found forest green, 3/4″ polypropylene webbing and with a little searching I was able to find 1/4″ shock cord that was a very good color match. I thought that a forest green color would look good and I am very happy with it, and now my Ronan will stand out a bit from the rest of the crowd! I still have to get the foam glued to the hatch lips, and then install the tie down straps for the hatch lids. After that I’ll install the perimeter lines and the deck rigging will be done. Then on to the seat.
:^)
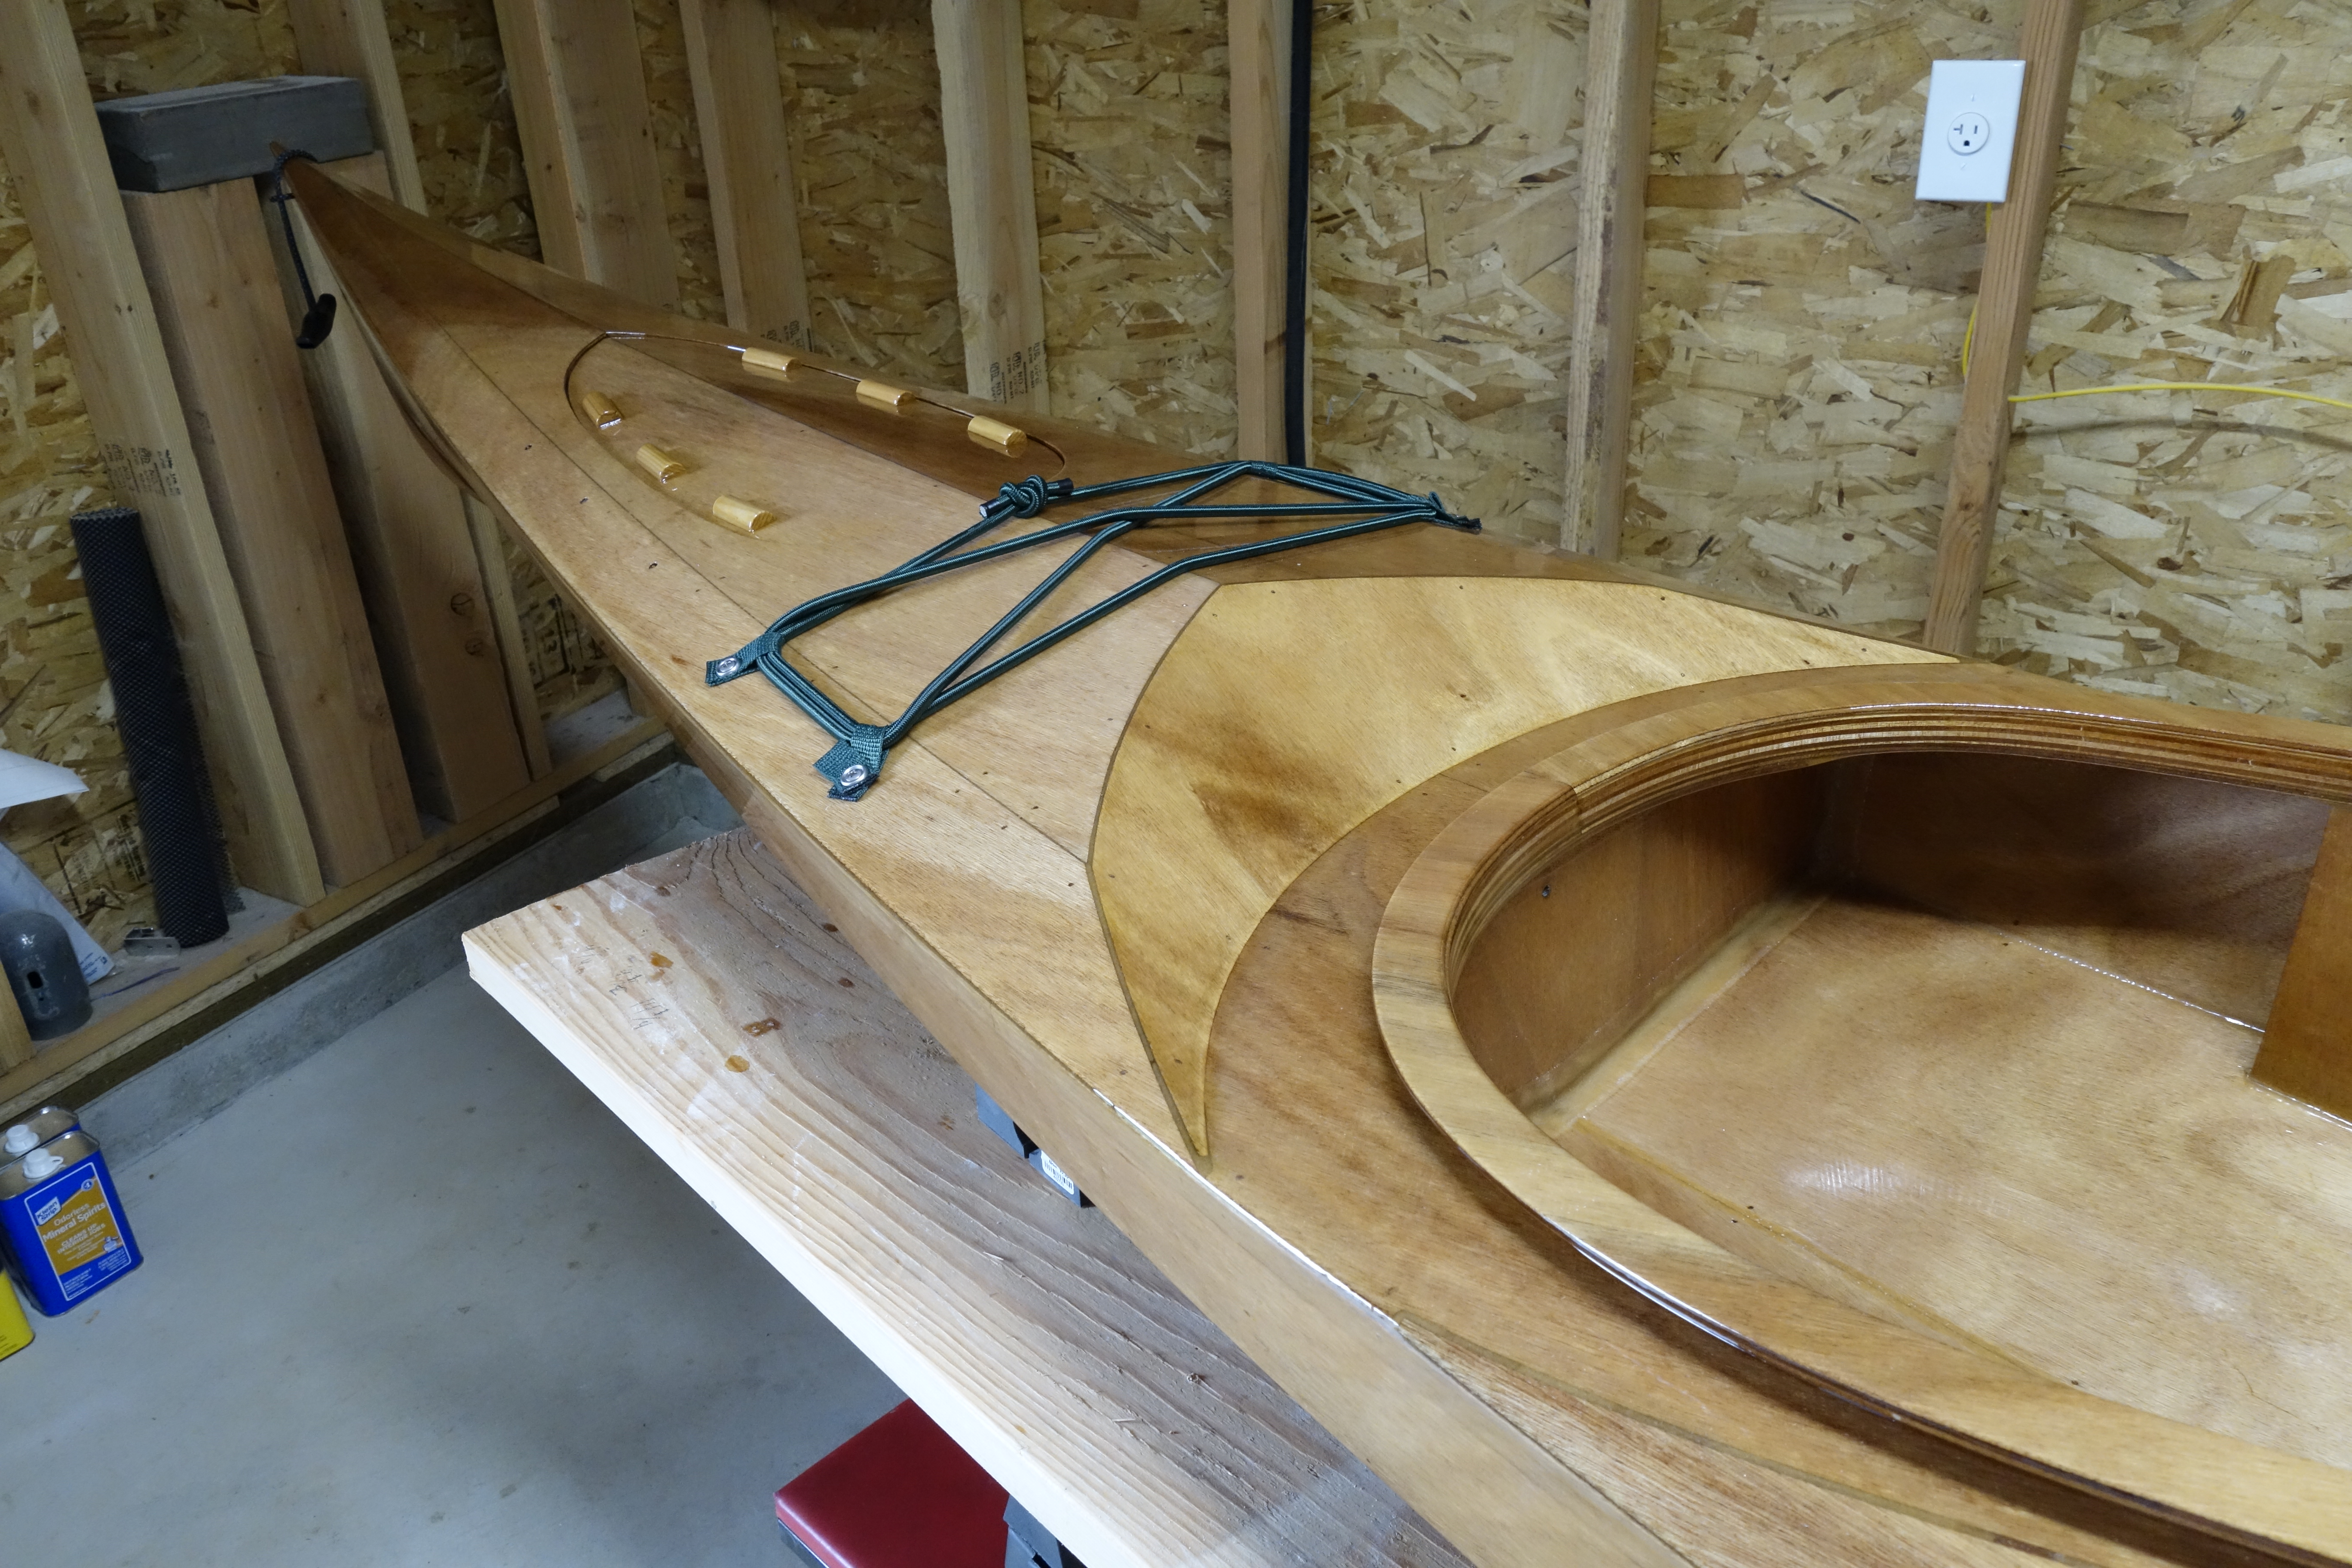
The paddle park seems to work!Aft shock cordsForward shock cords.The forward hatch cover is just there for show. I still have to install the foam on the lips. Aft hatch cover, just for show.Above you can see the color of the polypropylene webbing I bought. Pretty good match for the shock cord I think.It’s getting there! Hatch foam, straps, and the perimeter lines to do yet.
I spent the morning deciding where I wanted my deck rigging and paddle park, and drilling the holes in the deck for that stuff. Then I rolled on, and tipped off the final fill coat of epoxy on the deck. The hull comes tomorrow.
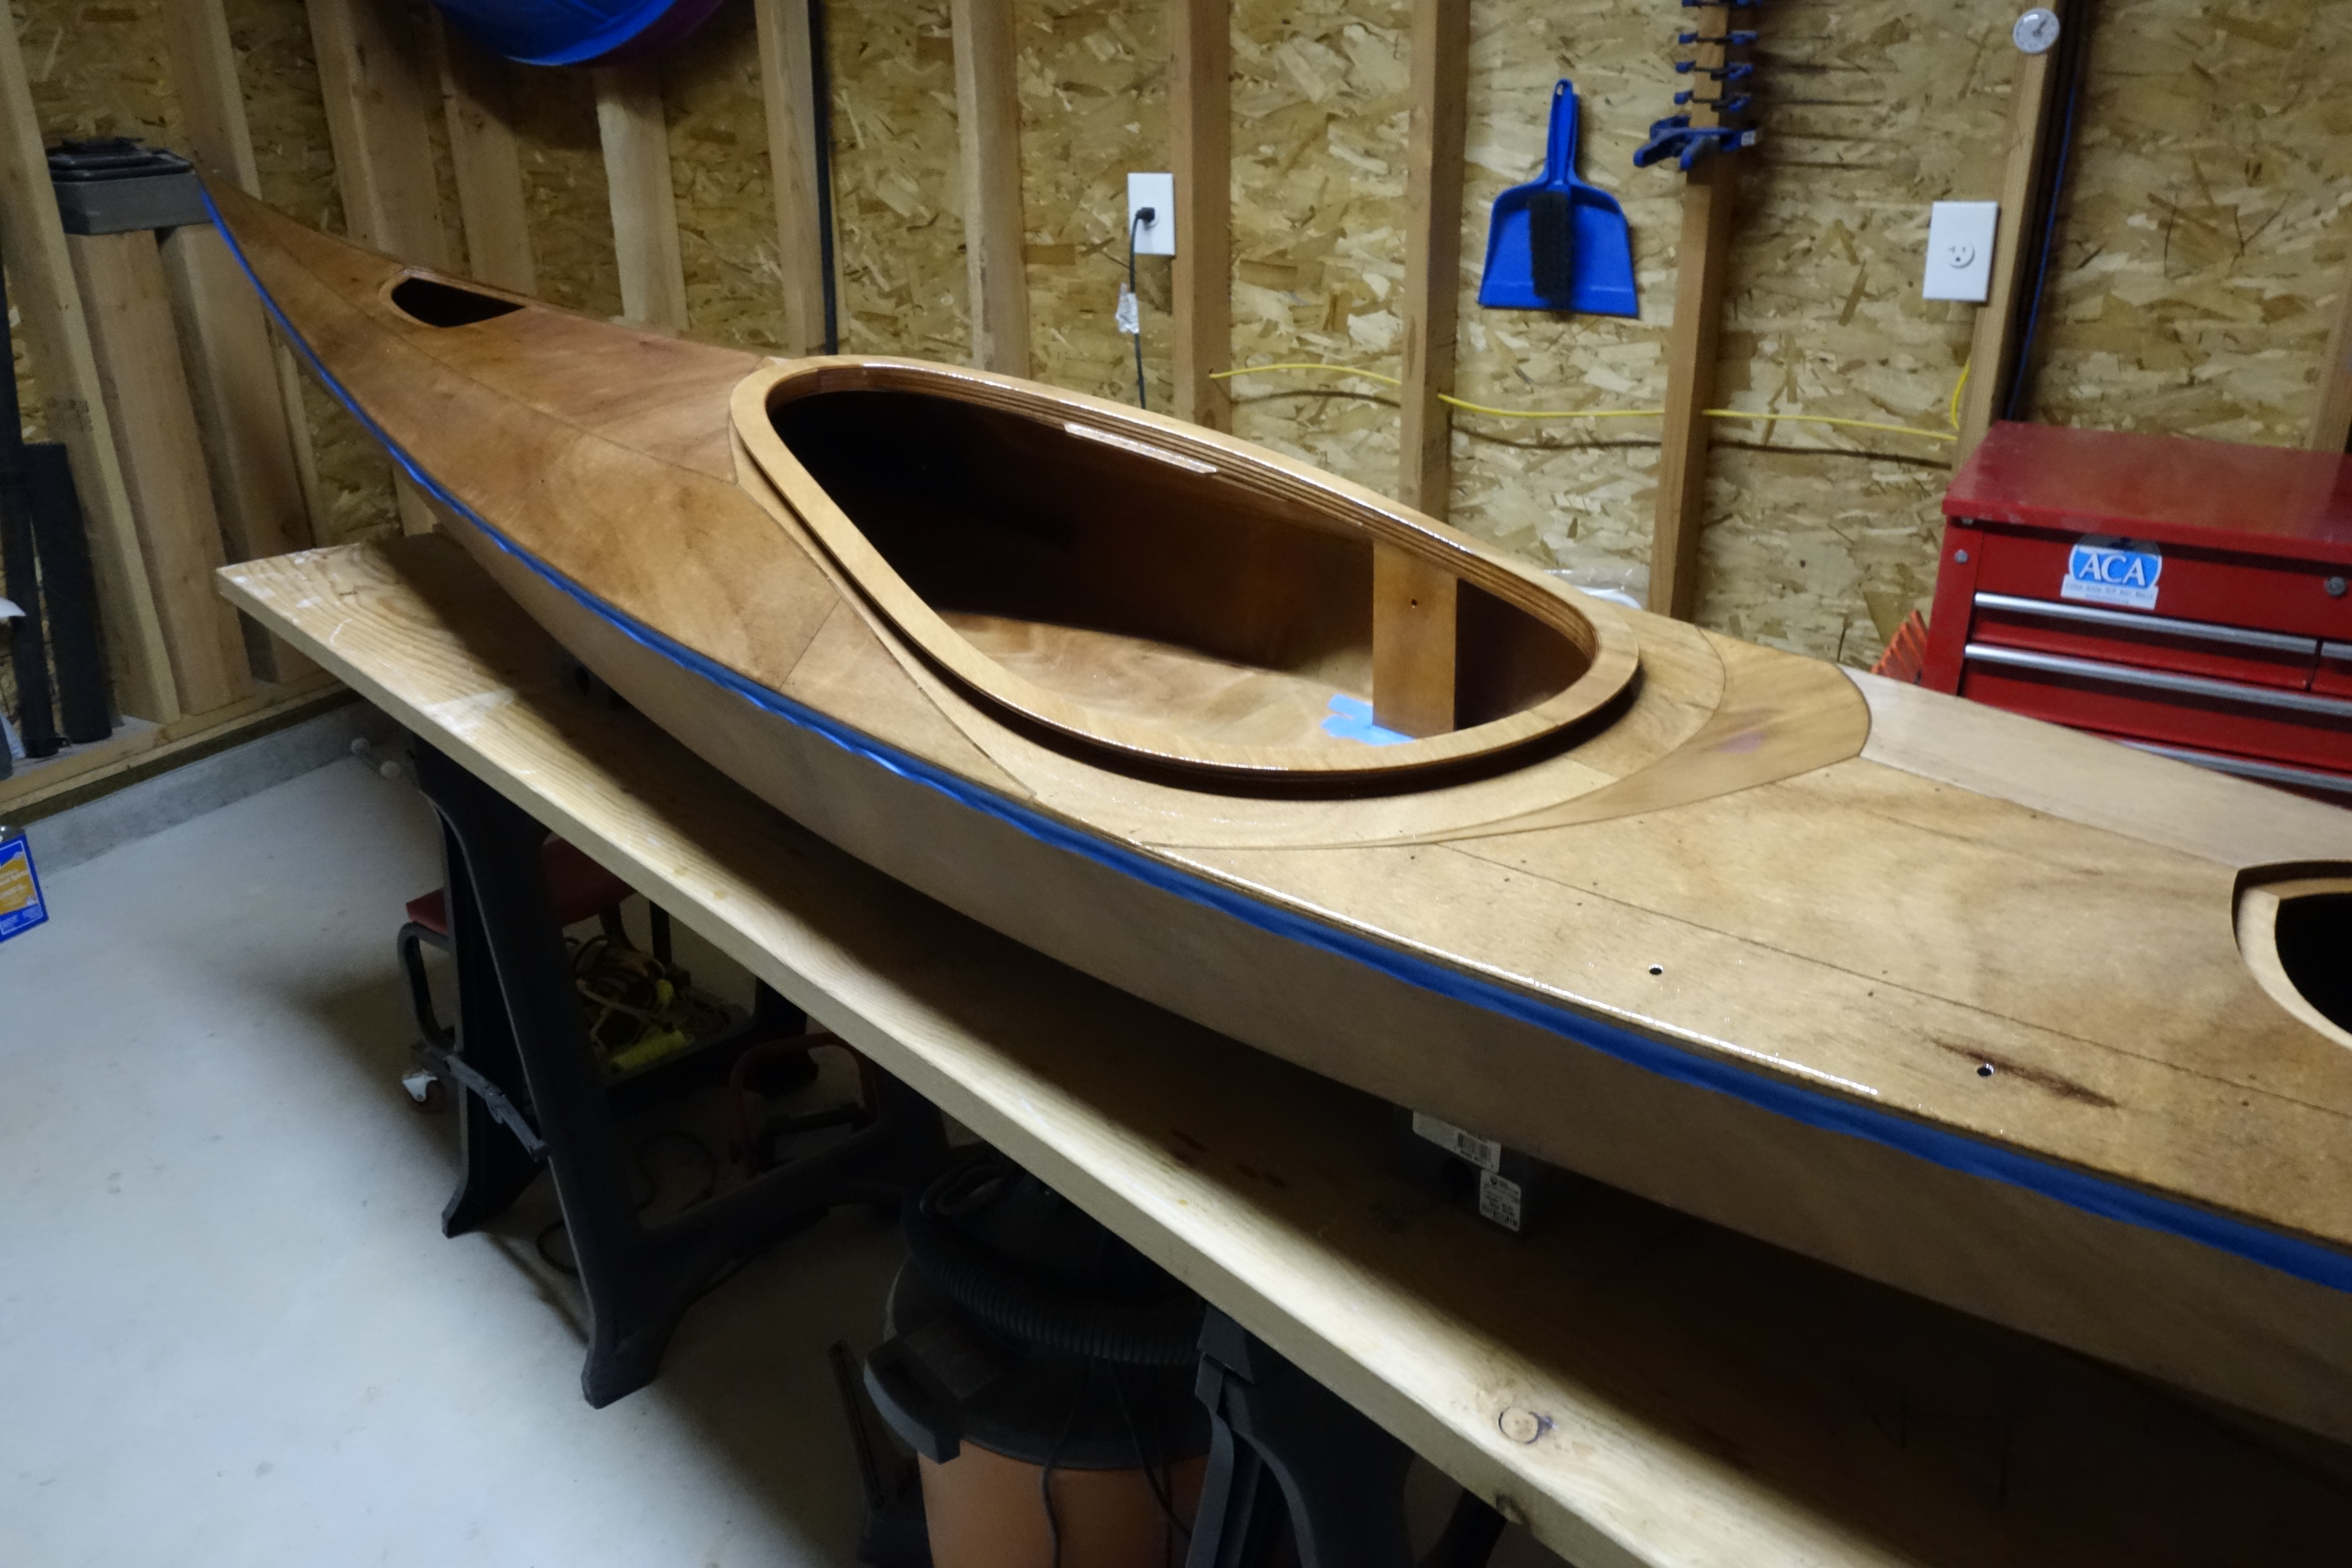
I taped just below the shear line and folded the tape under, on itself so that any epoxy that might run over the shear wouldn’t run down the hull, but would drip onto the bench or floor instead. I spent too much time sanding the hull smooth to have to do it all over again to get rid of runs and drips.Here you can see the holes for the straps on the port side, forward hatch, and the forward hole for the bow deck rigging. I will make sure that the open grain in all these holes is saturated with epoxy. I have pipe cleaners specifically for this purpose.Holes for port side, aft hatch cover and deck rigging.Starboard side, aft.Starboard side, forward.View up the port side.As per Pygmy’s recommendation, I use 1/8″ nap, foam rollers to apply the epoxy to large surface areas. I have found that cutting the 7″ roller covers in half, using a sharp utility knife works very well for reaching the tighter areas on the kayak. It also doubles the number of covers available to use during each application. This is important because in a relatively short time, the epoxy starts to become foamy in the roller cover and the cover must be discarded, otherwise, the epoxy finish will be cloudy rather than clear. That said, I was able to coat the entire deck using only one half of a roller cover. I may need to use two for the hull as it has a larger surface area.Epoxy rolled on with a foam roller, and tipped off with a 3″ foam brush.I used a 2″ foam brush to carefully apply epoxy to the cockpit coaming and hip braces, and also under the cockpit coaming and around the cockpit apron. I did this before I rolled out the rest of the deck so that when I tipped everything off it would all blend as I worked into the wet edge of where I worked on the coaming area.