This post is “pinned” to the top of the blog. The real content is below. If you have any questions or comments, feel free to ask in the comments below and I will happily answer as soon as I get a chance.
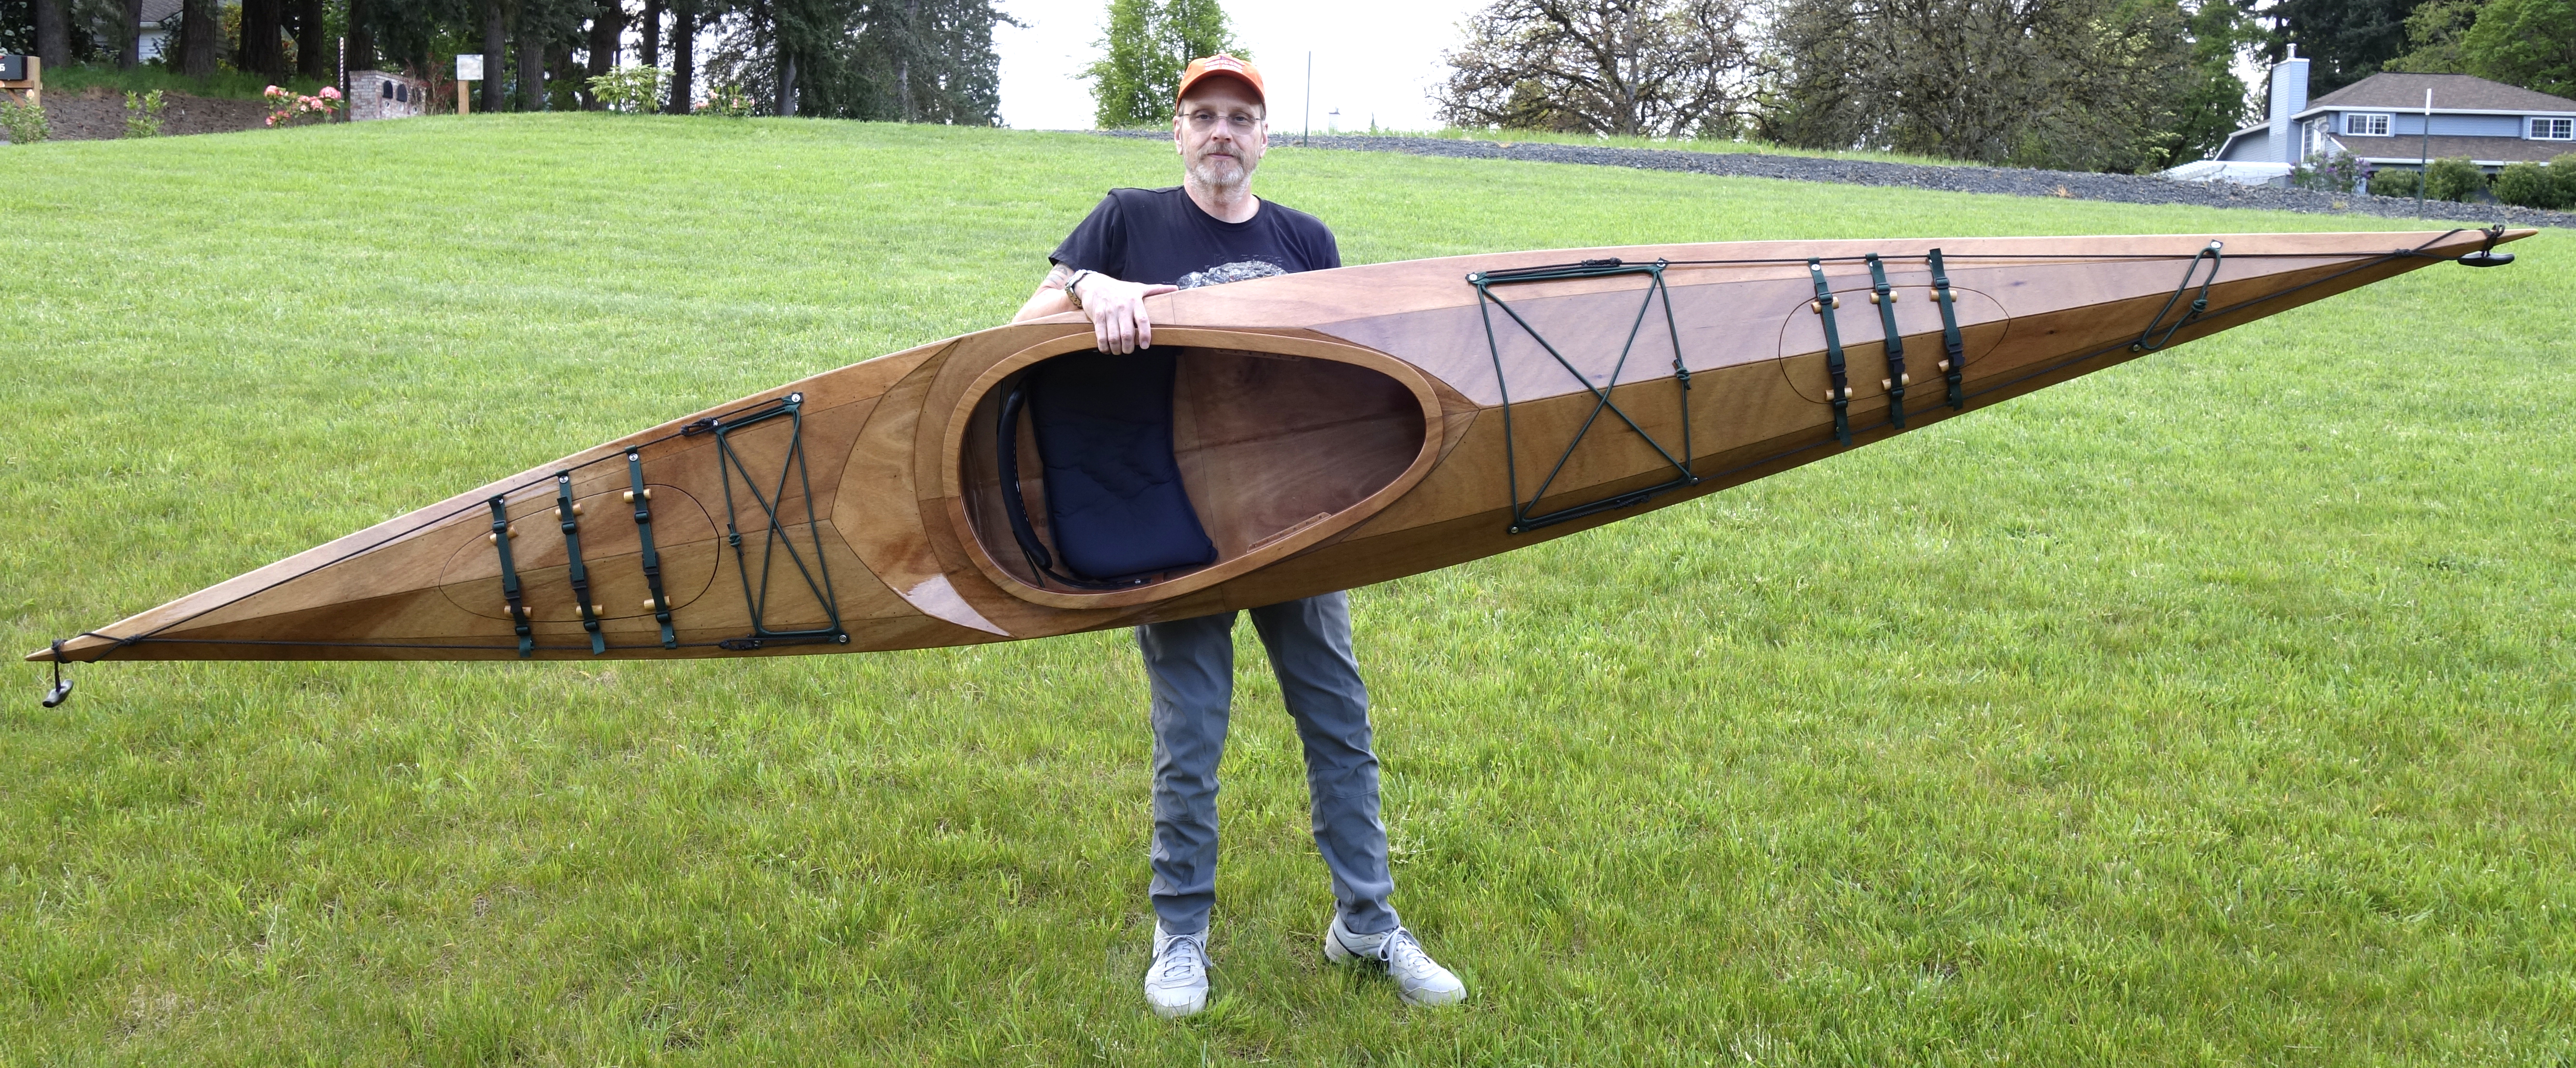
About this build and my goals: When I bought my kayak kit, my goal was to build a better performing, more beautiful kayak than I could otherwise buy. I received my kit on November 4, 2019, and started the actual construction of my kayak on November 10th, working in the evenings and on weekends, as time allowed. I finished construction on April 28, 2020. I think I have achieved my goal.
In this blog I document the order of the construction steps to build my kayak and describe how those steps went for me. That said, this blog is not a “how to” blog. Since this is my first attempt at anything like this, I hope that some of the things that went well for me might encourage someone who is apprehensive about a process in their own build. I also hope that by describing the steps that were challenging for me as a first-time builder, and why, I might make those steps a little easier for someone else.
All photos on this blog are protected by a Creative Commons license and cannot be used for commercial purposes without permission. Pygmy Boats has permission to use any part of this blog, including photographs, for whatever uses they see fit. I have not been compensated in any way by Pygmy Boats, or any other manufacturer or vendor whose products I have used in the construction of this kayak. If you want to use any of my photos for any reason please ask.
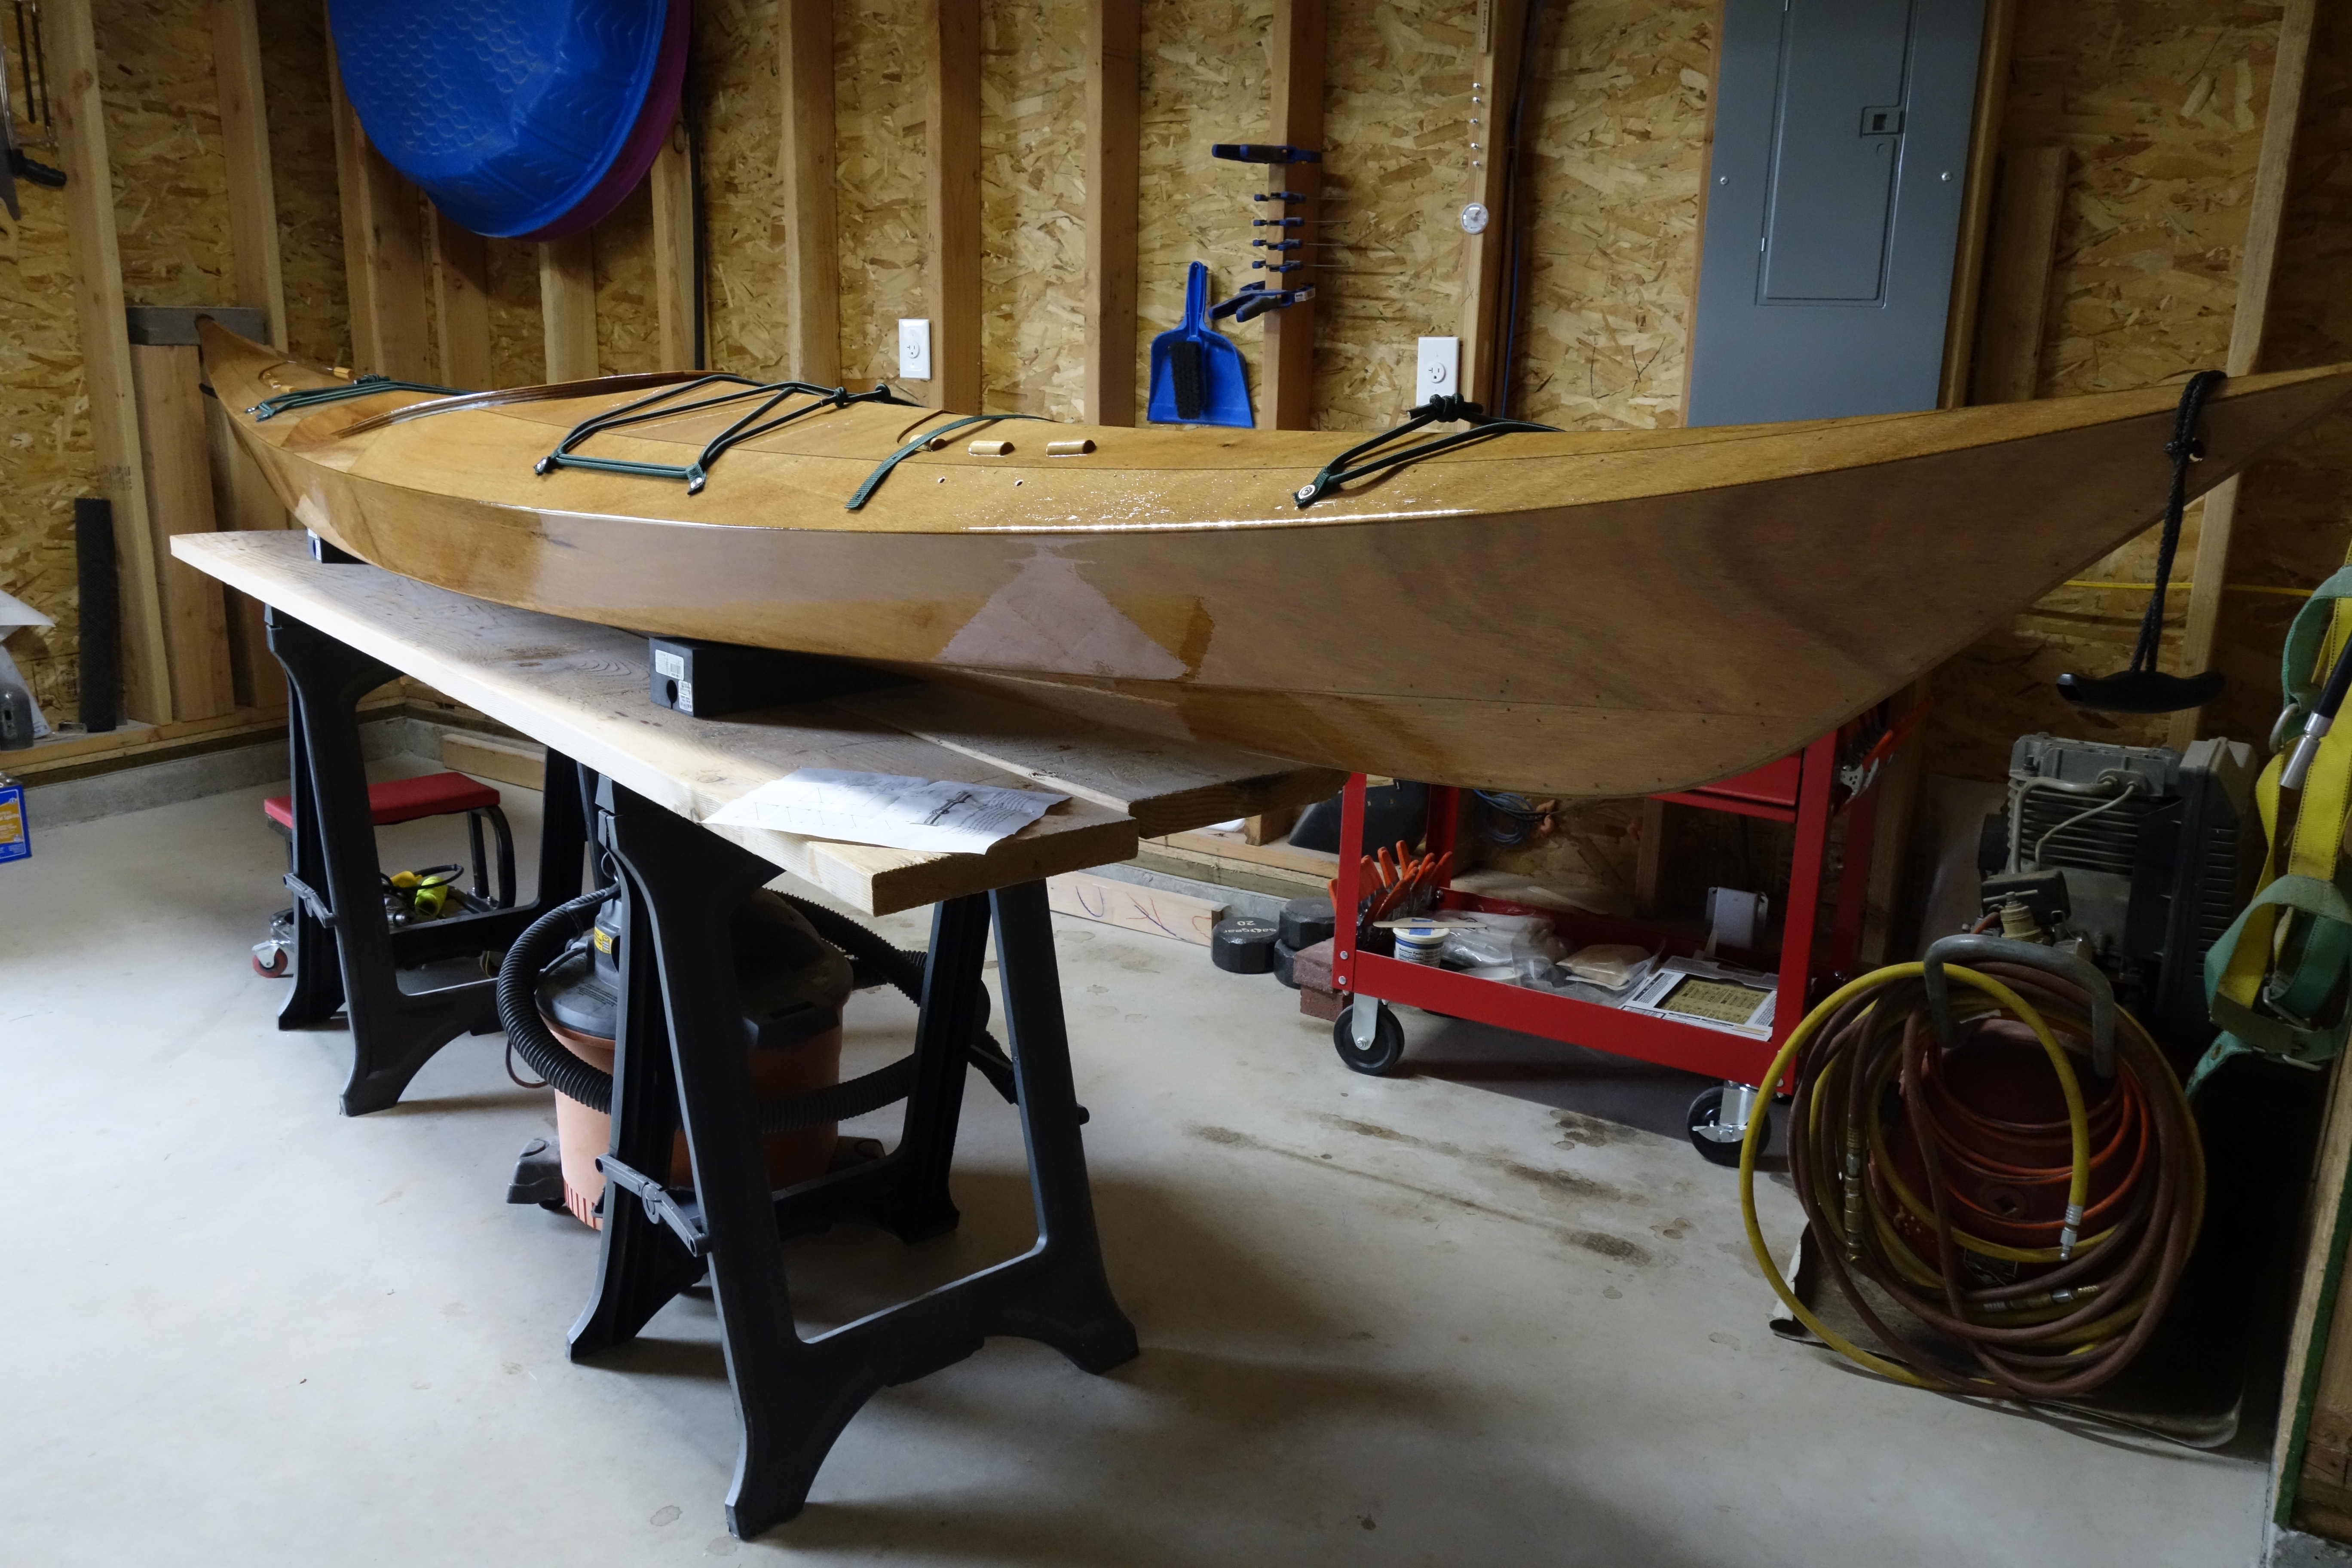
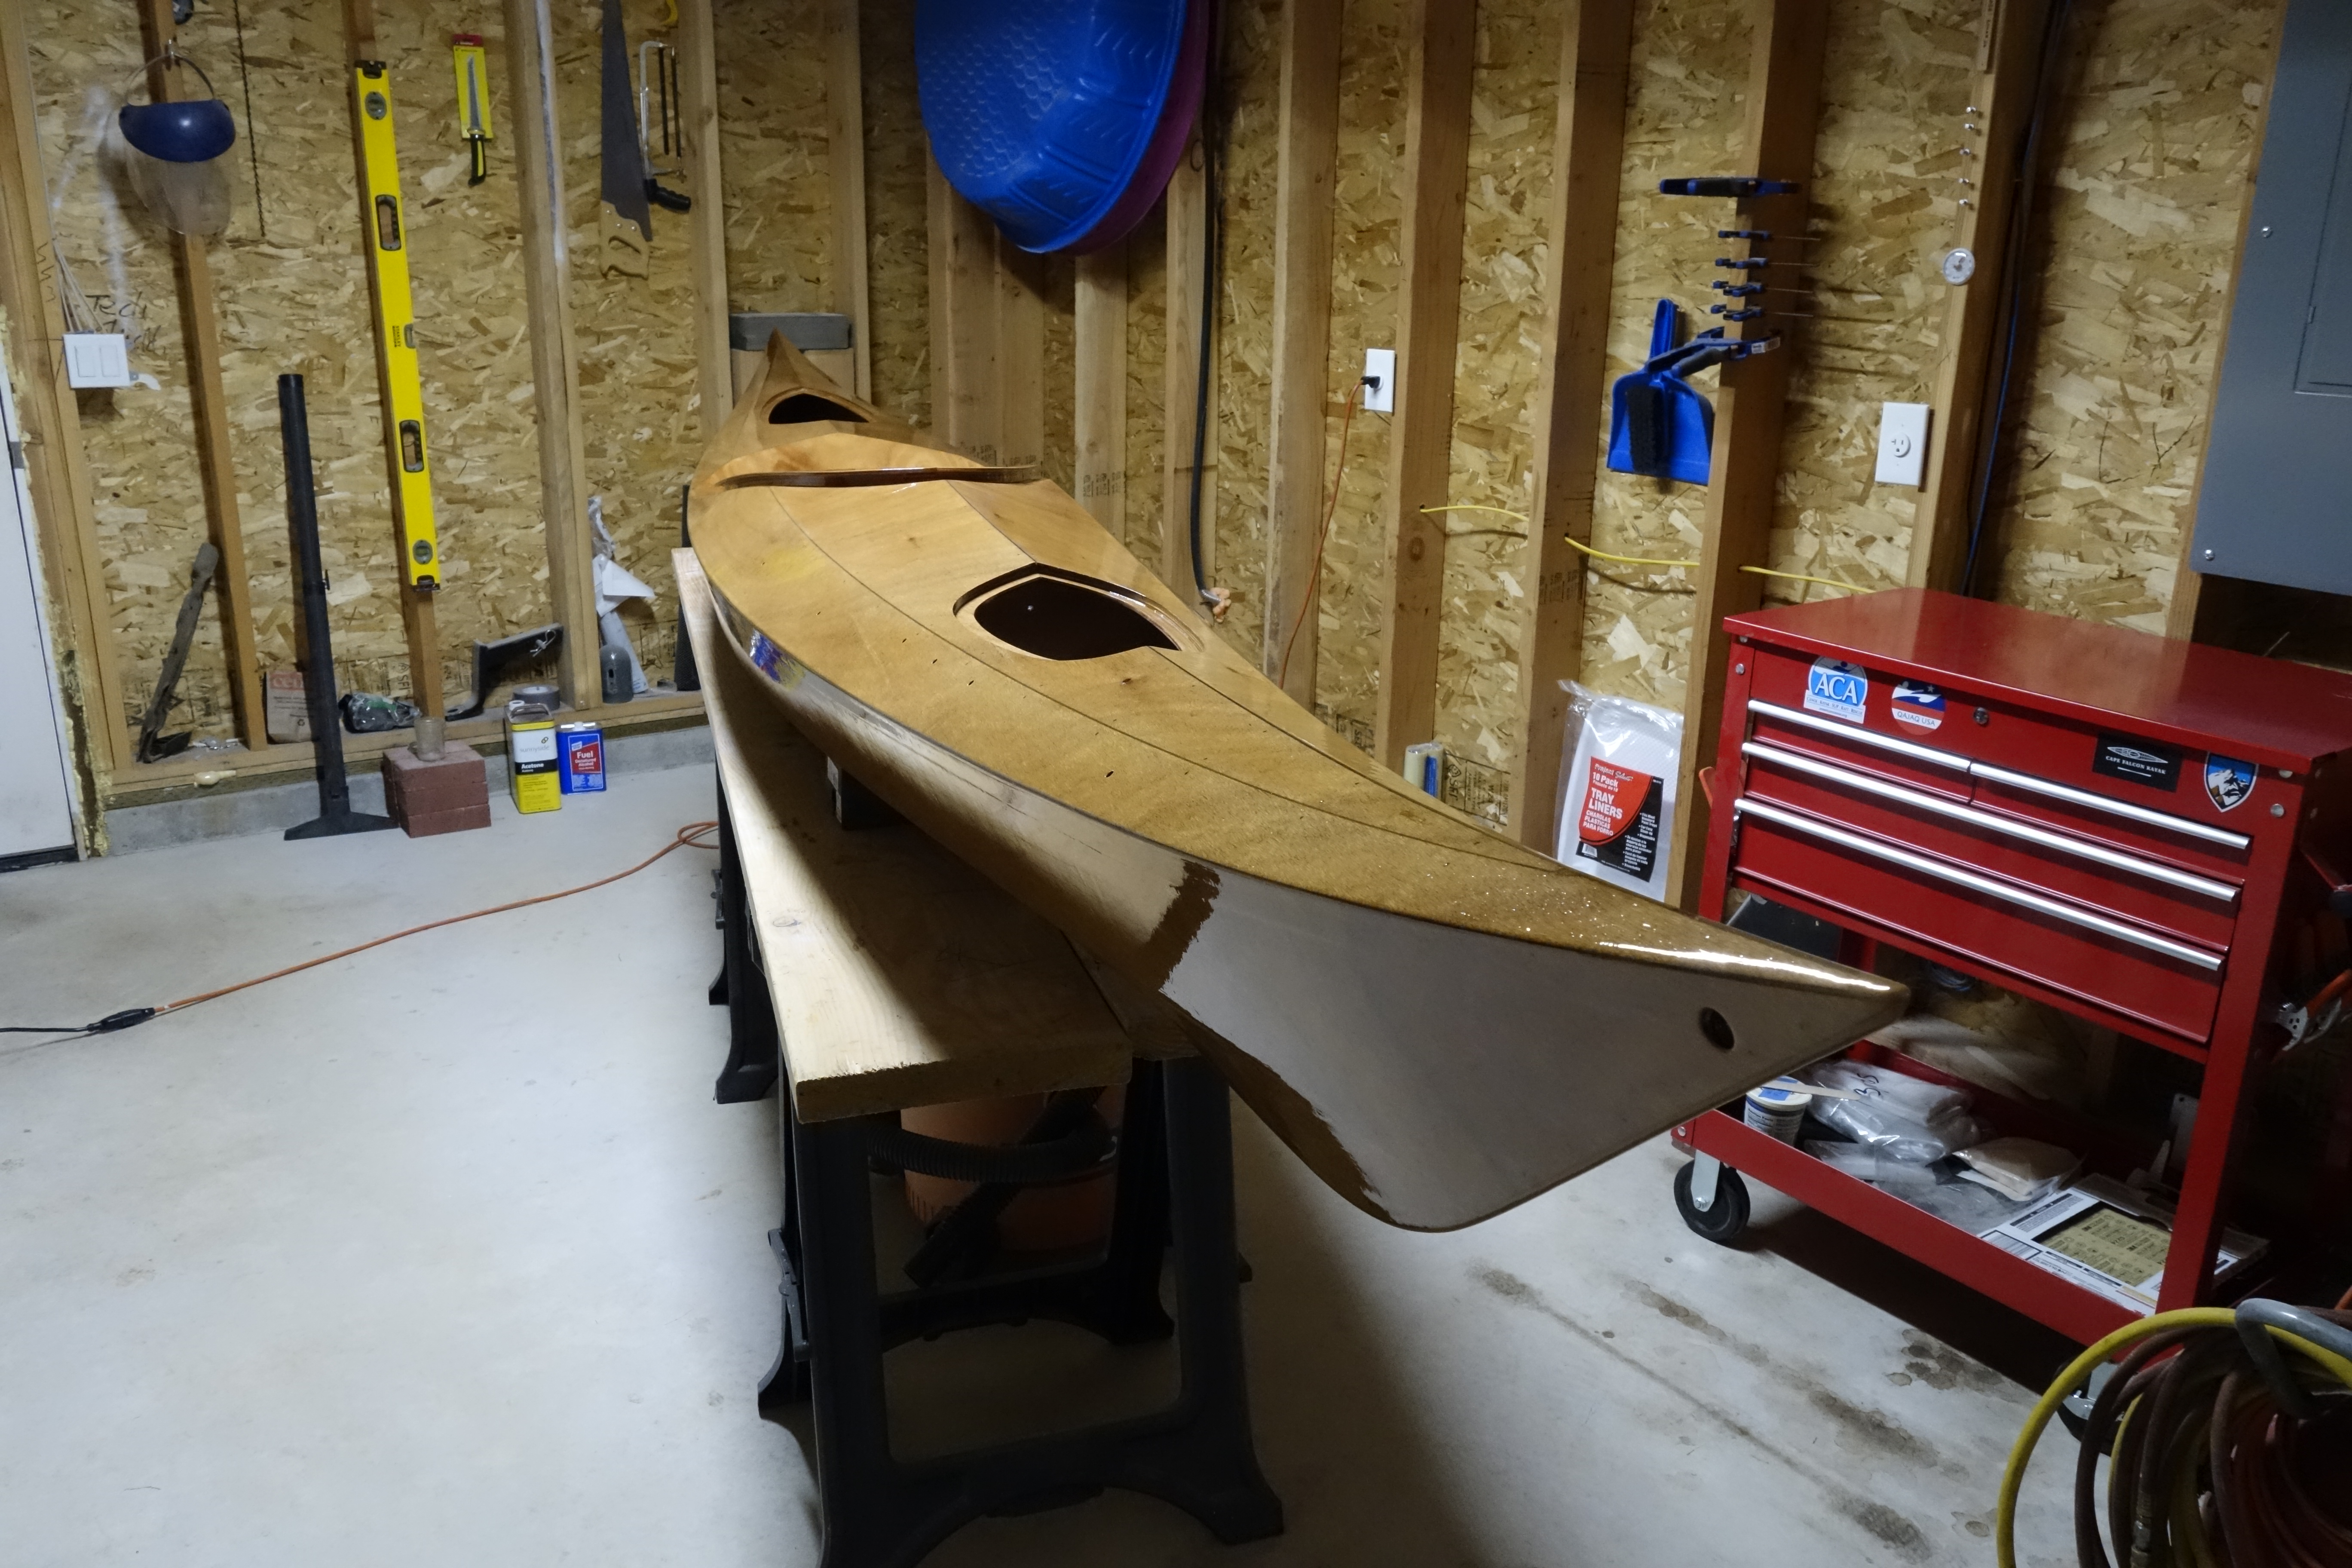
Construction complete. I am officially calling today, April 28, 2020, the day that I completed construction of the Pygmy Ronan that I started back on November 10, 2019. This has been a very satisfying experience, and for that I thank John Lockwood and everyone at Pygmy Boats. Mr. Lockwood, Laura, Jim, and Suzanne (I spoke with one other person, but regrettably I can’t remember his name. Matt maybe?) have all been remarkably patient every time I called with a question, and have helped me through several stages of the build in which I lacked the confidence to move forward without guidance. I’m sure that I asked all of the stupid questions that could possibly be asked, and they were all answered with professionalism, patience, and kindness. Thank you Pygmy Boats!
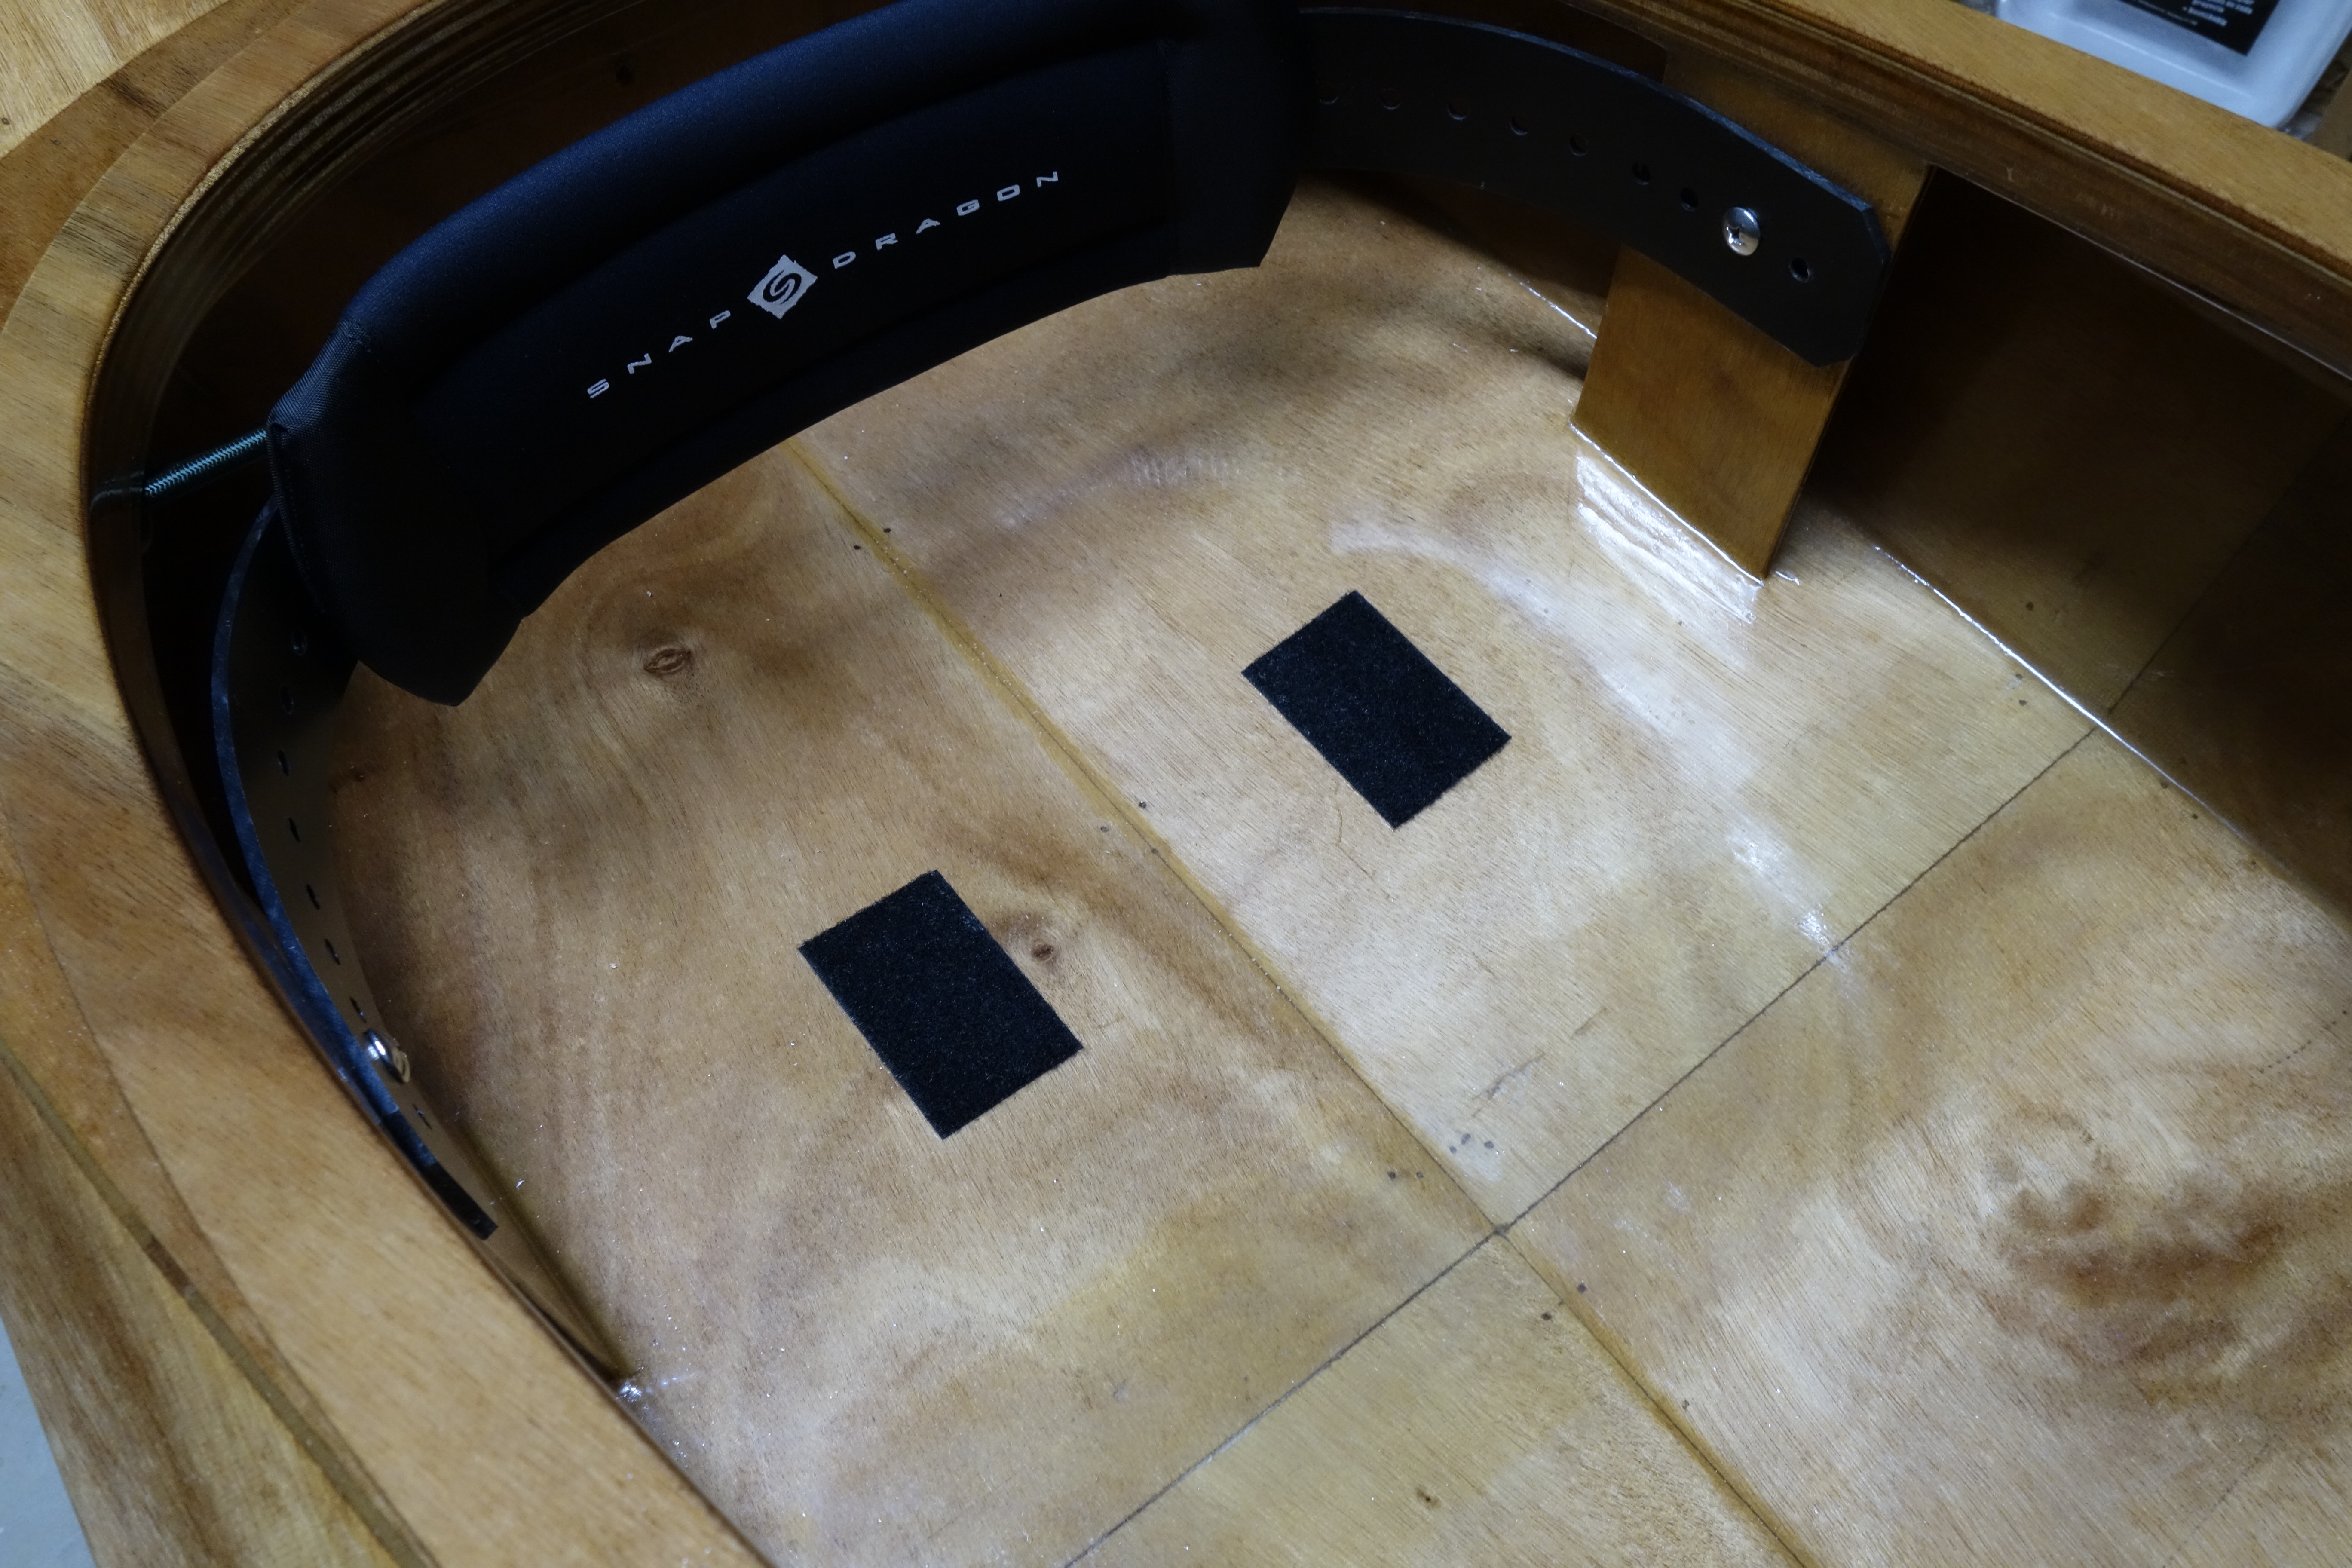
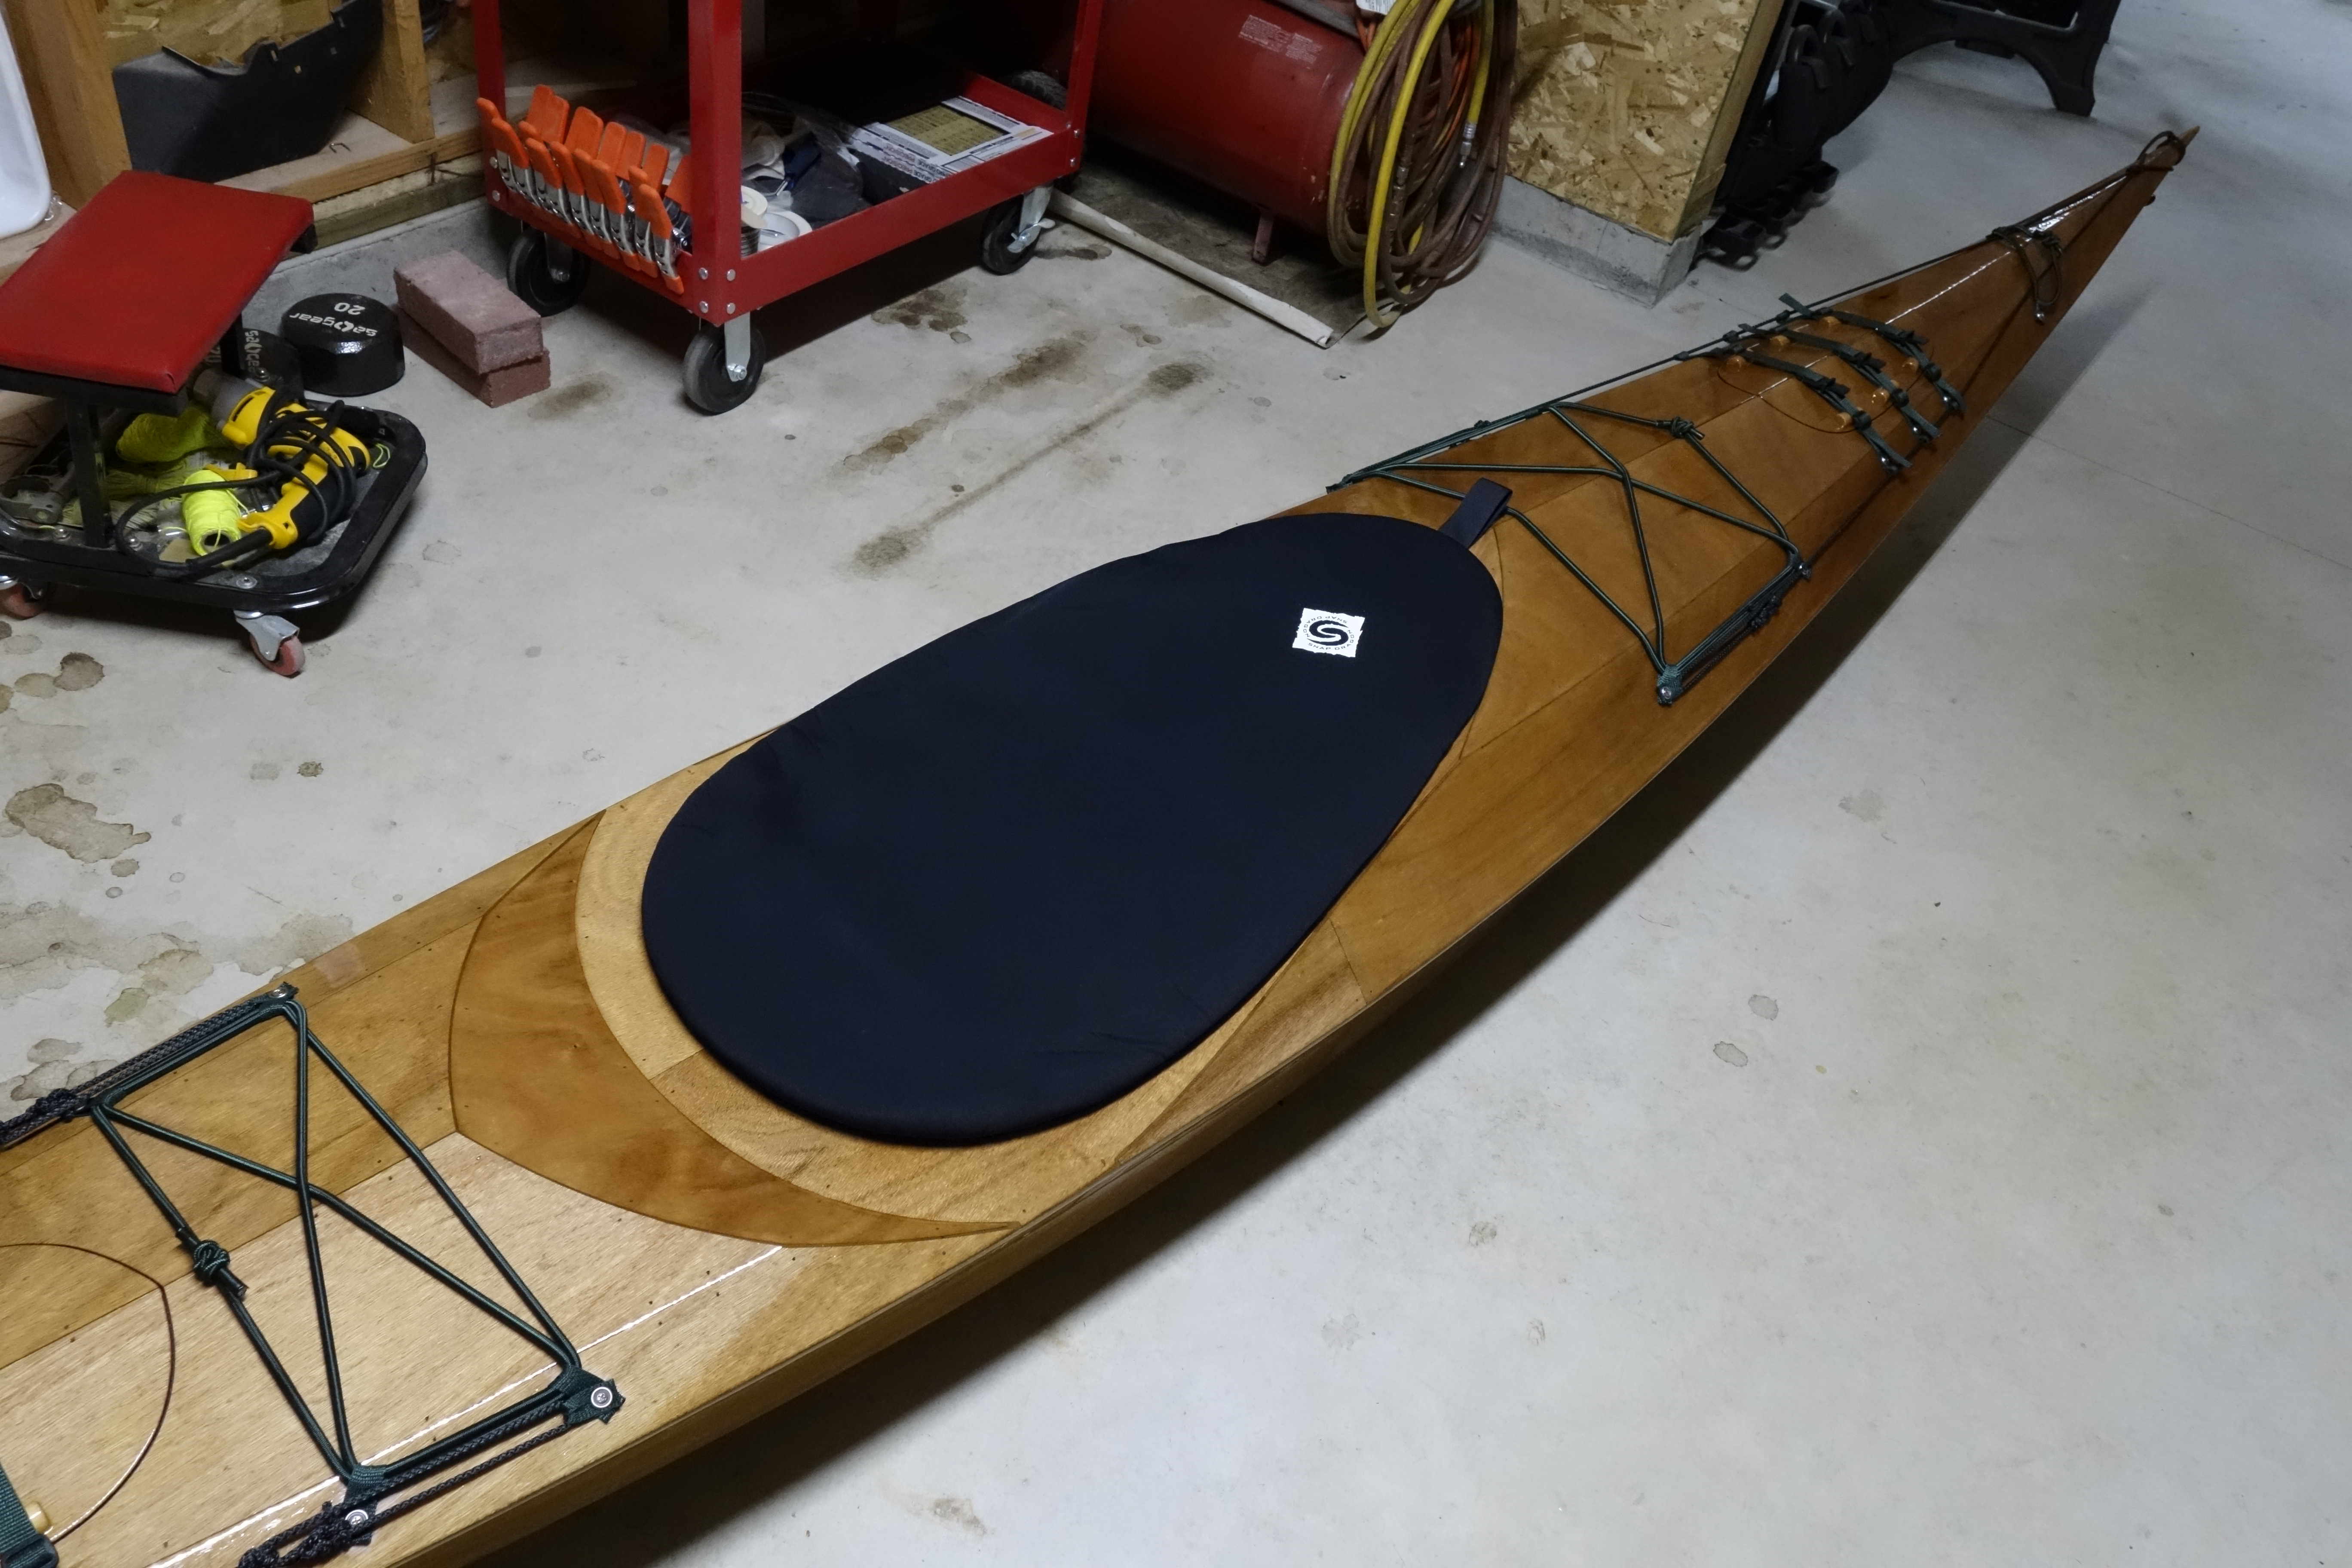
Today at lunchtime I glued the hook and loop (Velcro) material for attaching the seat pad, to the inside of the kayak. This is the only step in the instruction manual that I chose not to follow exactly. Pygmy says to use epoxy to attach the Velcro. Instead I used Barge Cement to glue the loop side of the Velcro to the inside of the hull. I reasoned that it is much easier to work with than epoxy, and if it holds, great! If it doesn’t hold I will then use epoxy.
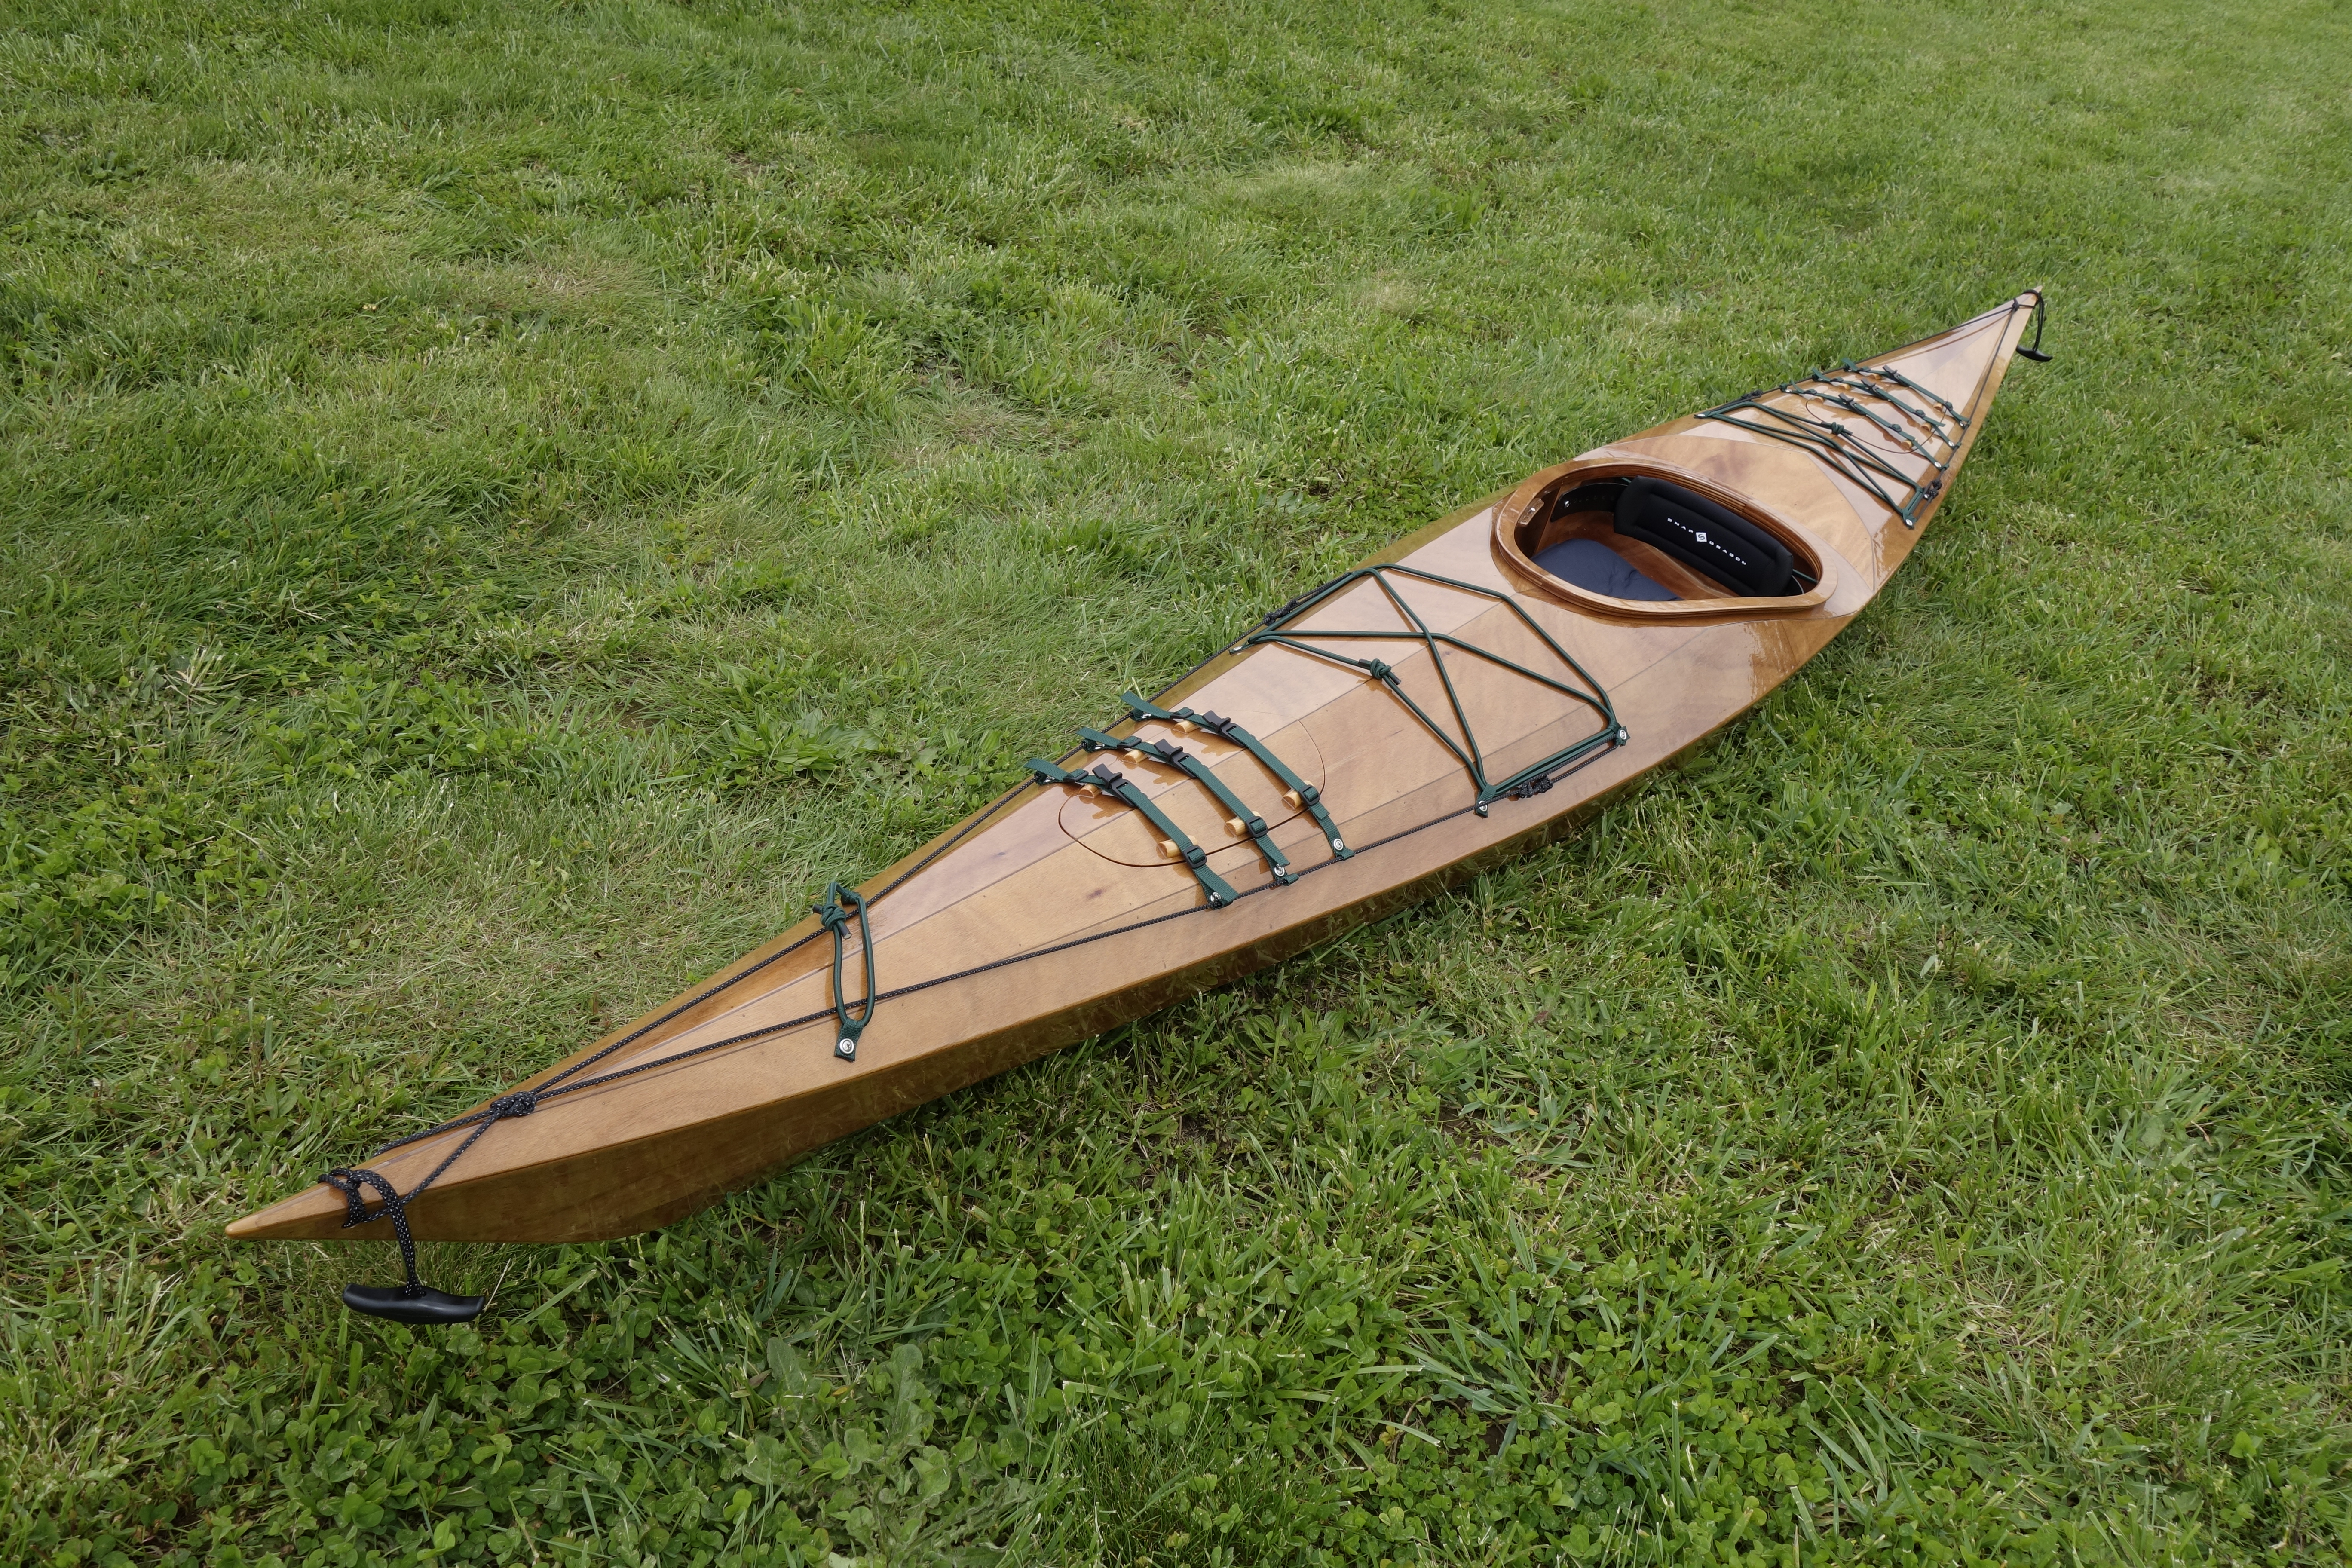
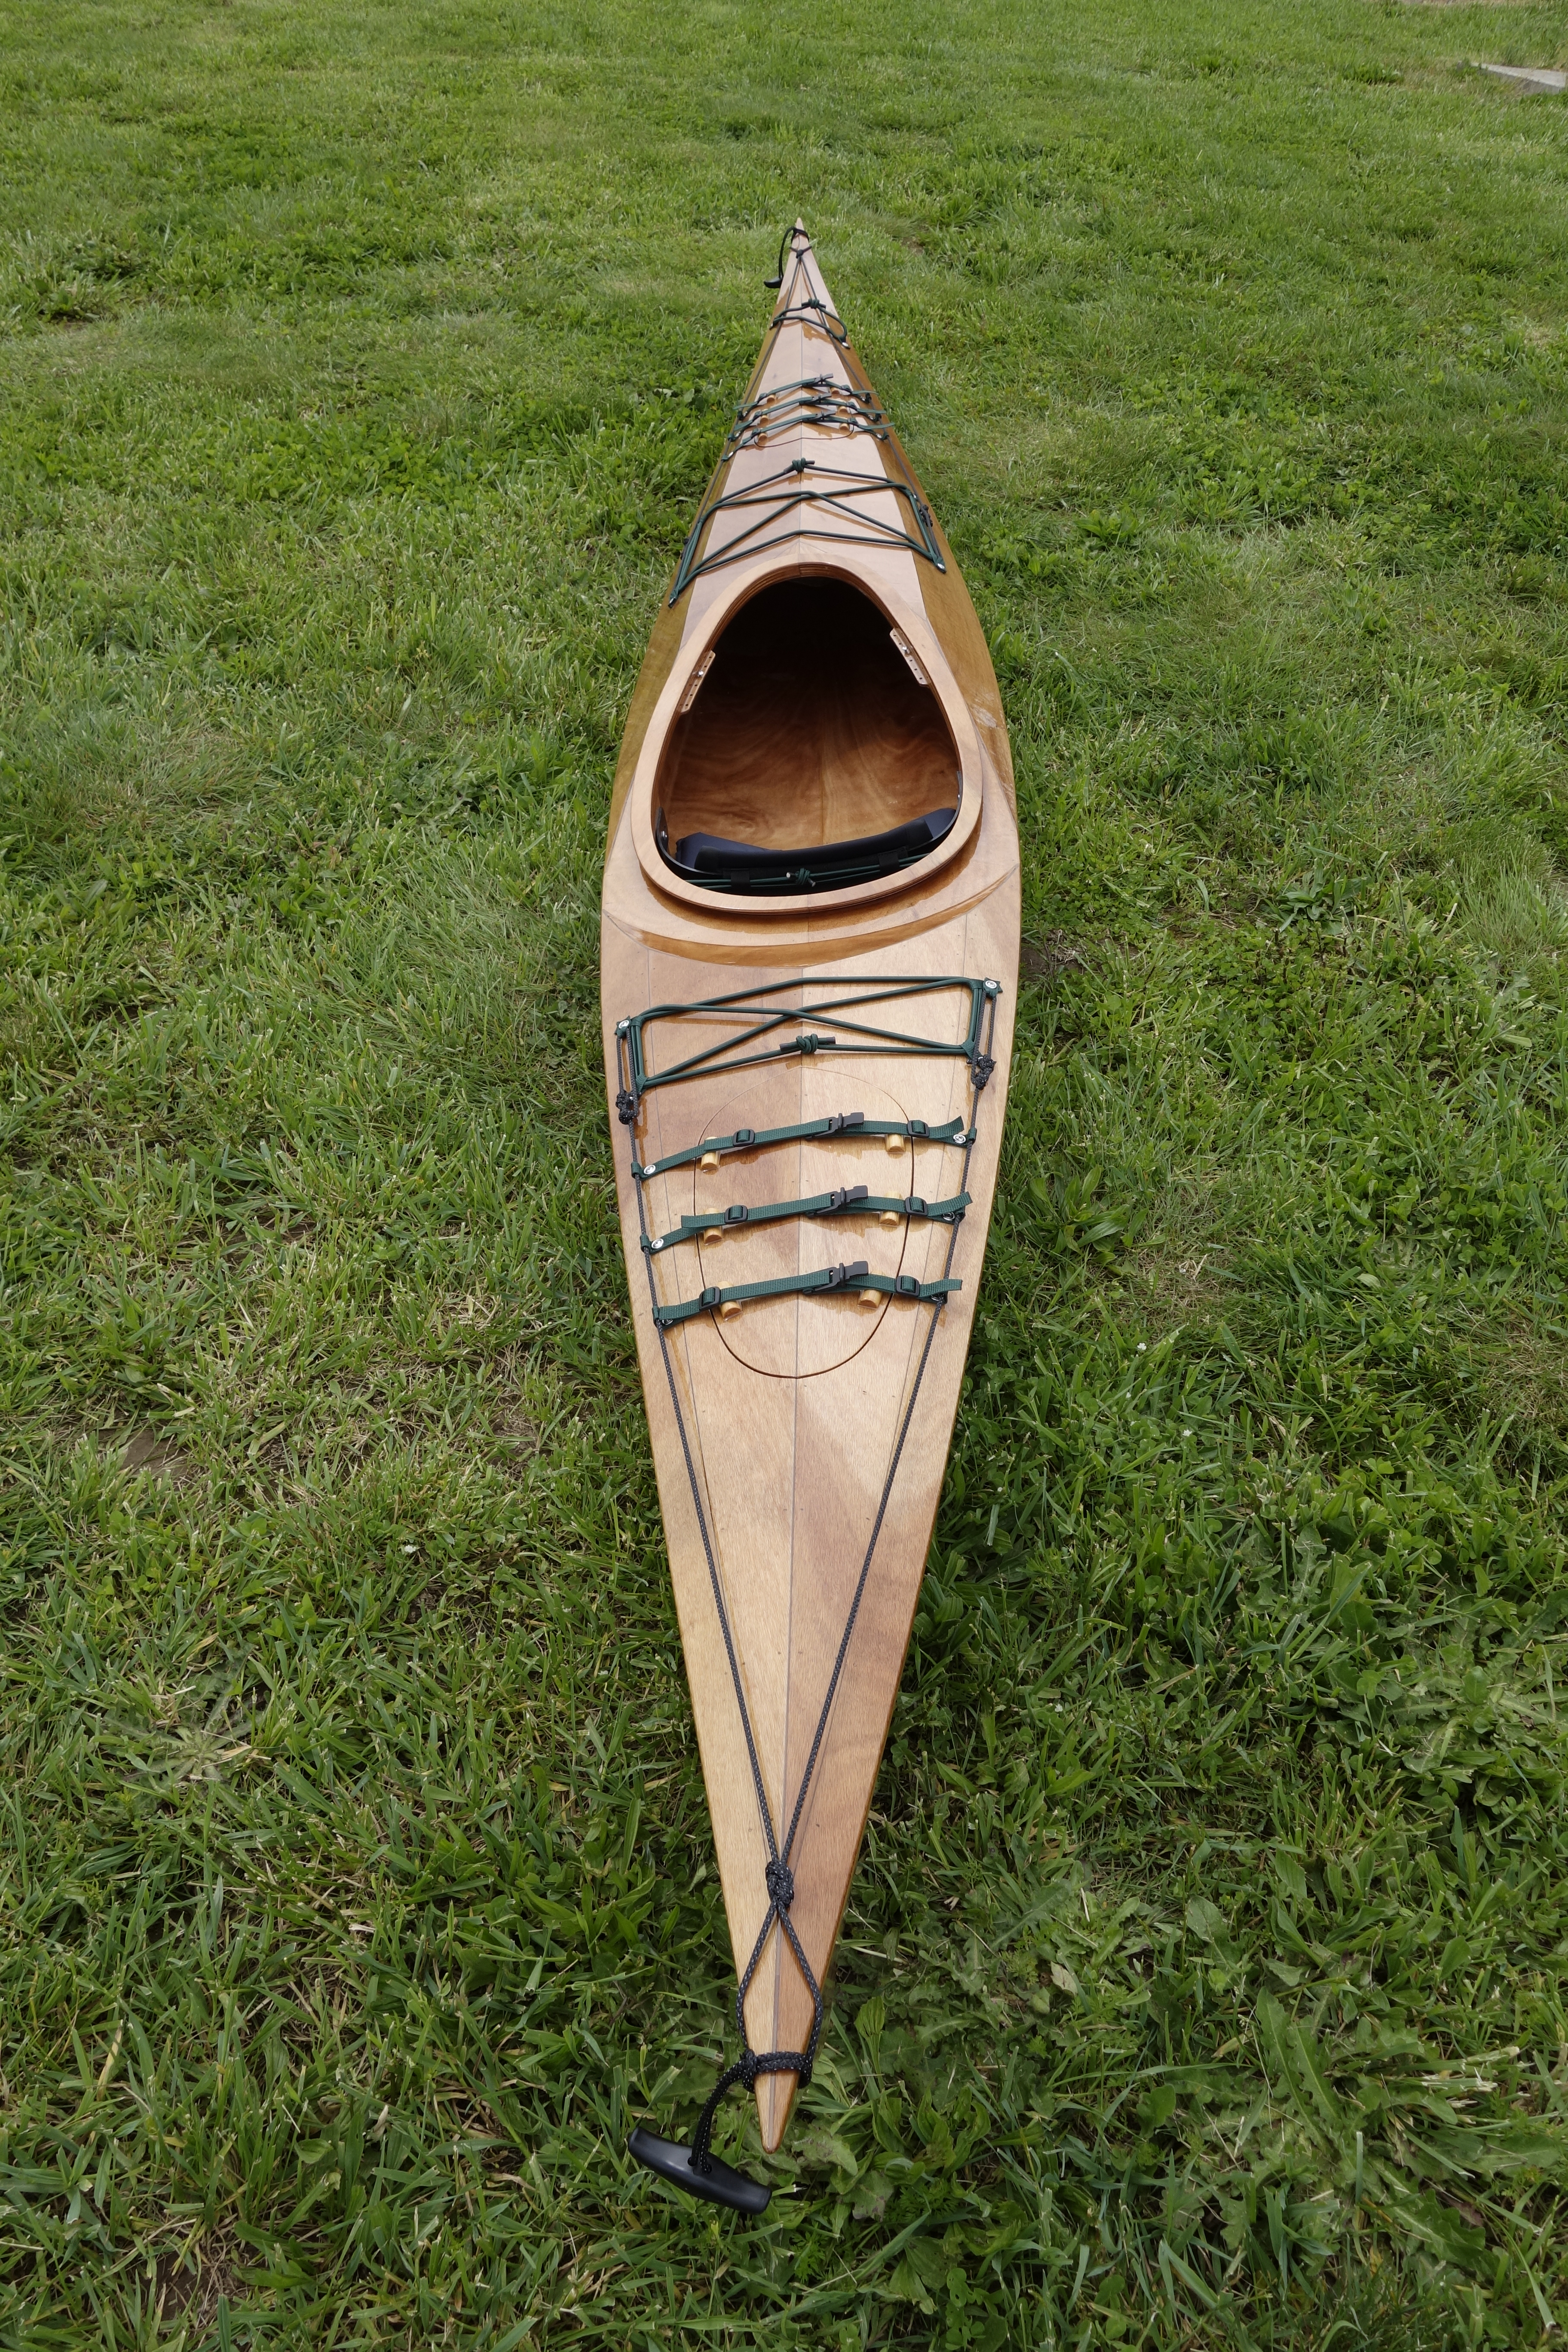
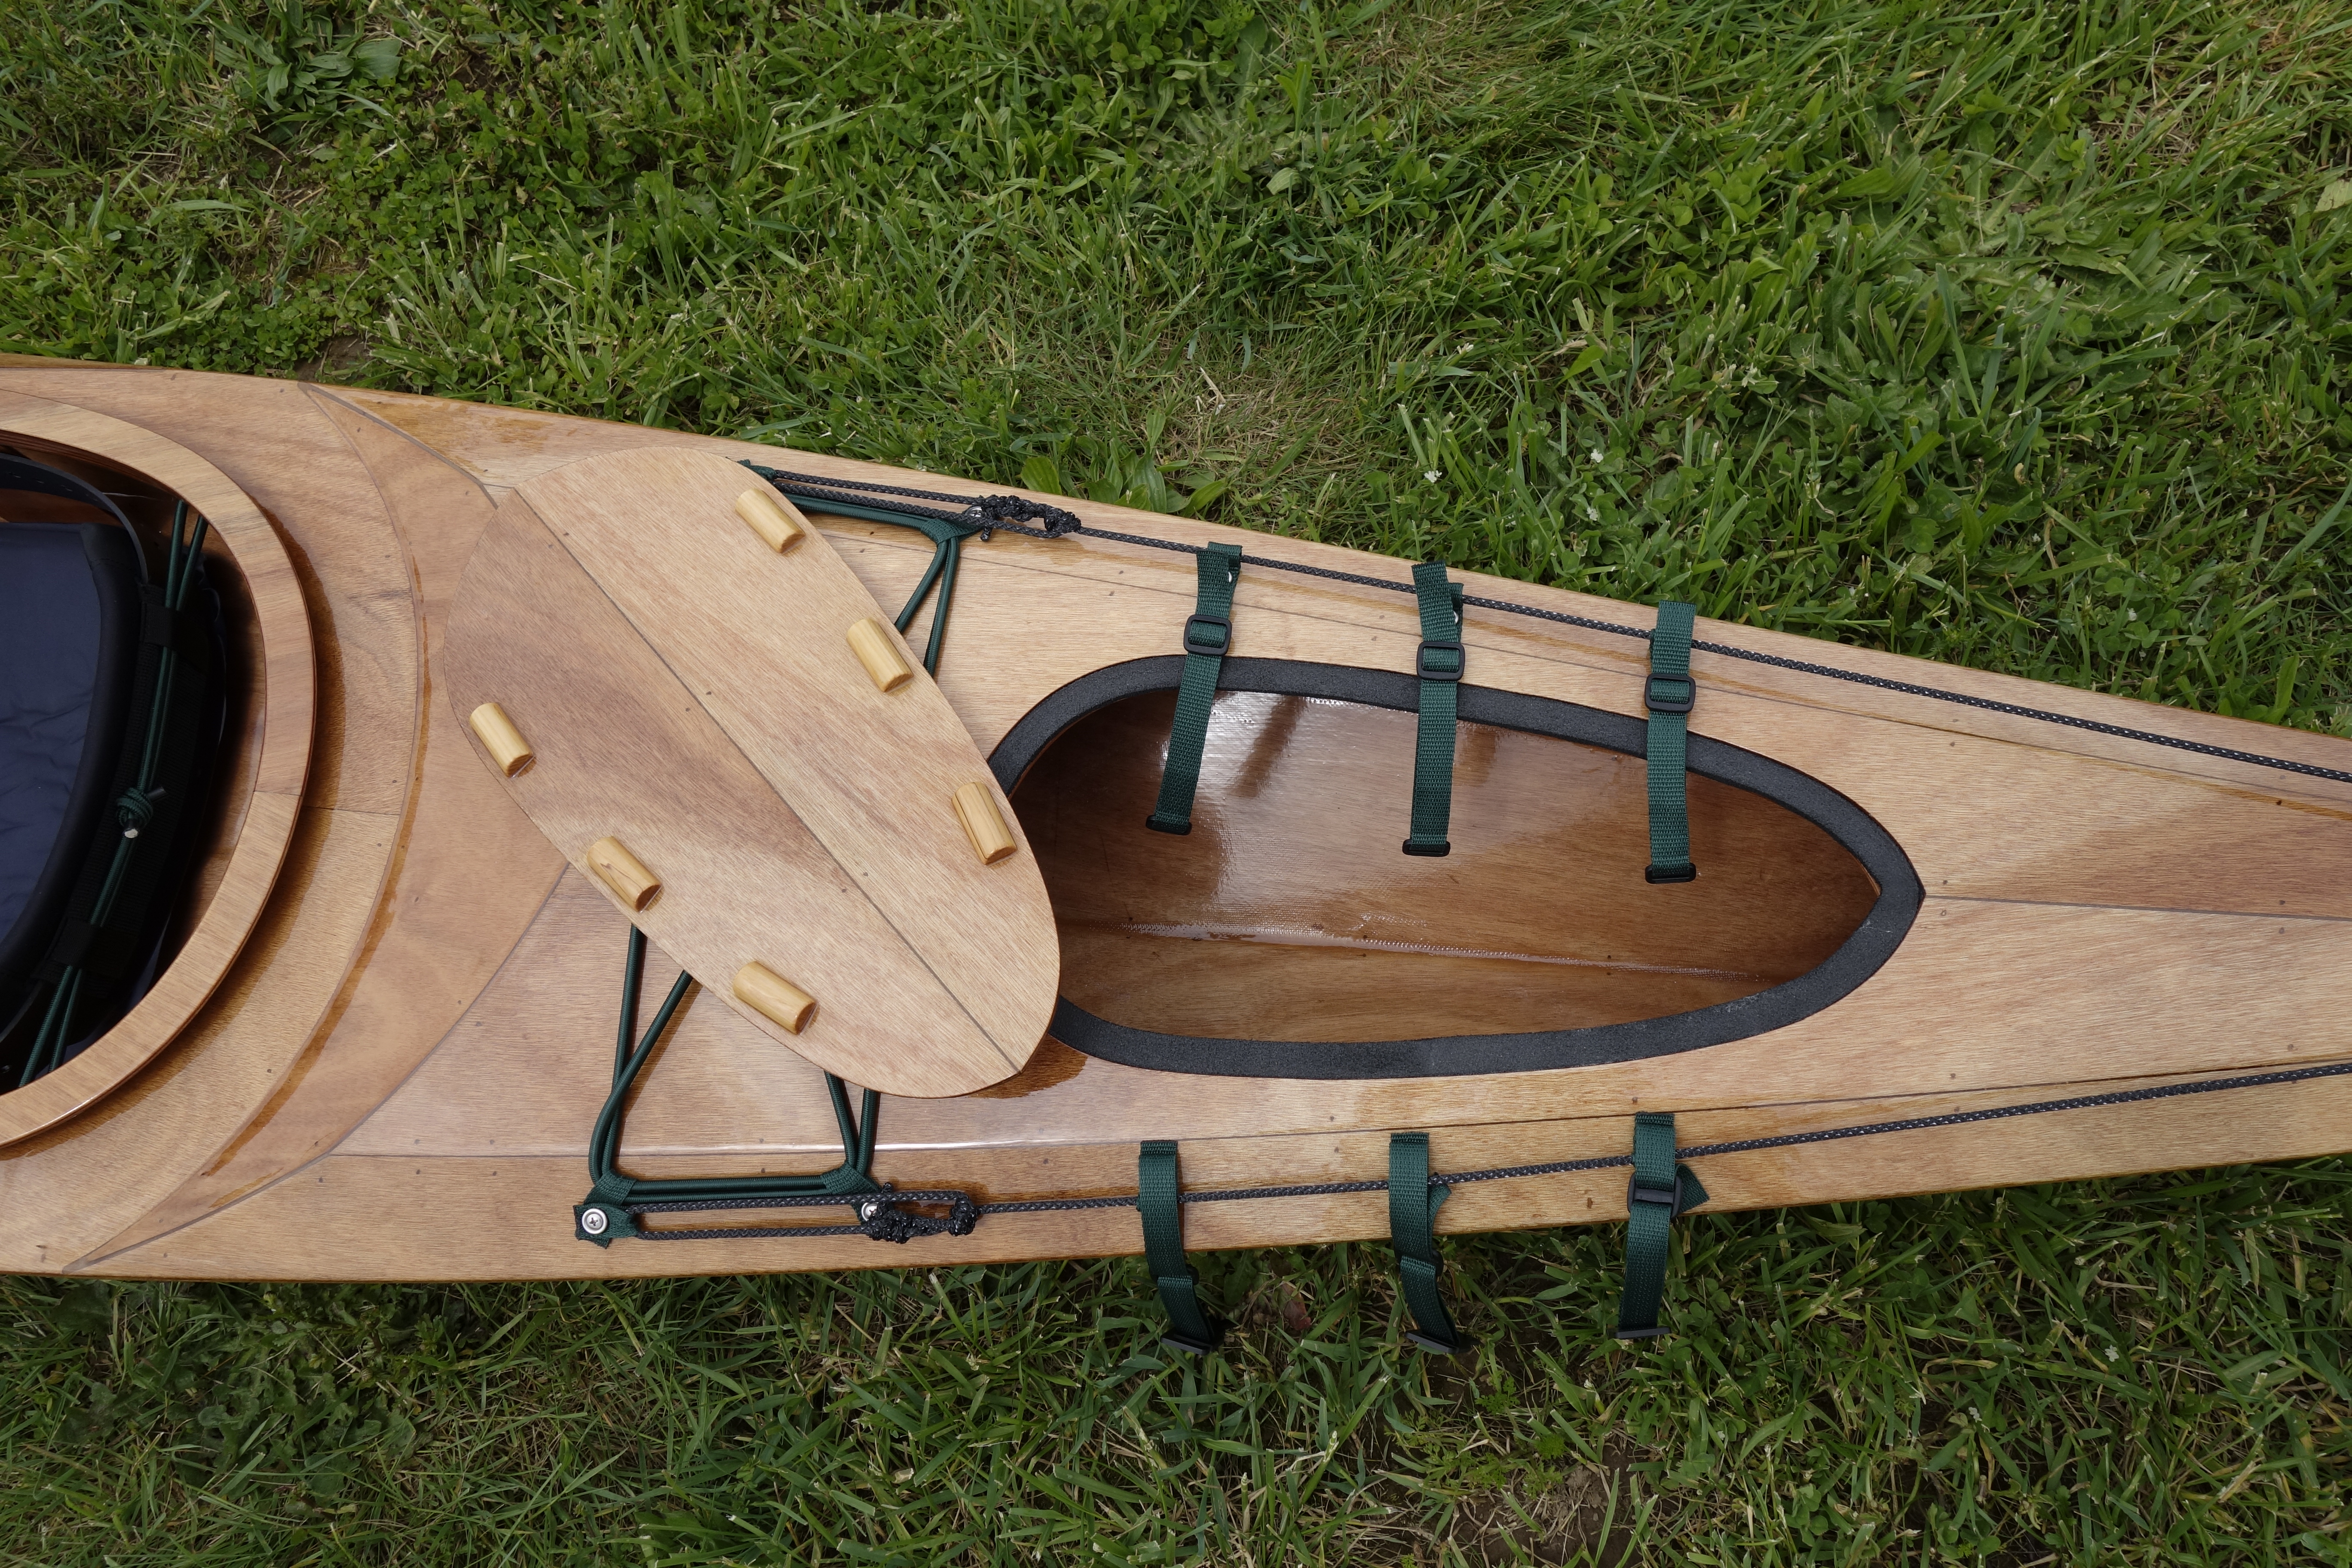
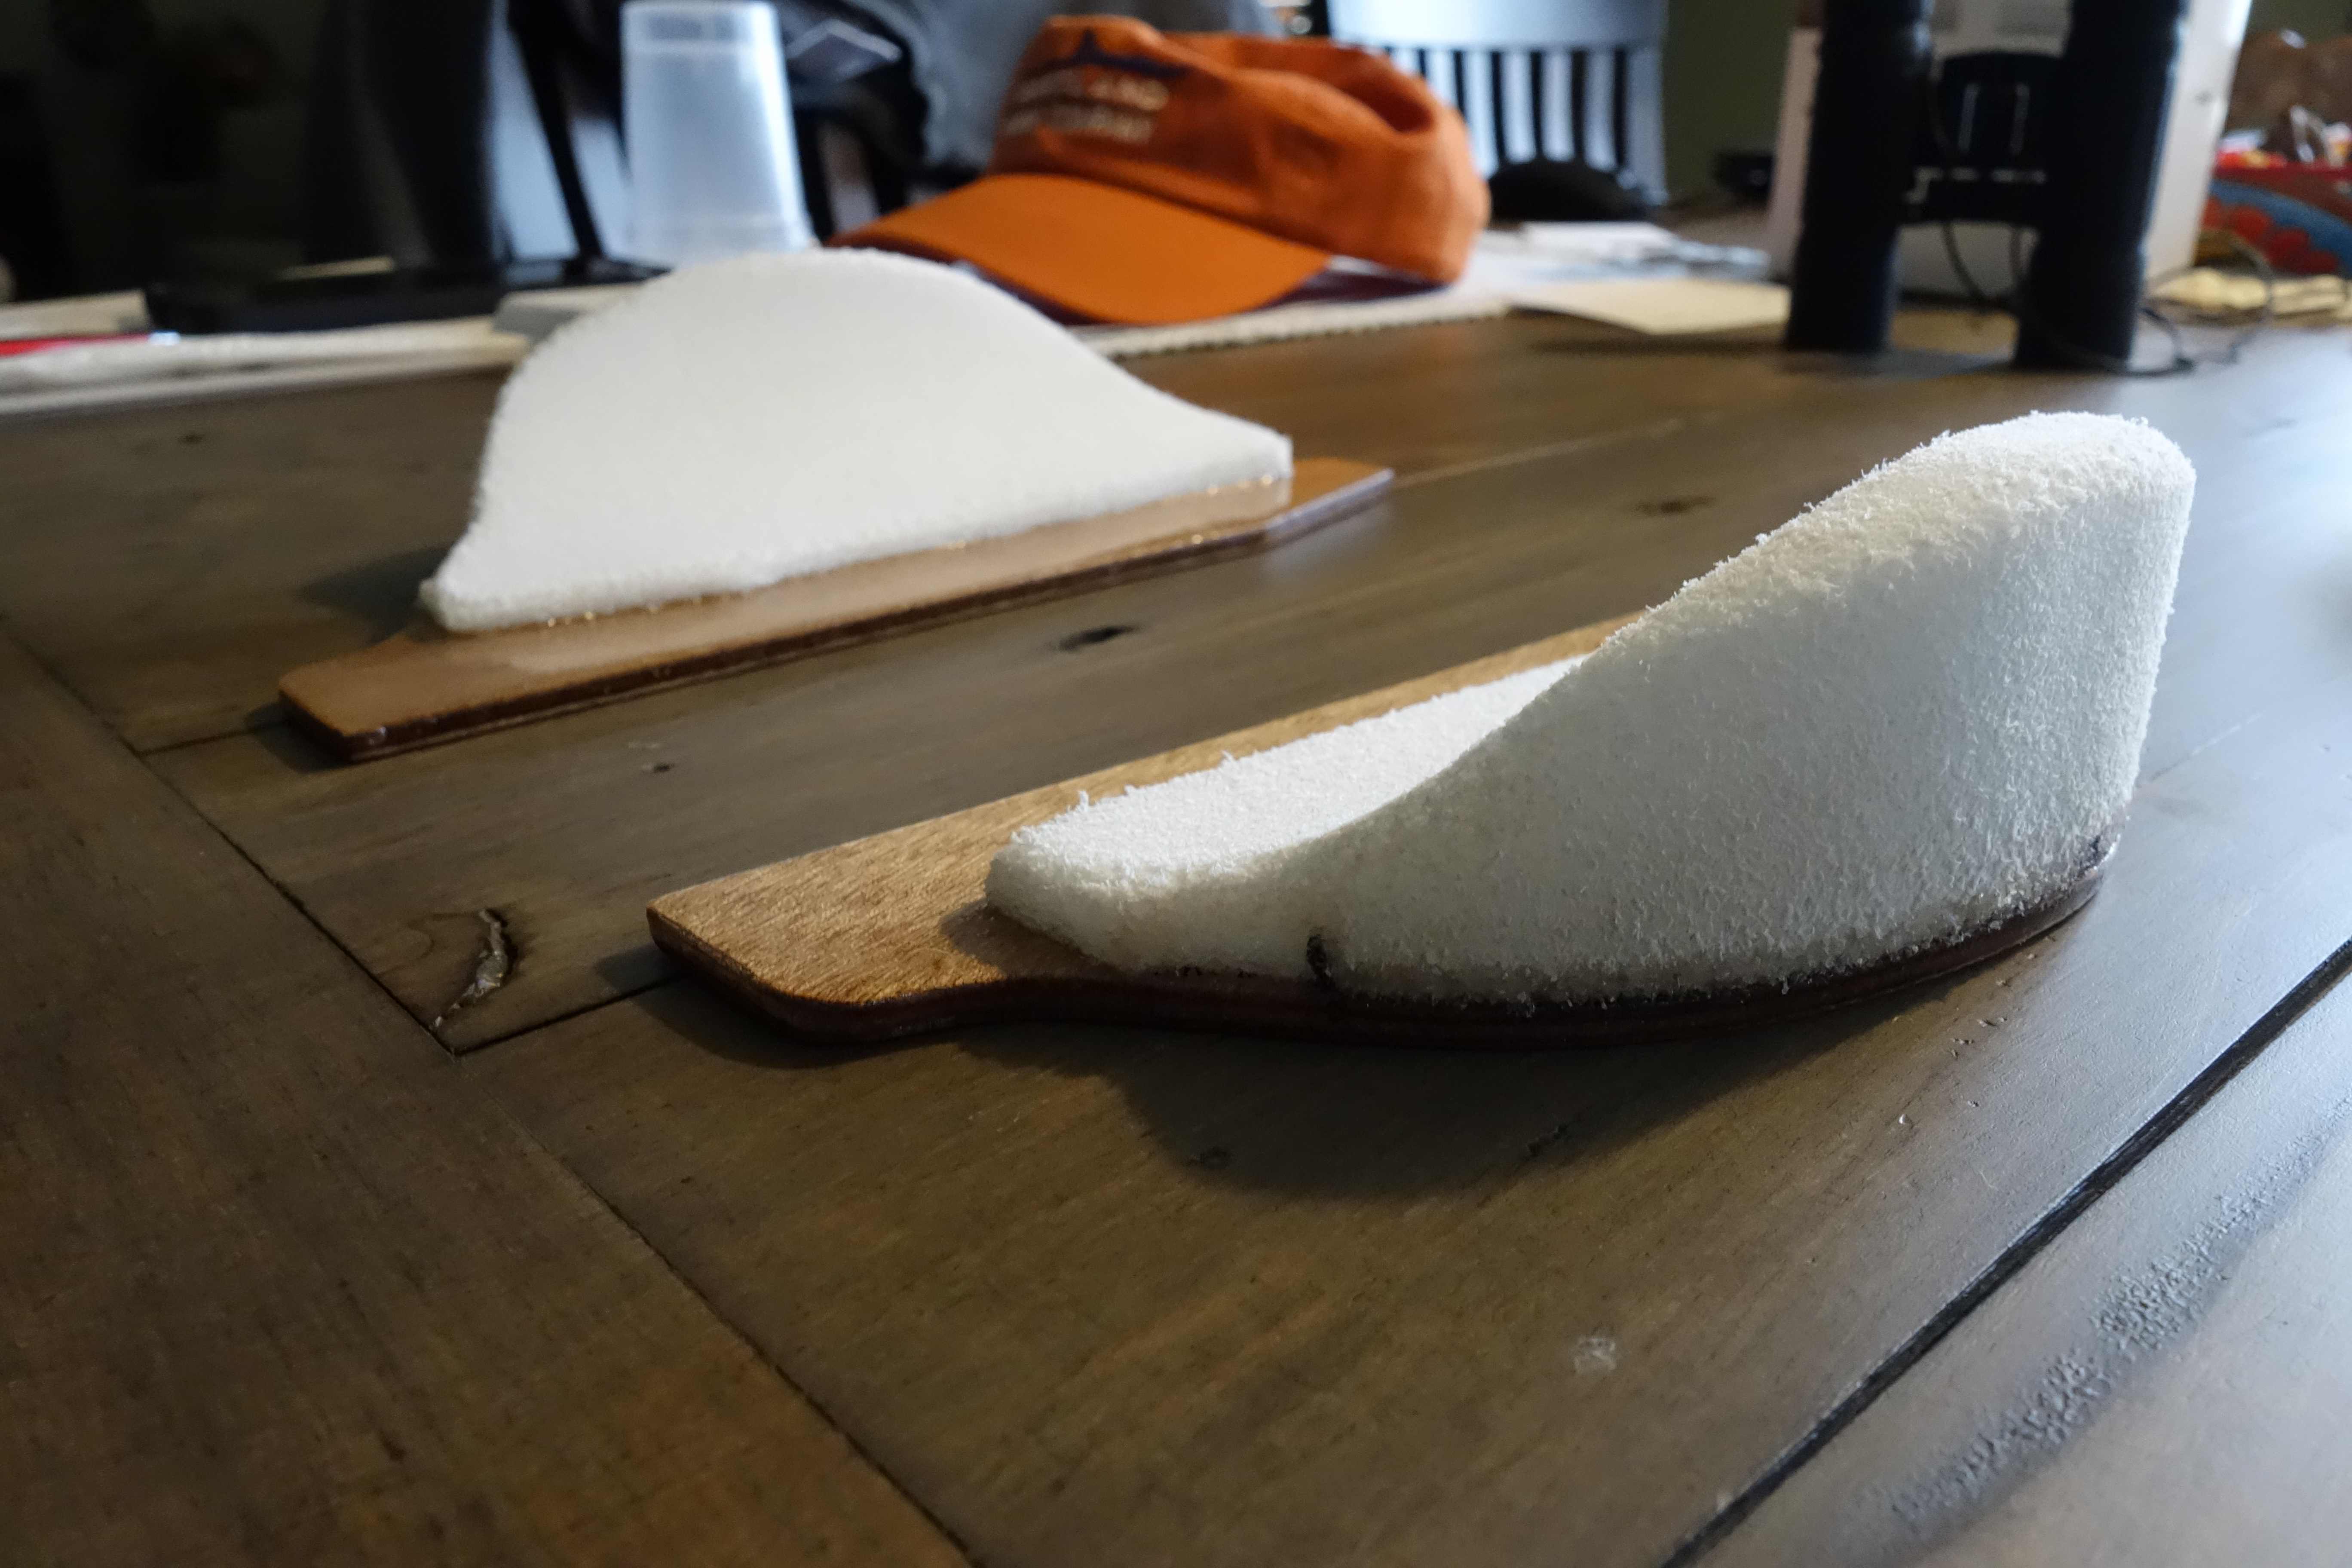
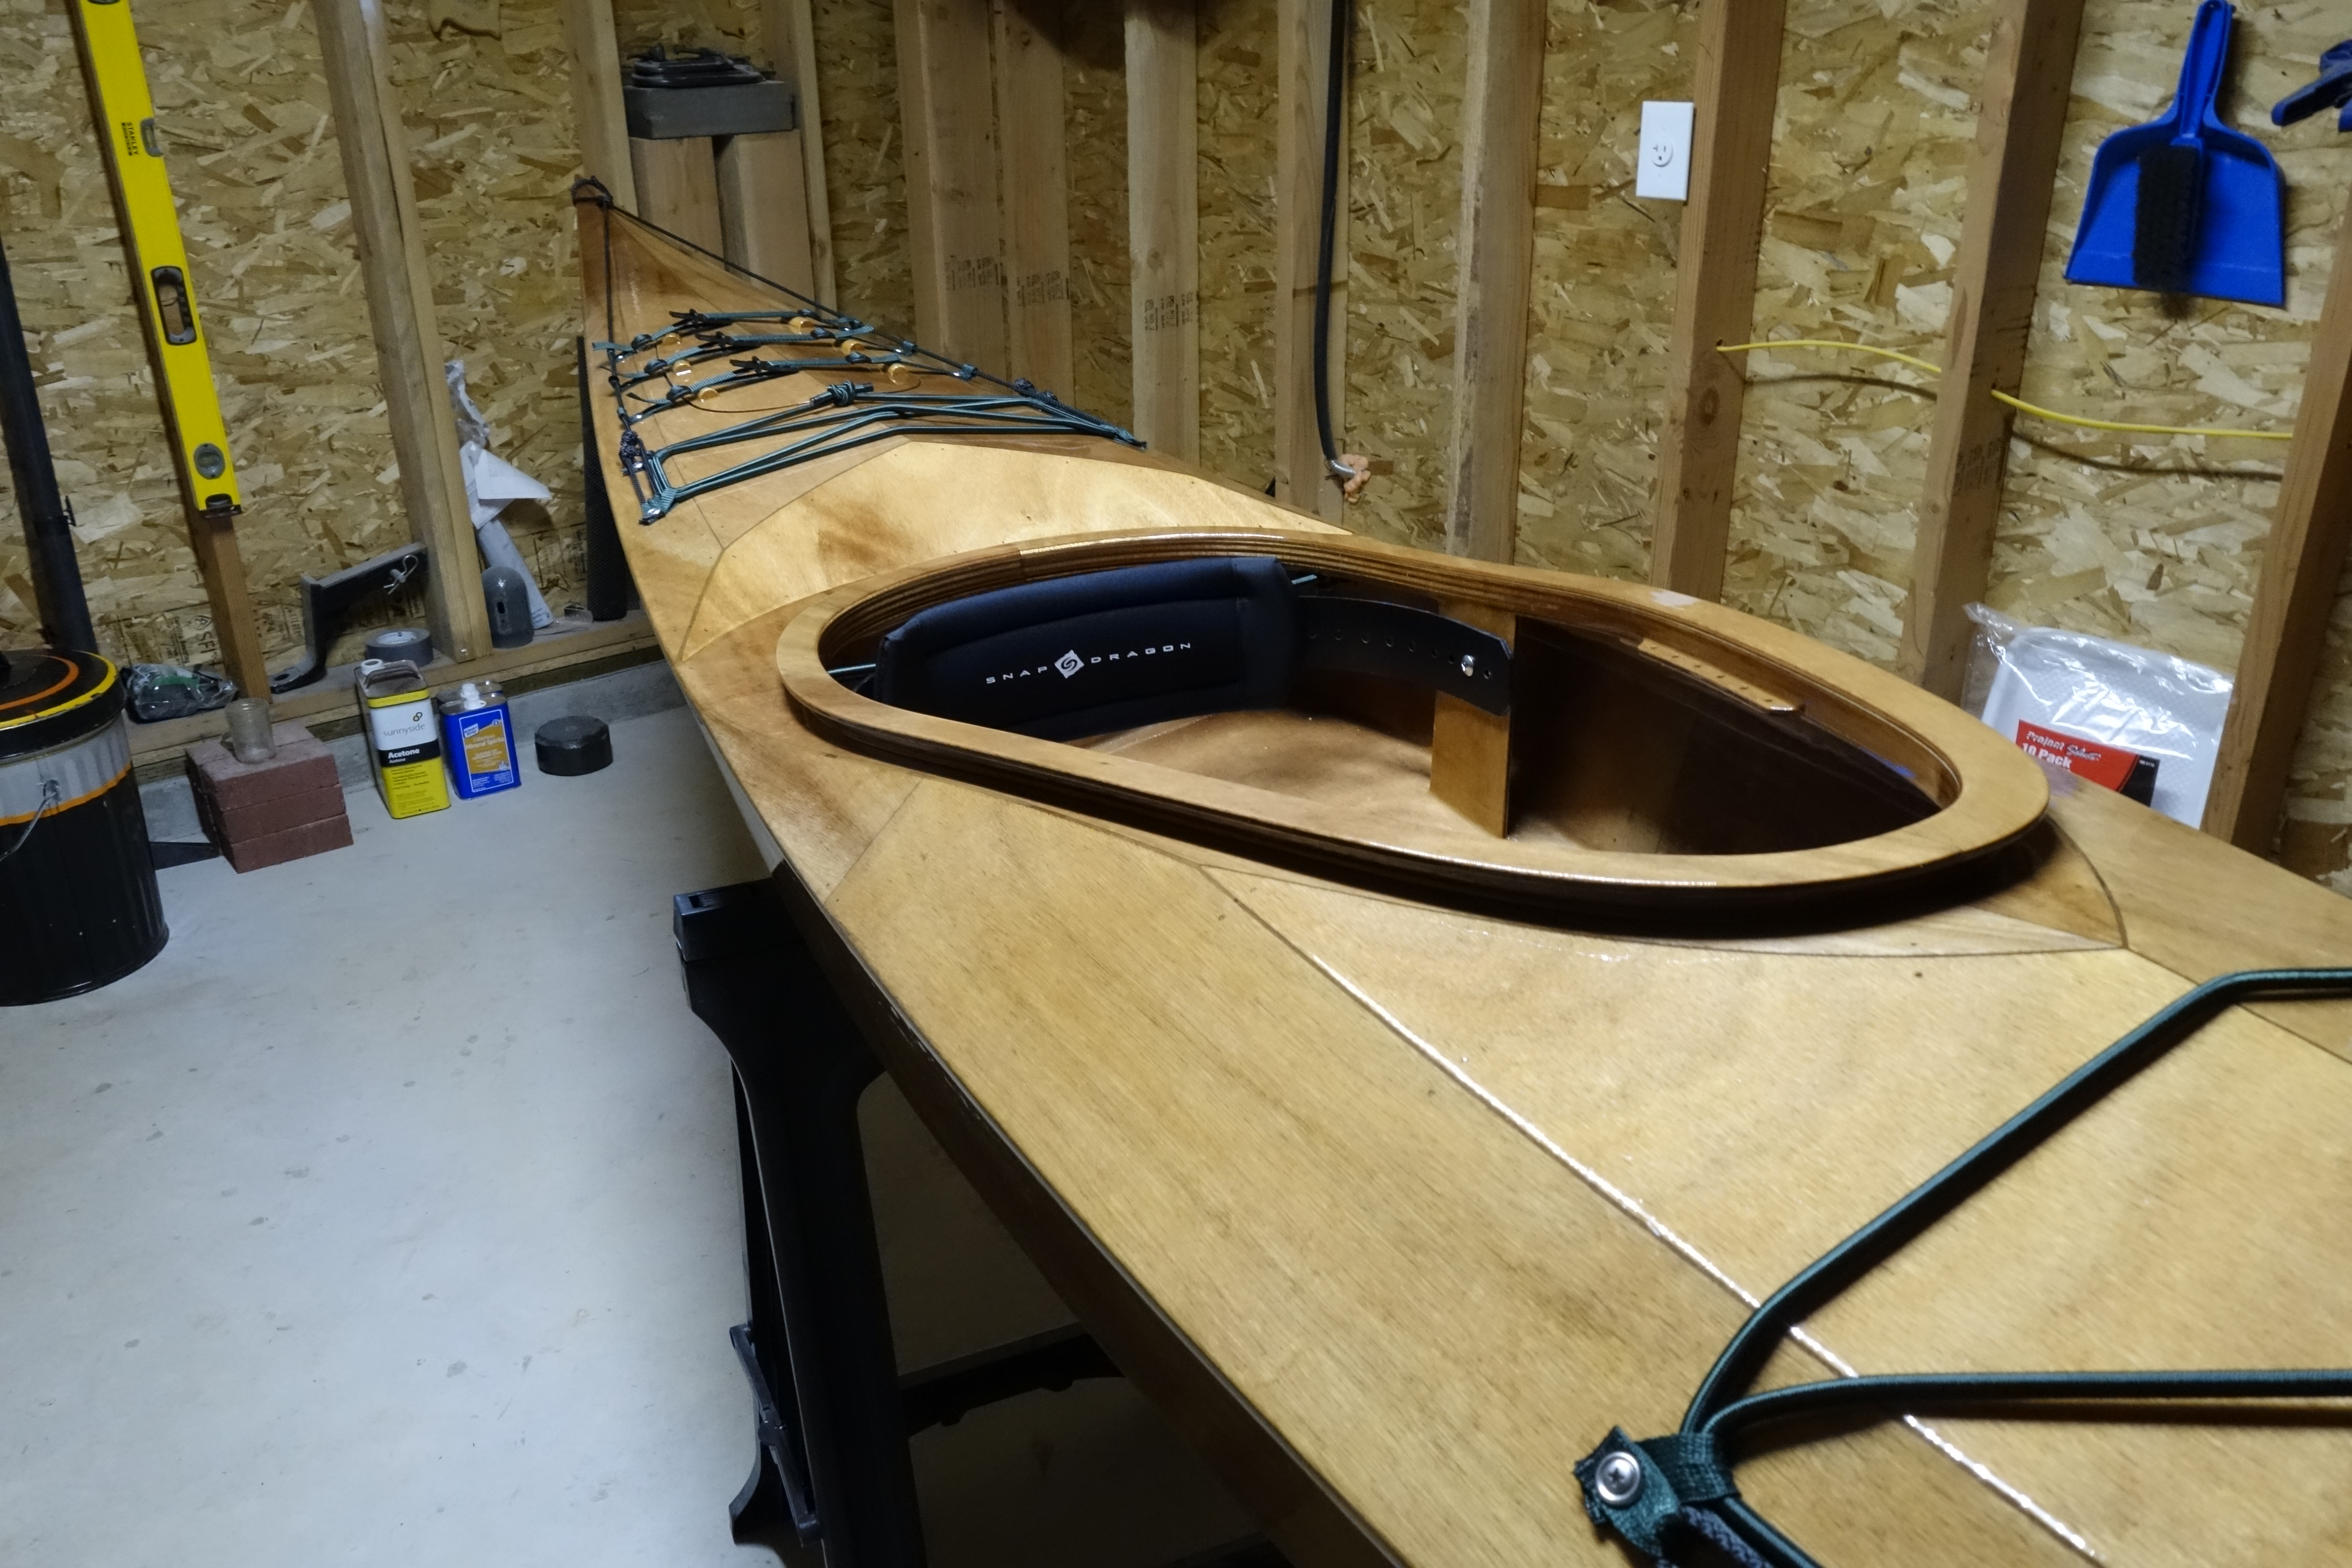
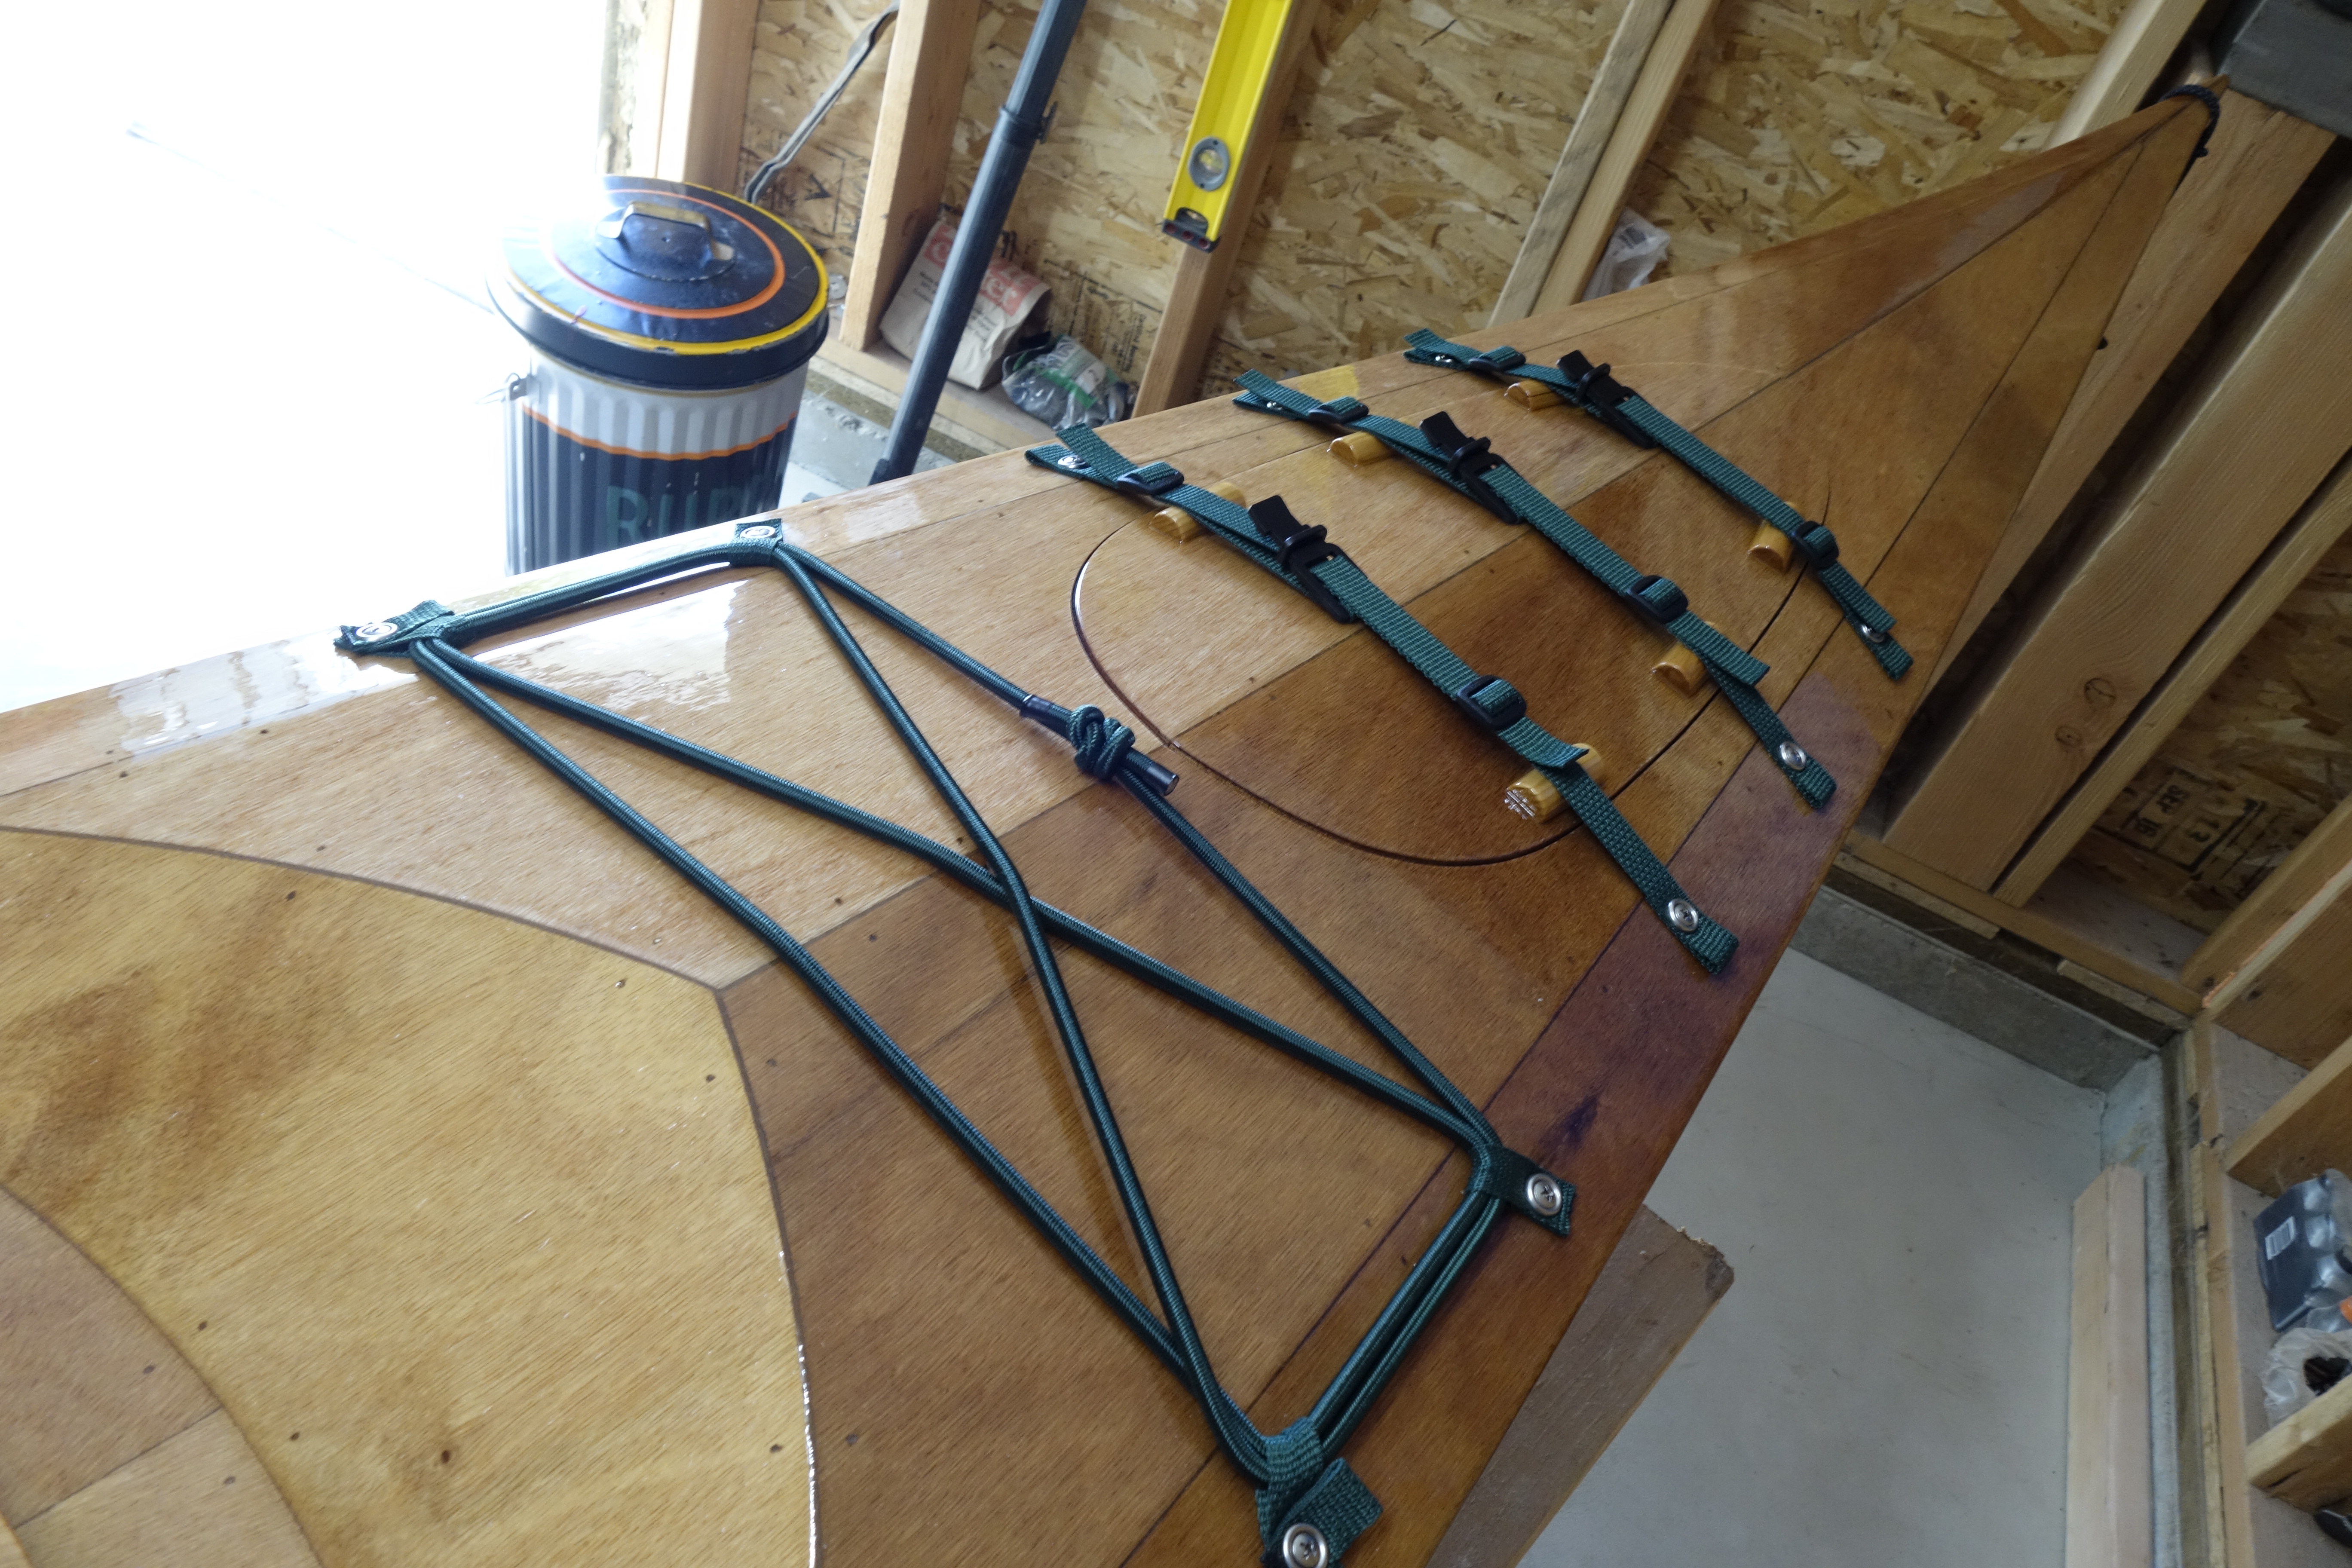
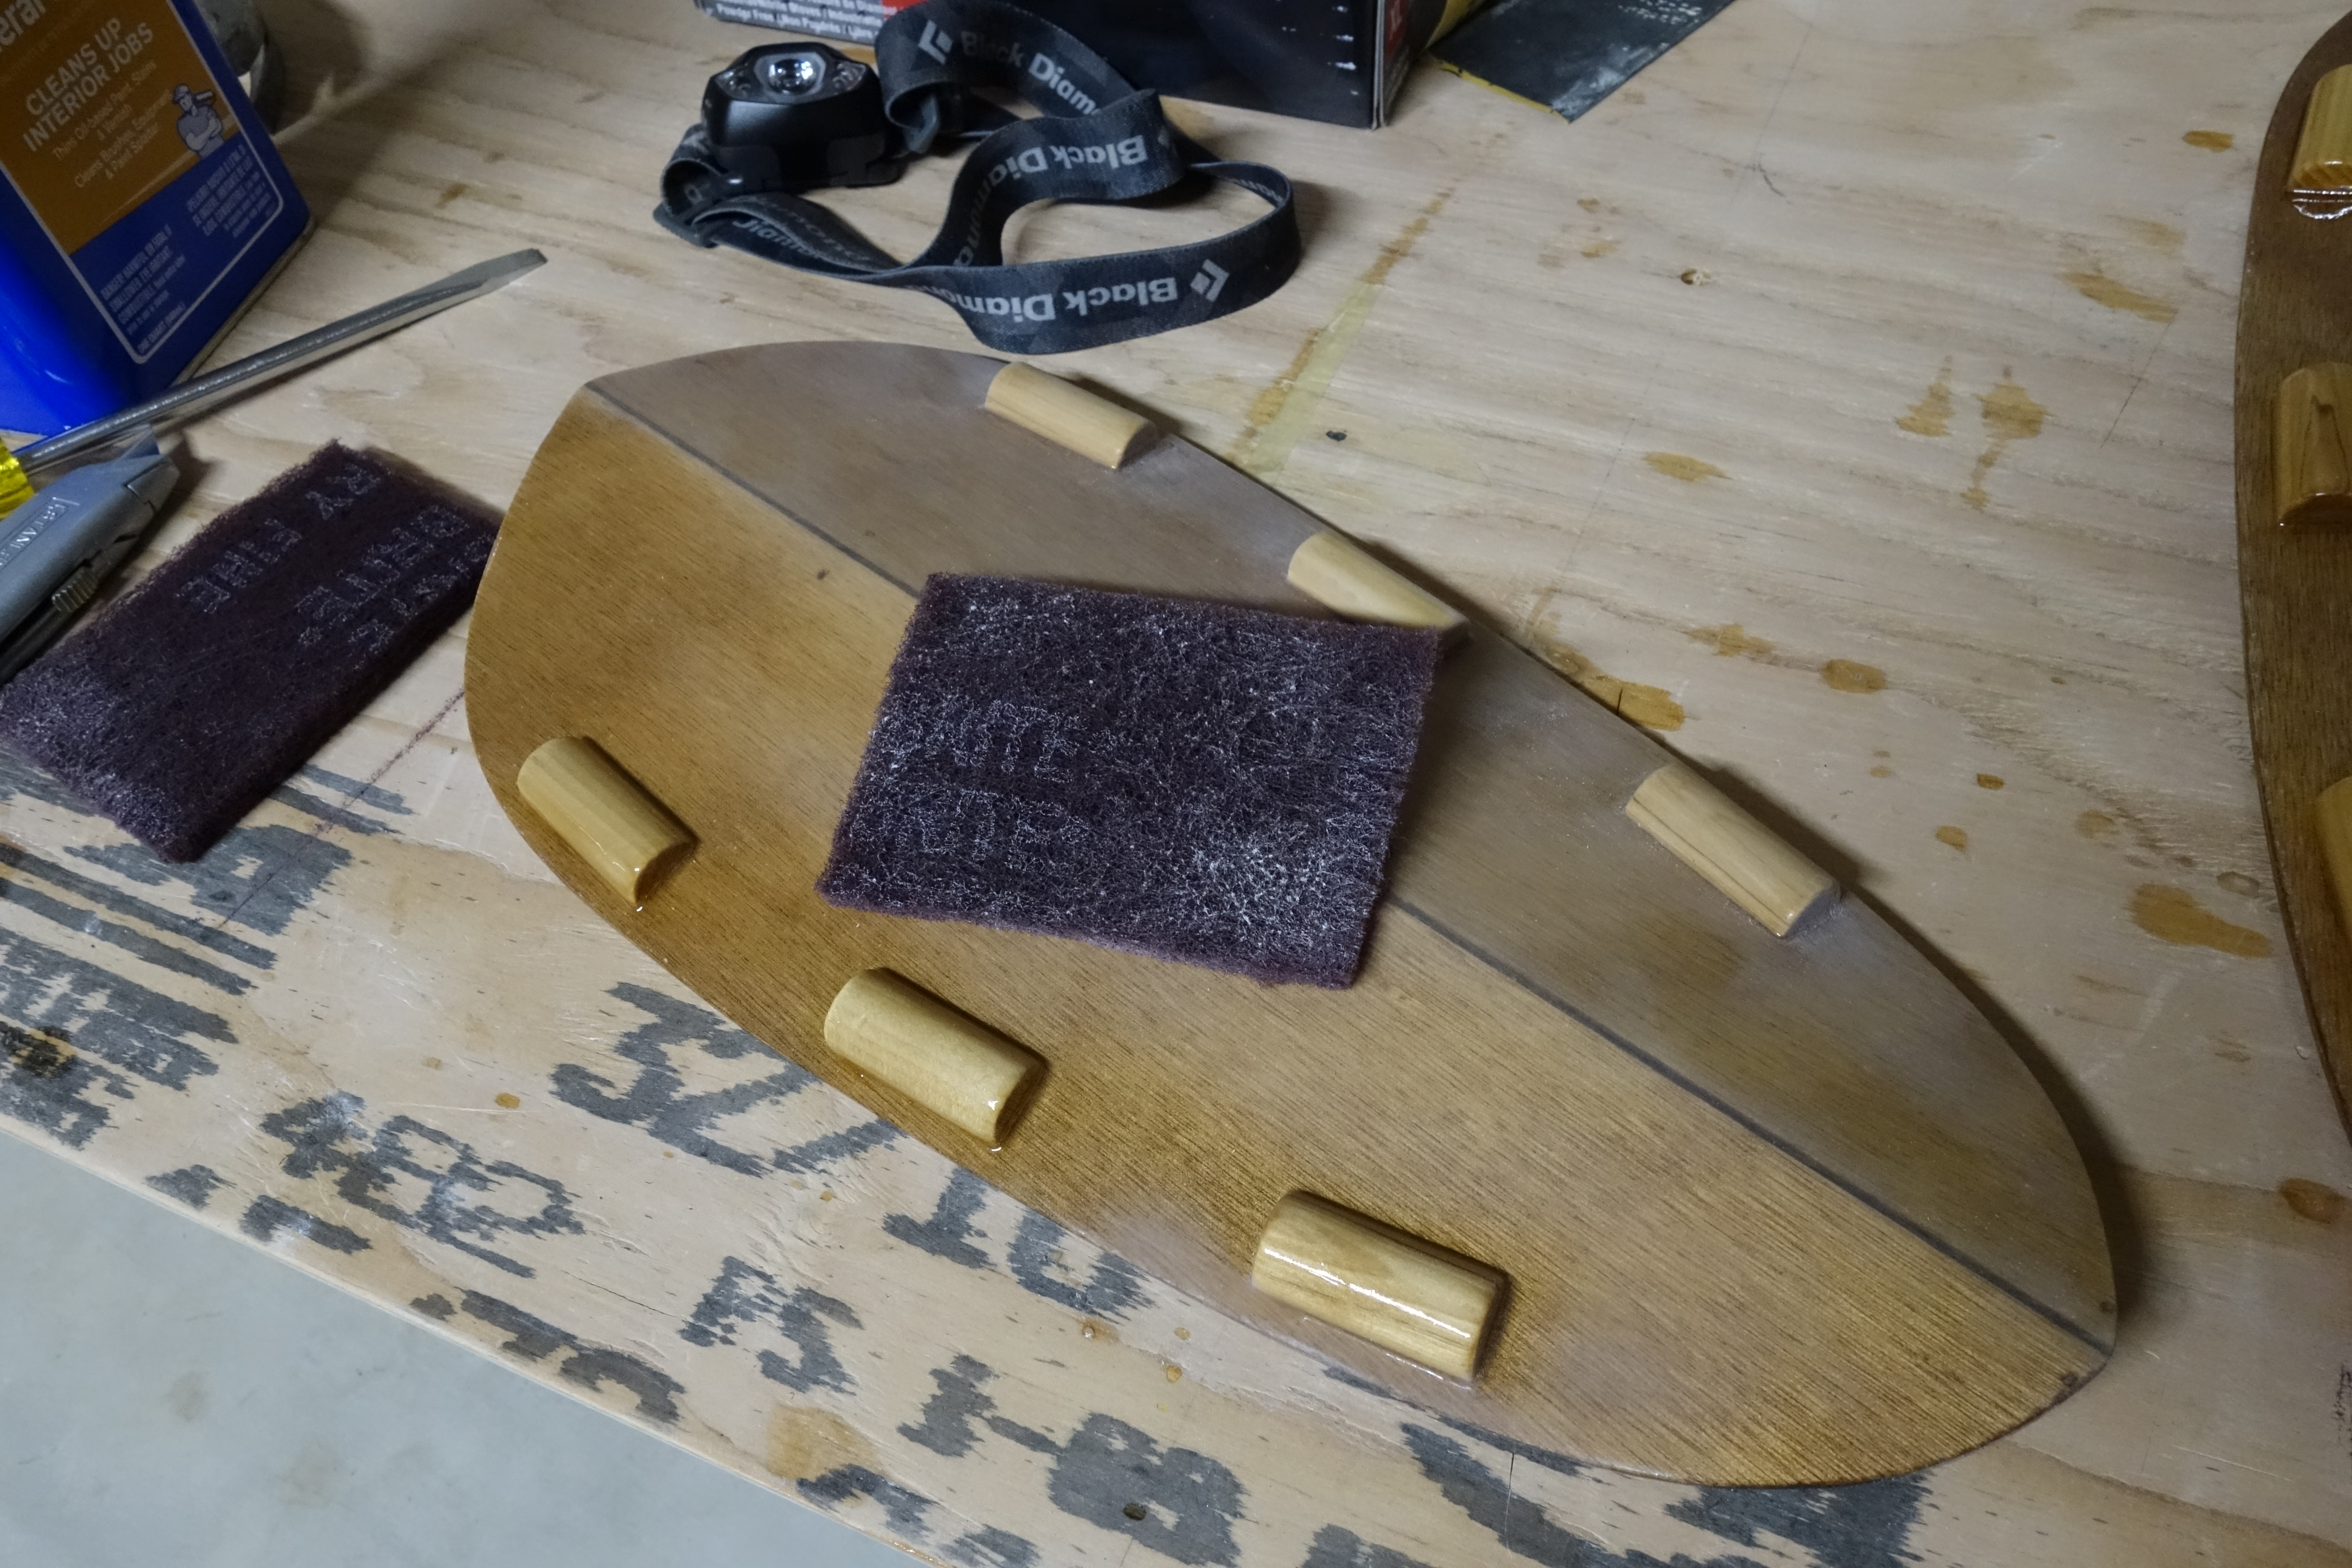
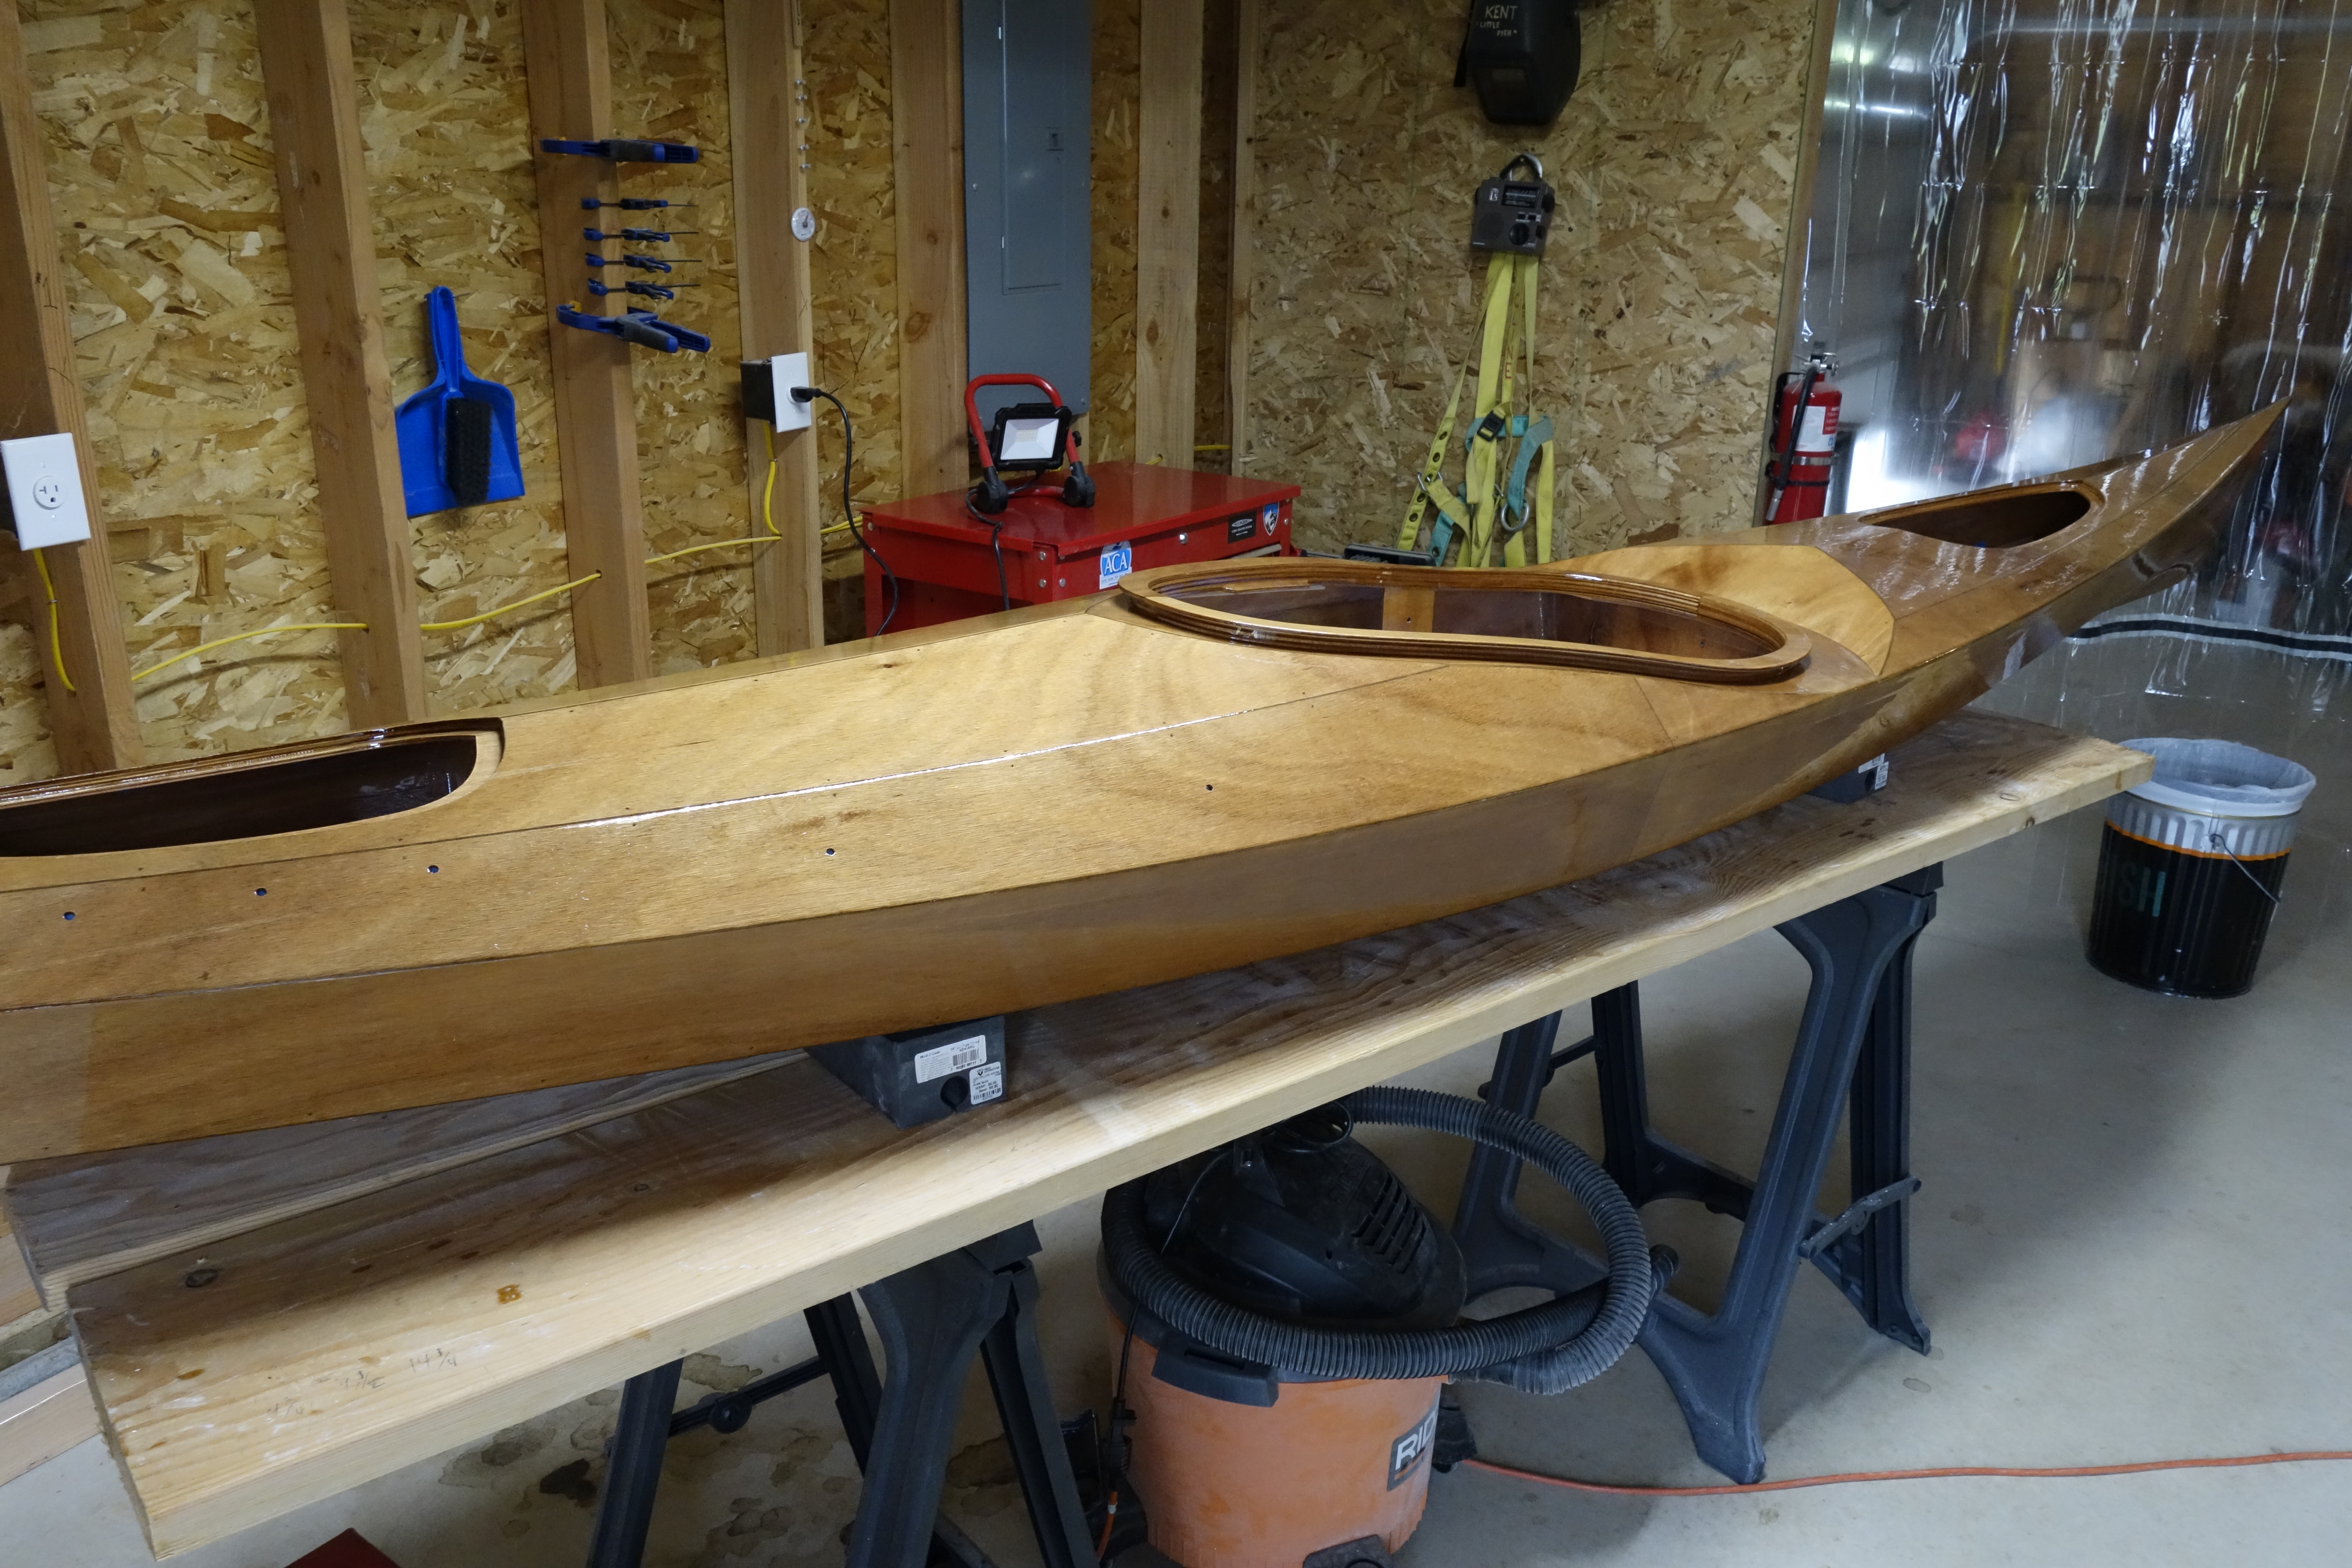
It took me a couple of days after I finished the kayak to complete the thigh braces. I finished them on May 1, 2020. Here are a few photos of the braces by themselves and installed in the Ronan.
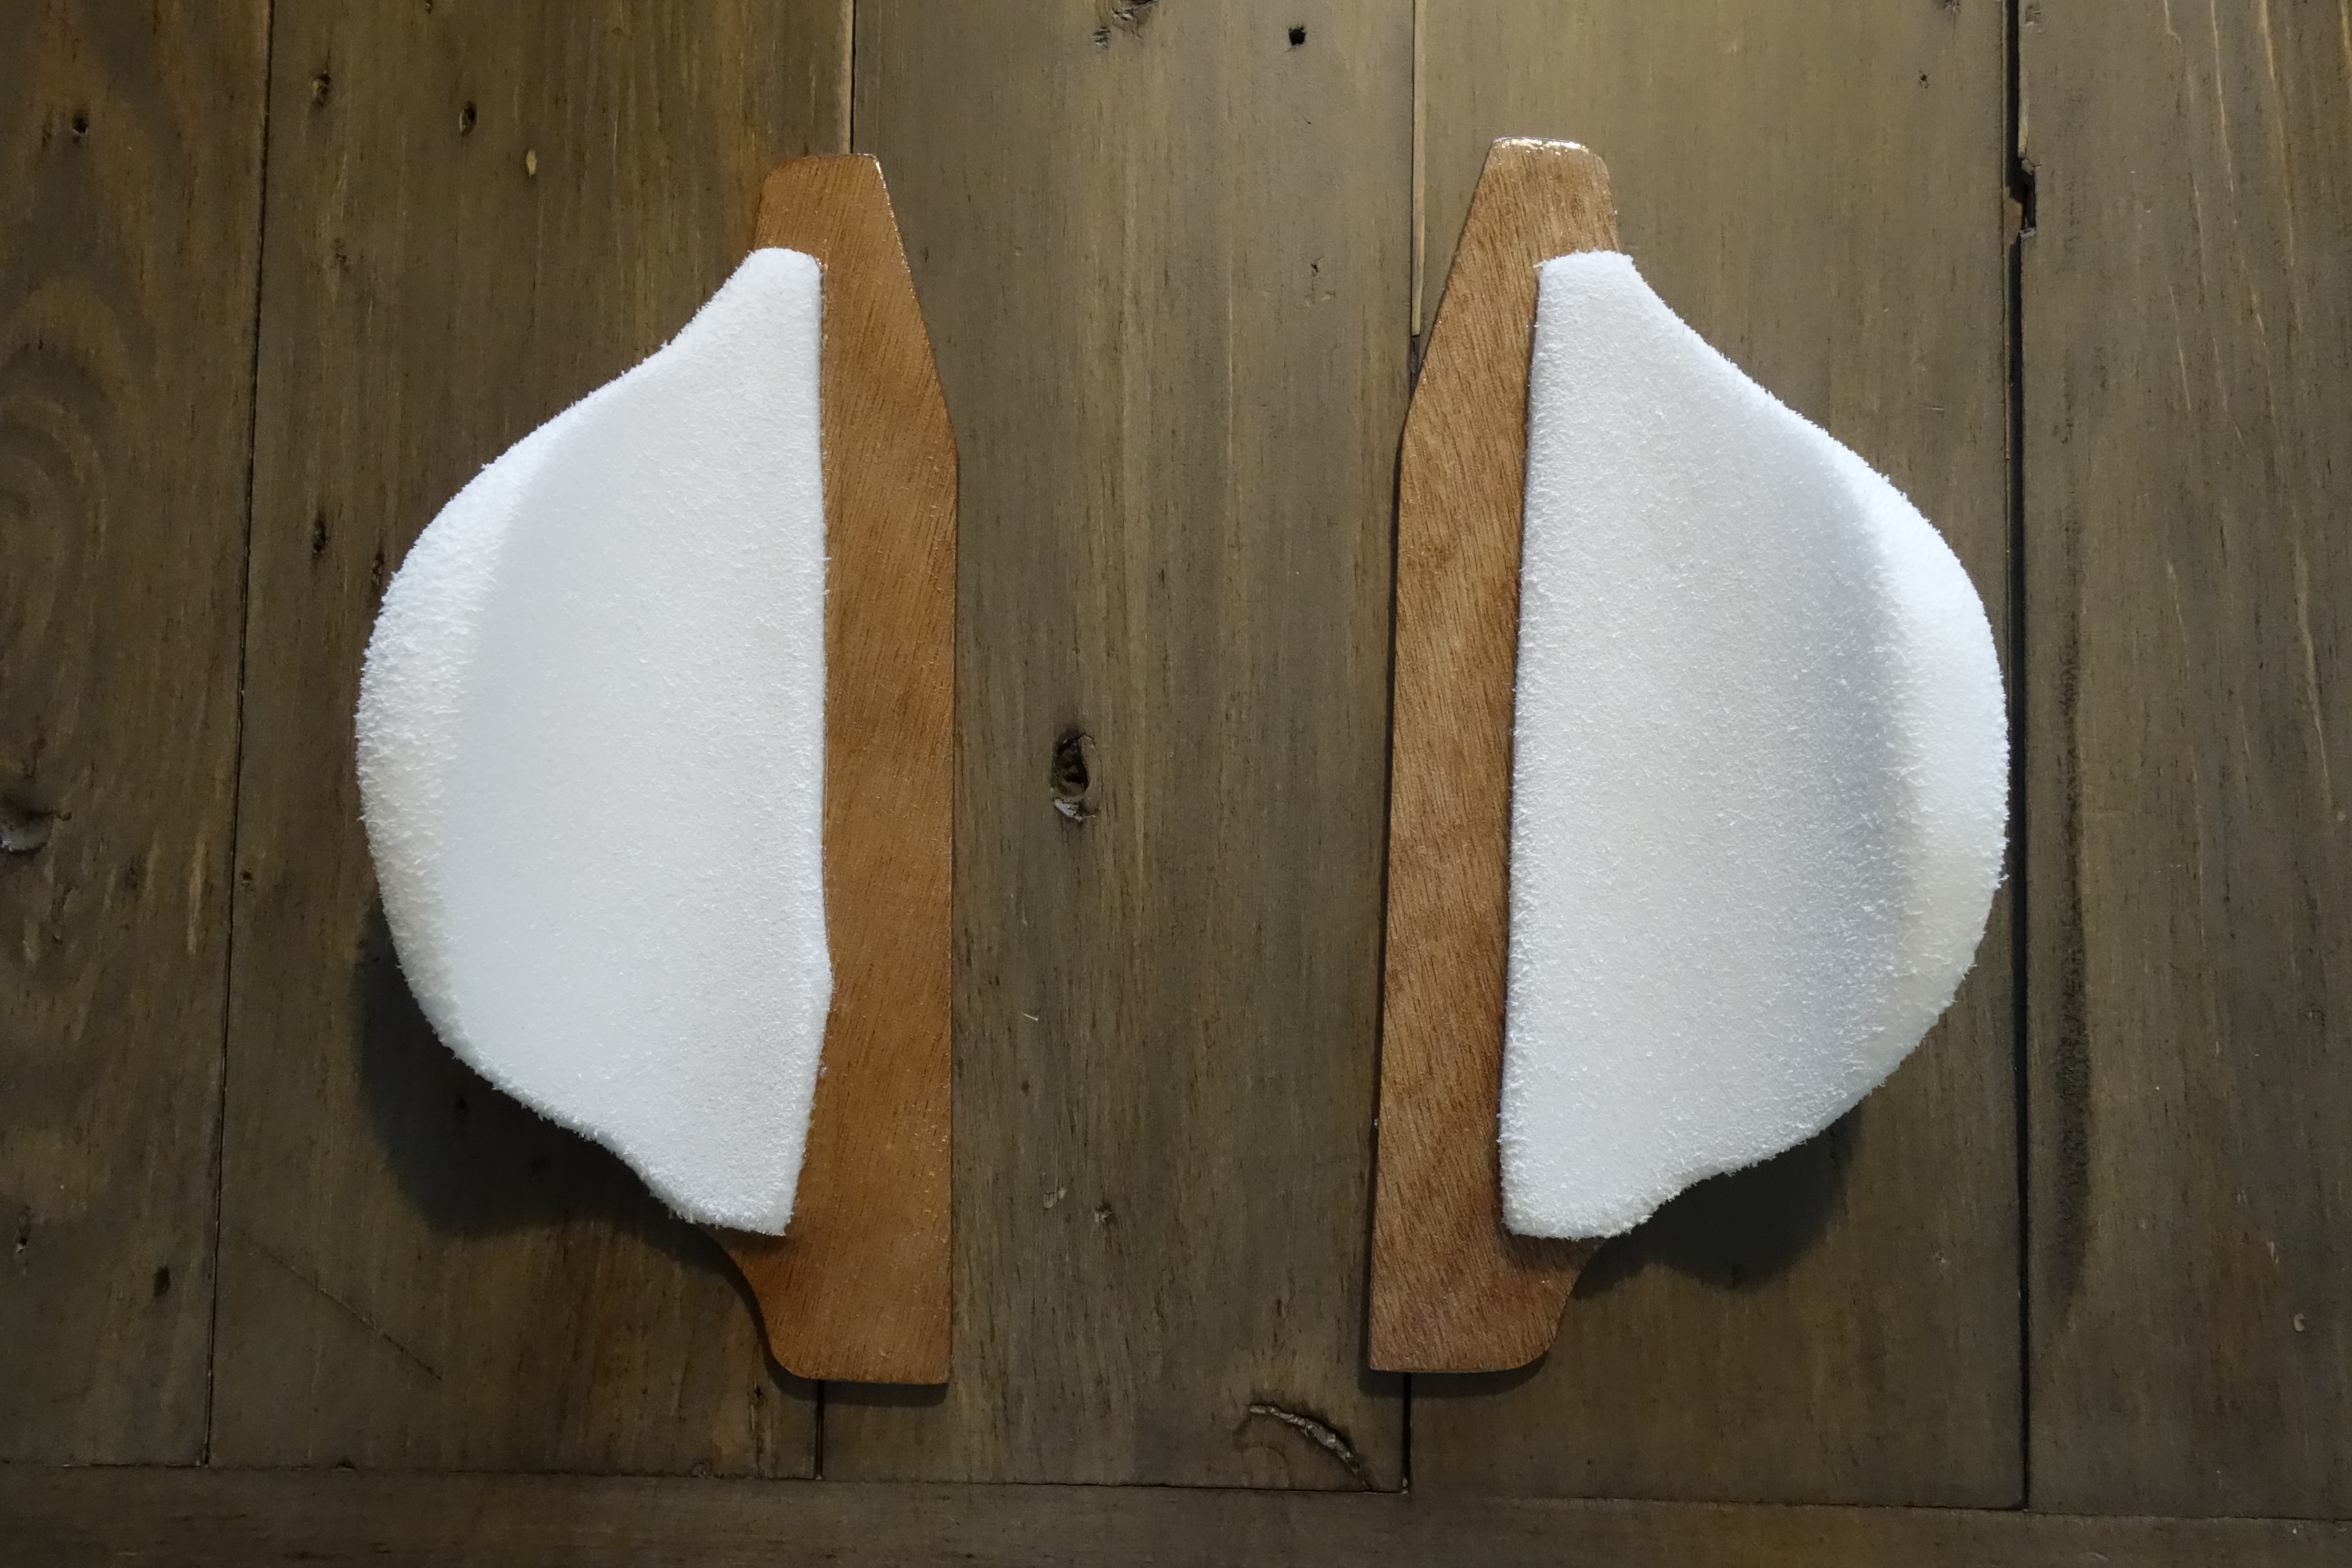
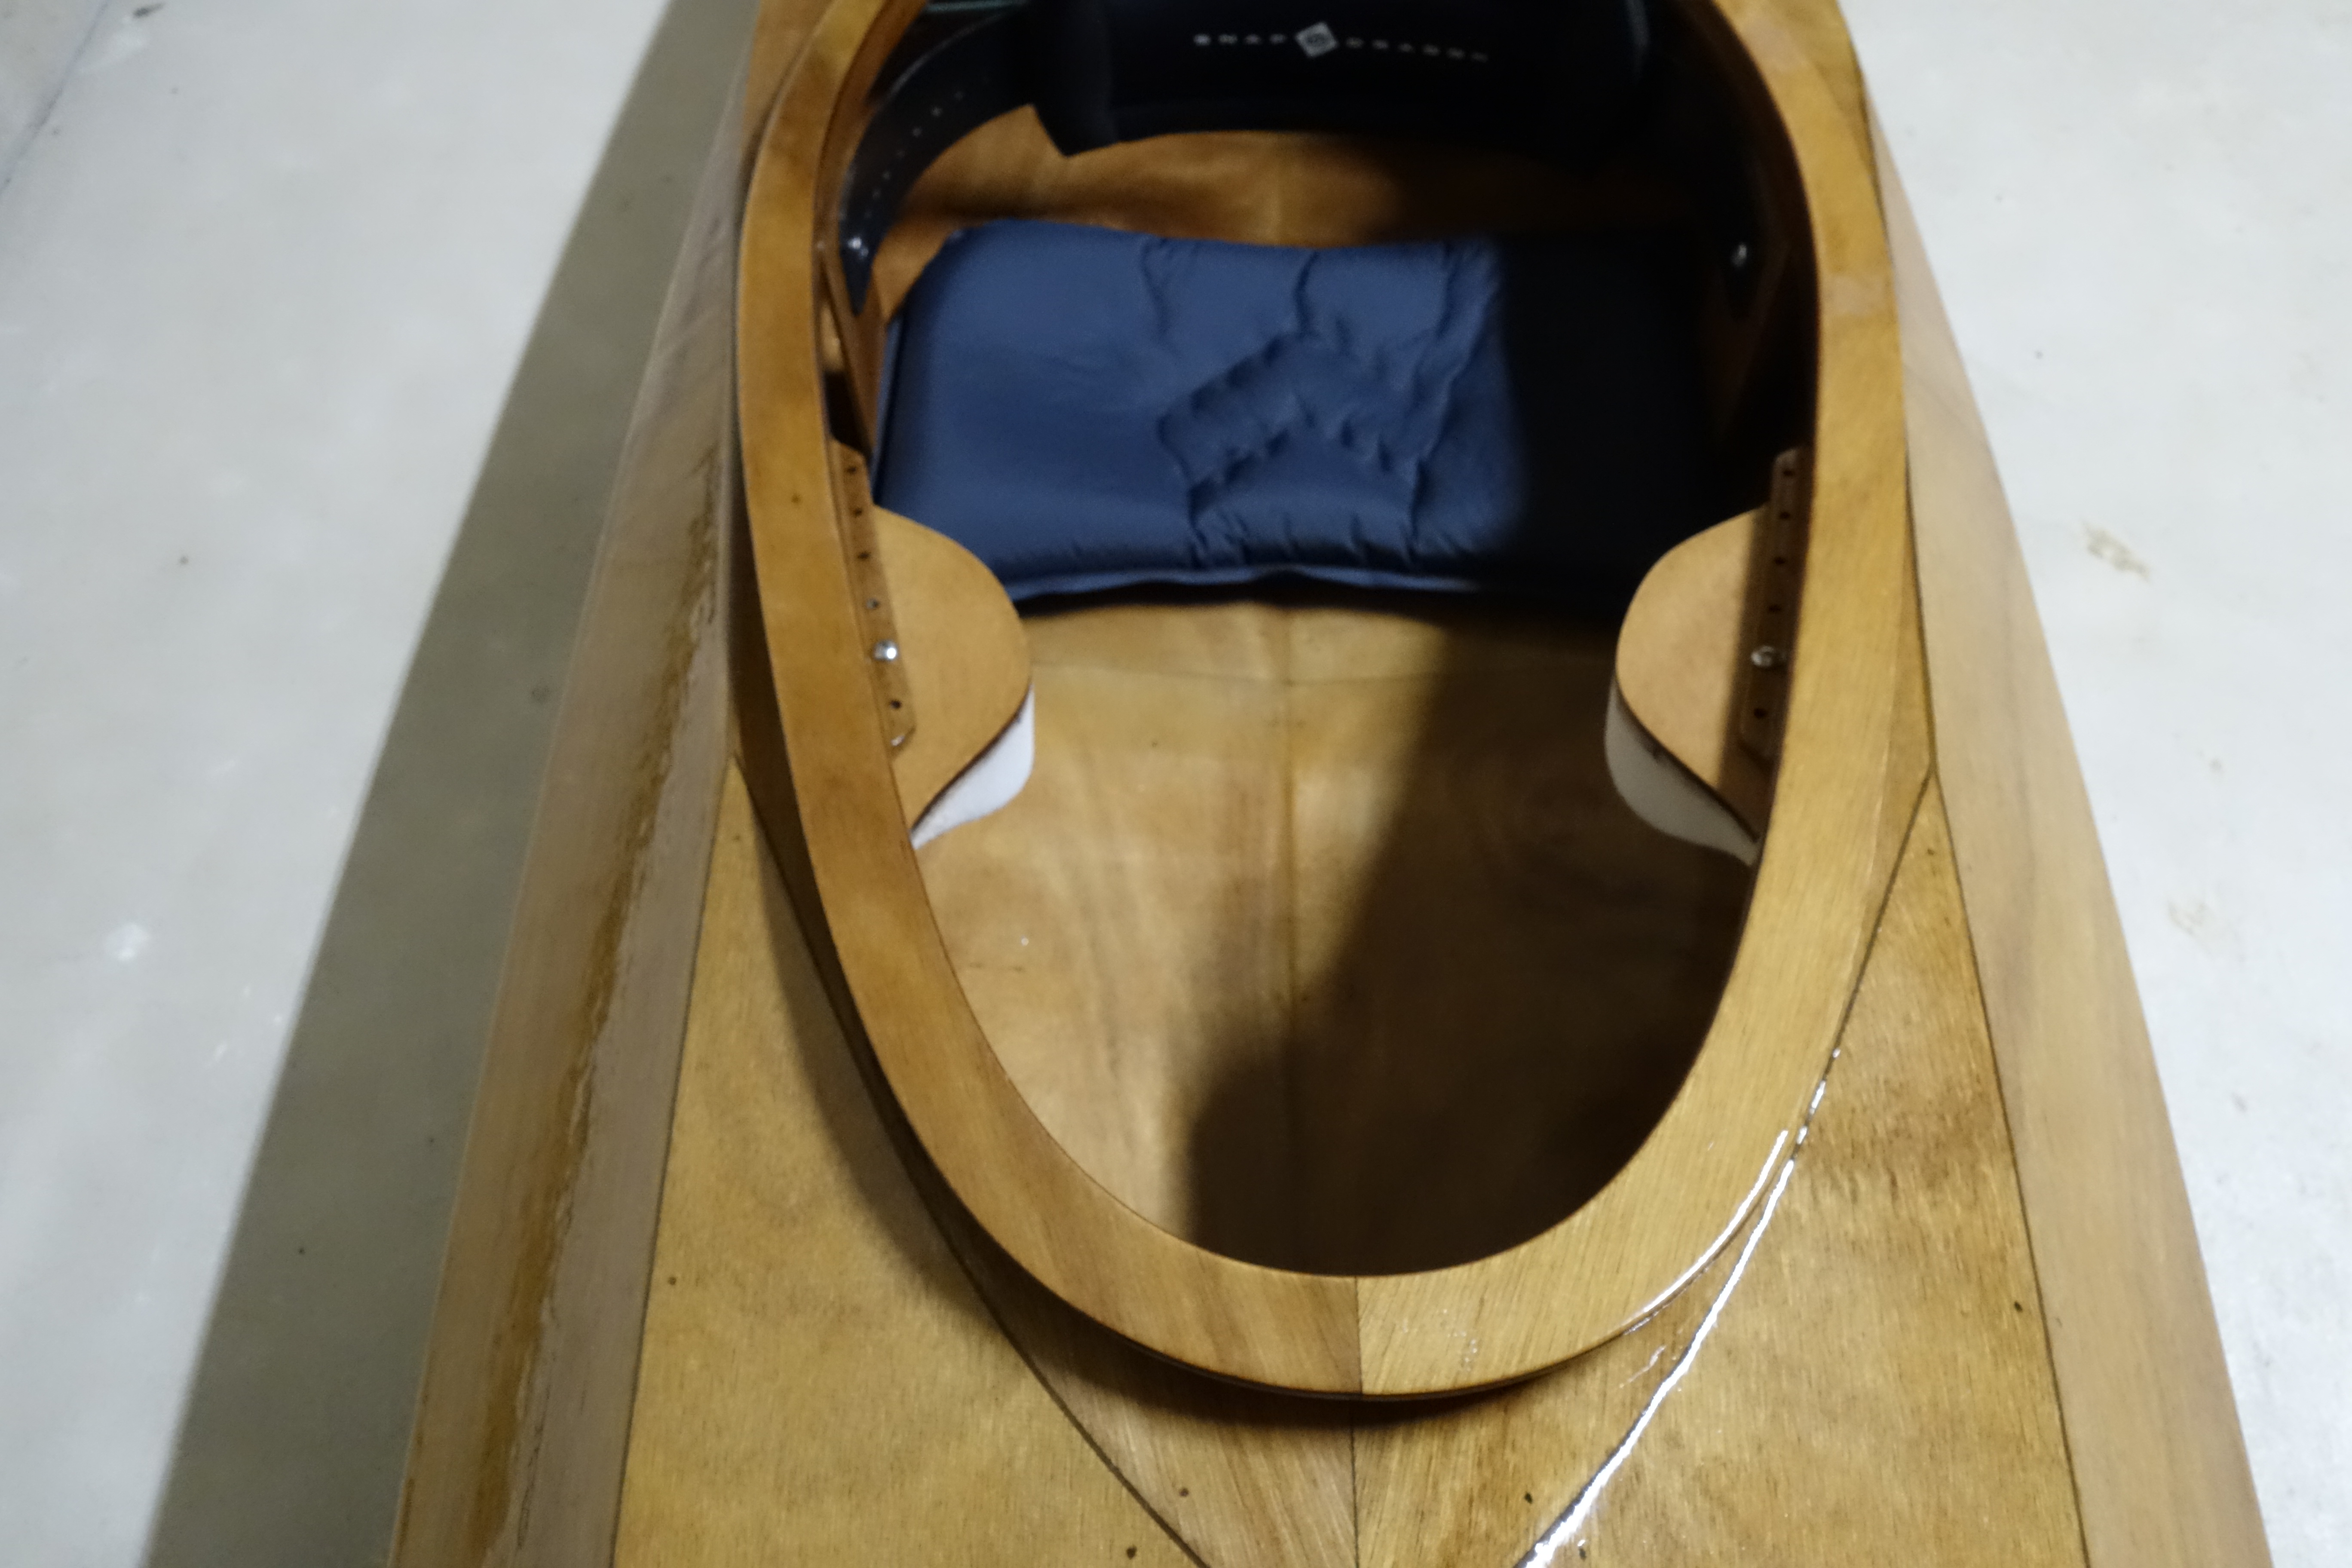
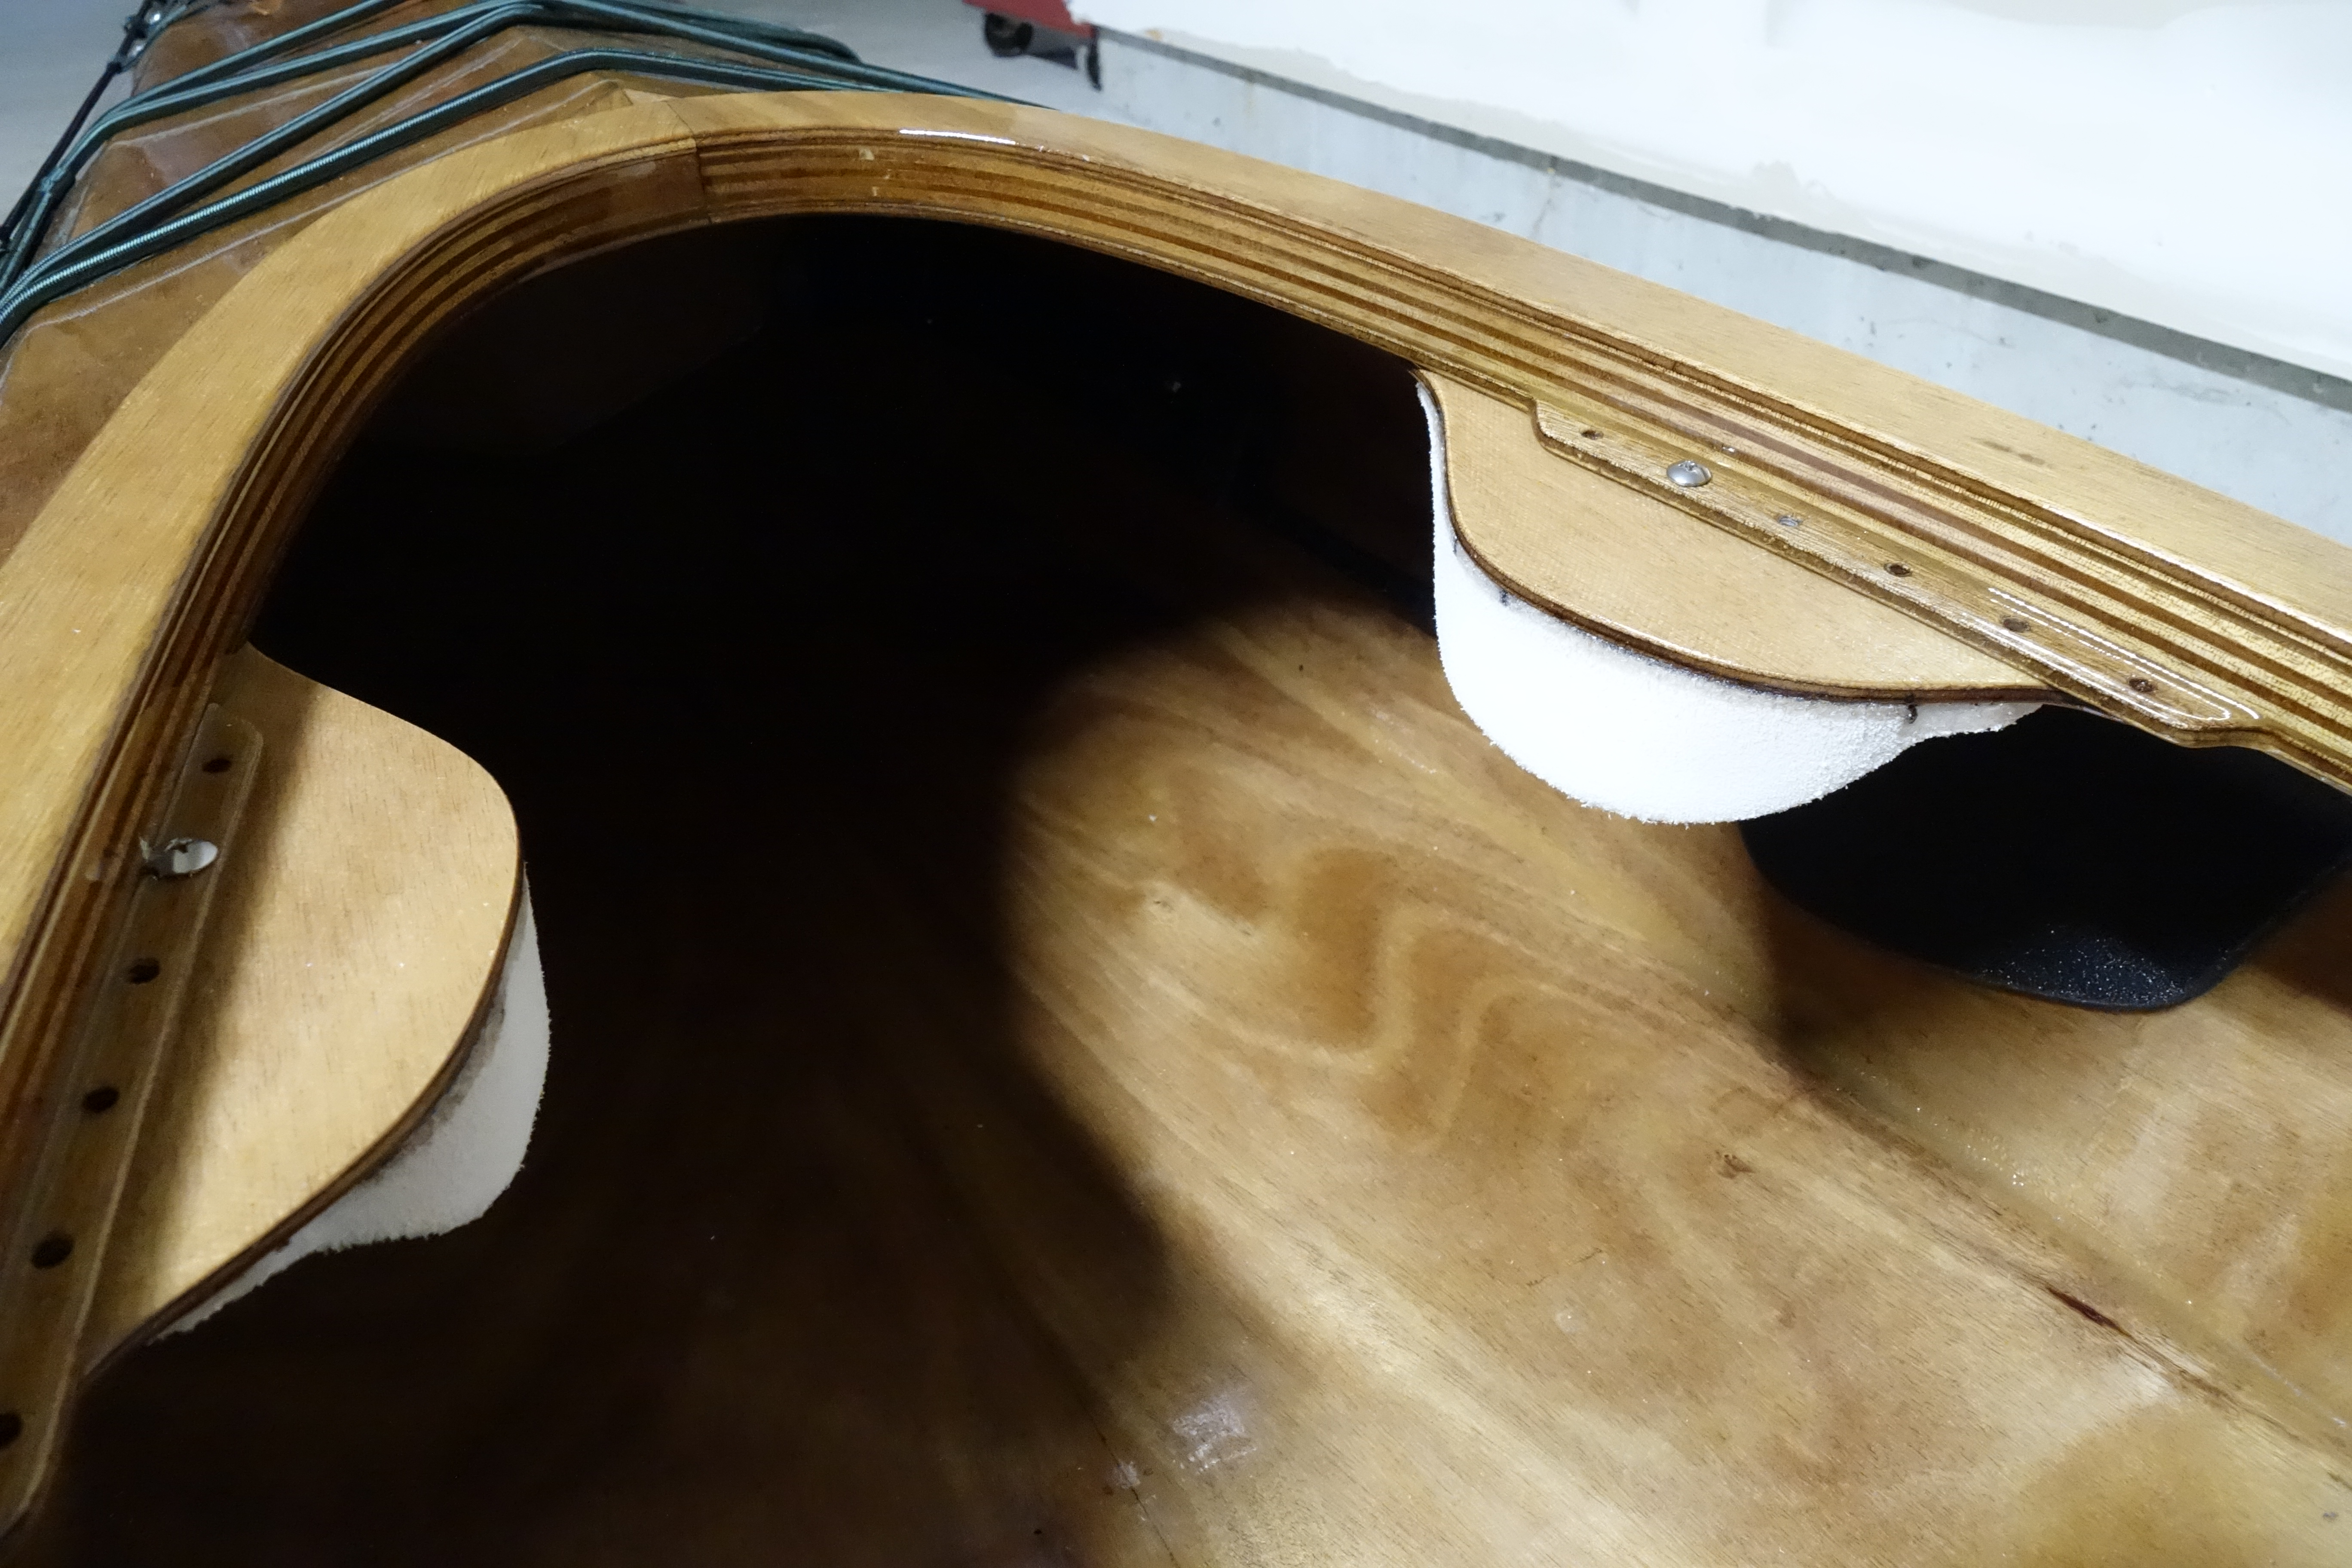
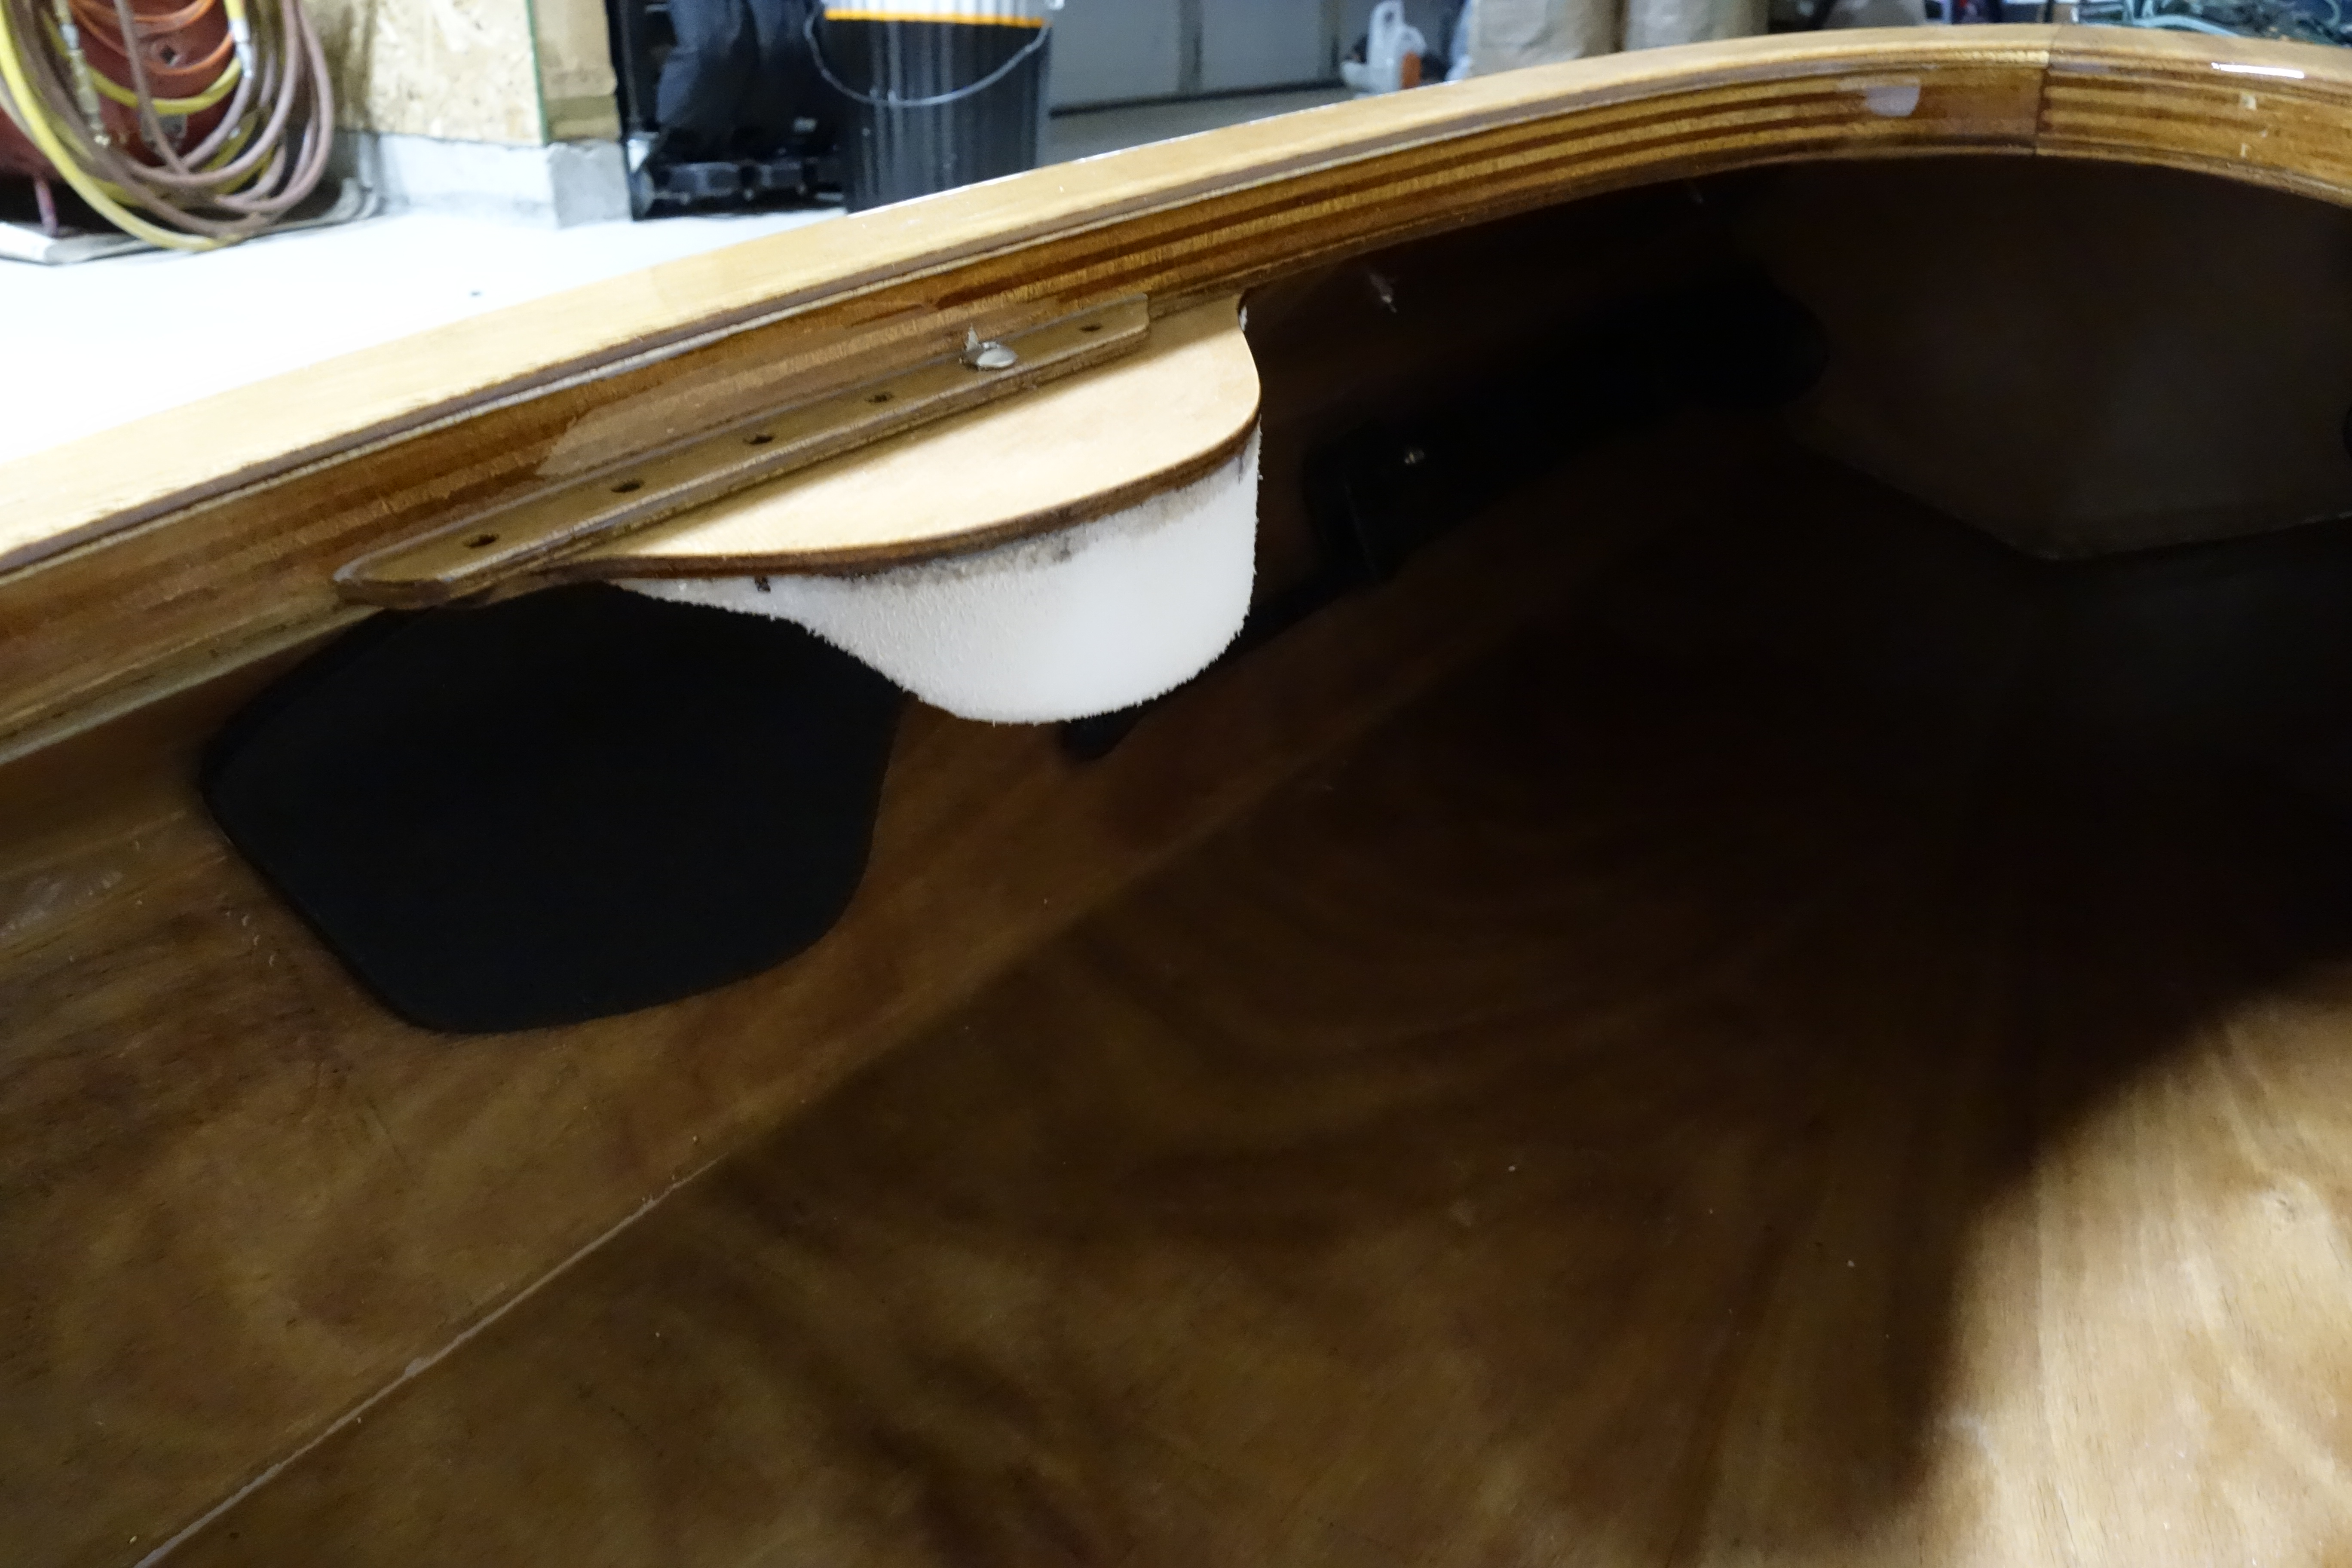
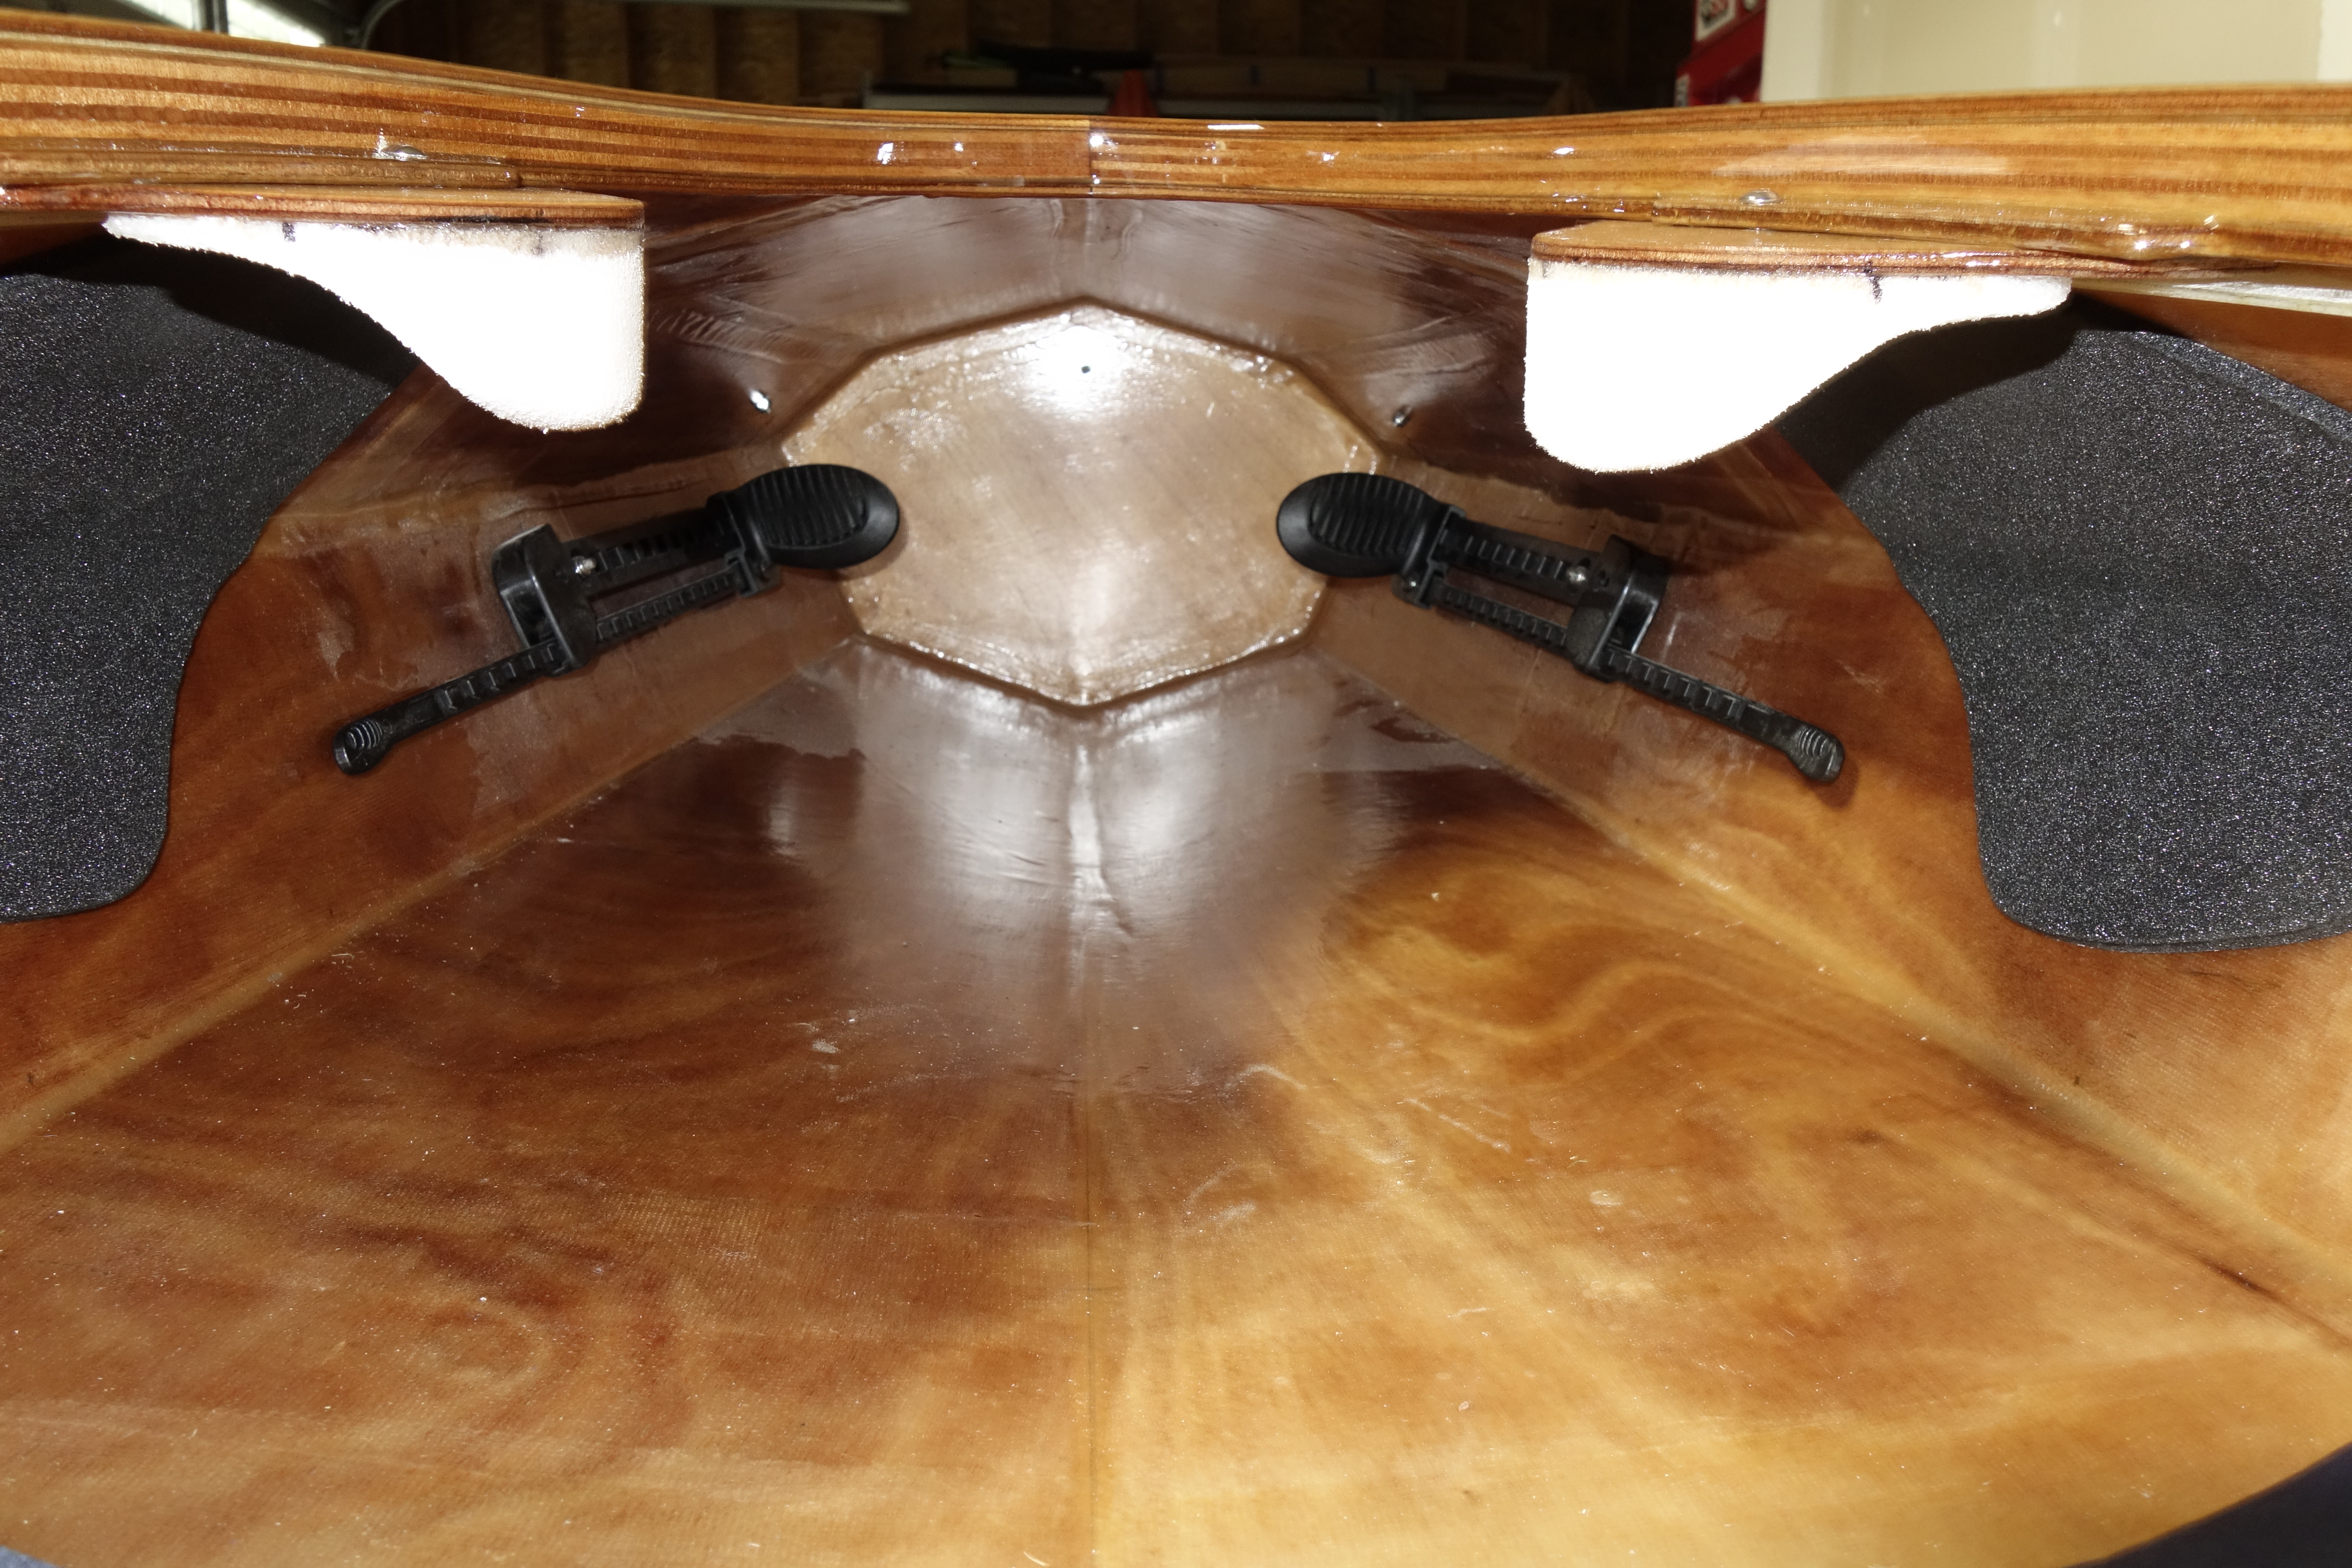
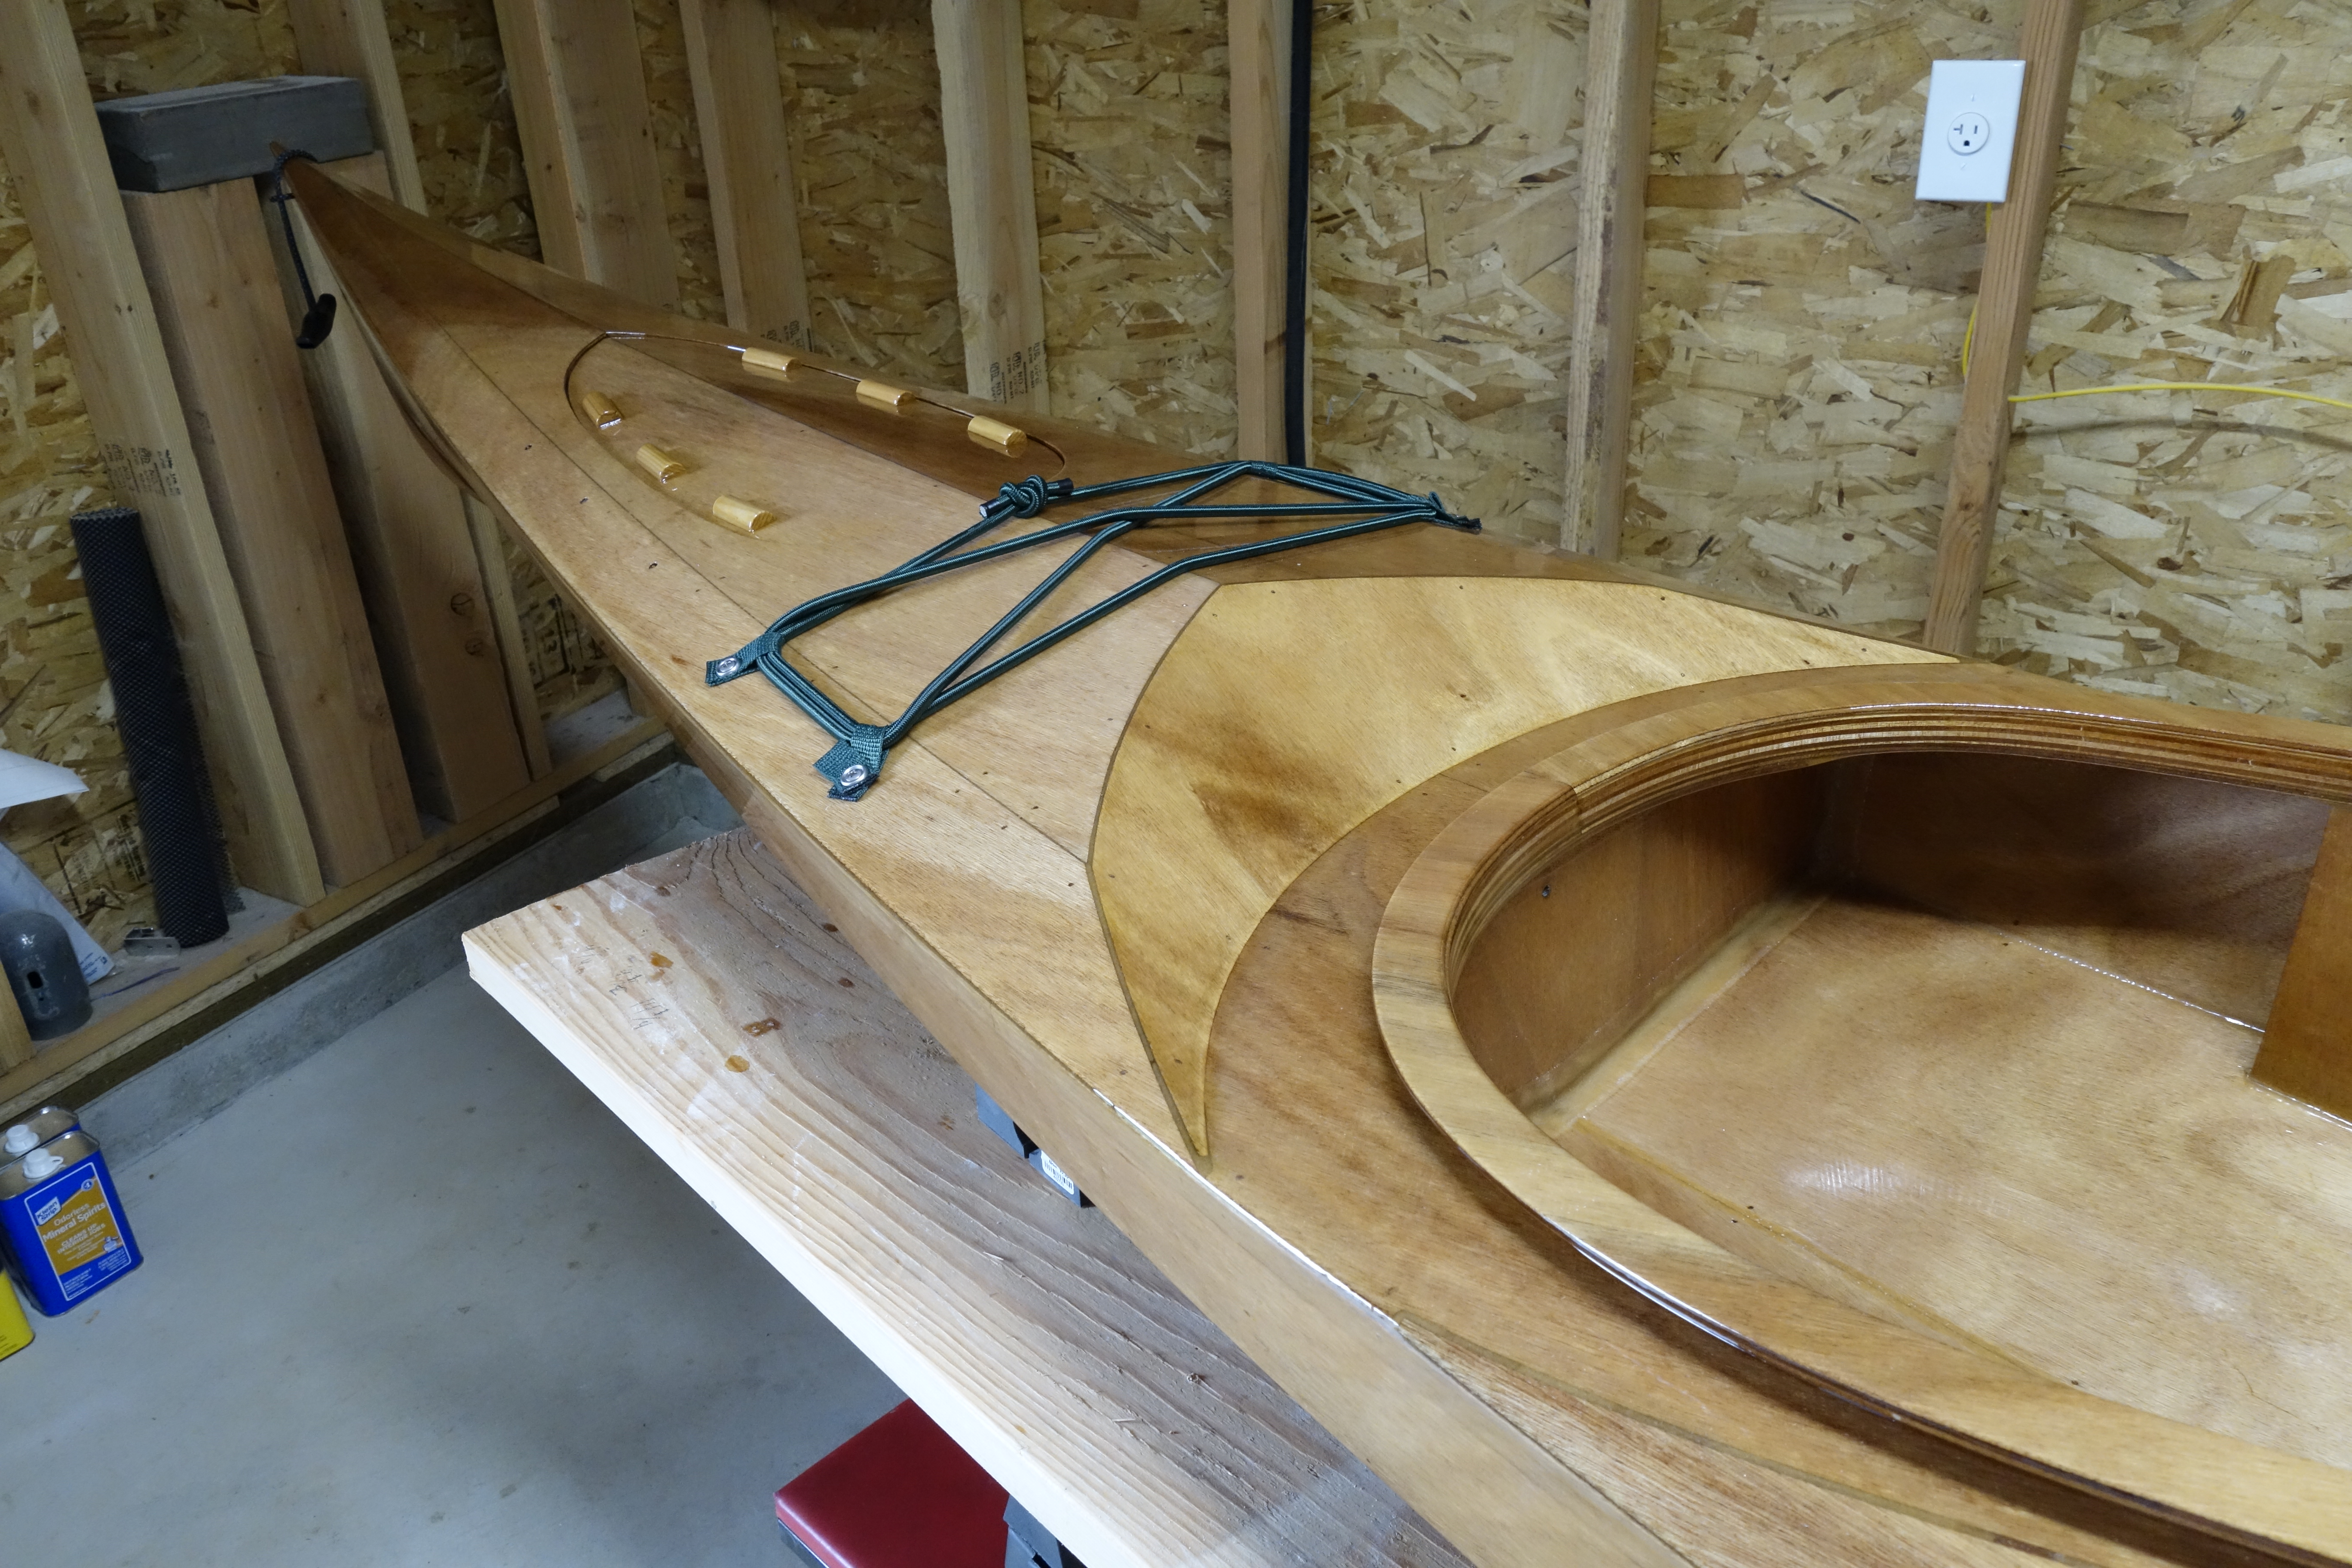
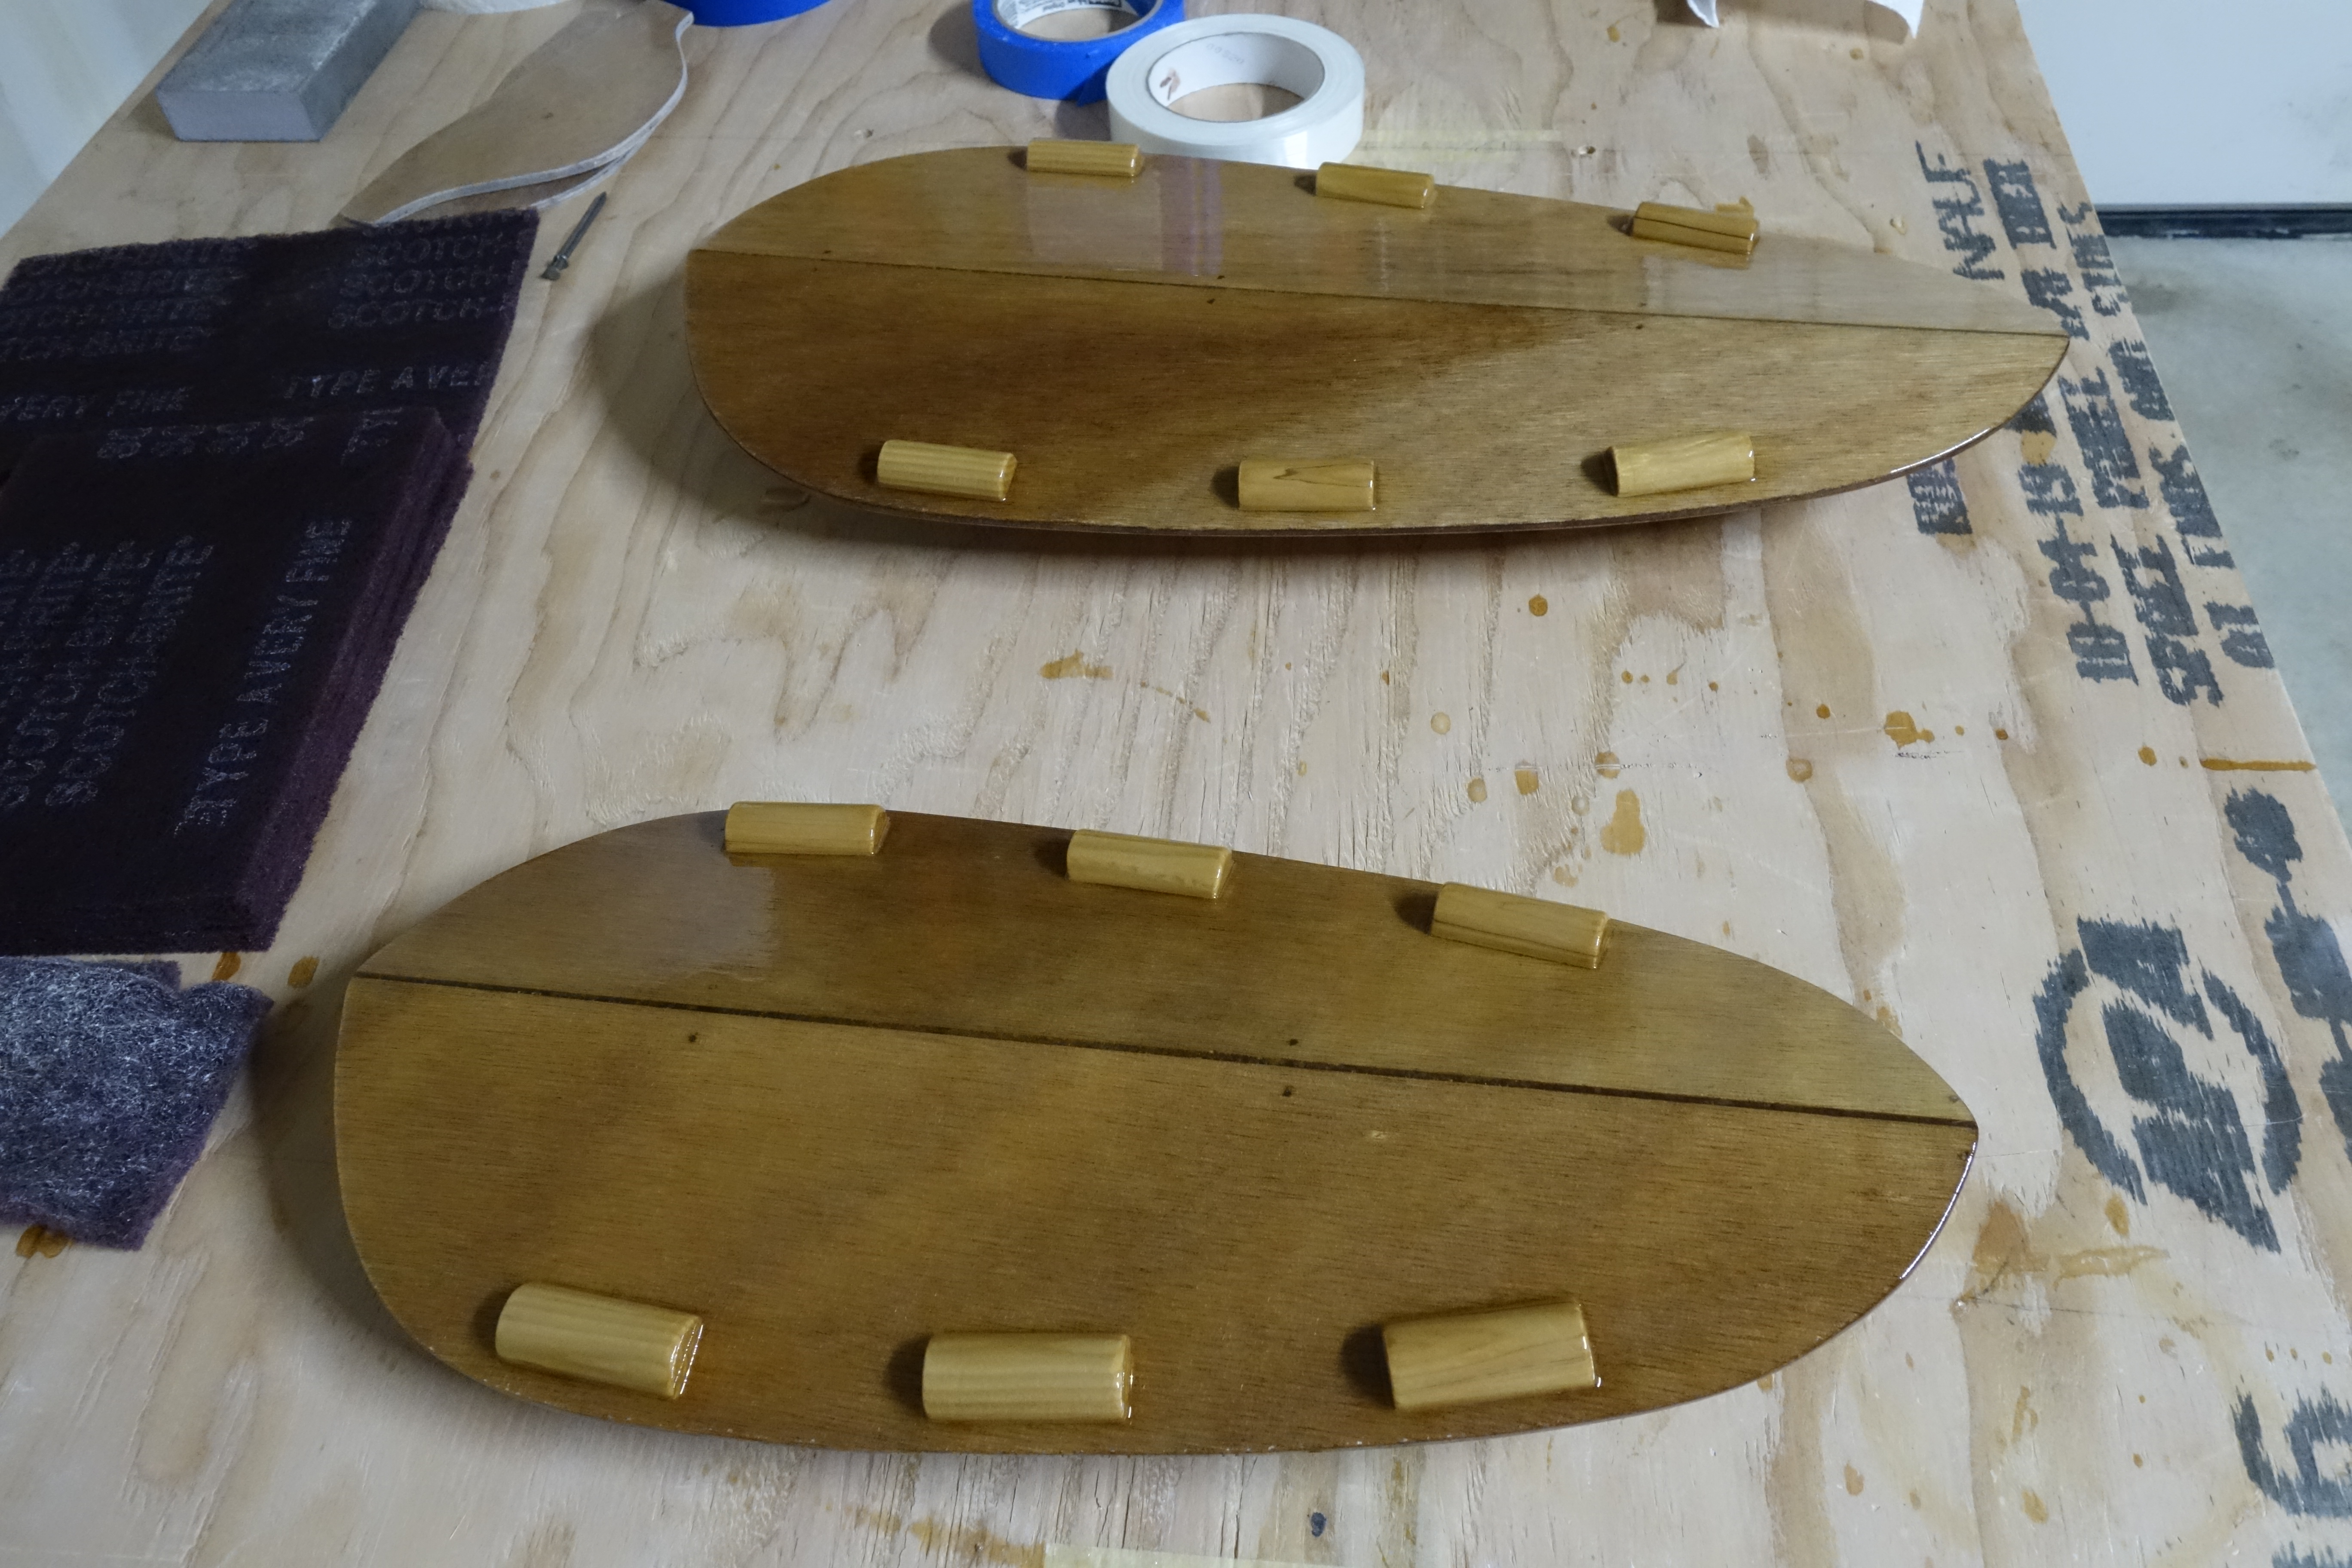
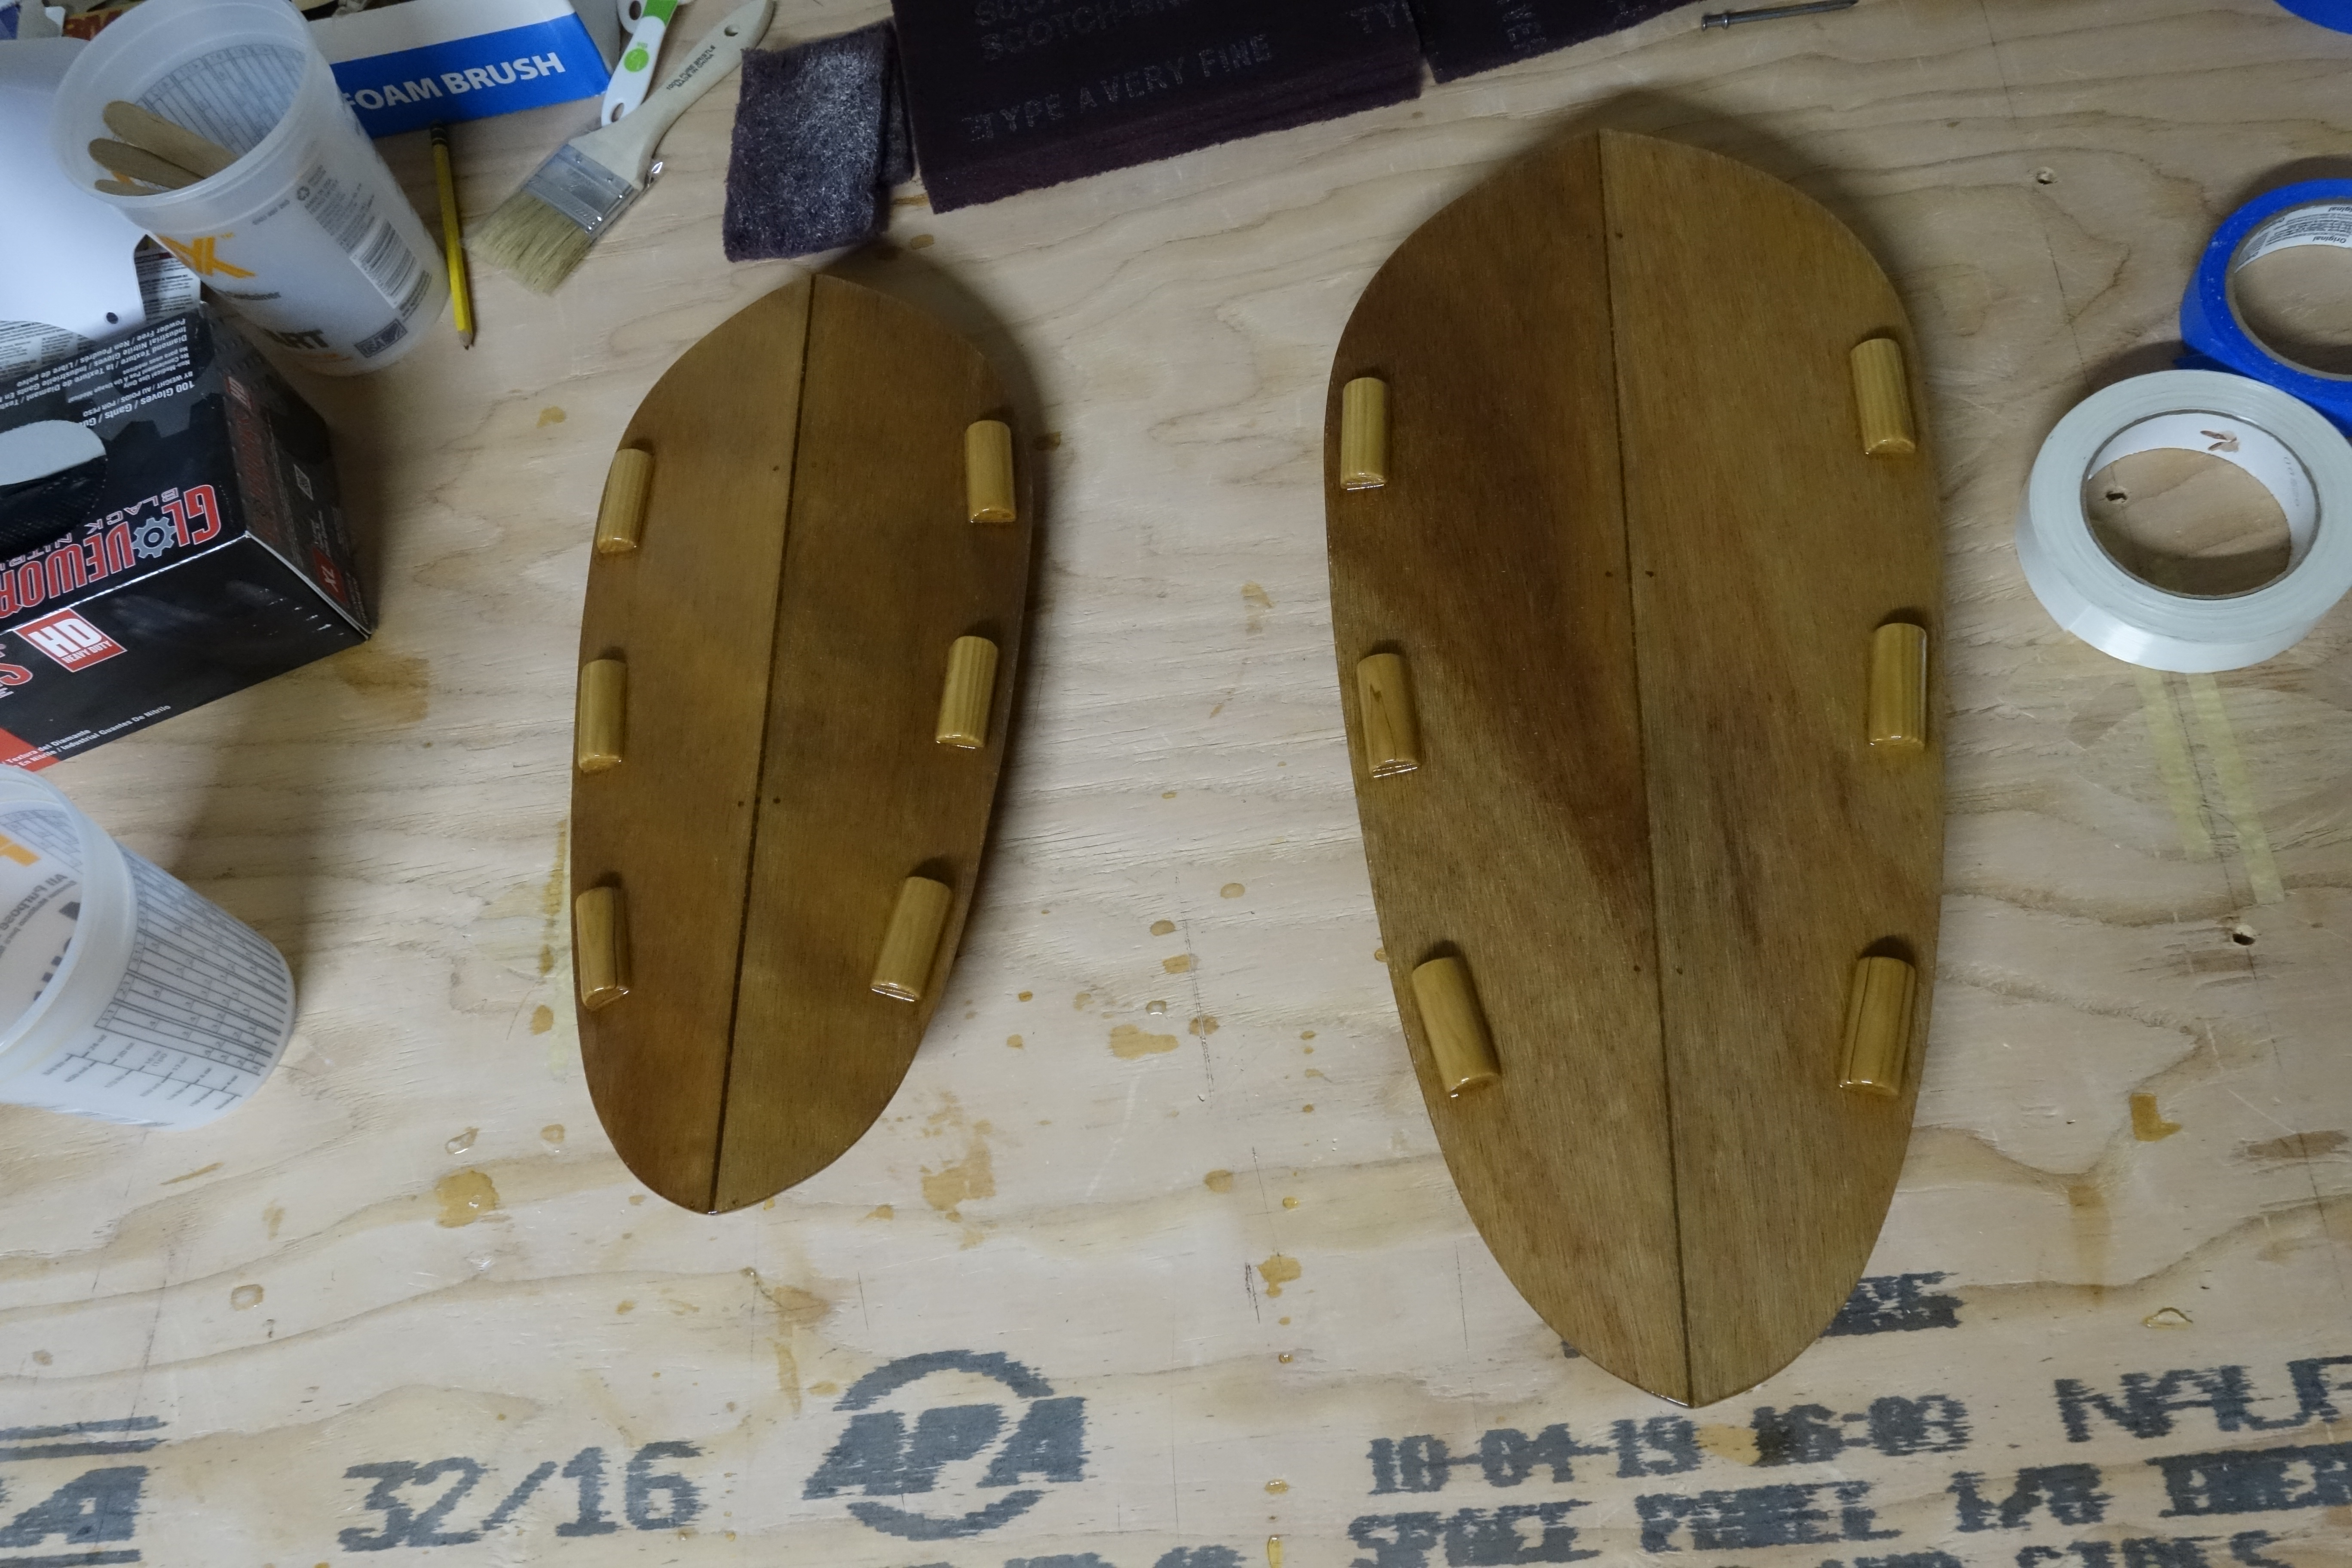
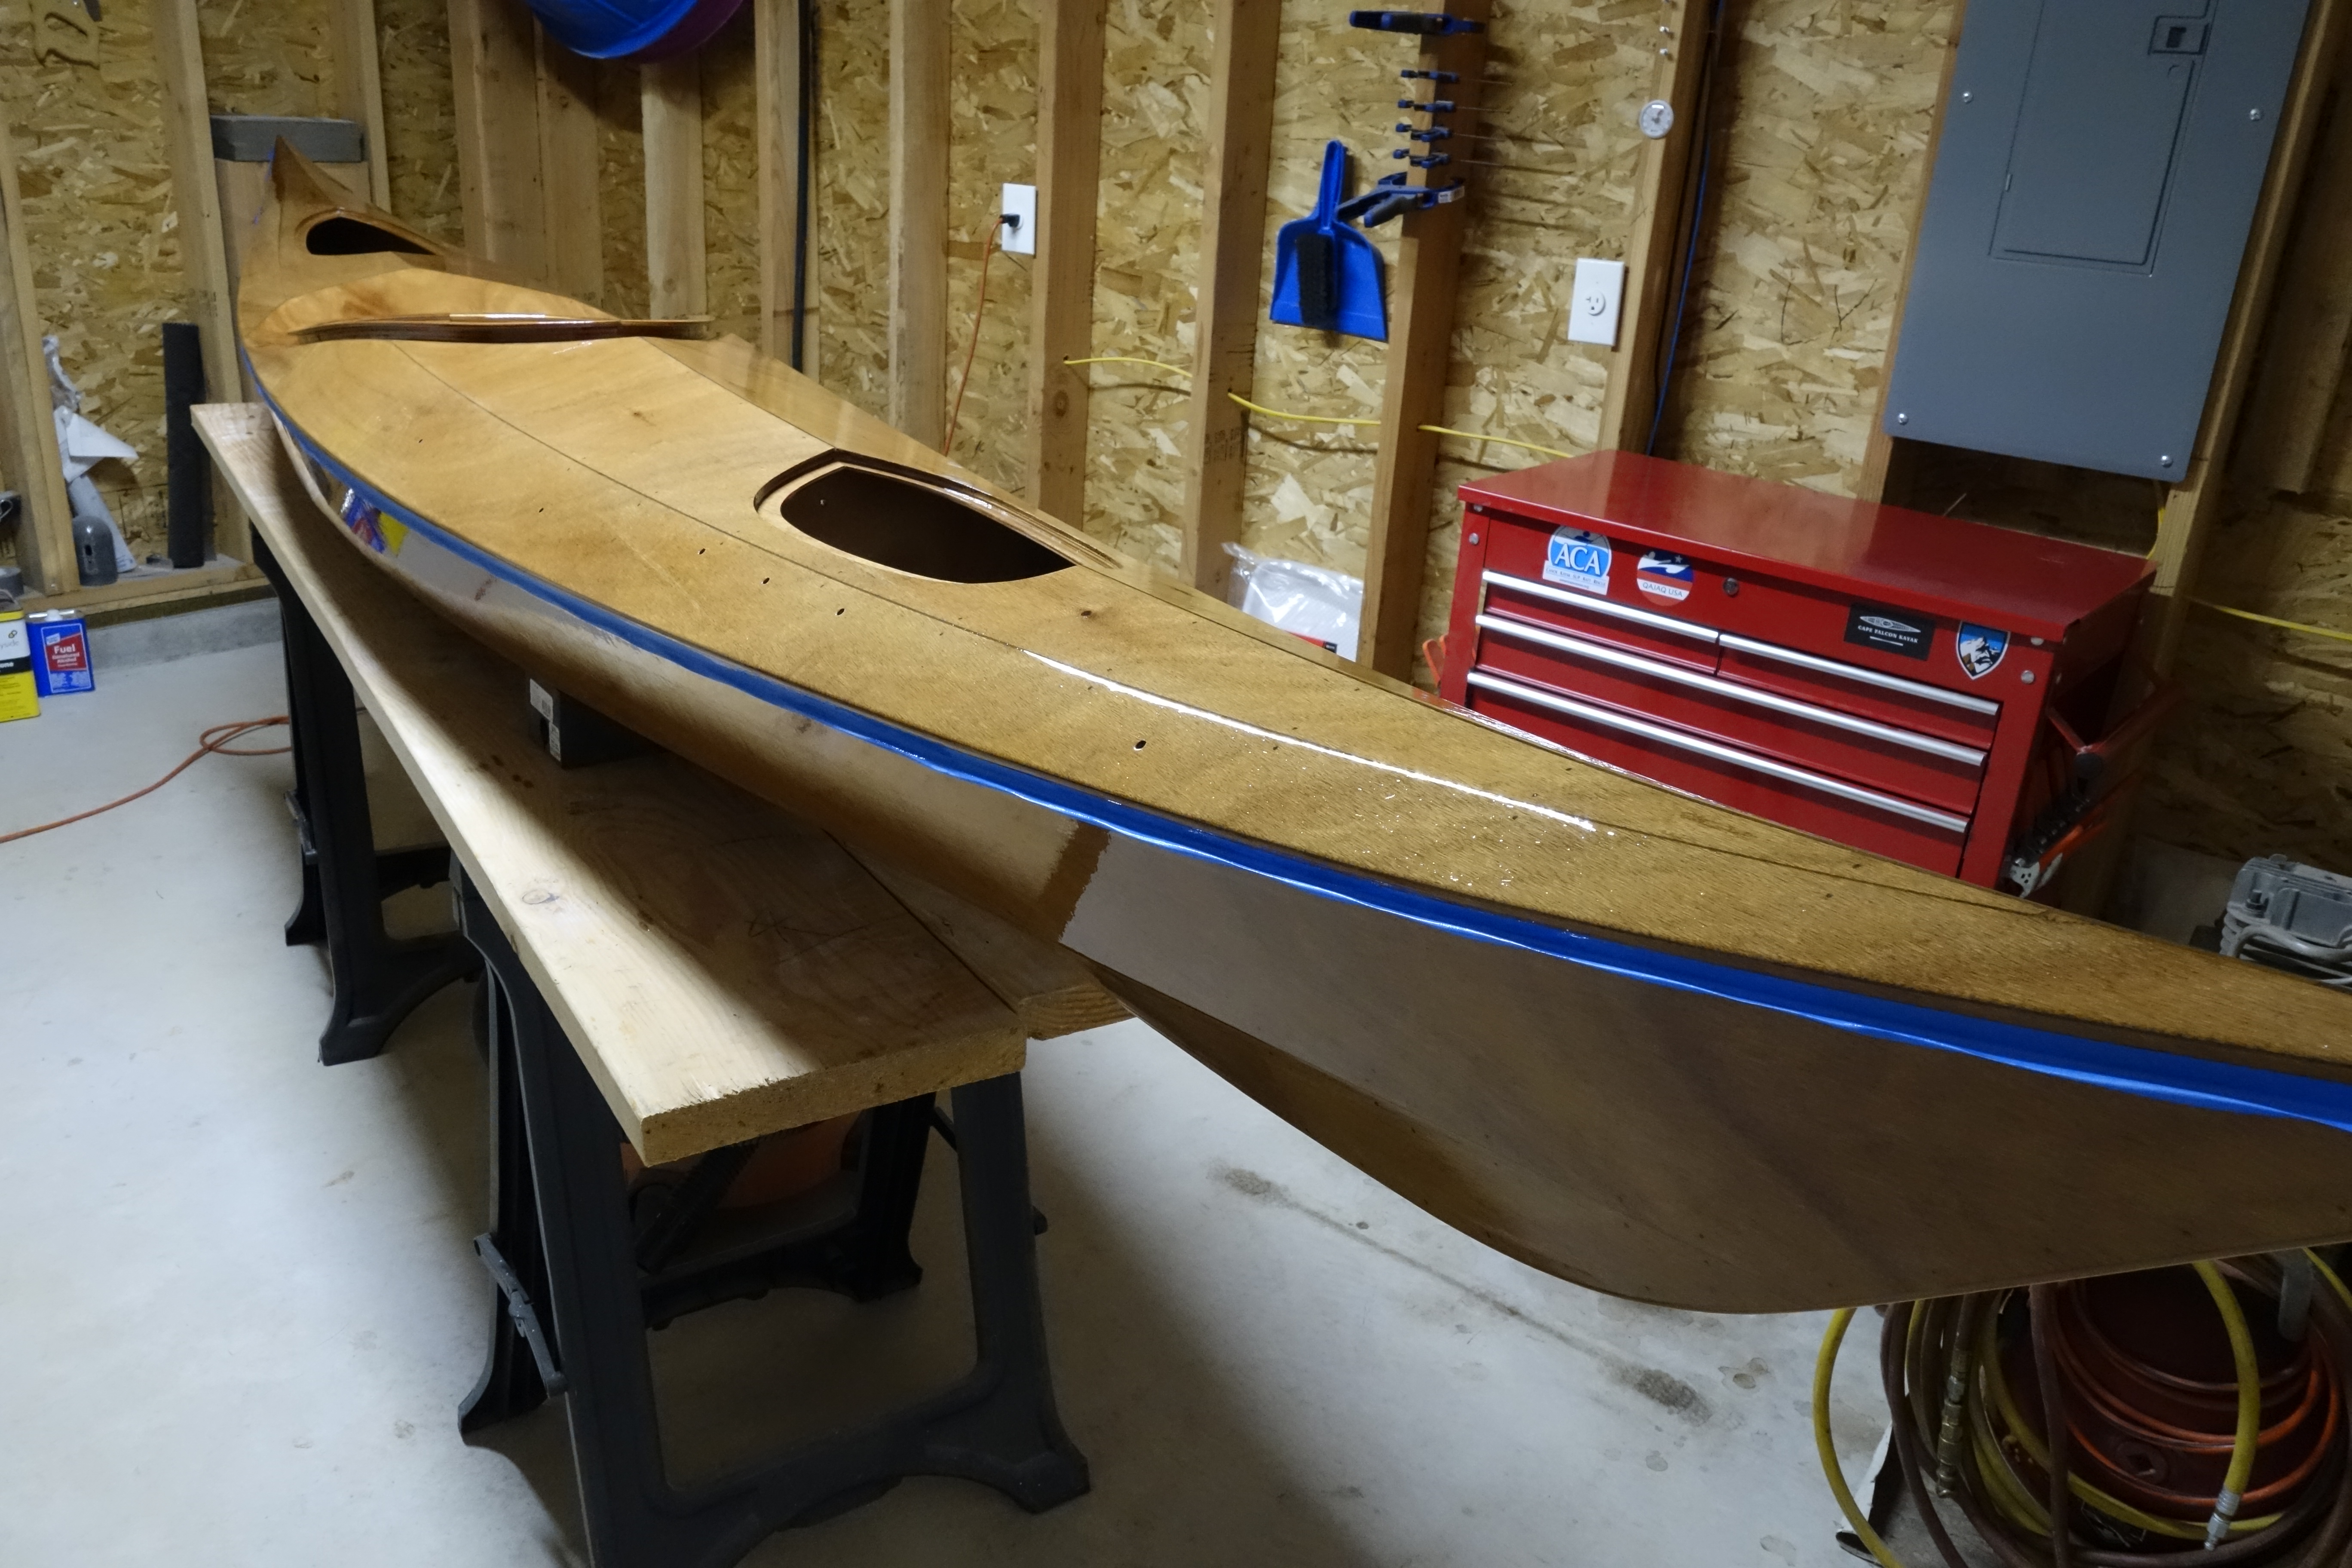
Sorry for not showing how these were made. The wood plates have been fiberglassed on both sides. Pygmy offers two different kinds of foam. This white foam is very stiff, and comes pre-cut to the approximate shape of the wood backing plates. After the foam is epoxied to the backing plates it is then cut/filed/sanded to the size and shape that works best for you. They also sell blocks of softer, gray foam that they say is easily sculpted to the desired shape. Pygmy also supplies a pair of threaded inserts that are hammered into the underside of the backing plates prior to the foam being glued to them. This means that a machine screw inserted from the top will pull the threaded insert up against the bottom of the plate. This makes for a very strong mechanical attachment to the kayak when paired with the fiberglass slot that was fabricated when making the underside of the deck.Auto-focus fail. Sorry.Above you can see the Slidelock footbraces that I chose to use (forgive the dust in the front of the cockpit), and the foam knee/thigh pads that I installed, as well as the new thigh braces I just finished. On the right side of this photo, this camera angle shows pretty well how thigh braces fit into the fiberglass slots that I made under the deck. Those slots, along with the machine screw that goes through the flange on the coaming, make a very strong mechanical attachment between the thigh brace and the kayak. The Ronan is truly ready to paddle. Done! Finished! Complete!Almost looks like nothing ever happened here, except for the new Ronan on the floor!
This will most likely be my last update to this blog. I want to thank everyone who has stopped by, and I want to remind you that if you have any questions I encourage you to leave them in the comments and I will be happy to try to answer them. I will get an email if someone leaves a comment, so it shouldn’t matter how much time has elapsed.
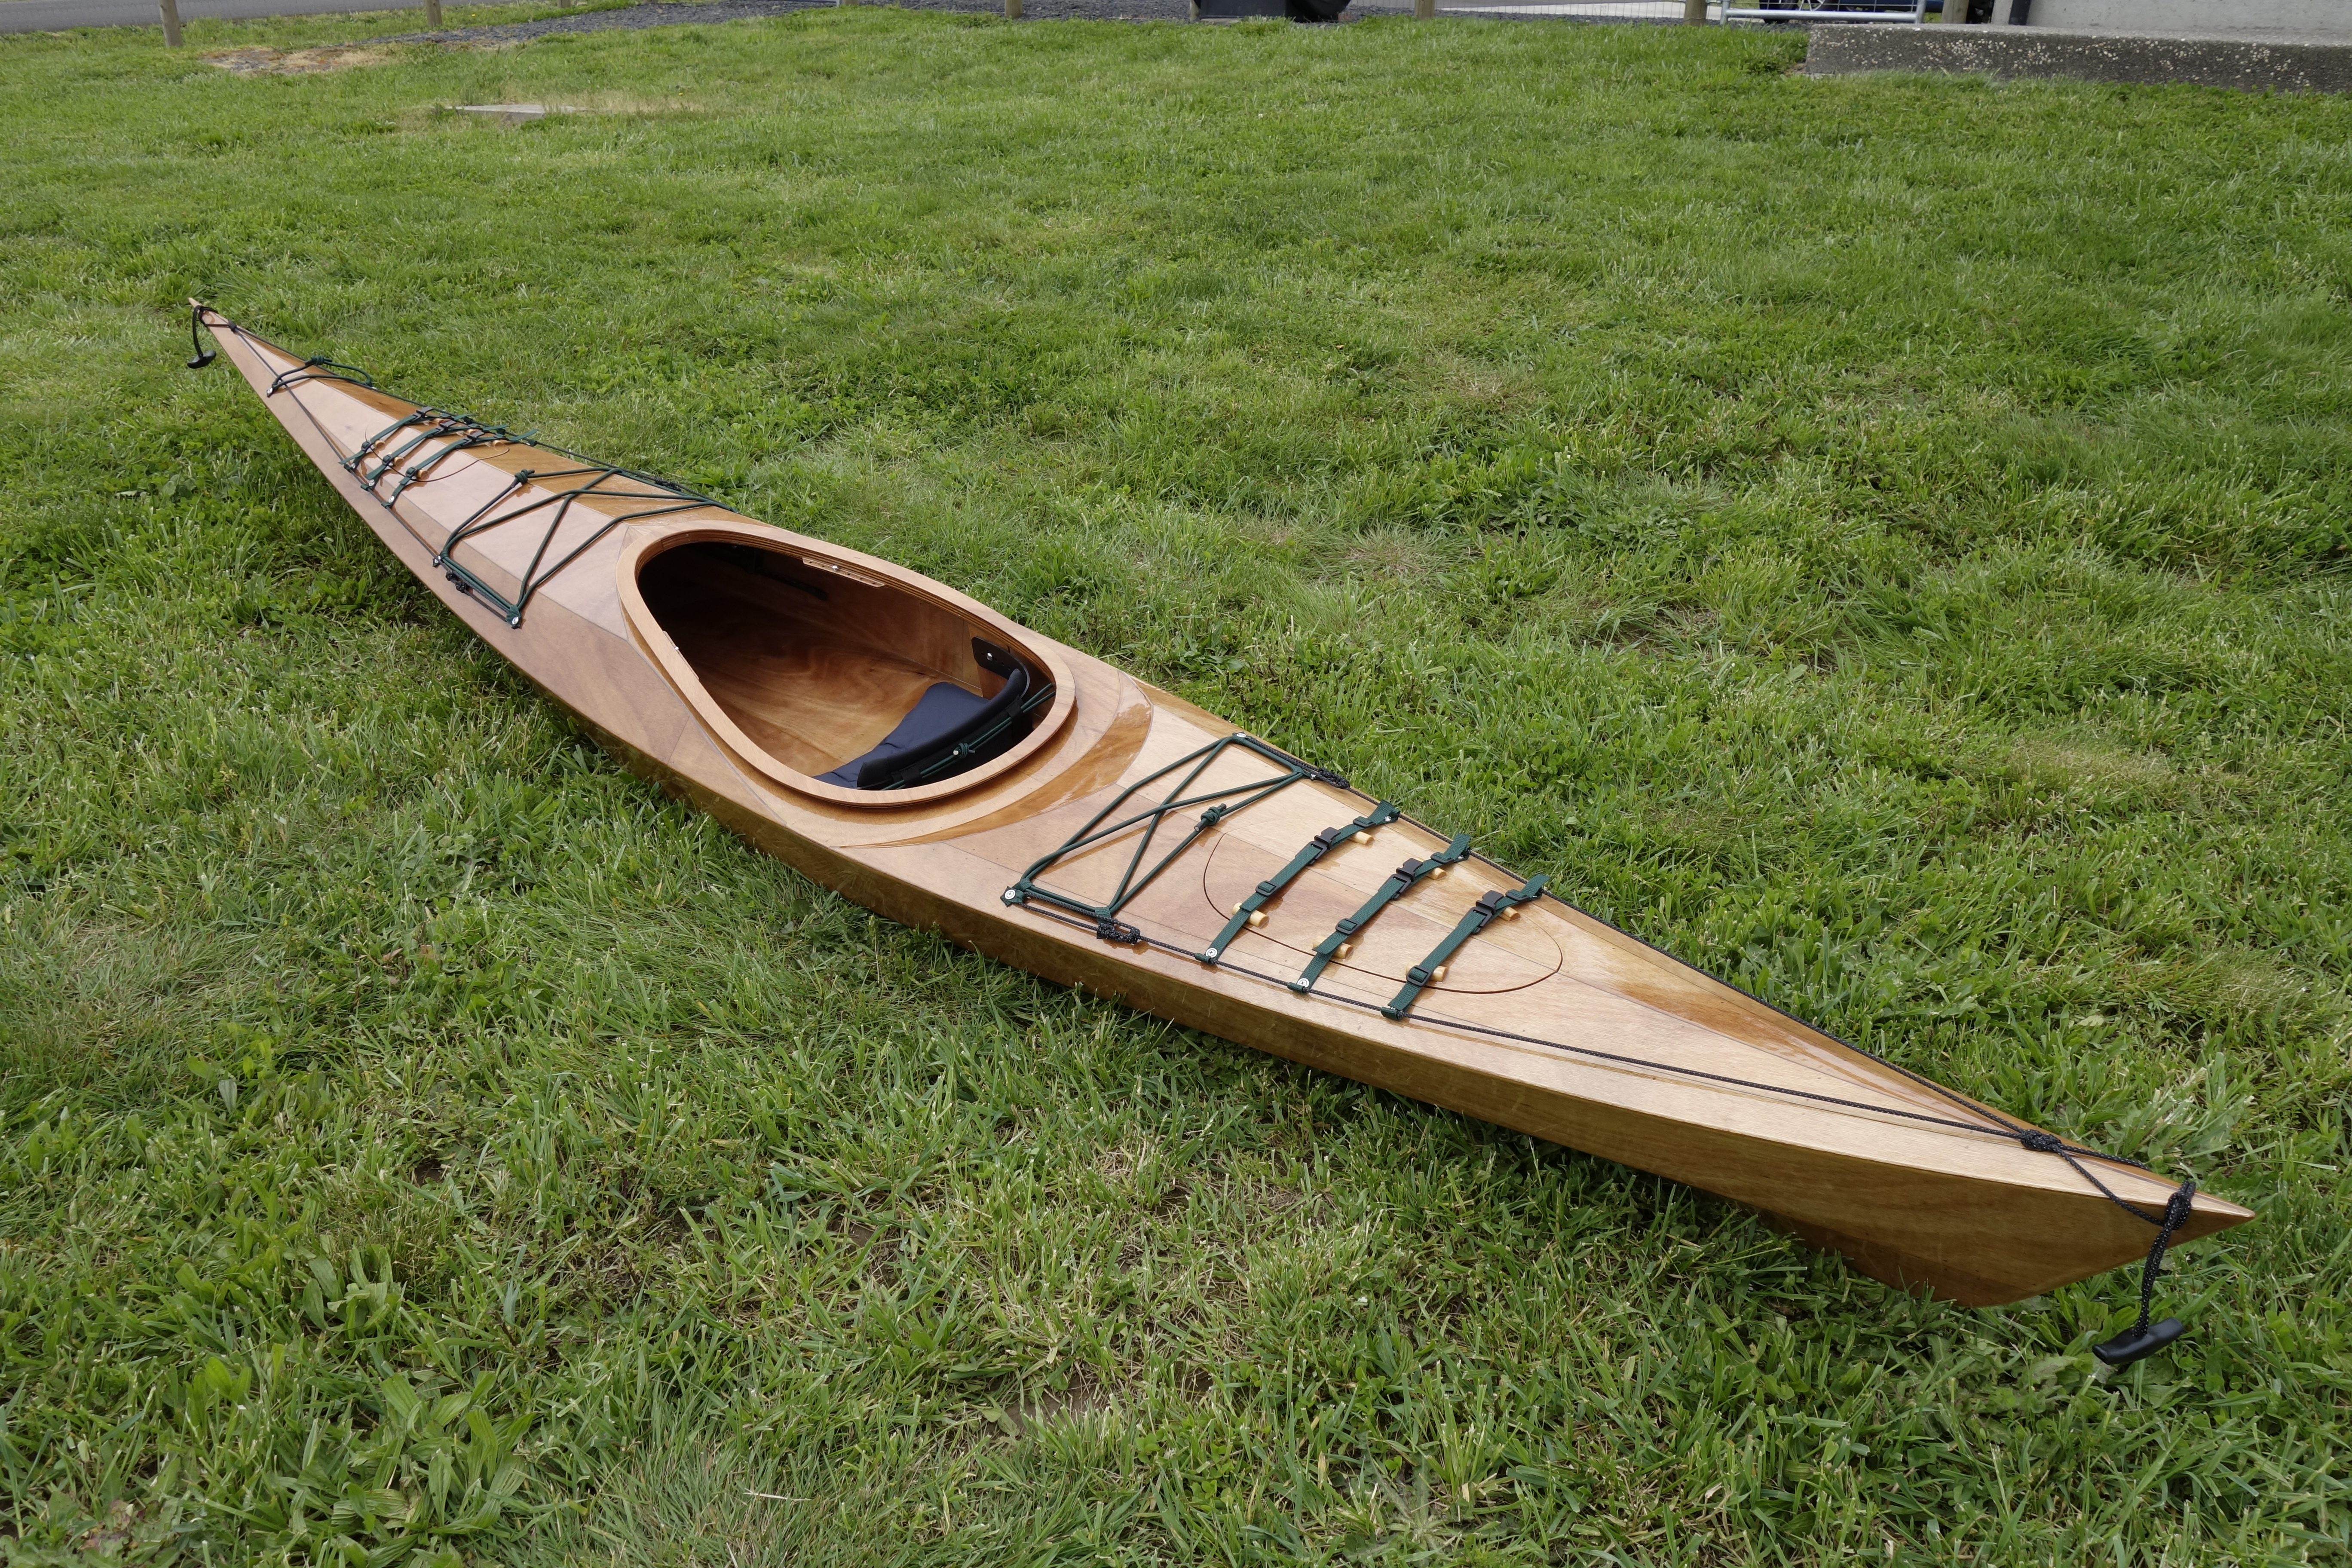
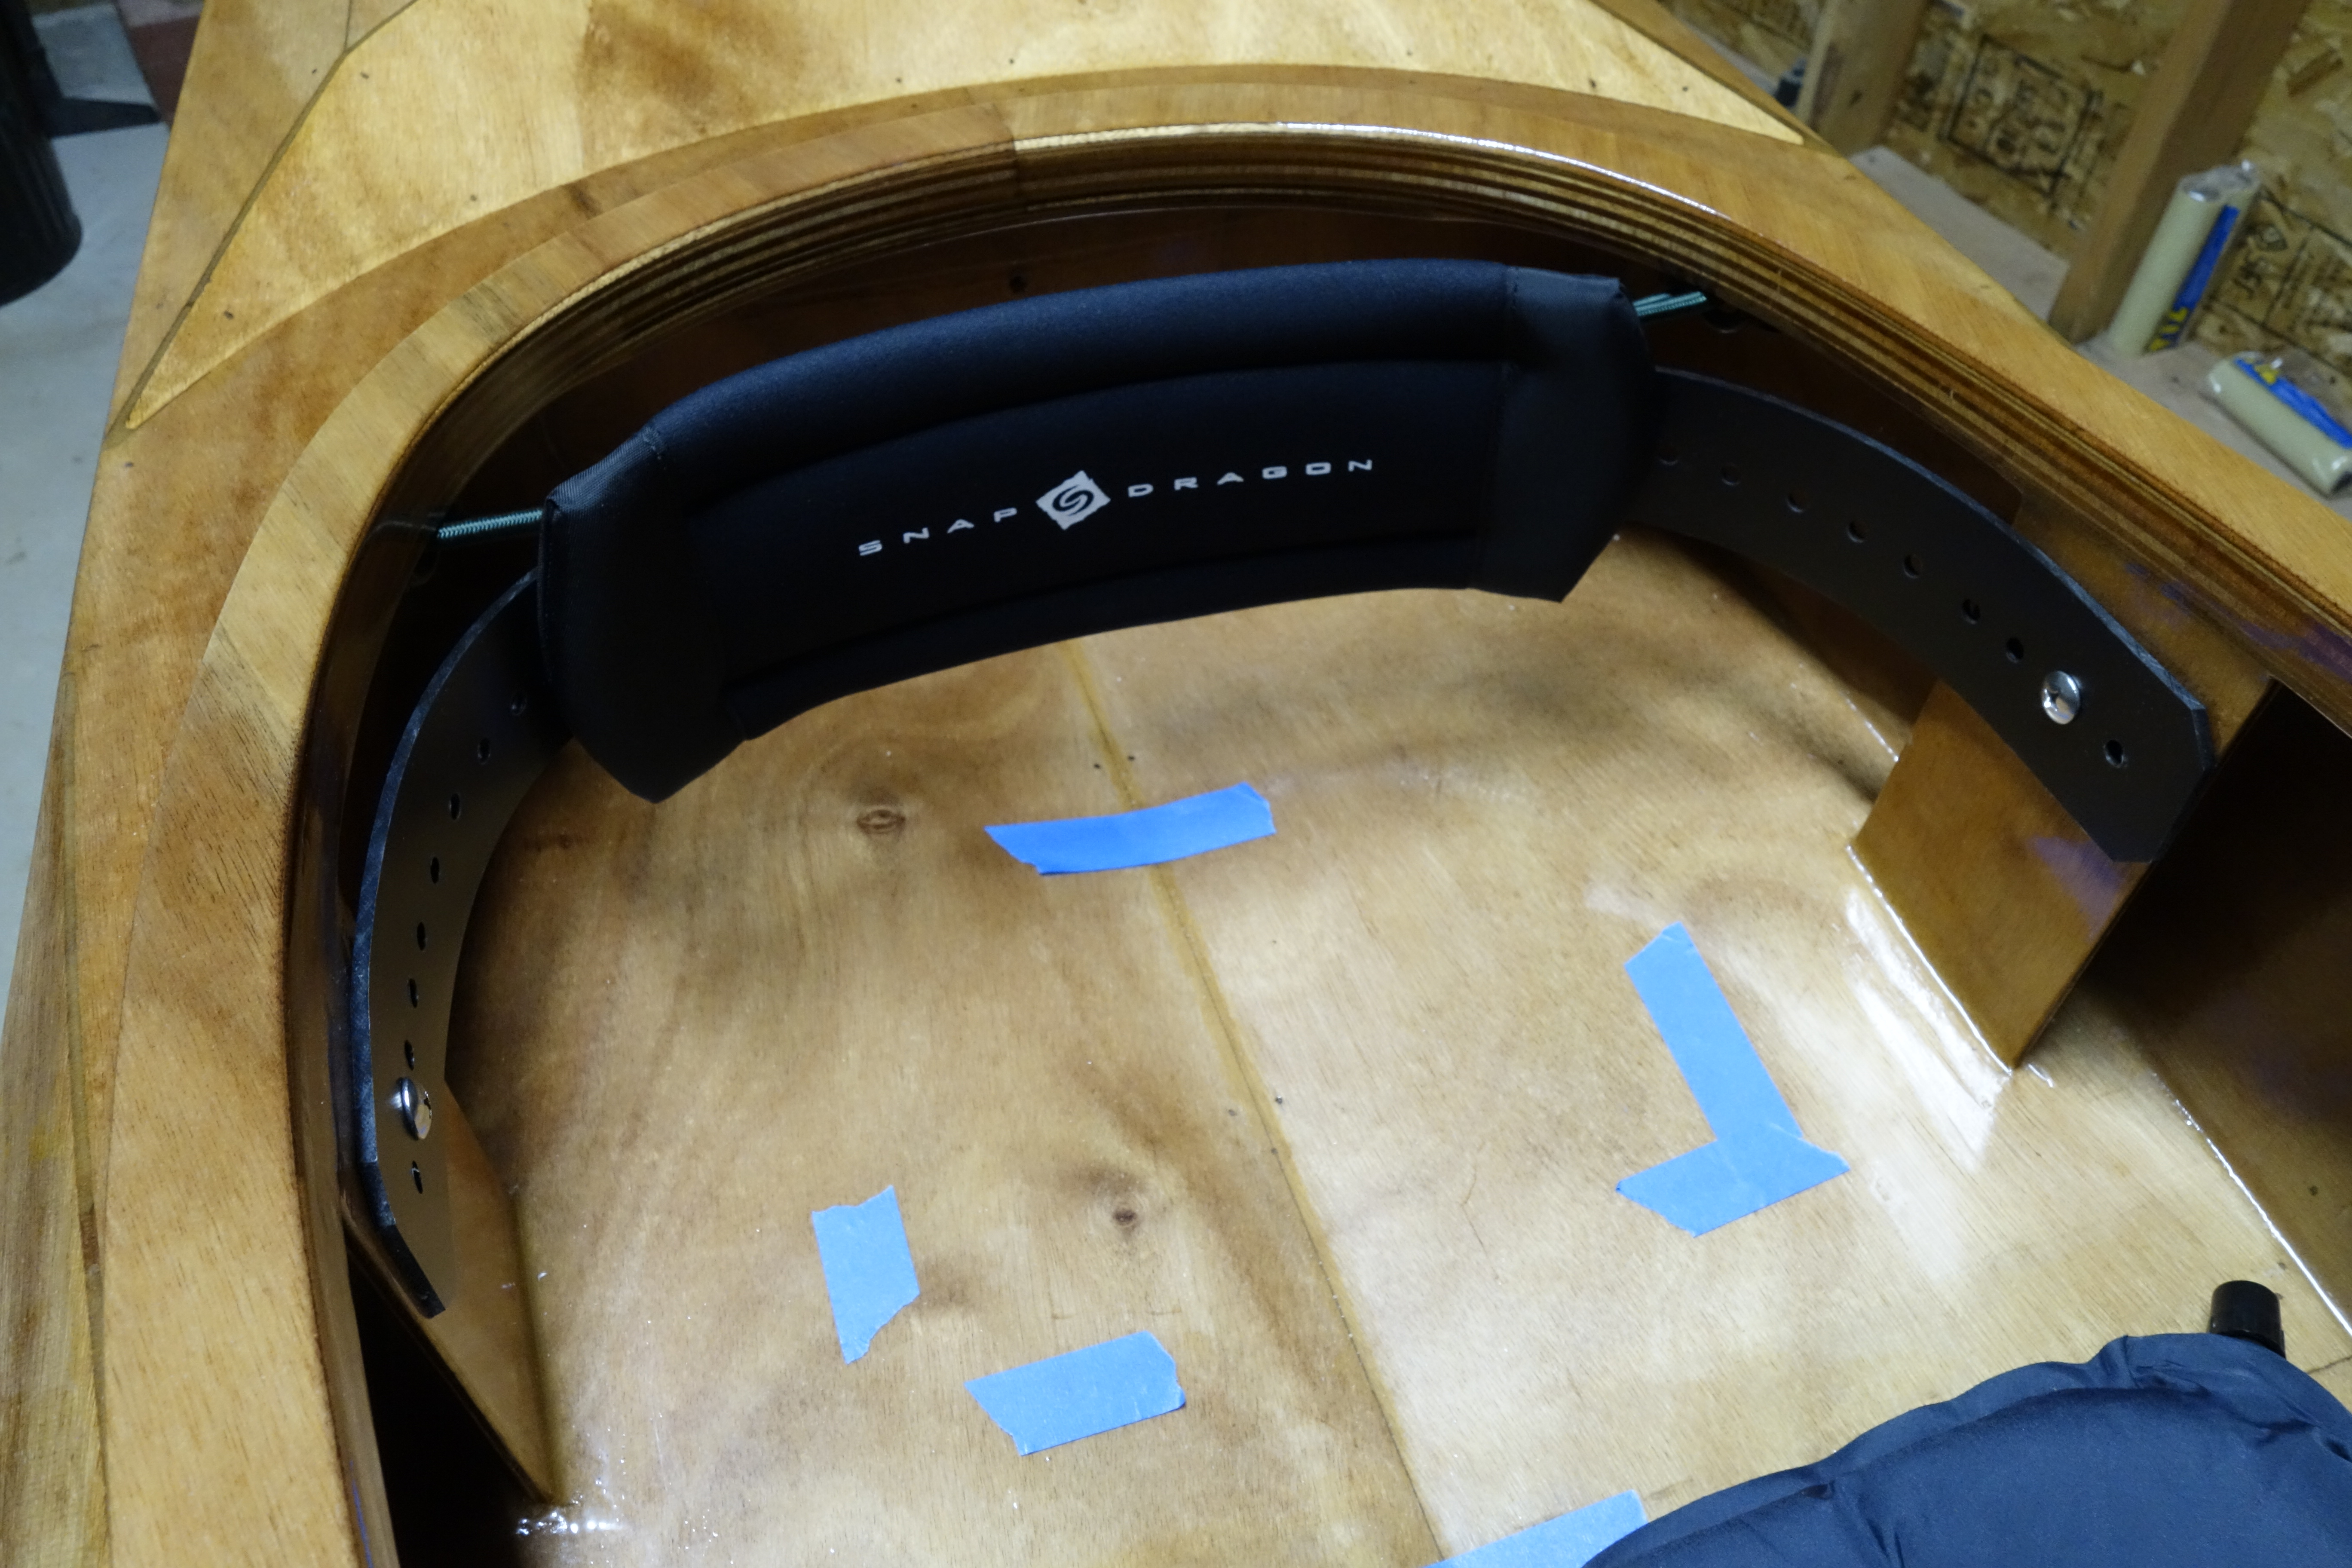
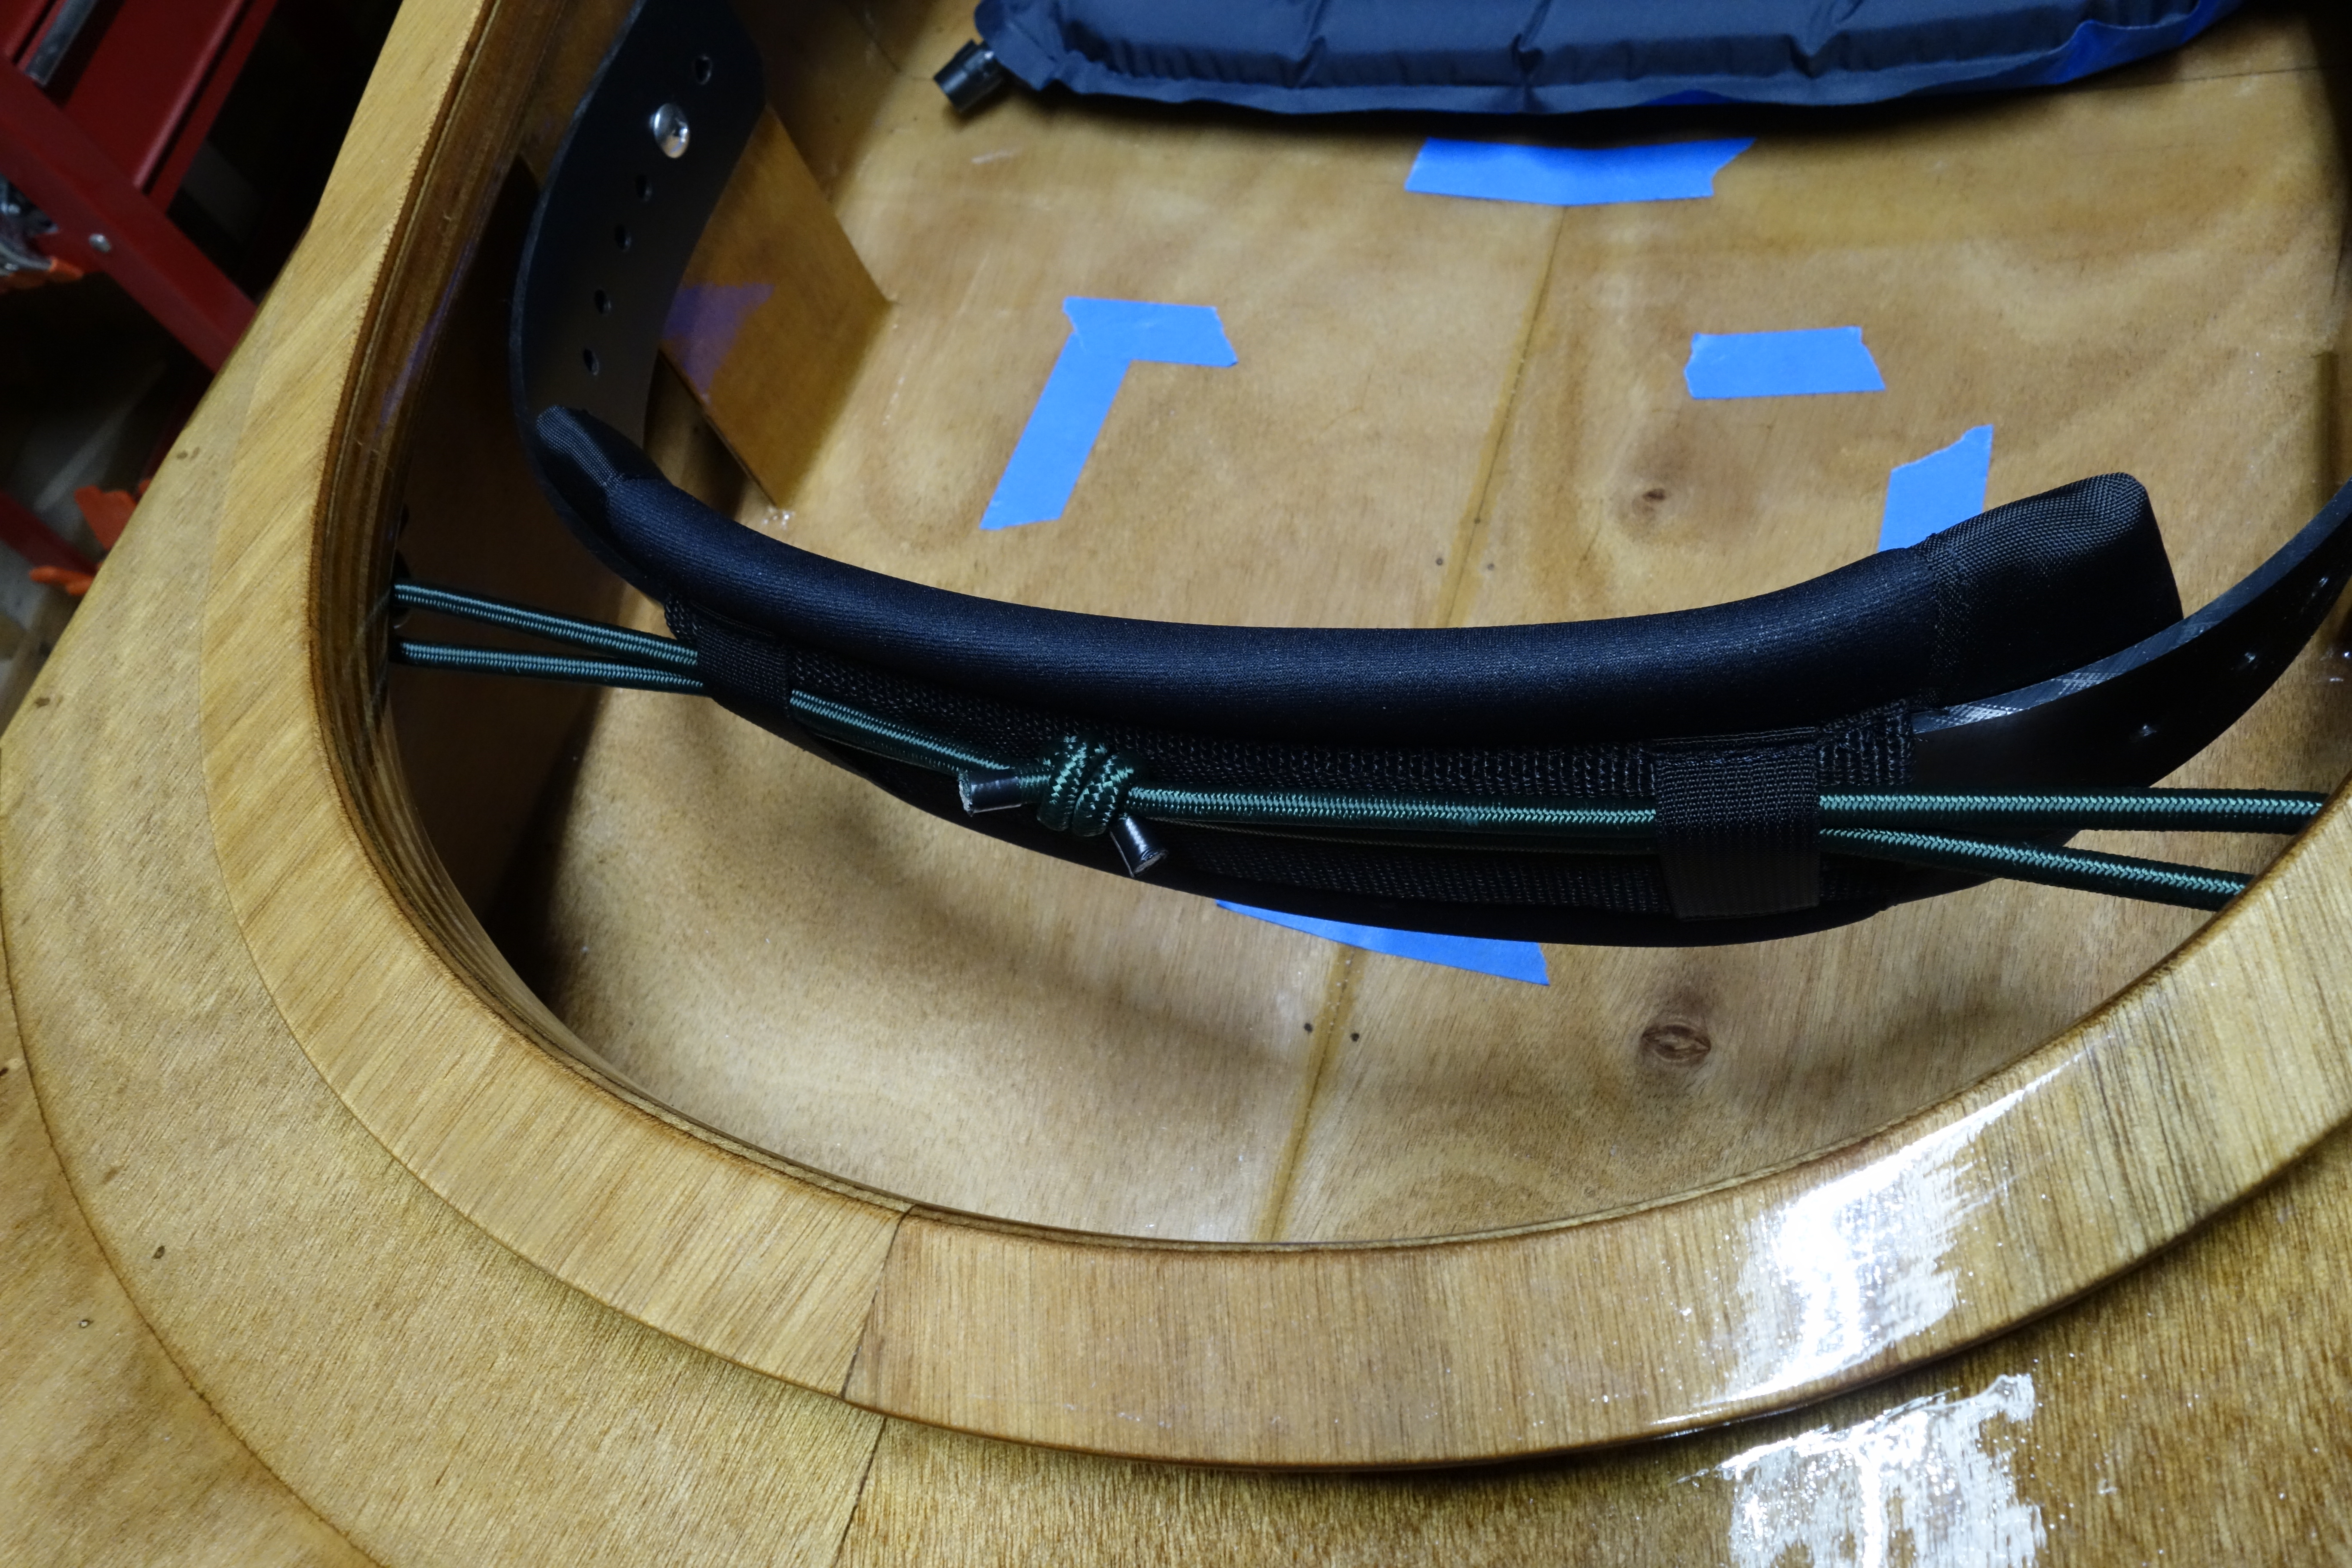
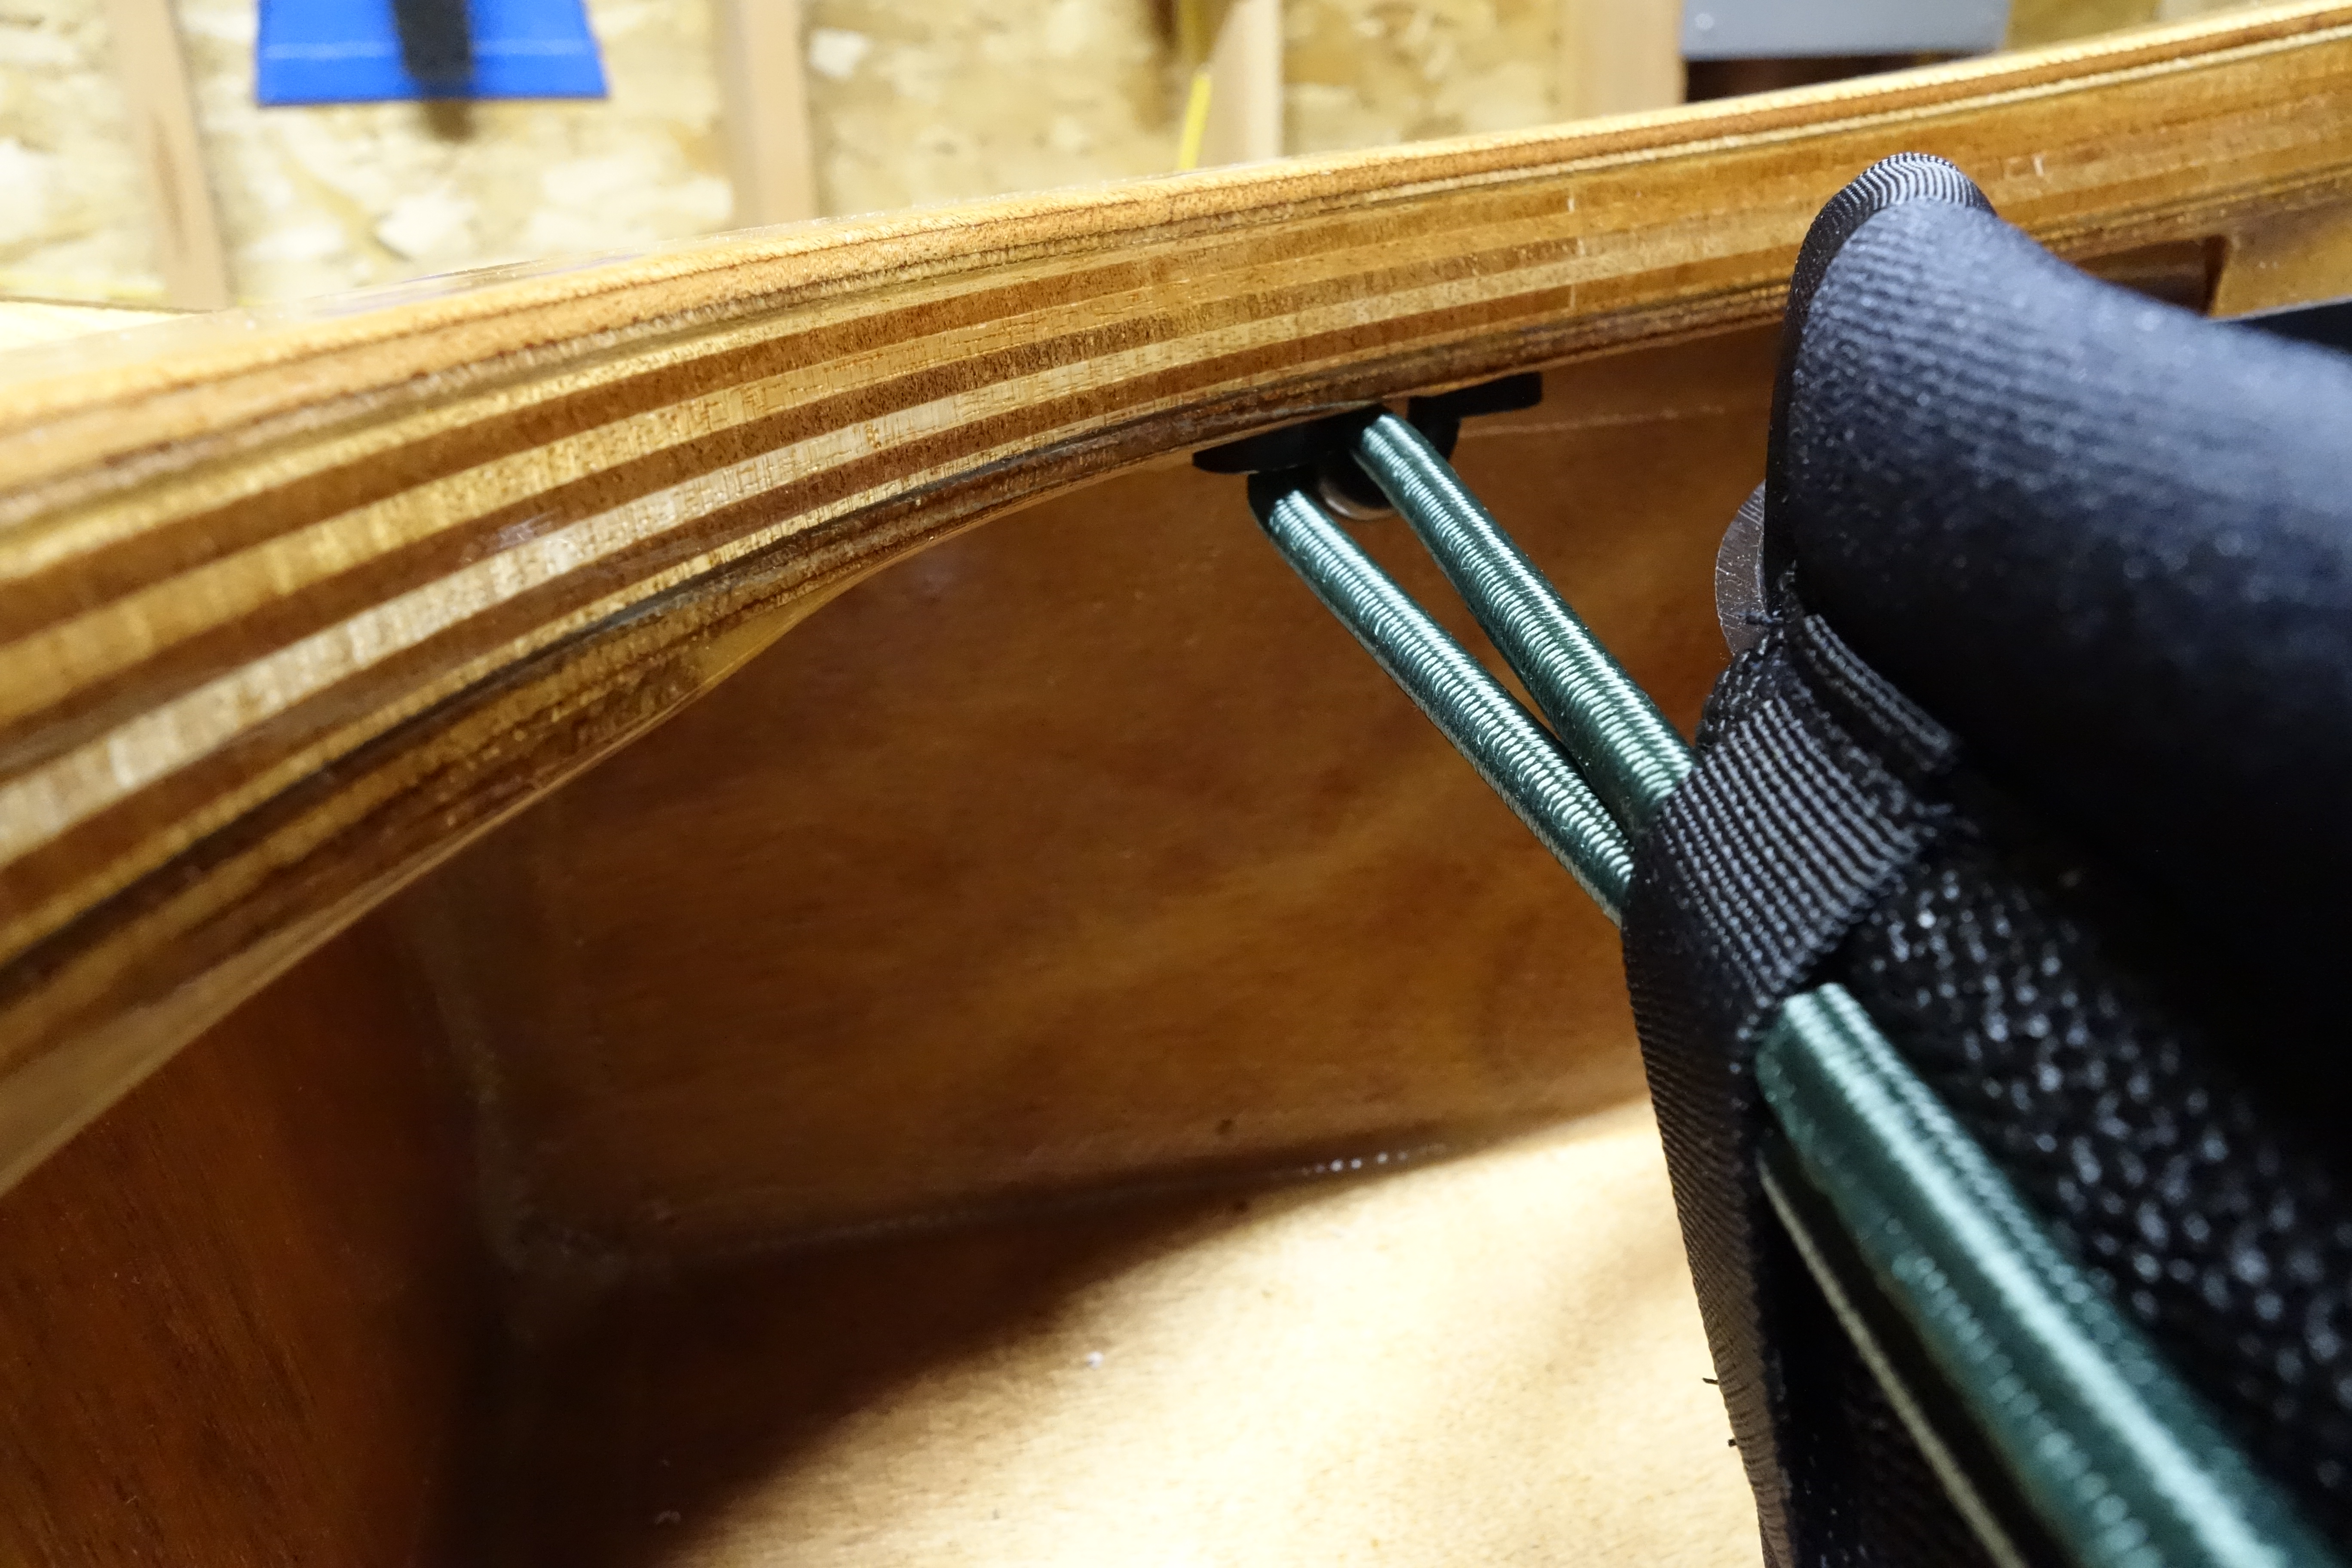
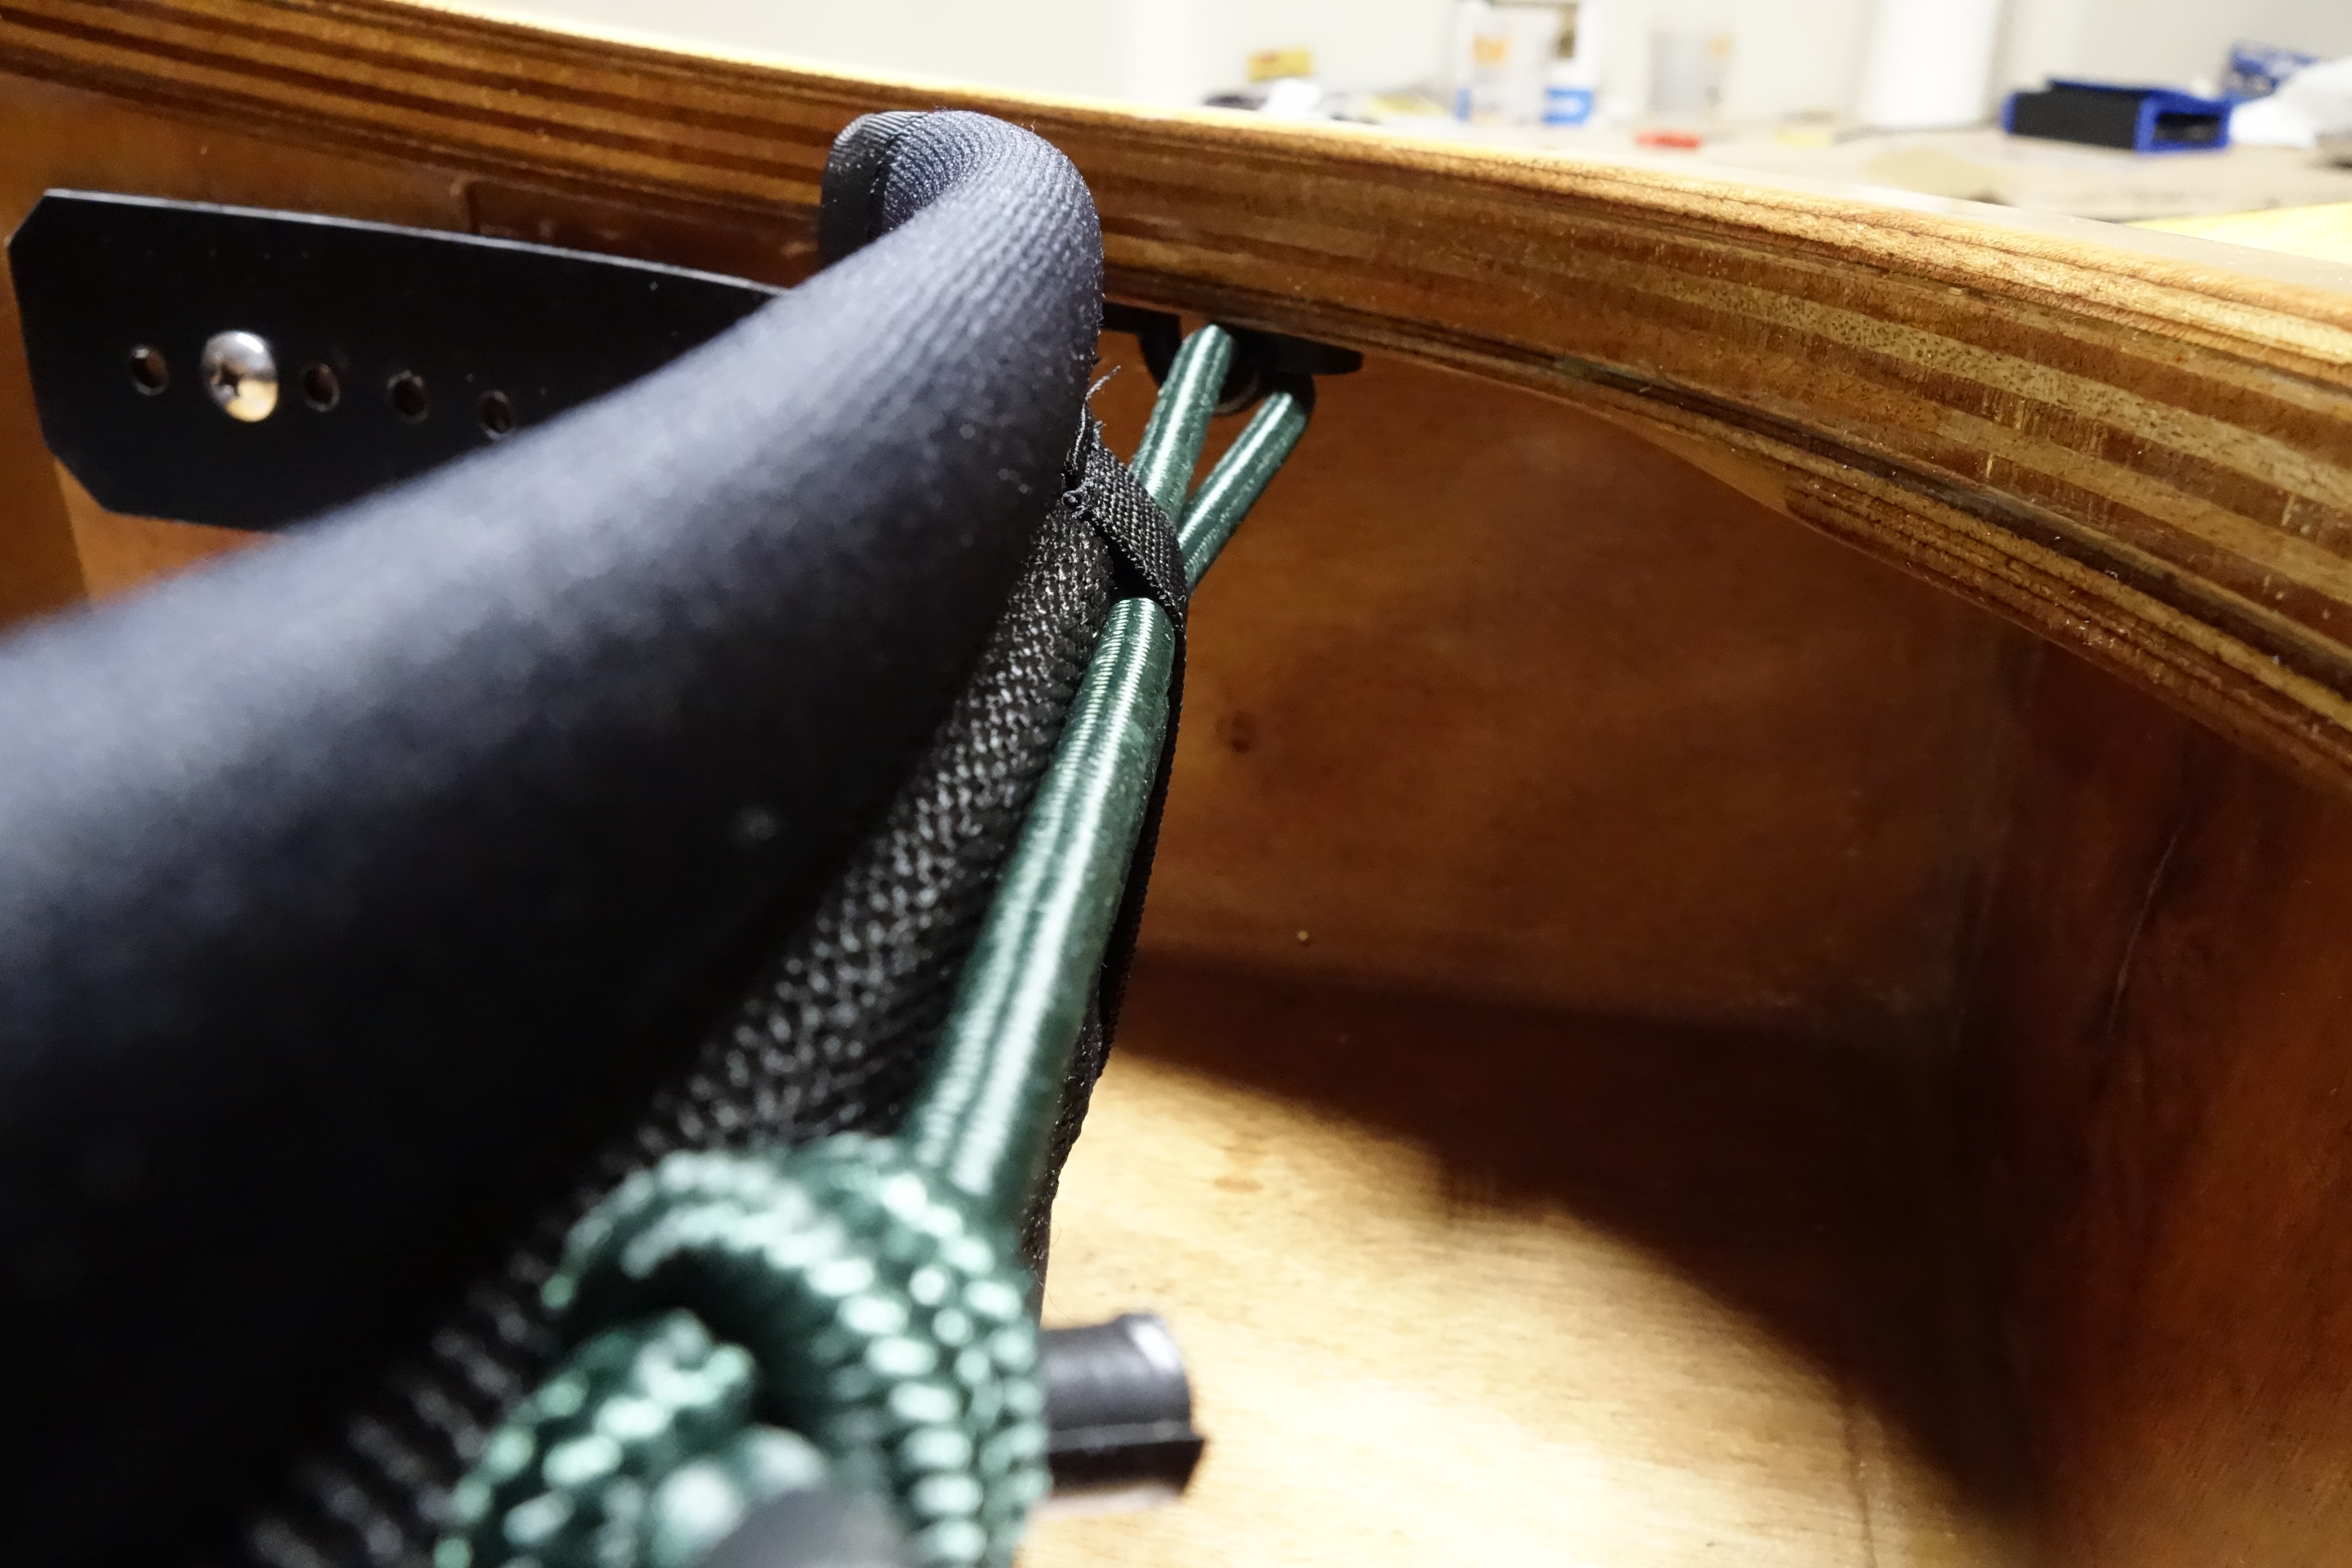
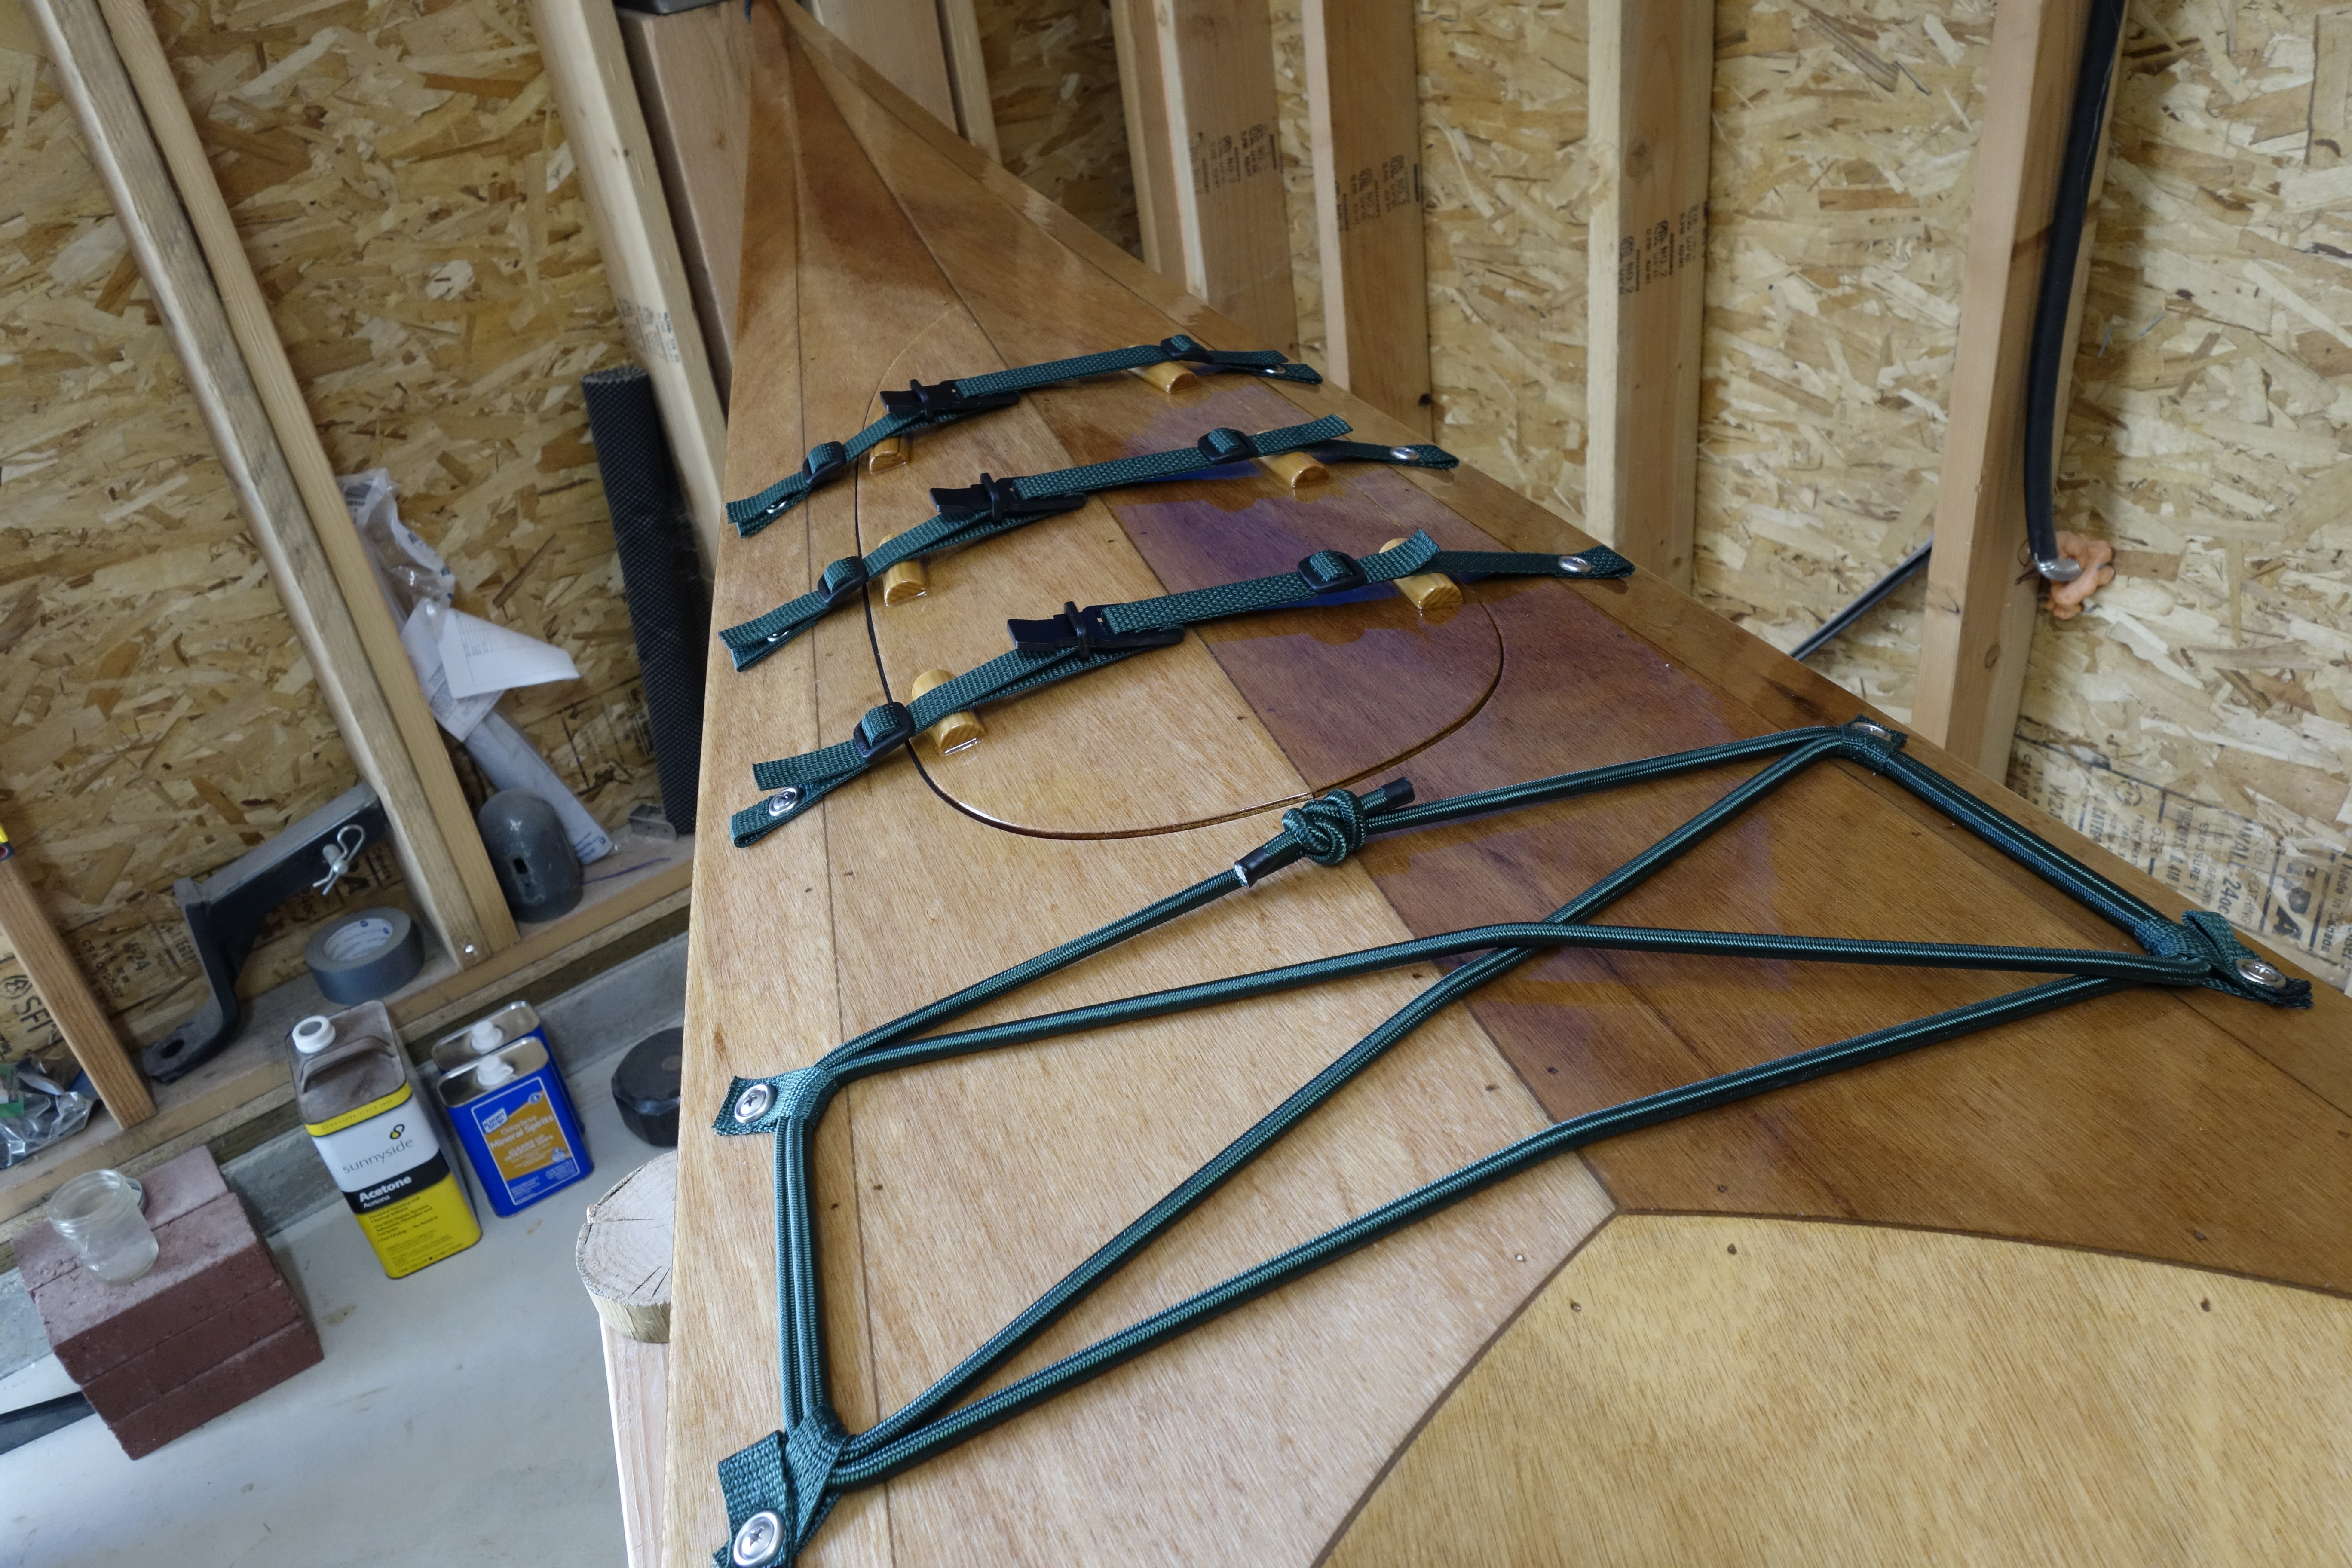
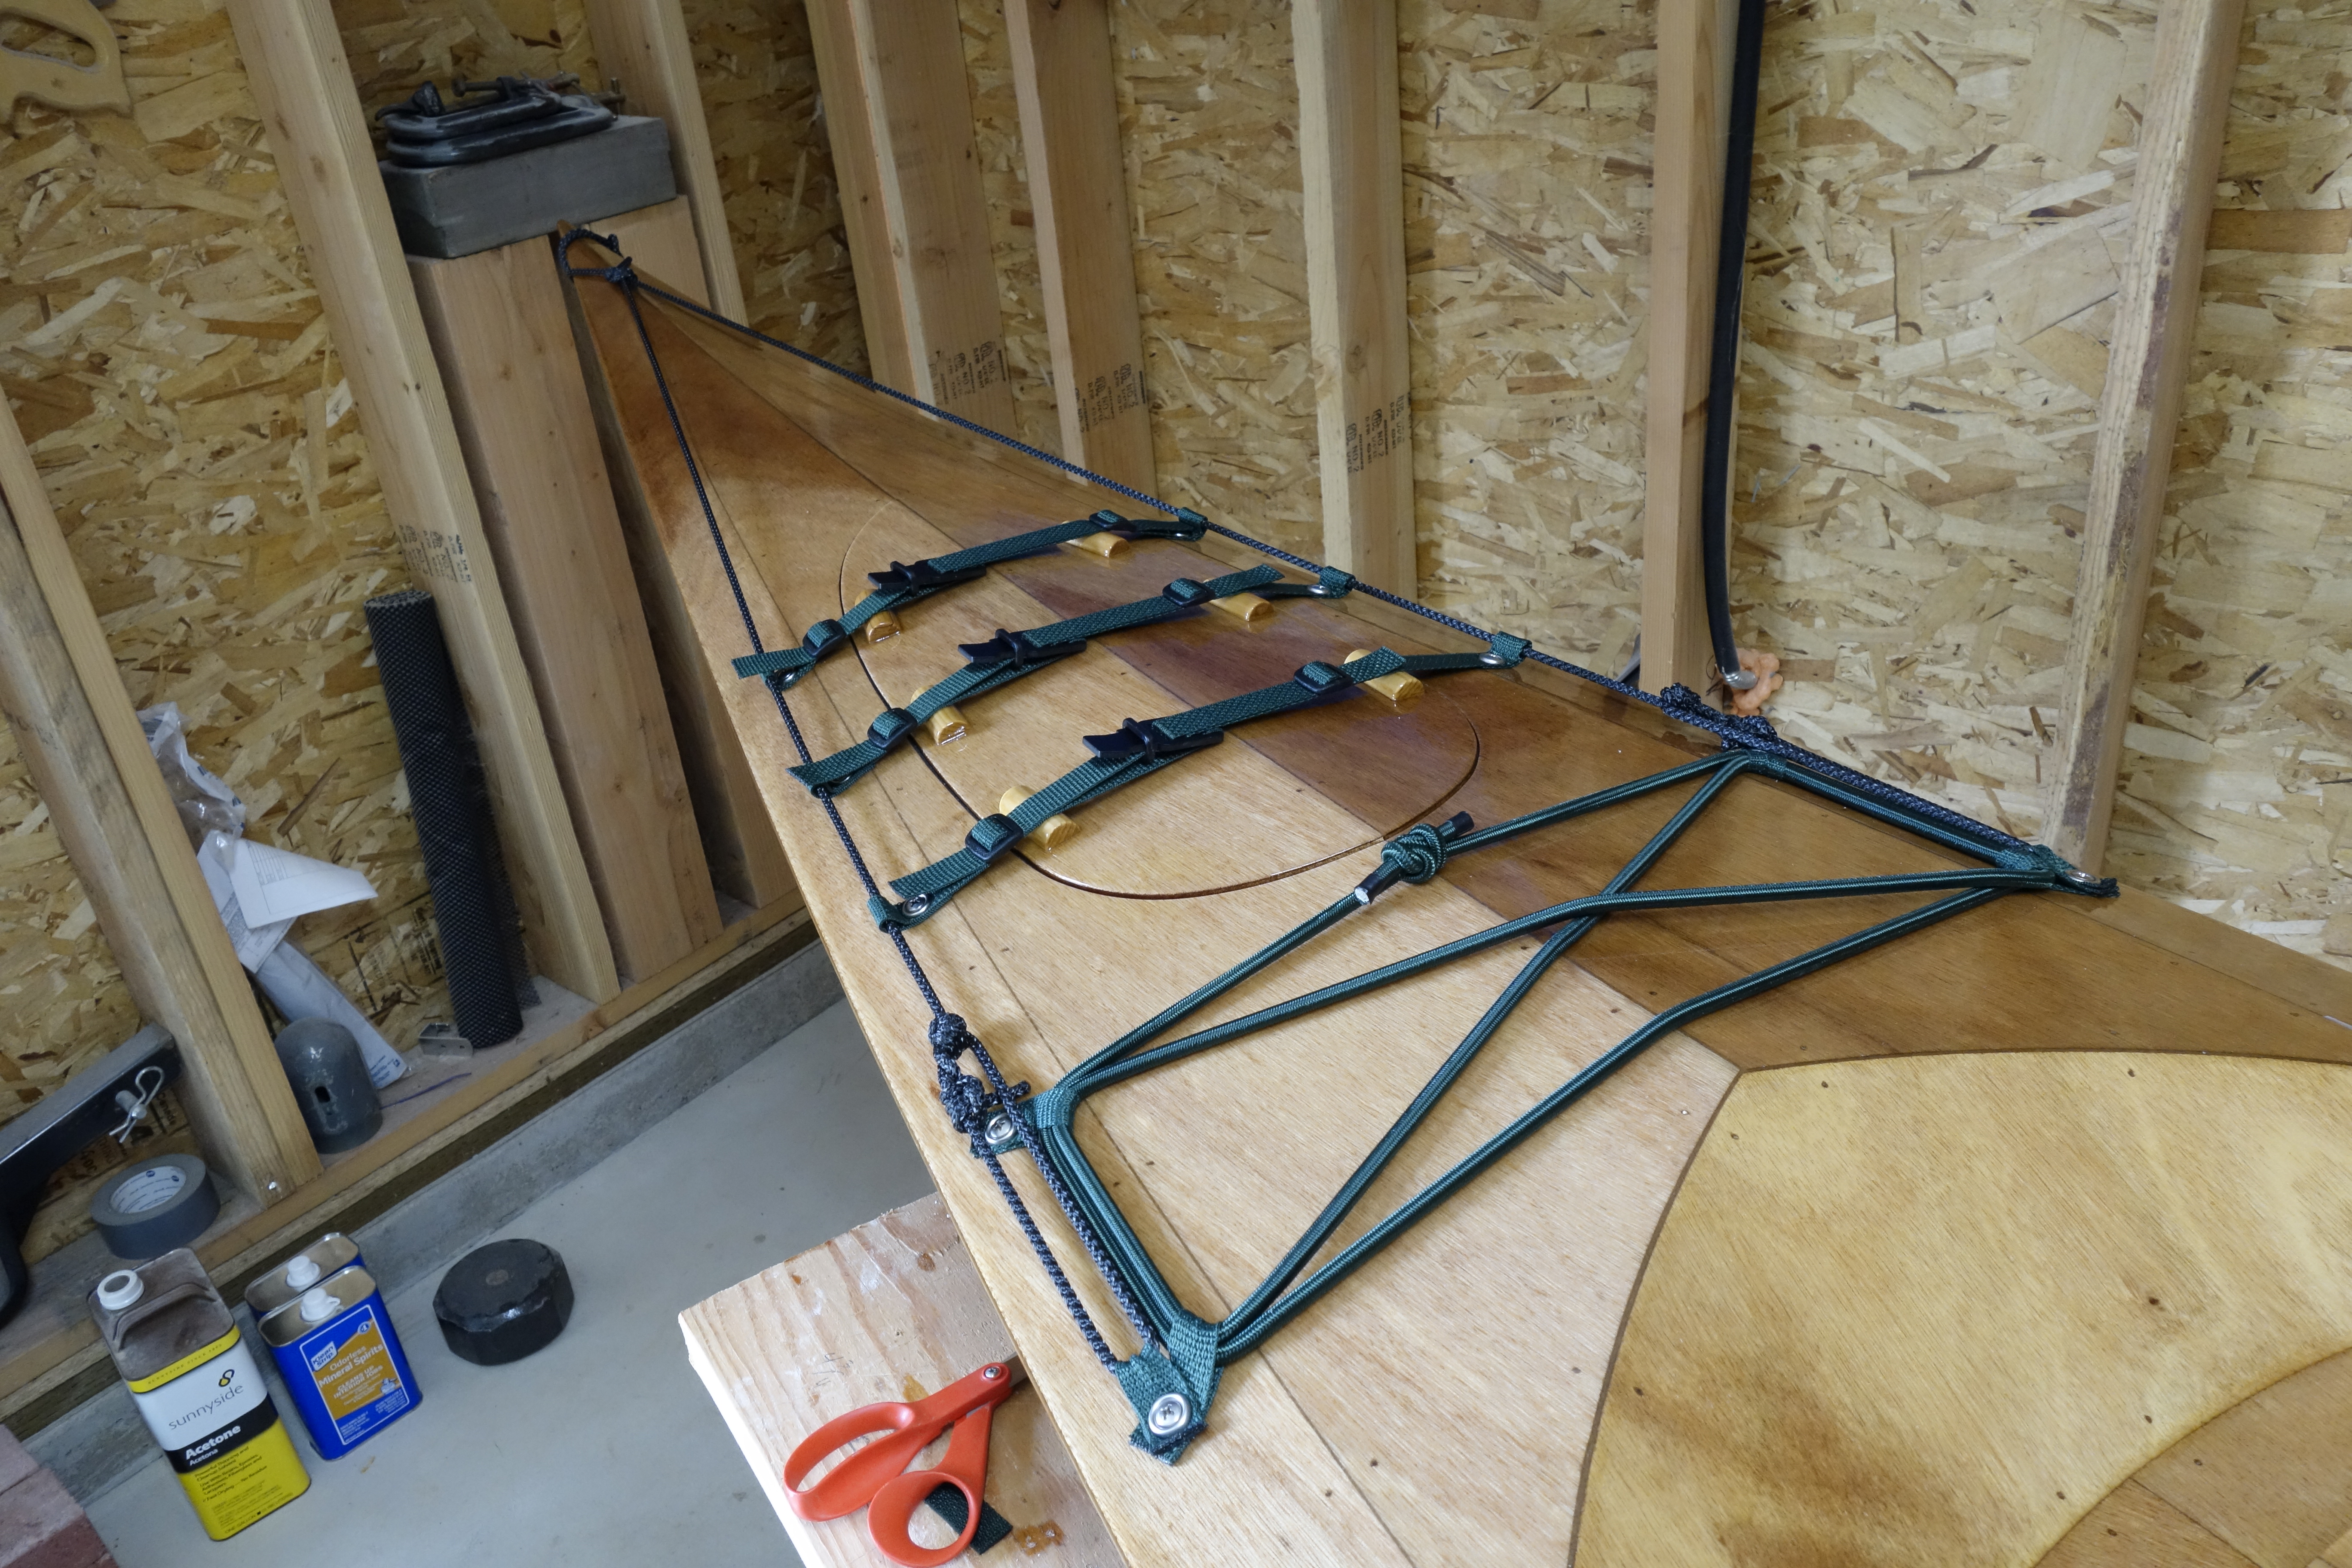
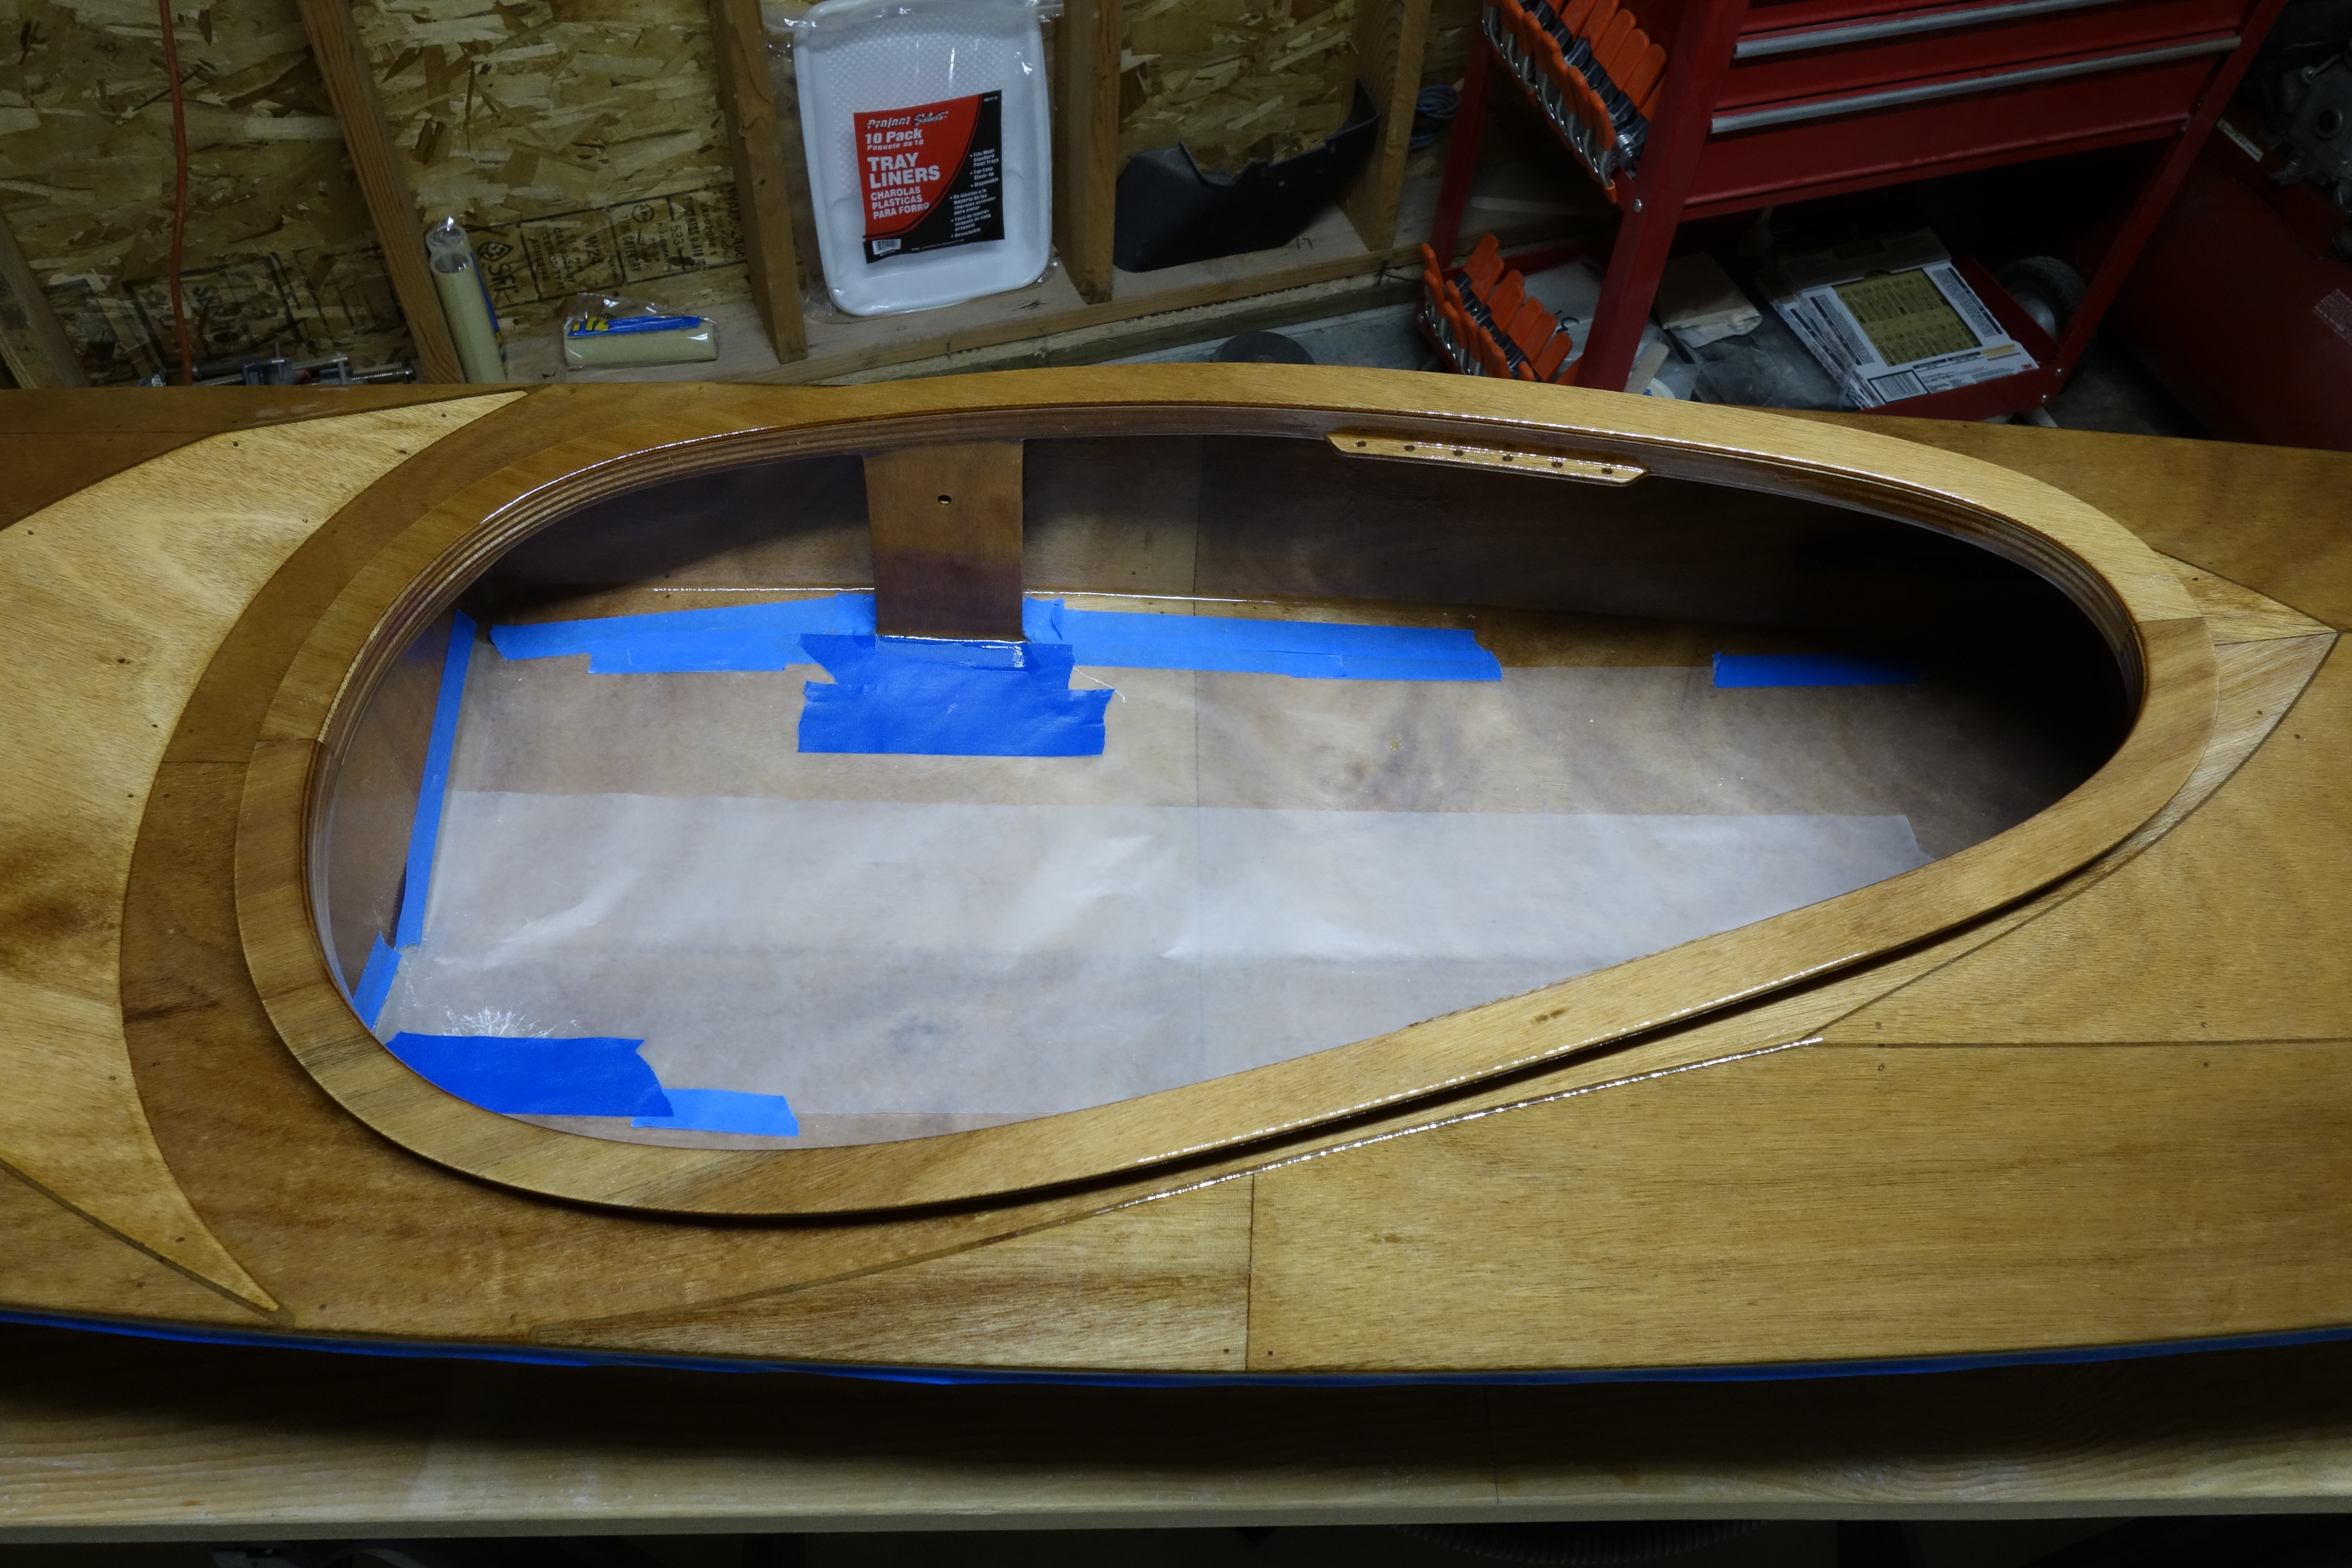
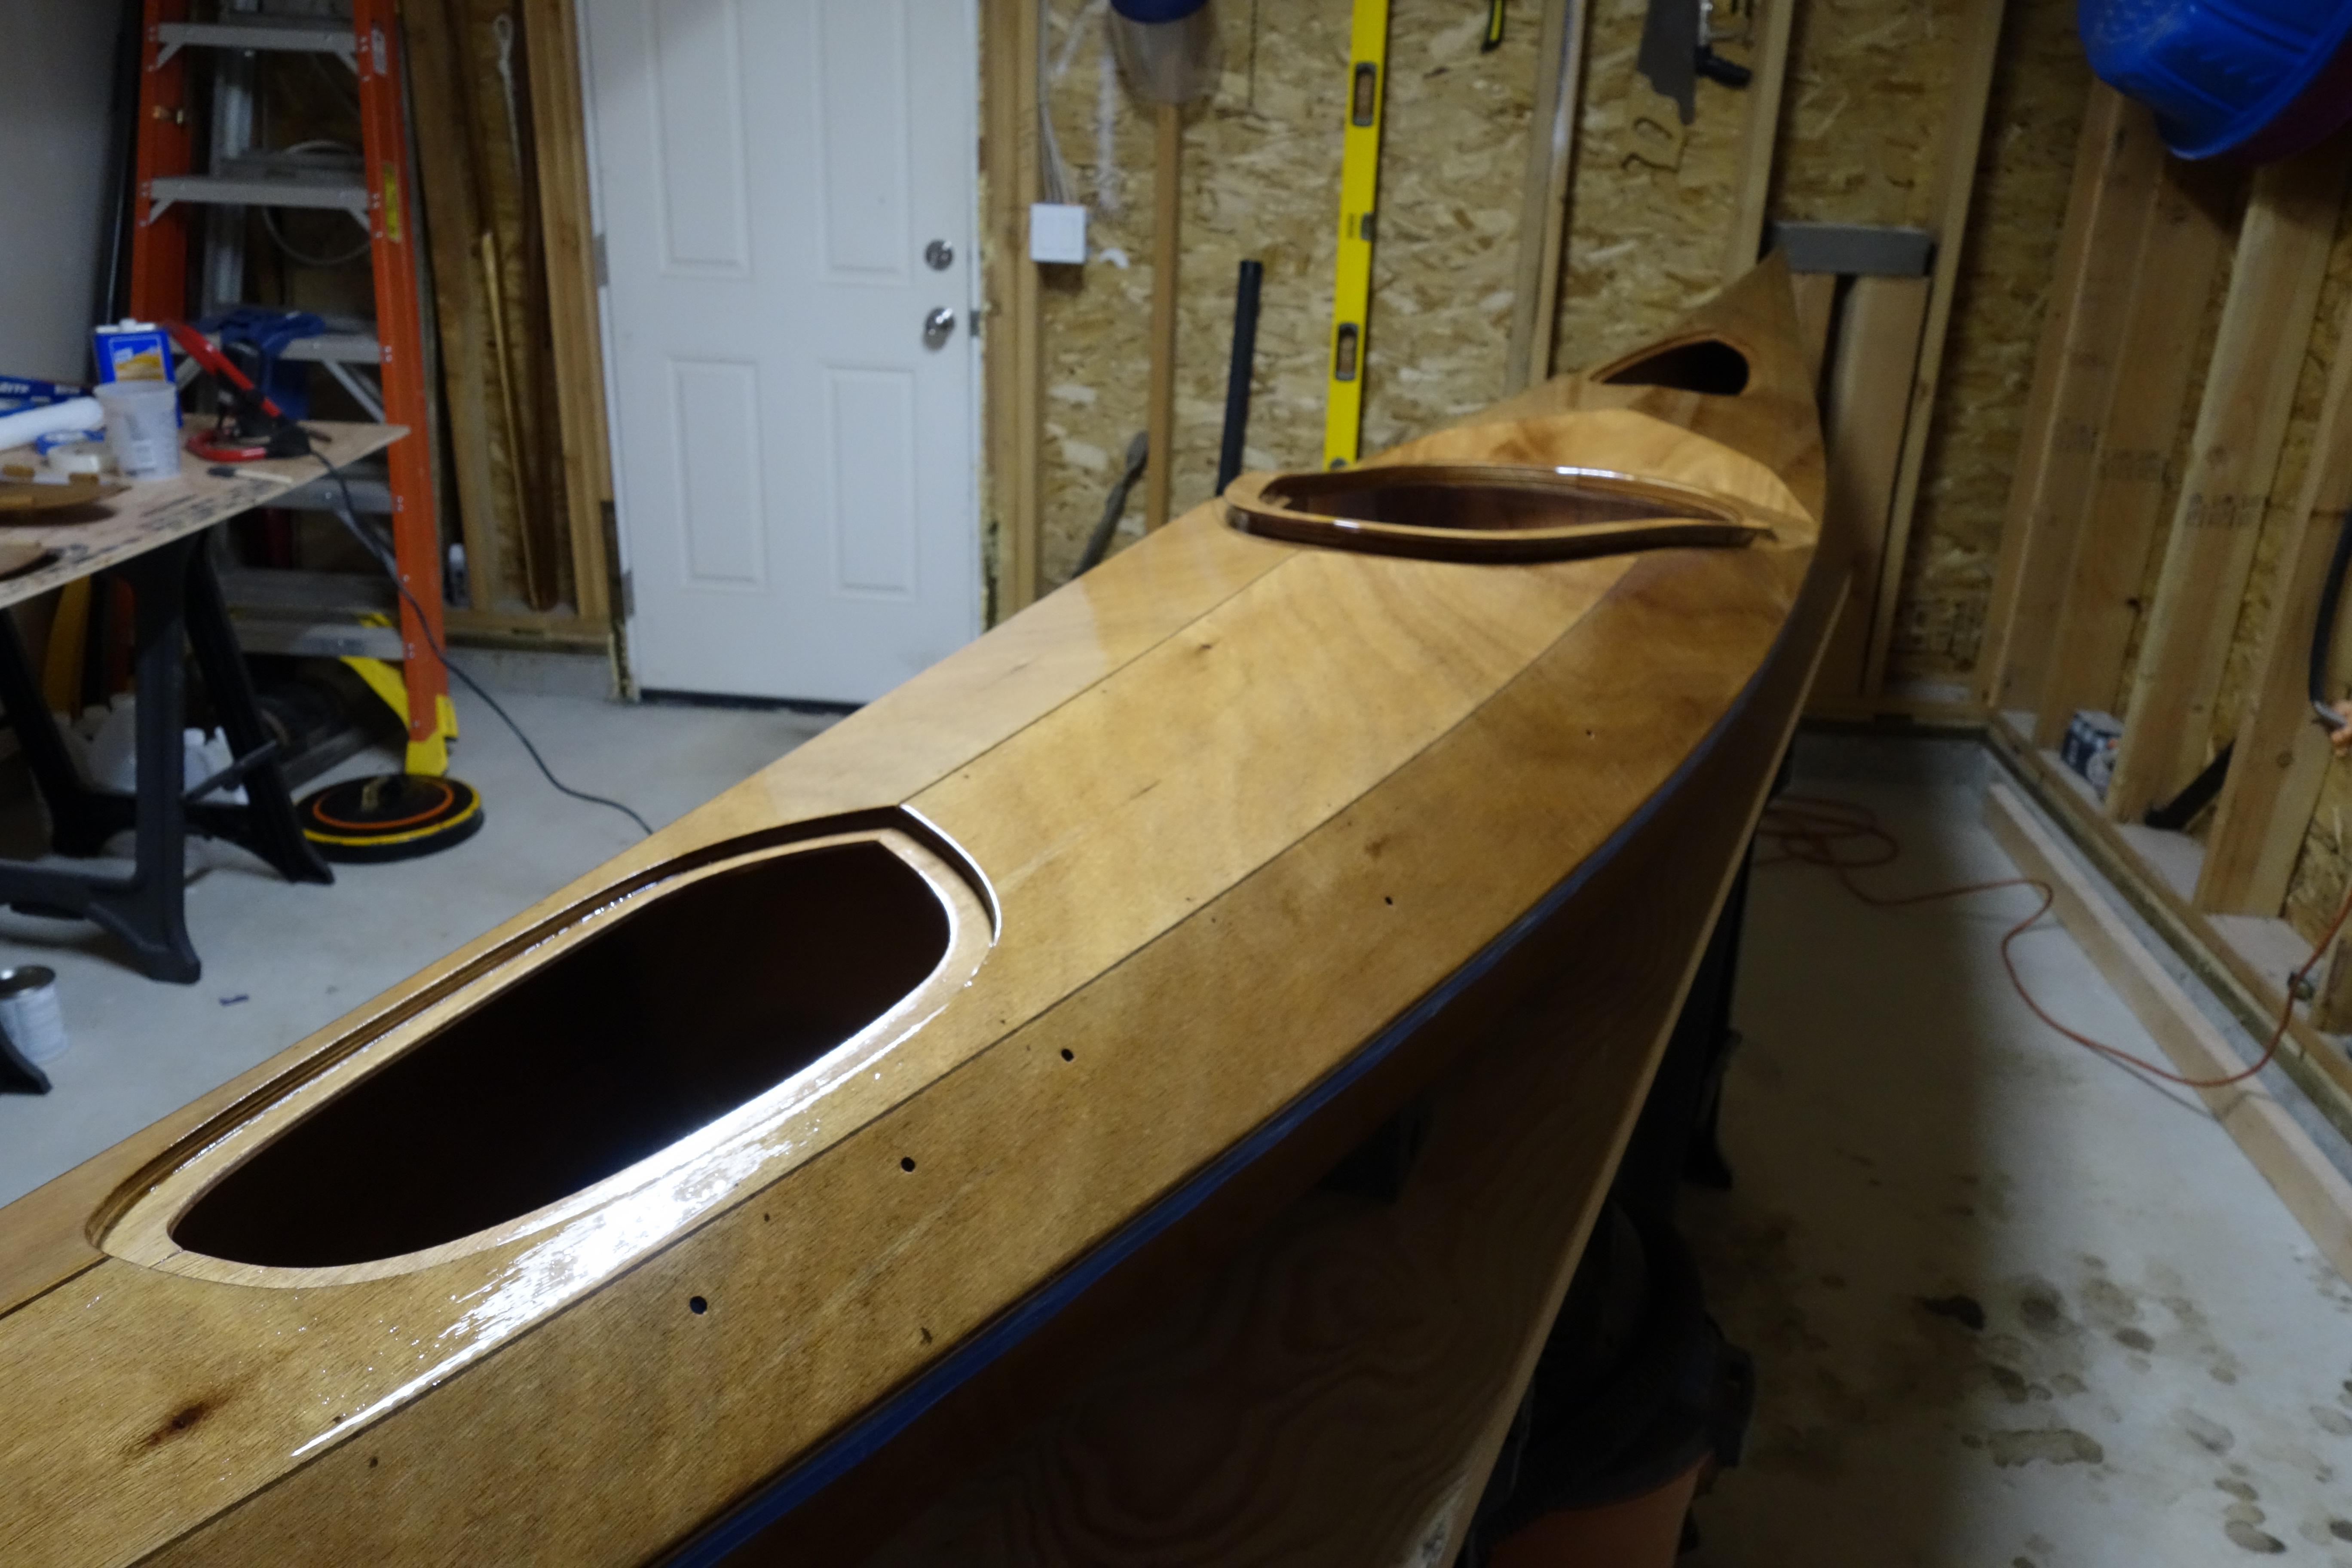
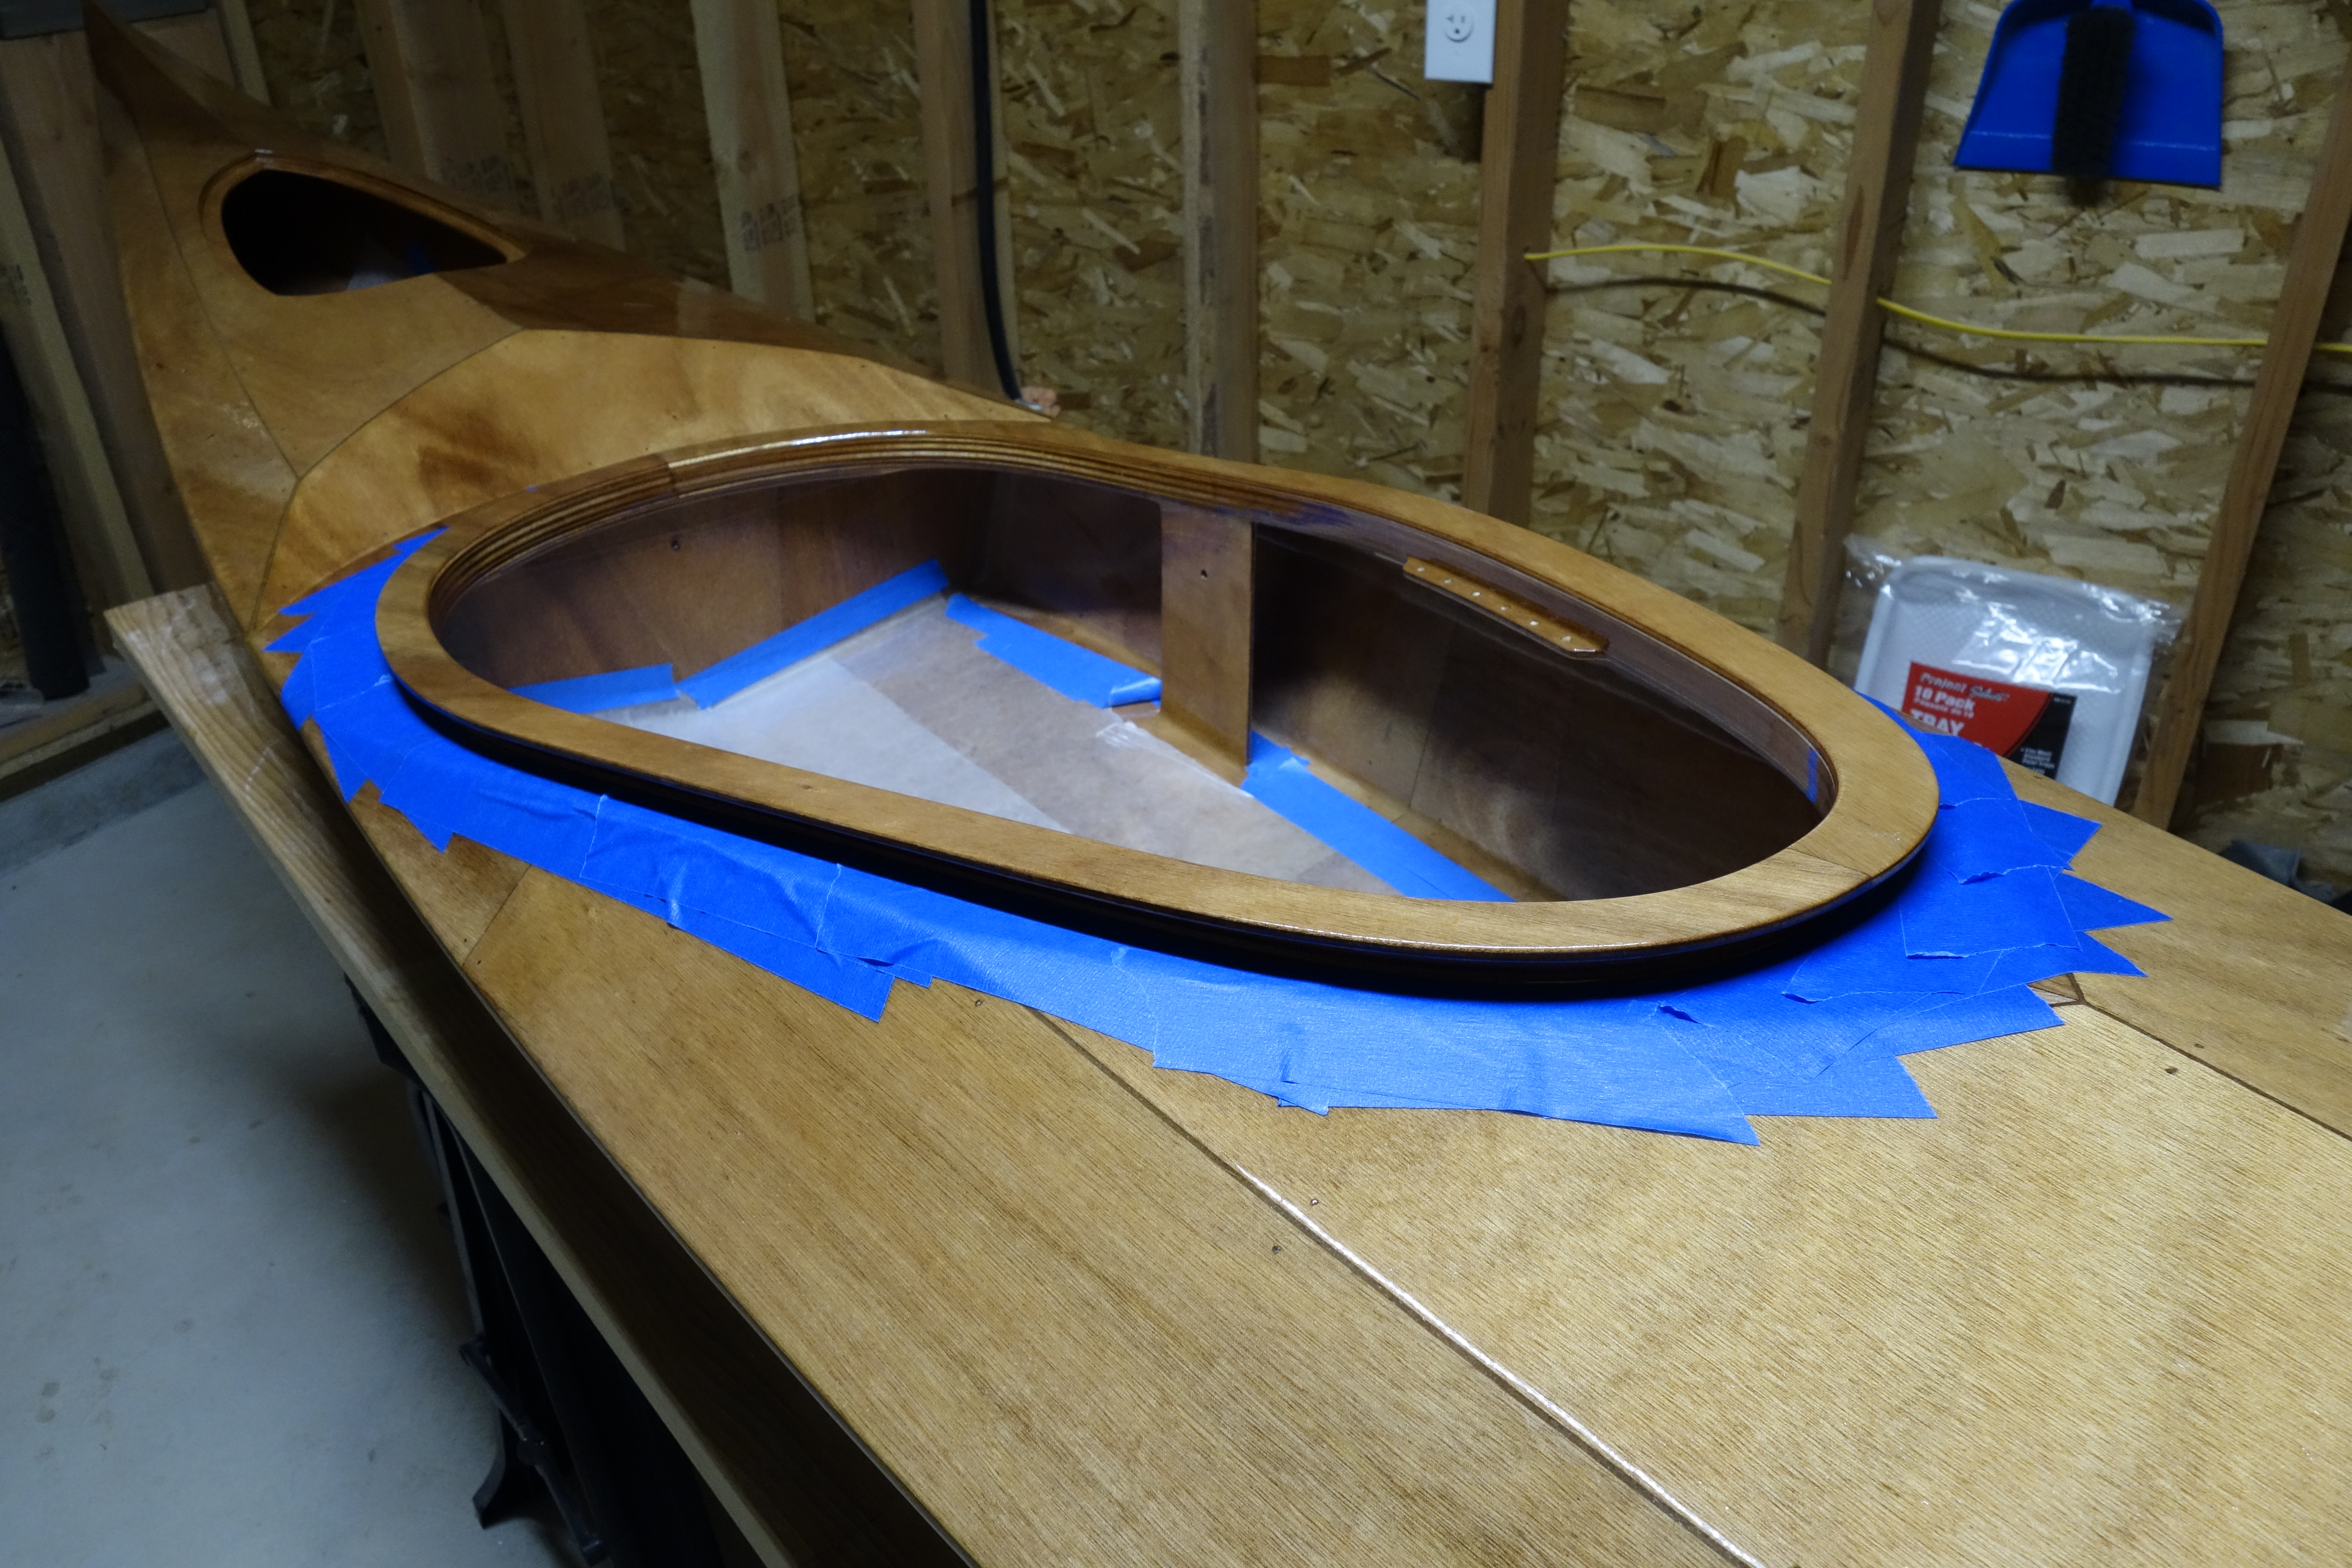
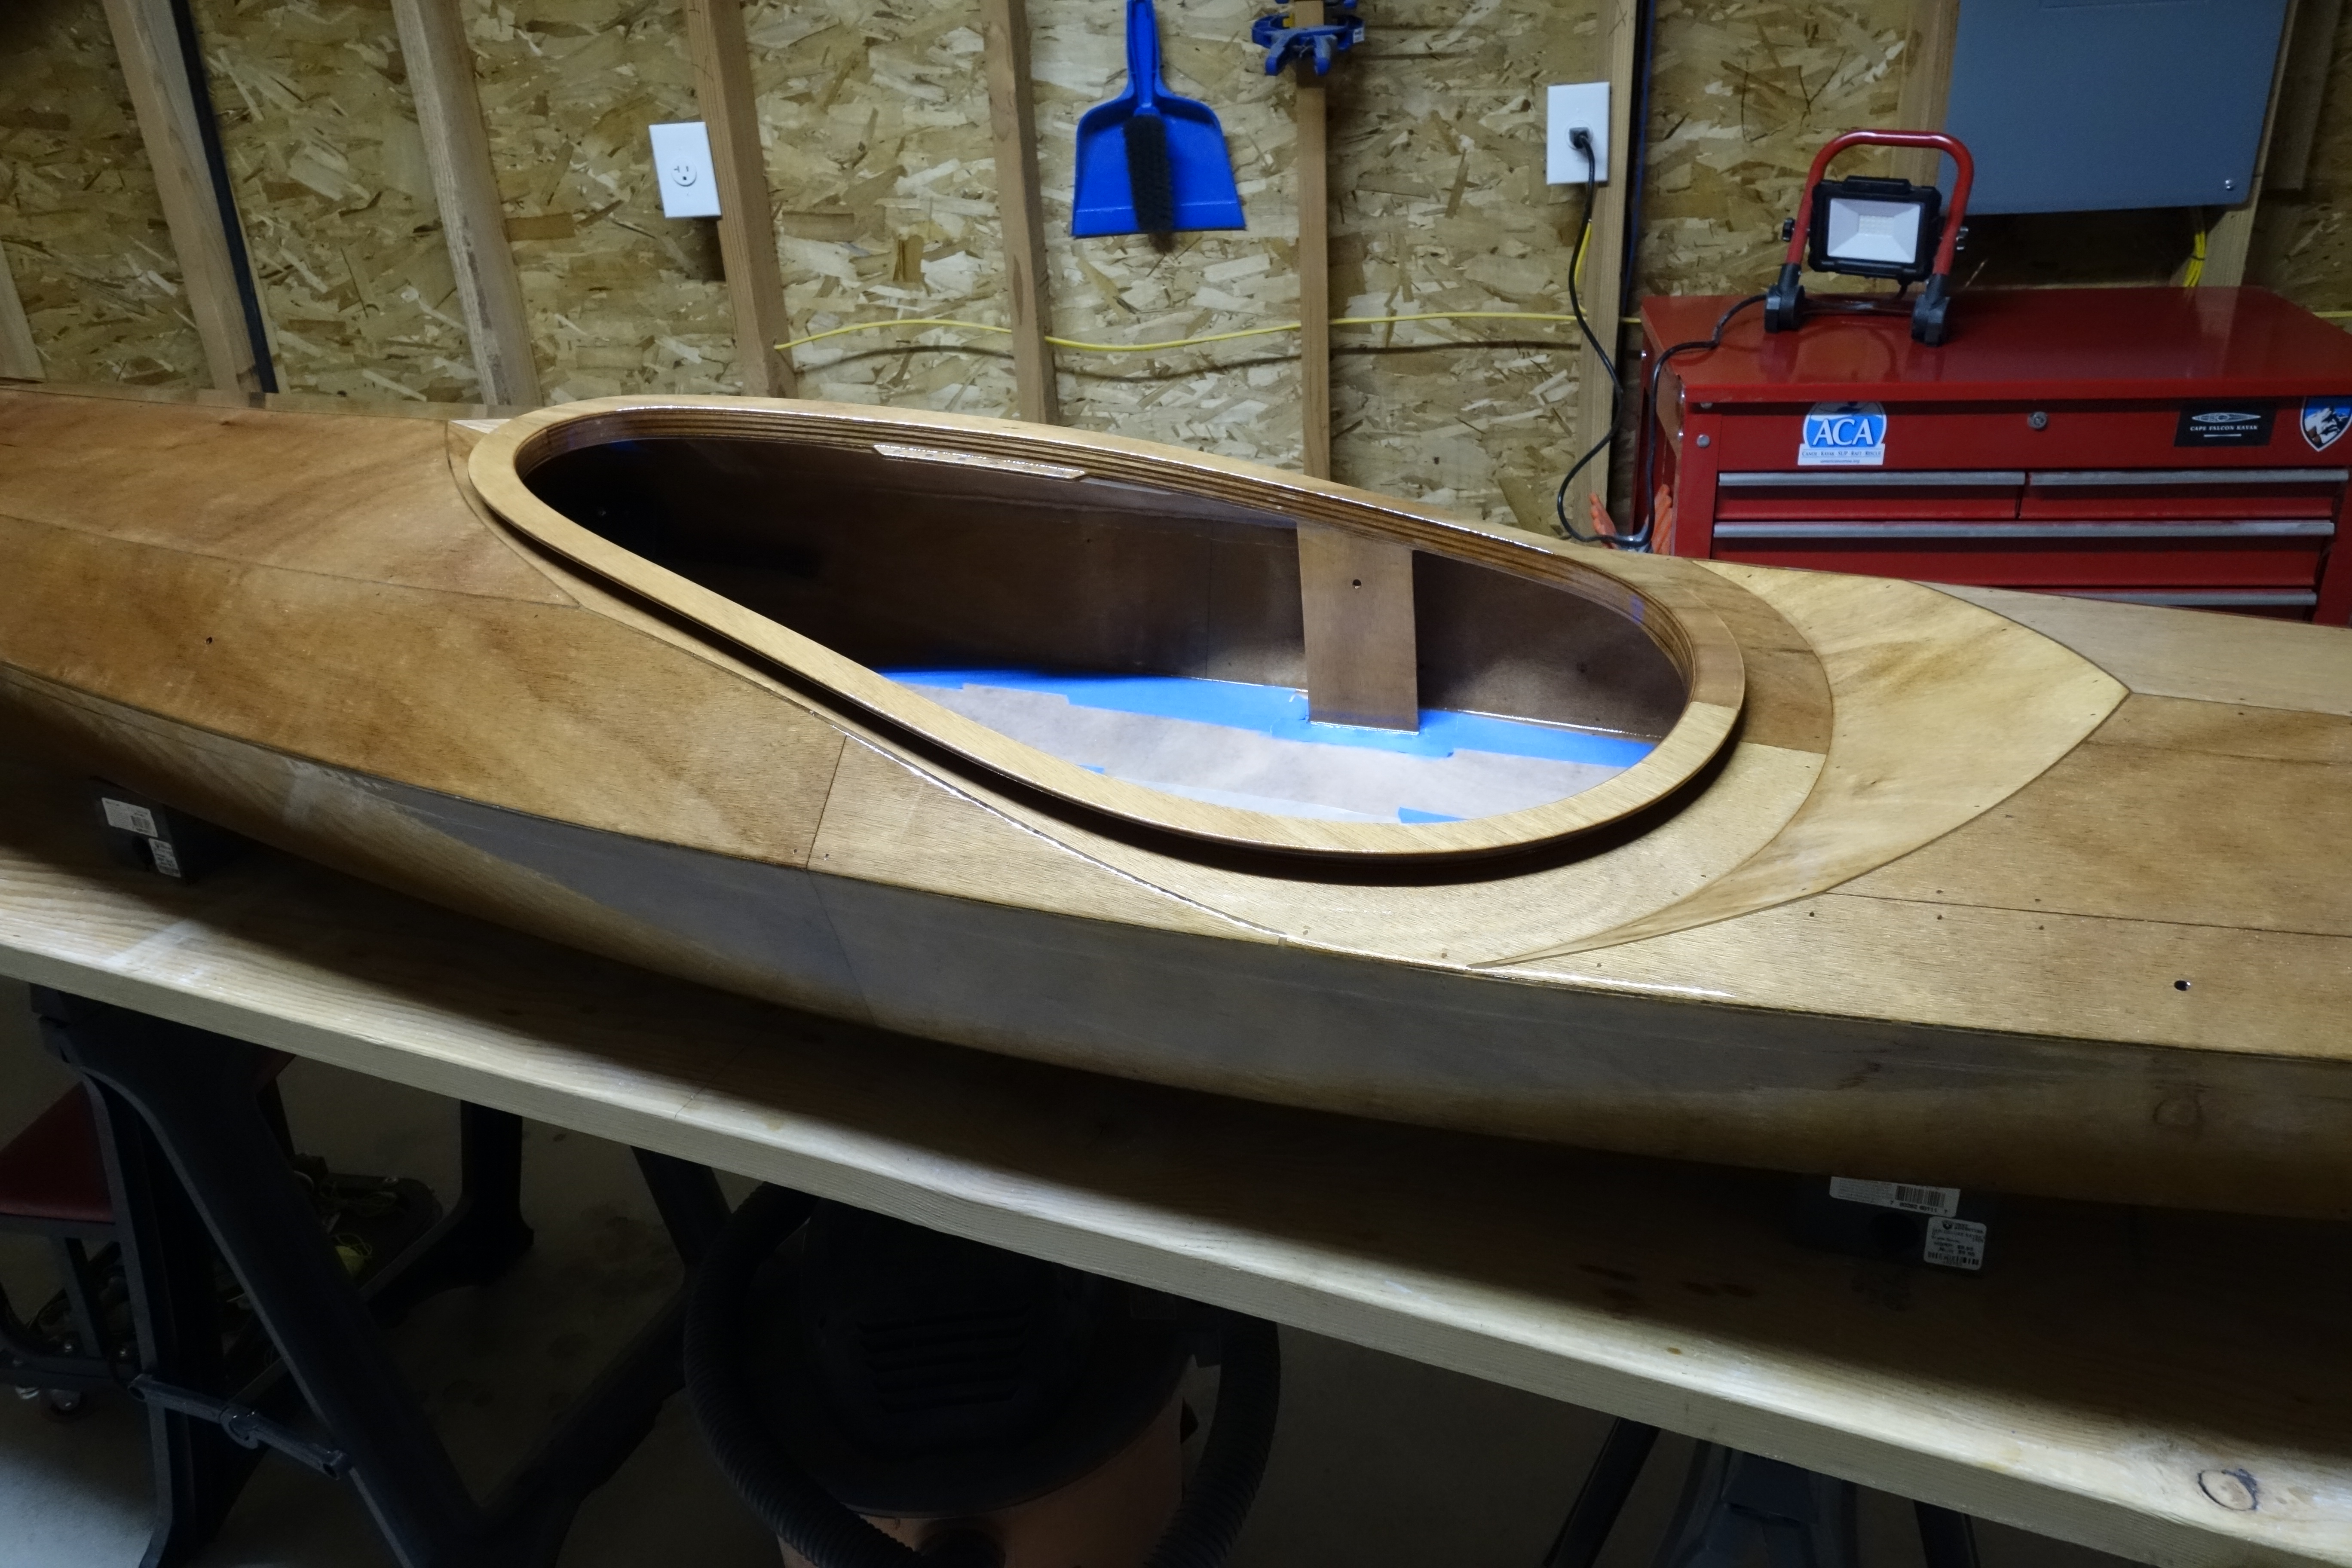
This afternoon after work I had time to get the back band and its suspension installed. This involved mounting a couple of hard pad eyes under the cockpit coaming, which made me nervous in a way that almost no other process in building the entire kayak did. To make the pilot holes for the fasteners I had to turn the kayak upside down and use a 90 degree drill adapter to drill through the underside of the deck and into the cockpit coaming. I was worried about not drilling straight and blowing out the side of the coaming, or even drilling right through the top of the coaming. Either would have been a disaster. It was only four little holes for the fasteners, but it sure felt to me like there was not much margin for error. It worked out fine. I wish I’d put them an inch further aft, but they seem to work fine, so all’s well that ends well I suppose.
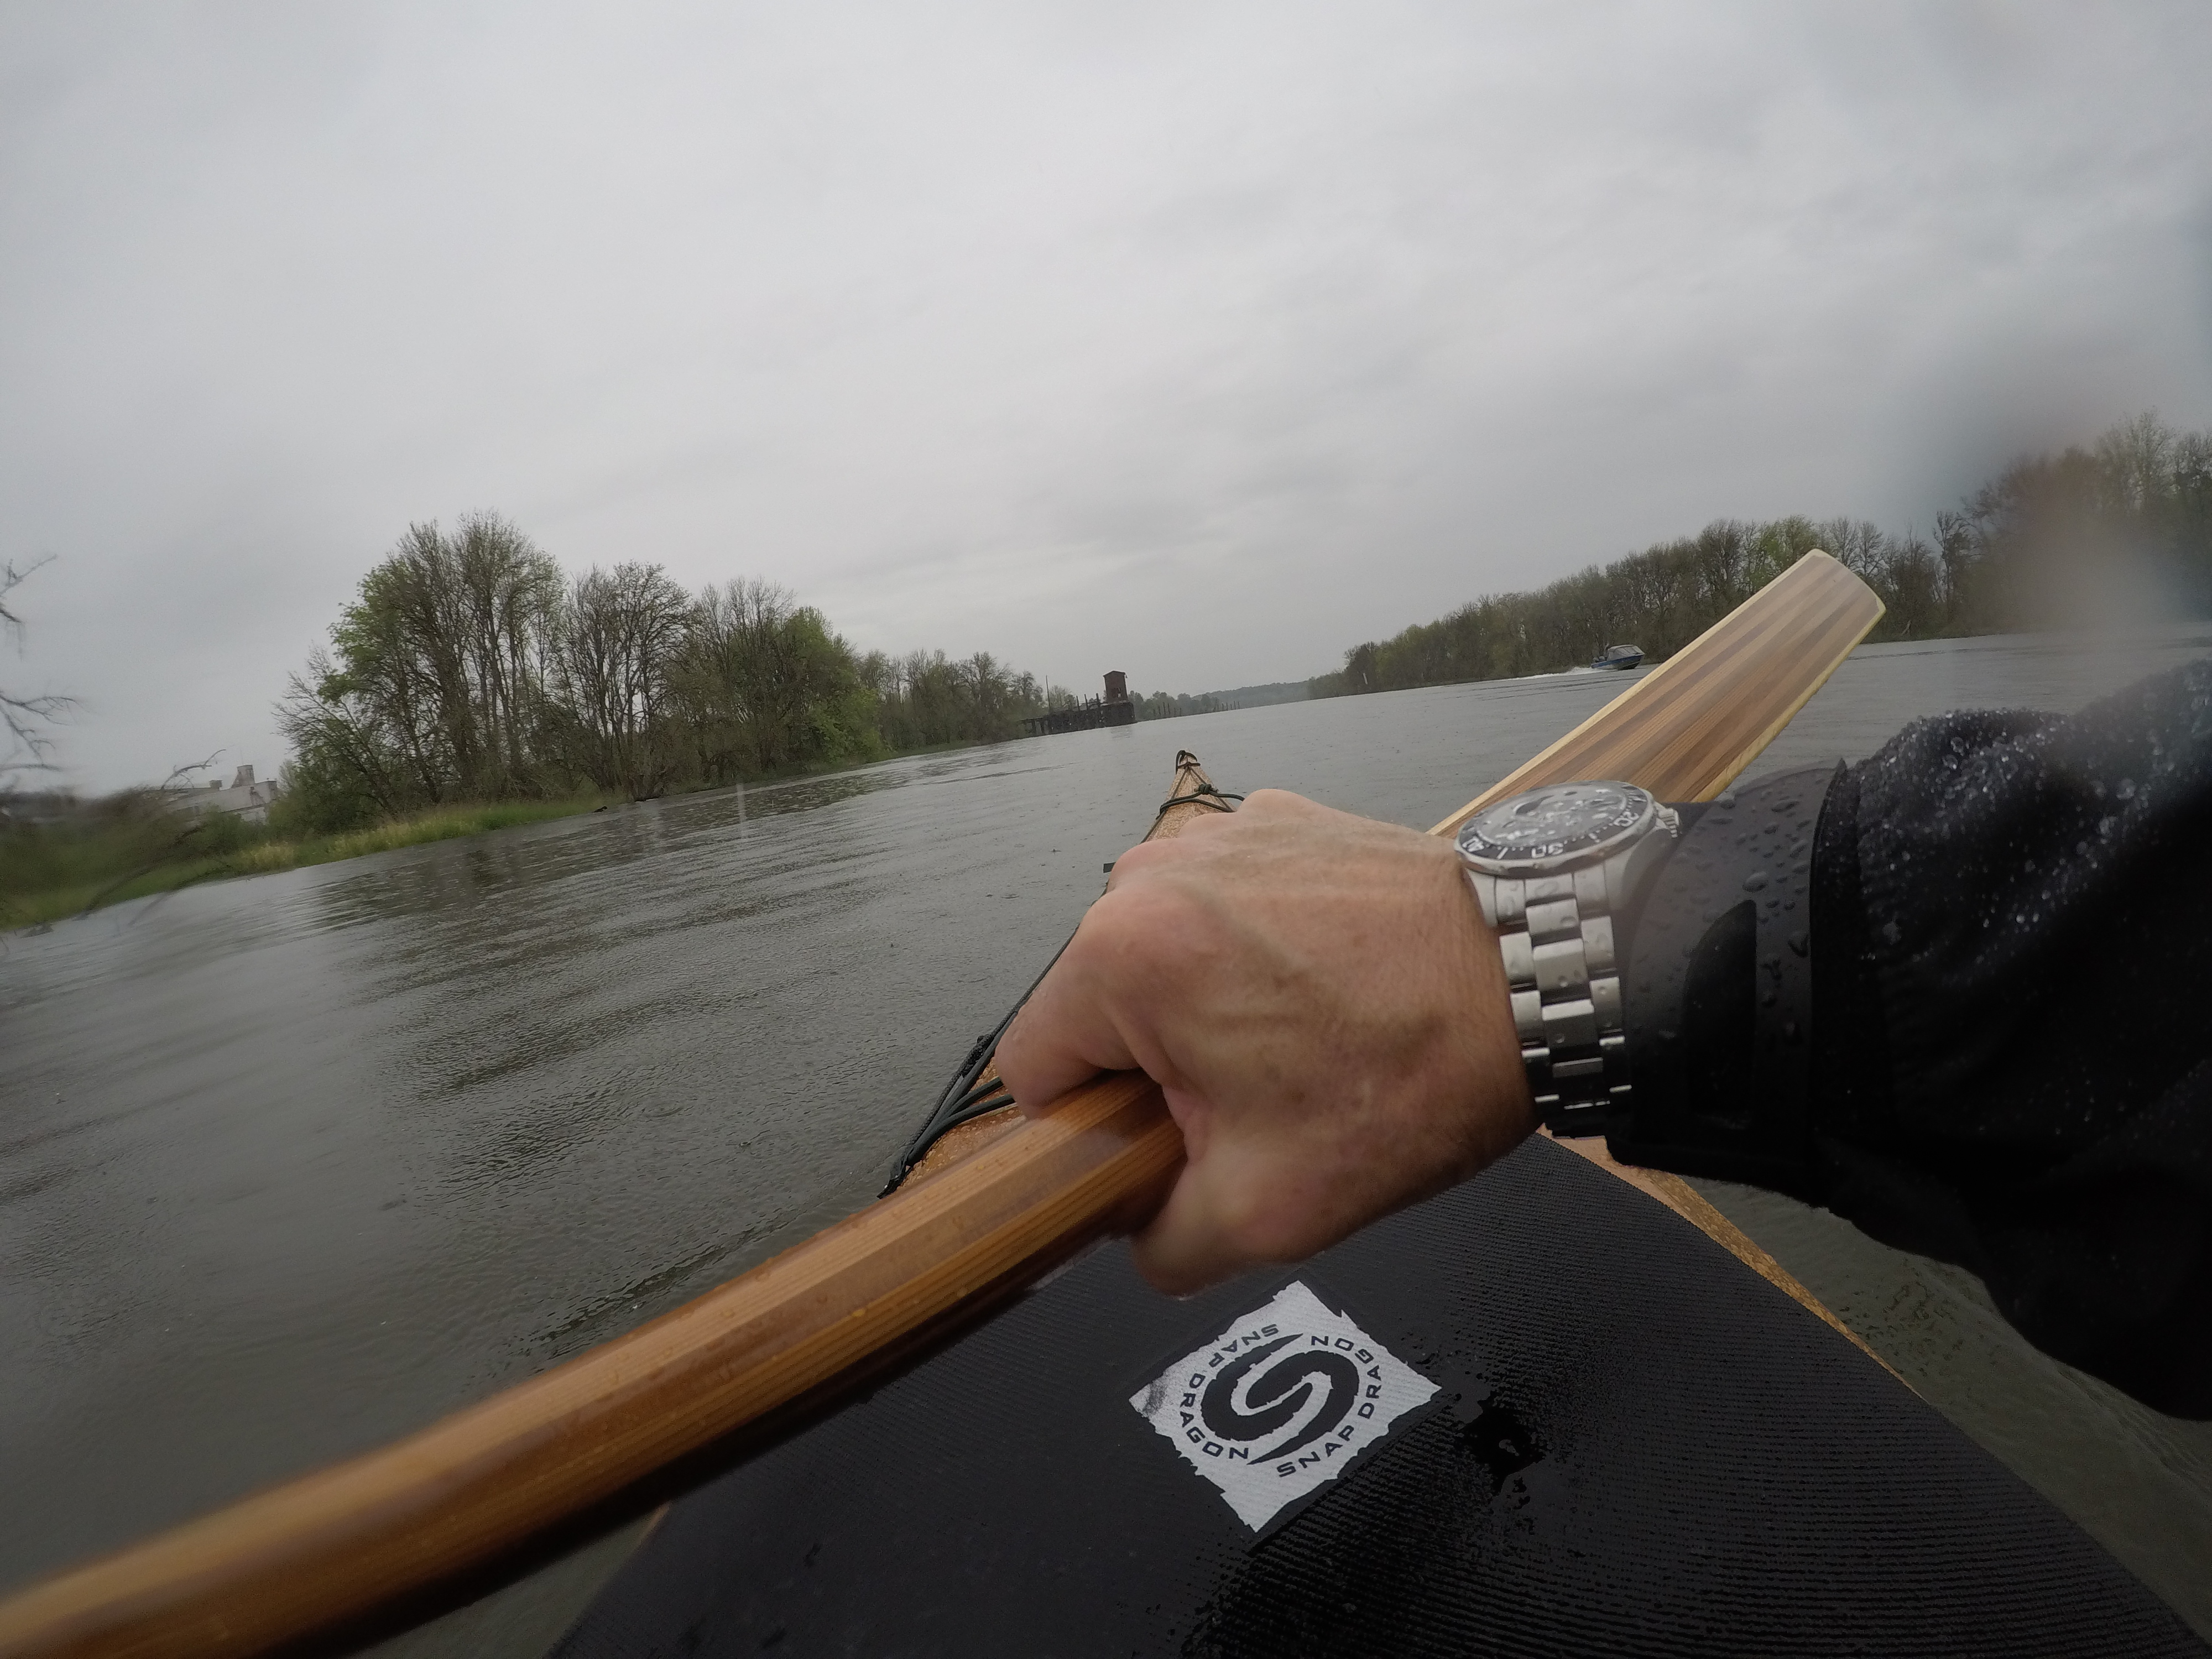
You may be saying “Hey! That’s not a Pygmy back band.” Nope. I bought a Snap Dragon back band (Edit: 04/16/2022: It has come to my attention that Snapdragon Designs may have gone out of business, and the back band that I used in my kayak appears to no longer be available. Cape Falcon Kayak produces and sells a similar-looking back band for use in skin-on-frame kayaks which may suit your needs.) from Cape Falcon Kayak. I made all of the measurements for the hip braces and the position of the holes for the back band to Pygmy specs, and the same goes for the pad eyes for the suspension. So if I decide that I don’t like the Snap Dragon band I can always install the stock Pygmy band.
The shock cord suspension keeps the back band in the correct position for normal paddling, but if I attempt a lay-back (Greenland style) roll the band moves down out of the way as I lean back. When I sit back up the band returns to the upright position. Simple and effective.Above you can see the port side pad eye mounted under the cockpit coaming. Drilling the pilot holes for the fasteners made me nervous. I’m not sure why. I am careful and pay attention to detail, but I was overthinking it and worked myself up about how things could go wrong. My advice is, don’t do that.Starboard side pad eye and suspension.
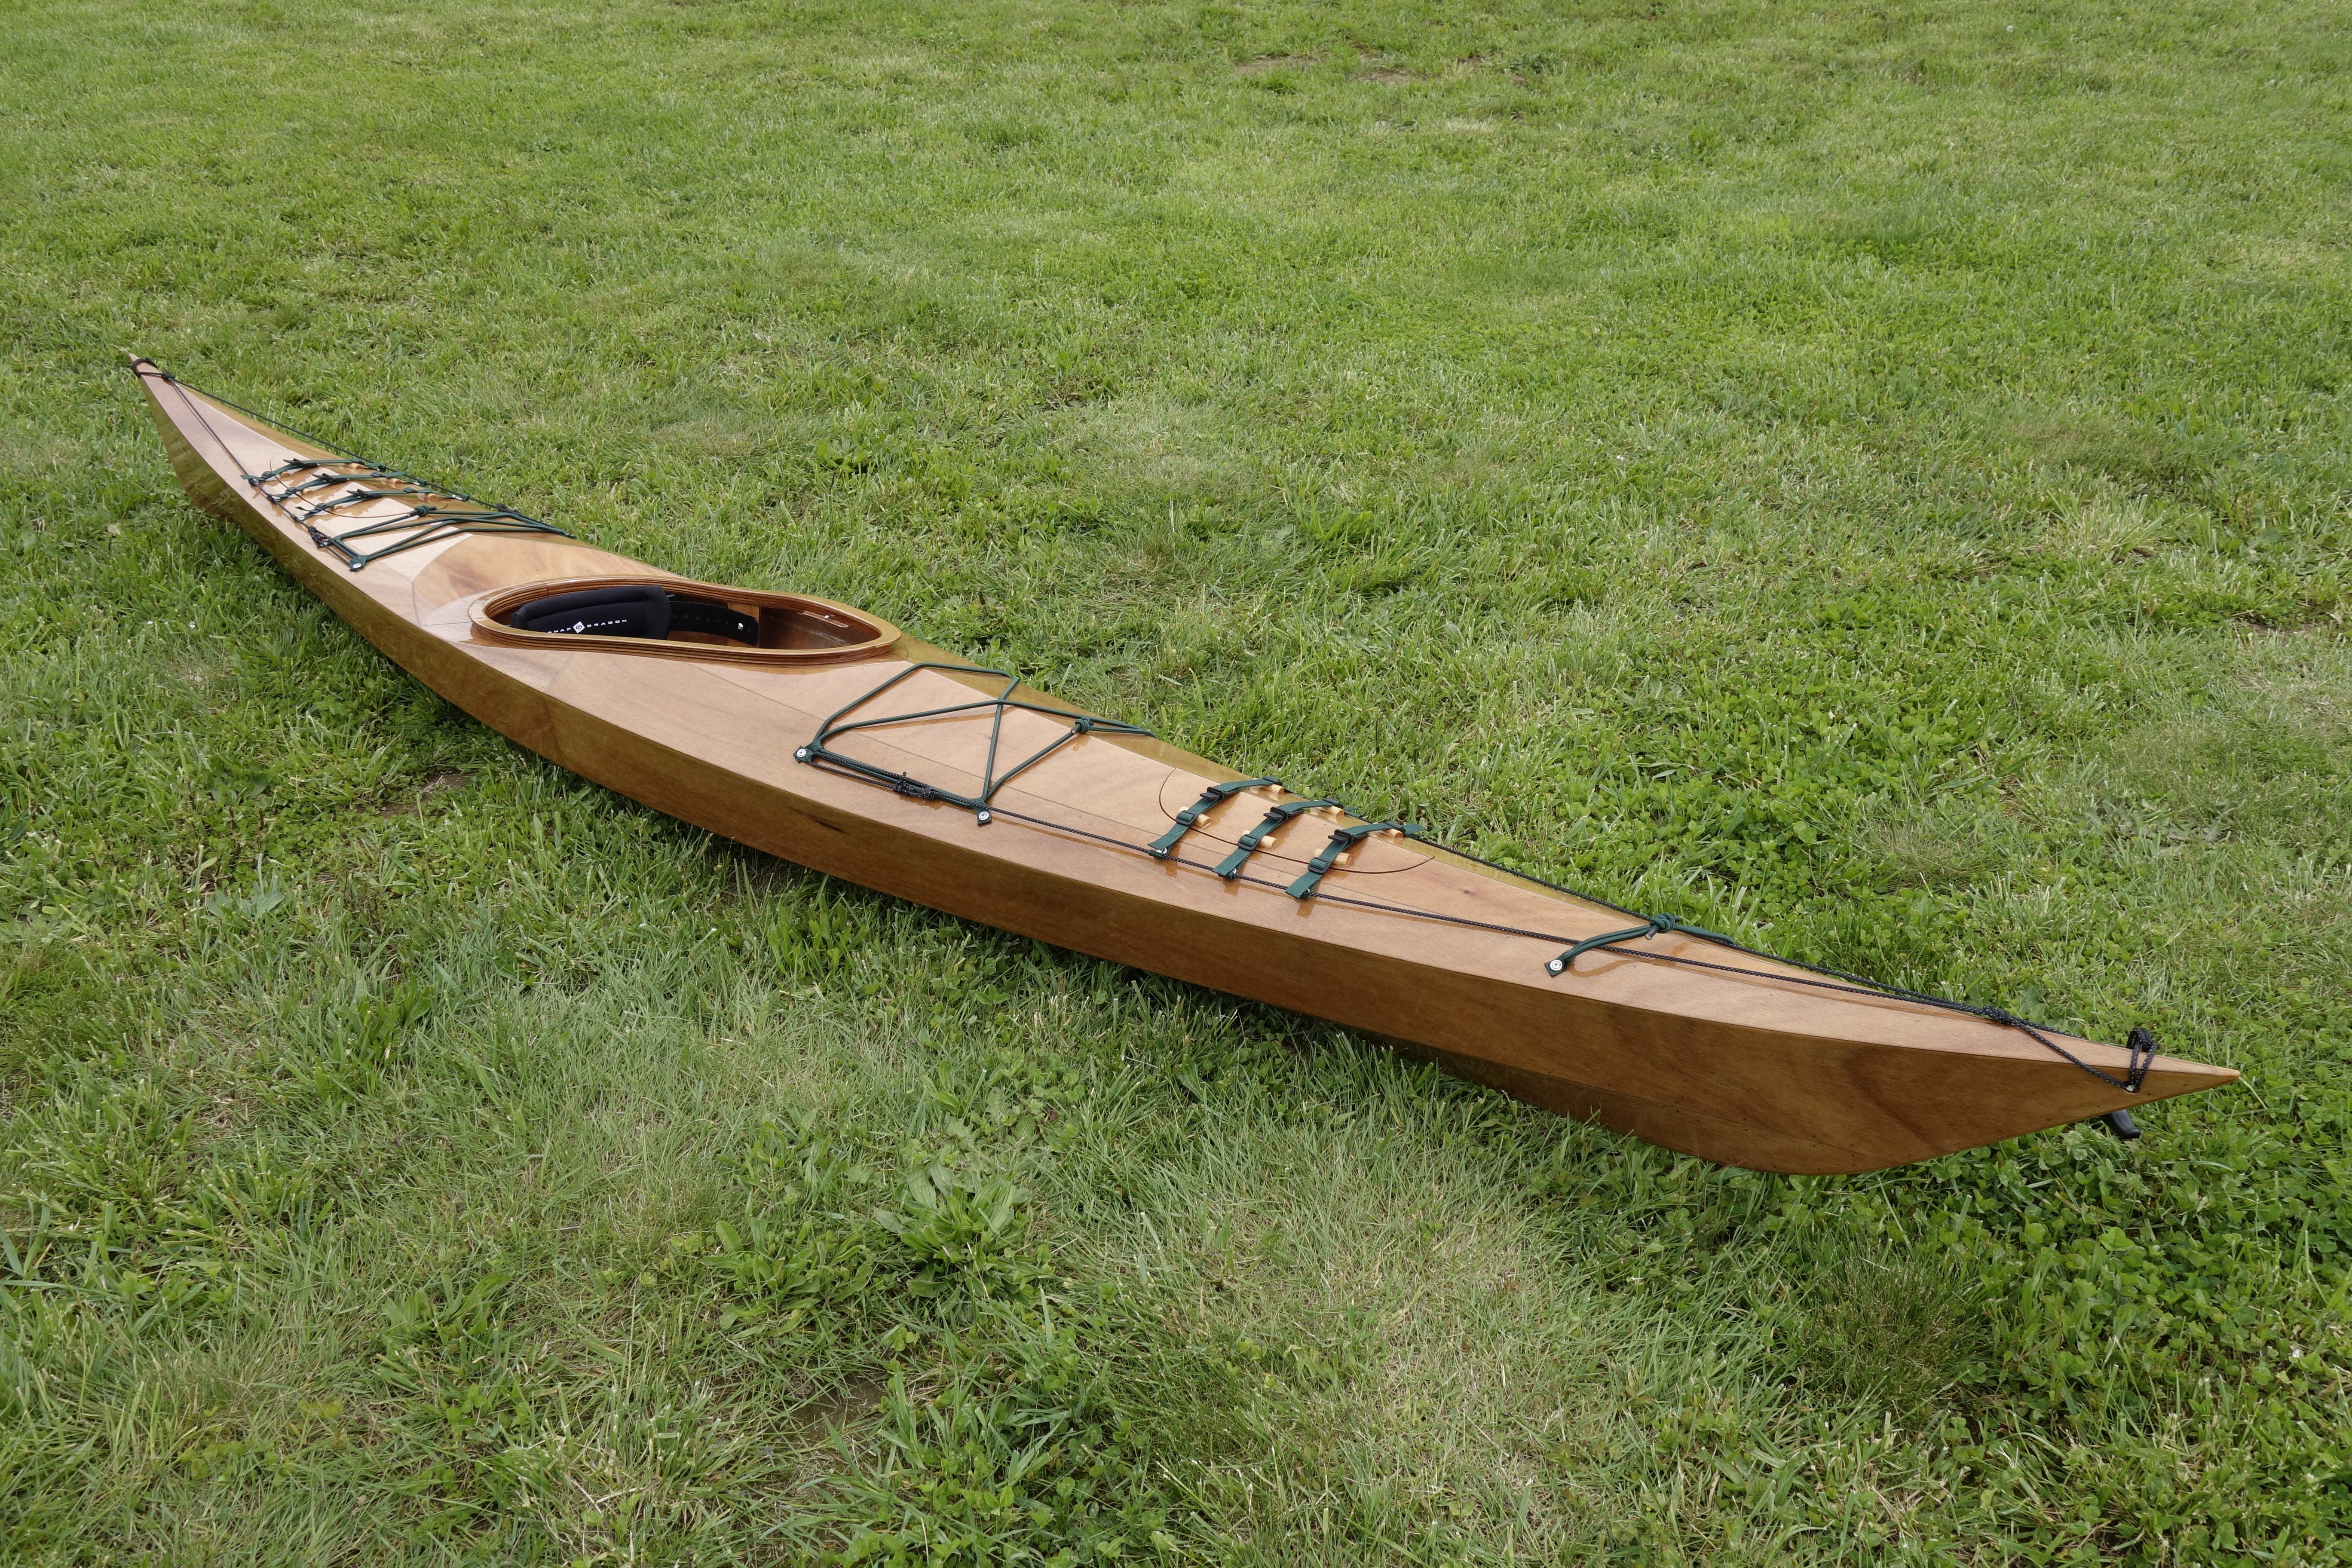
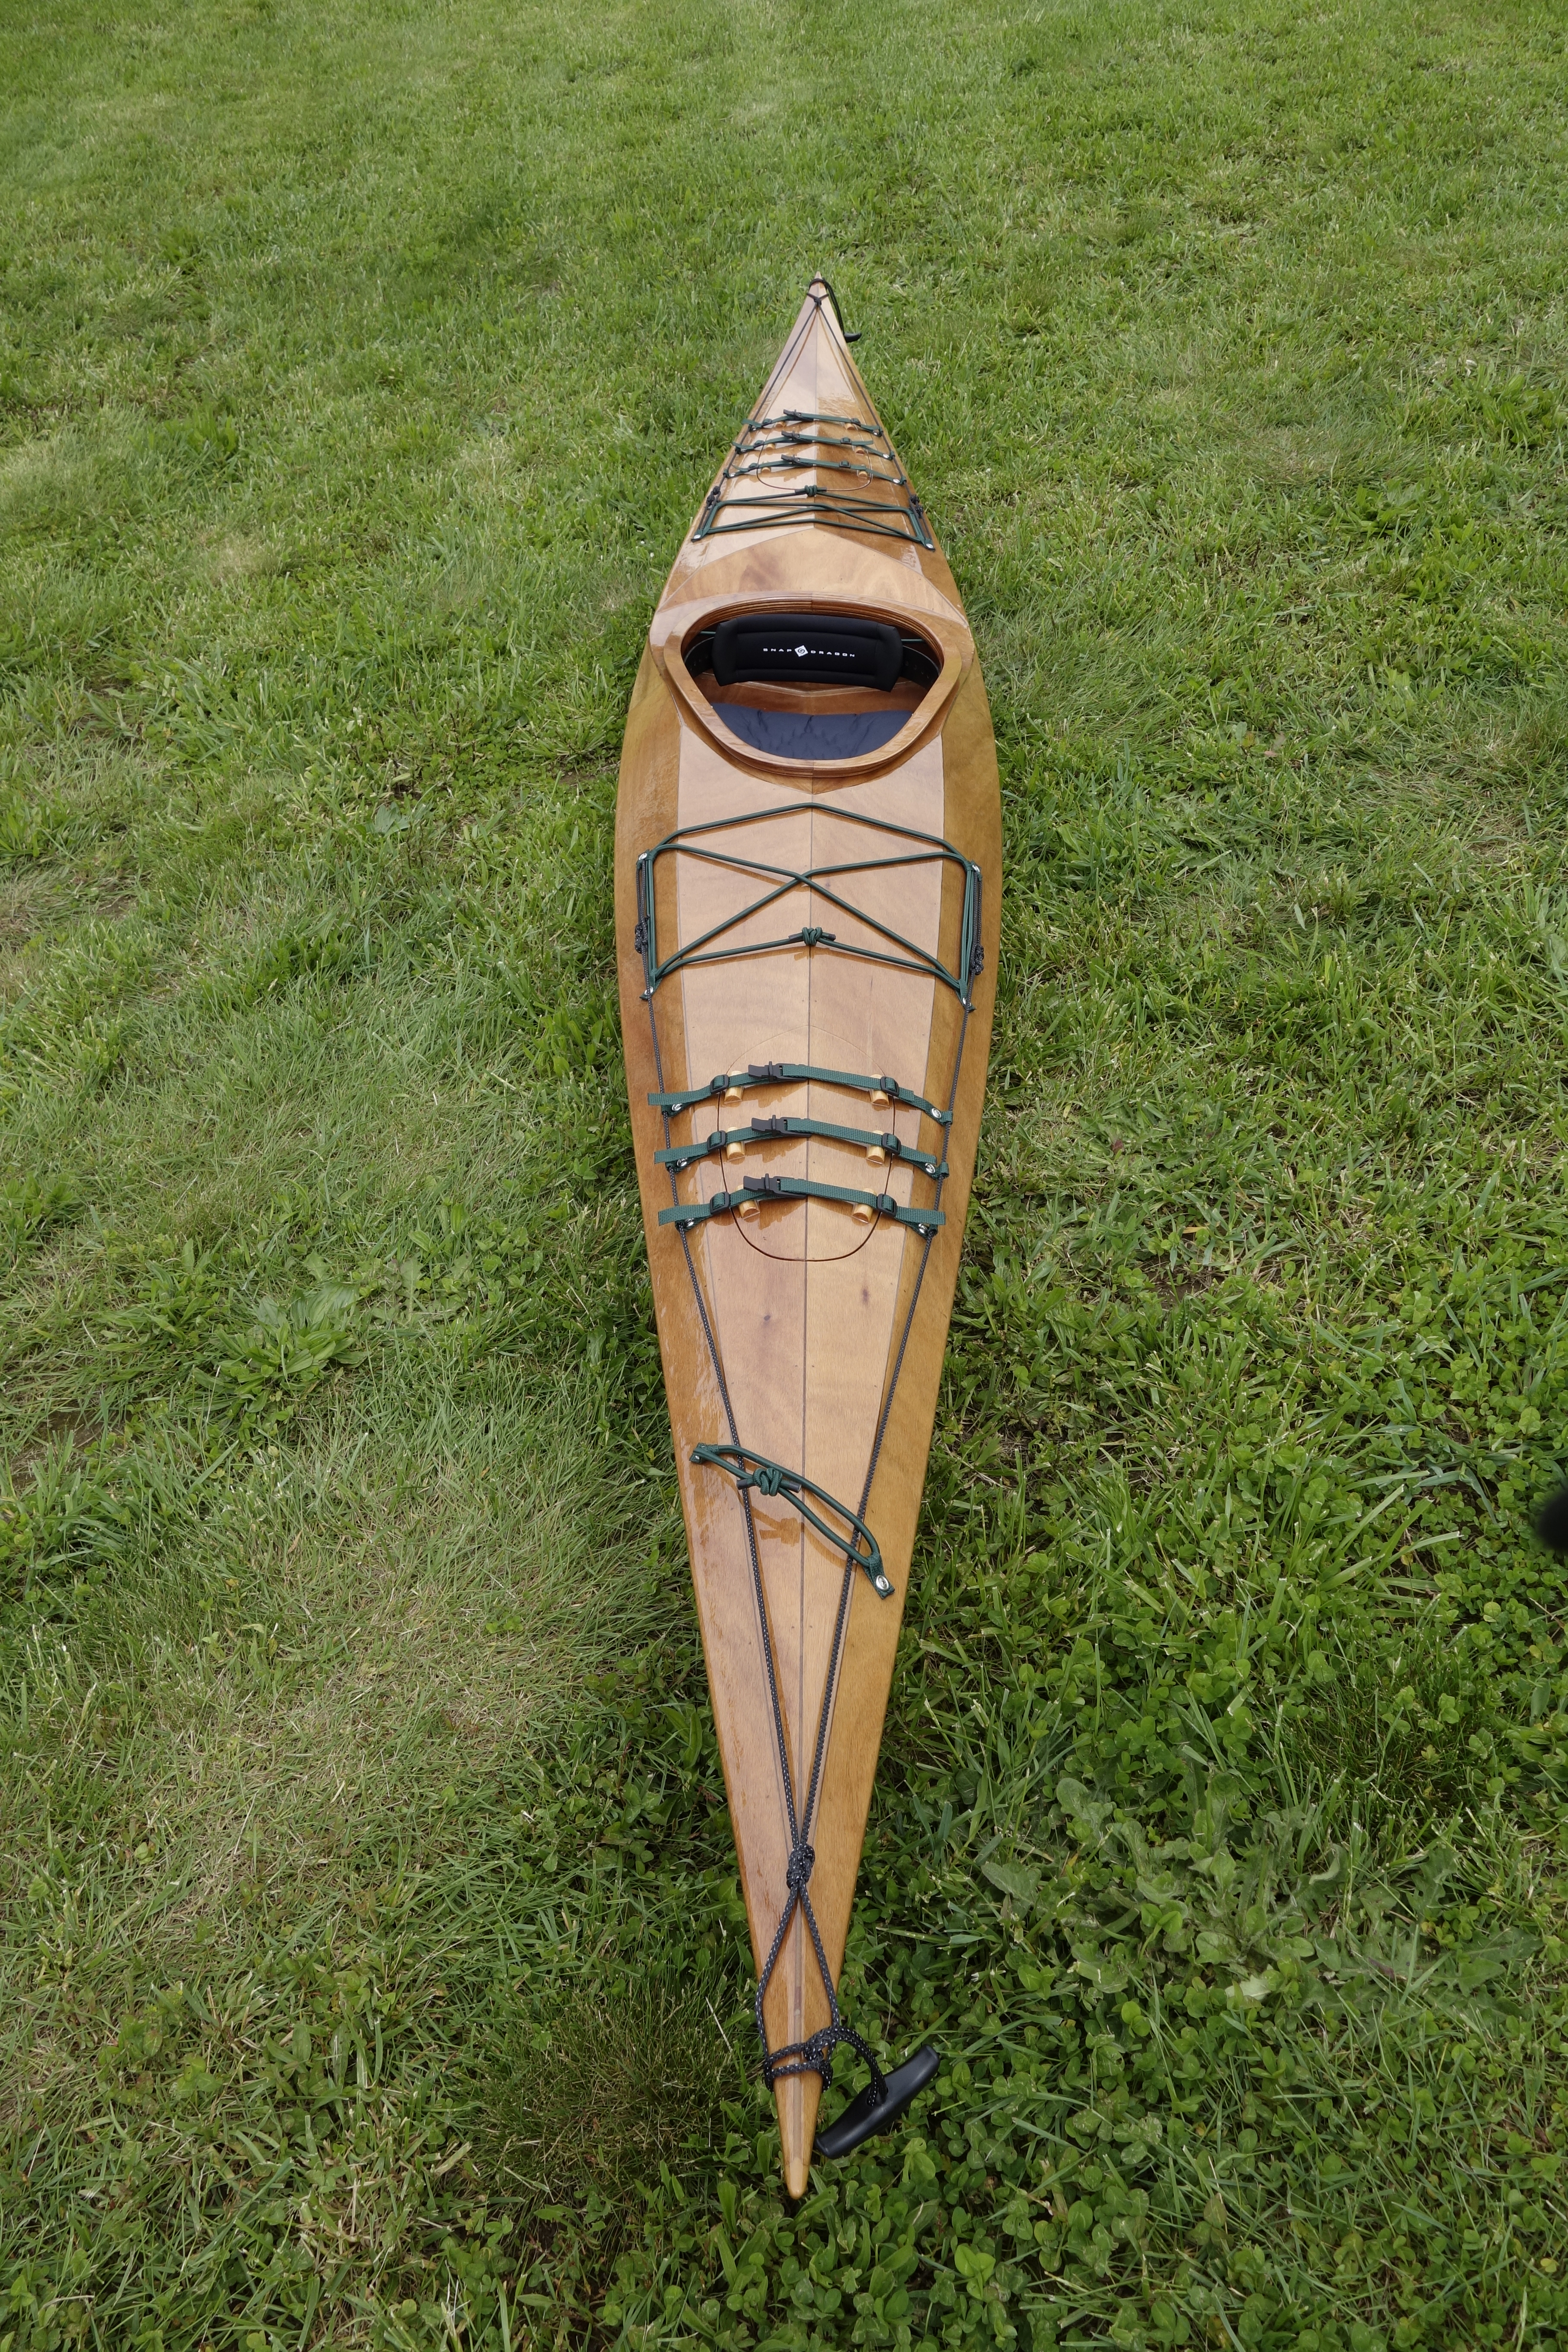
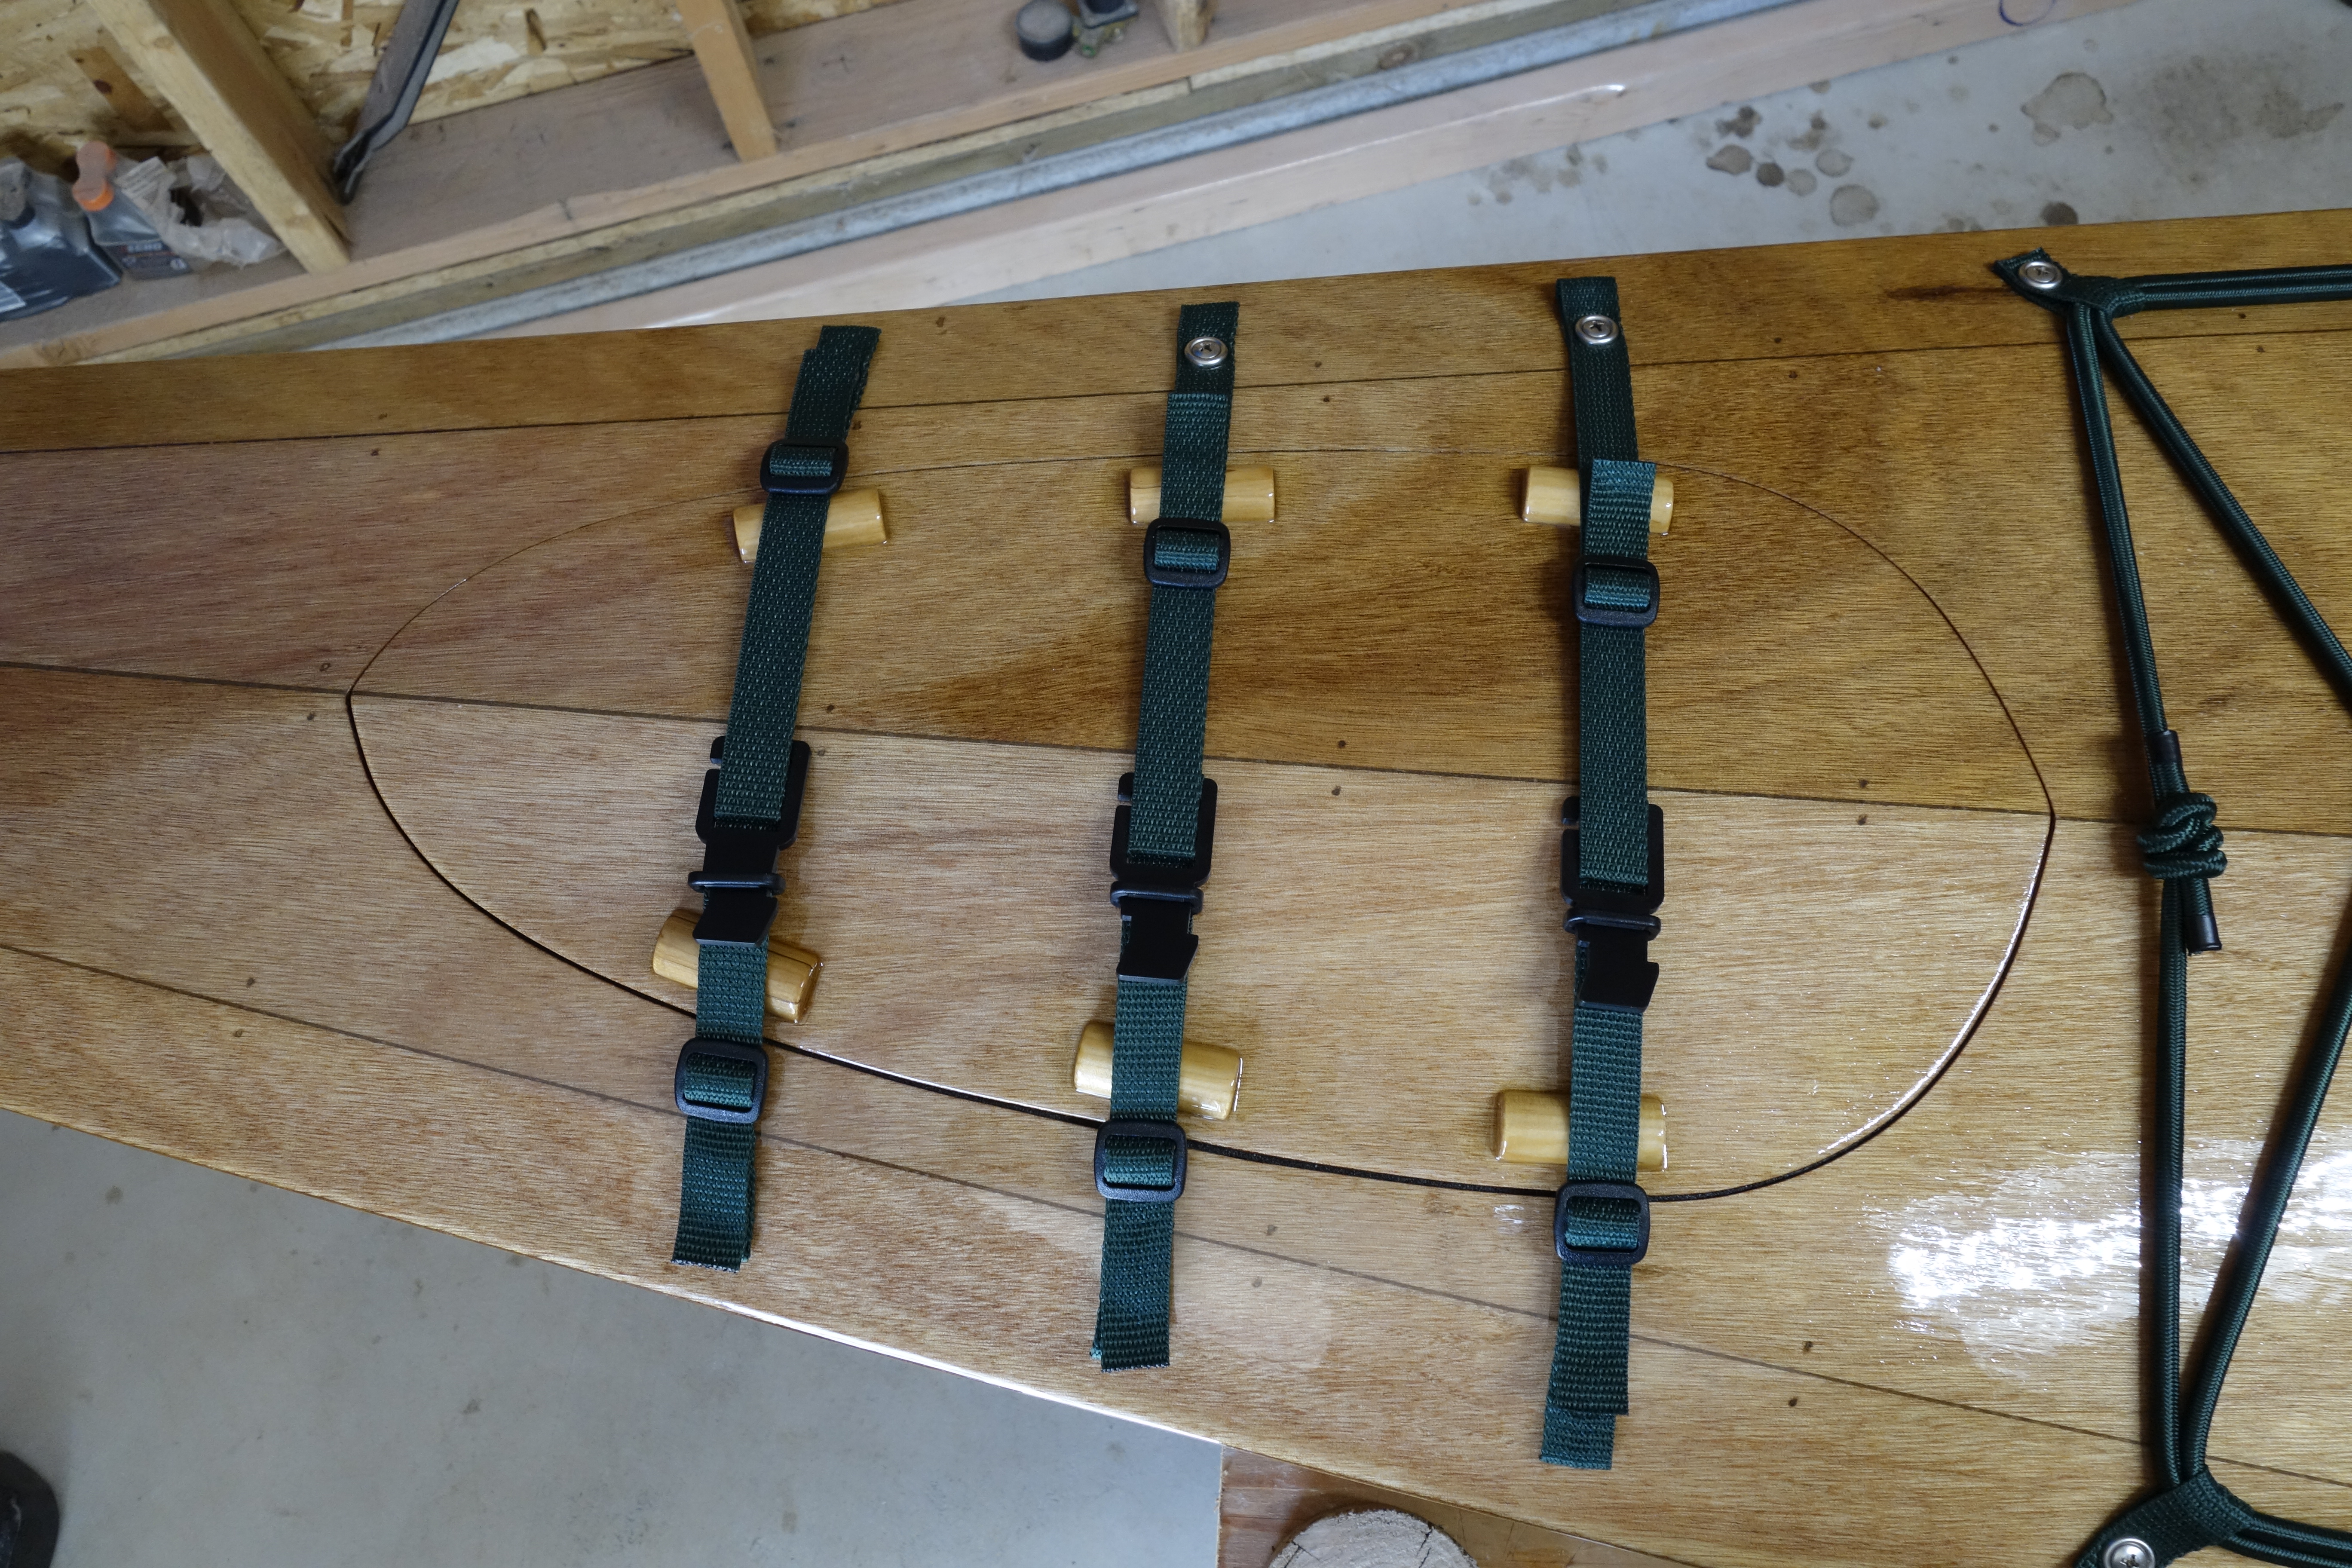
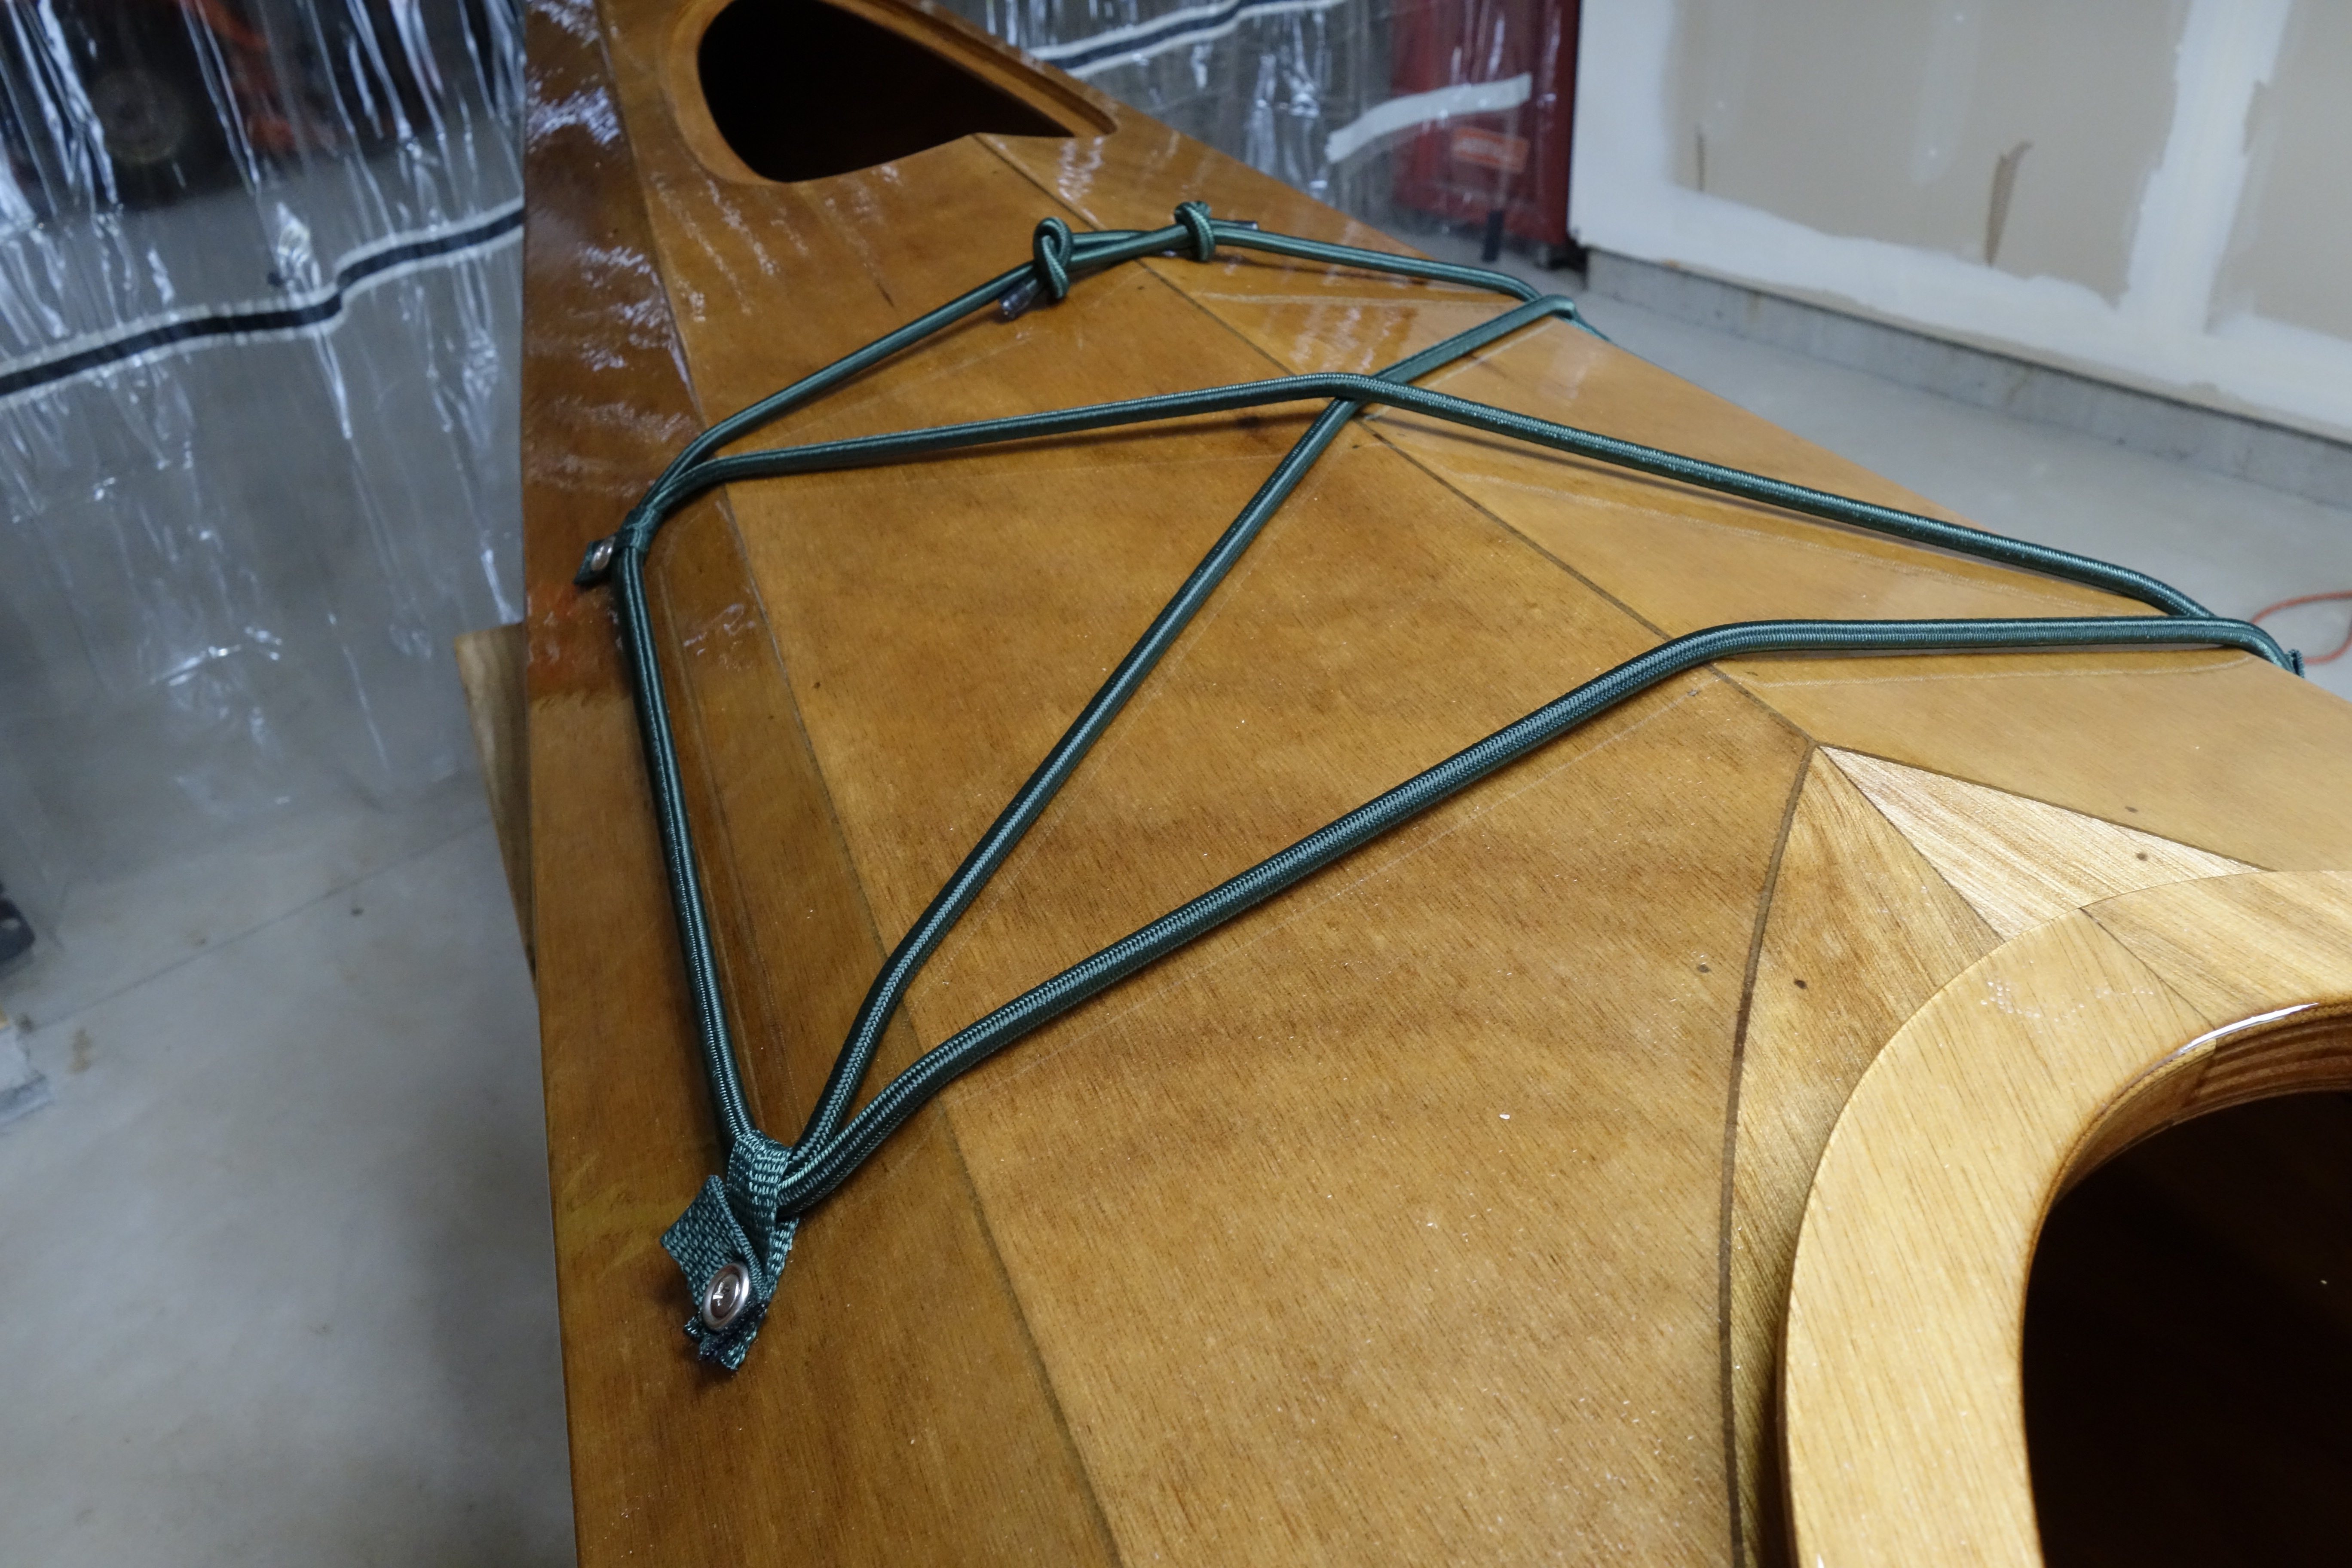
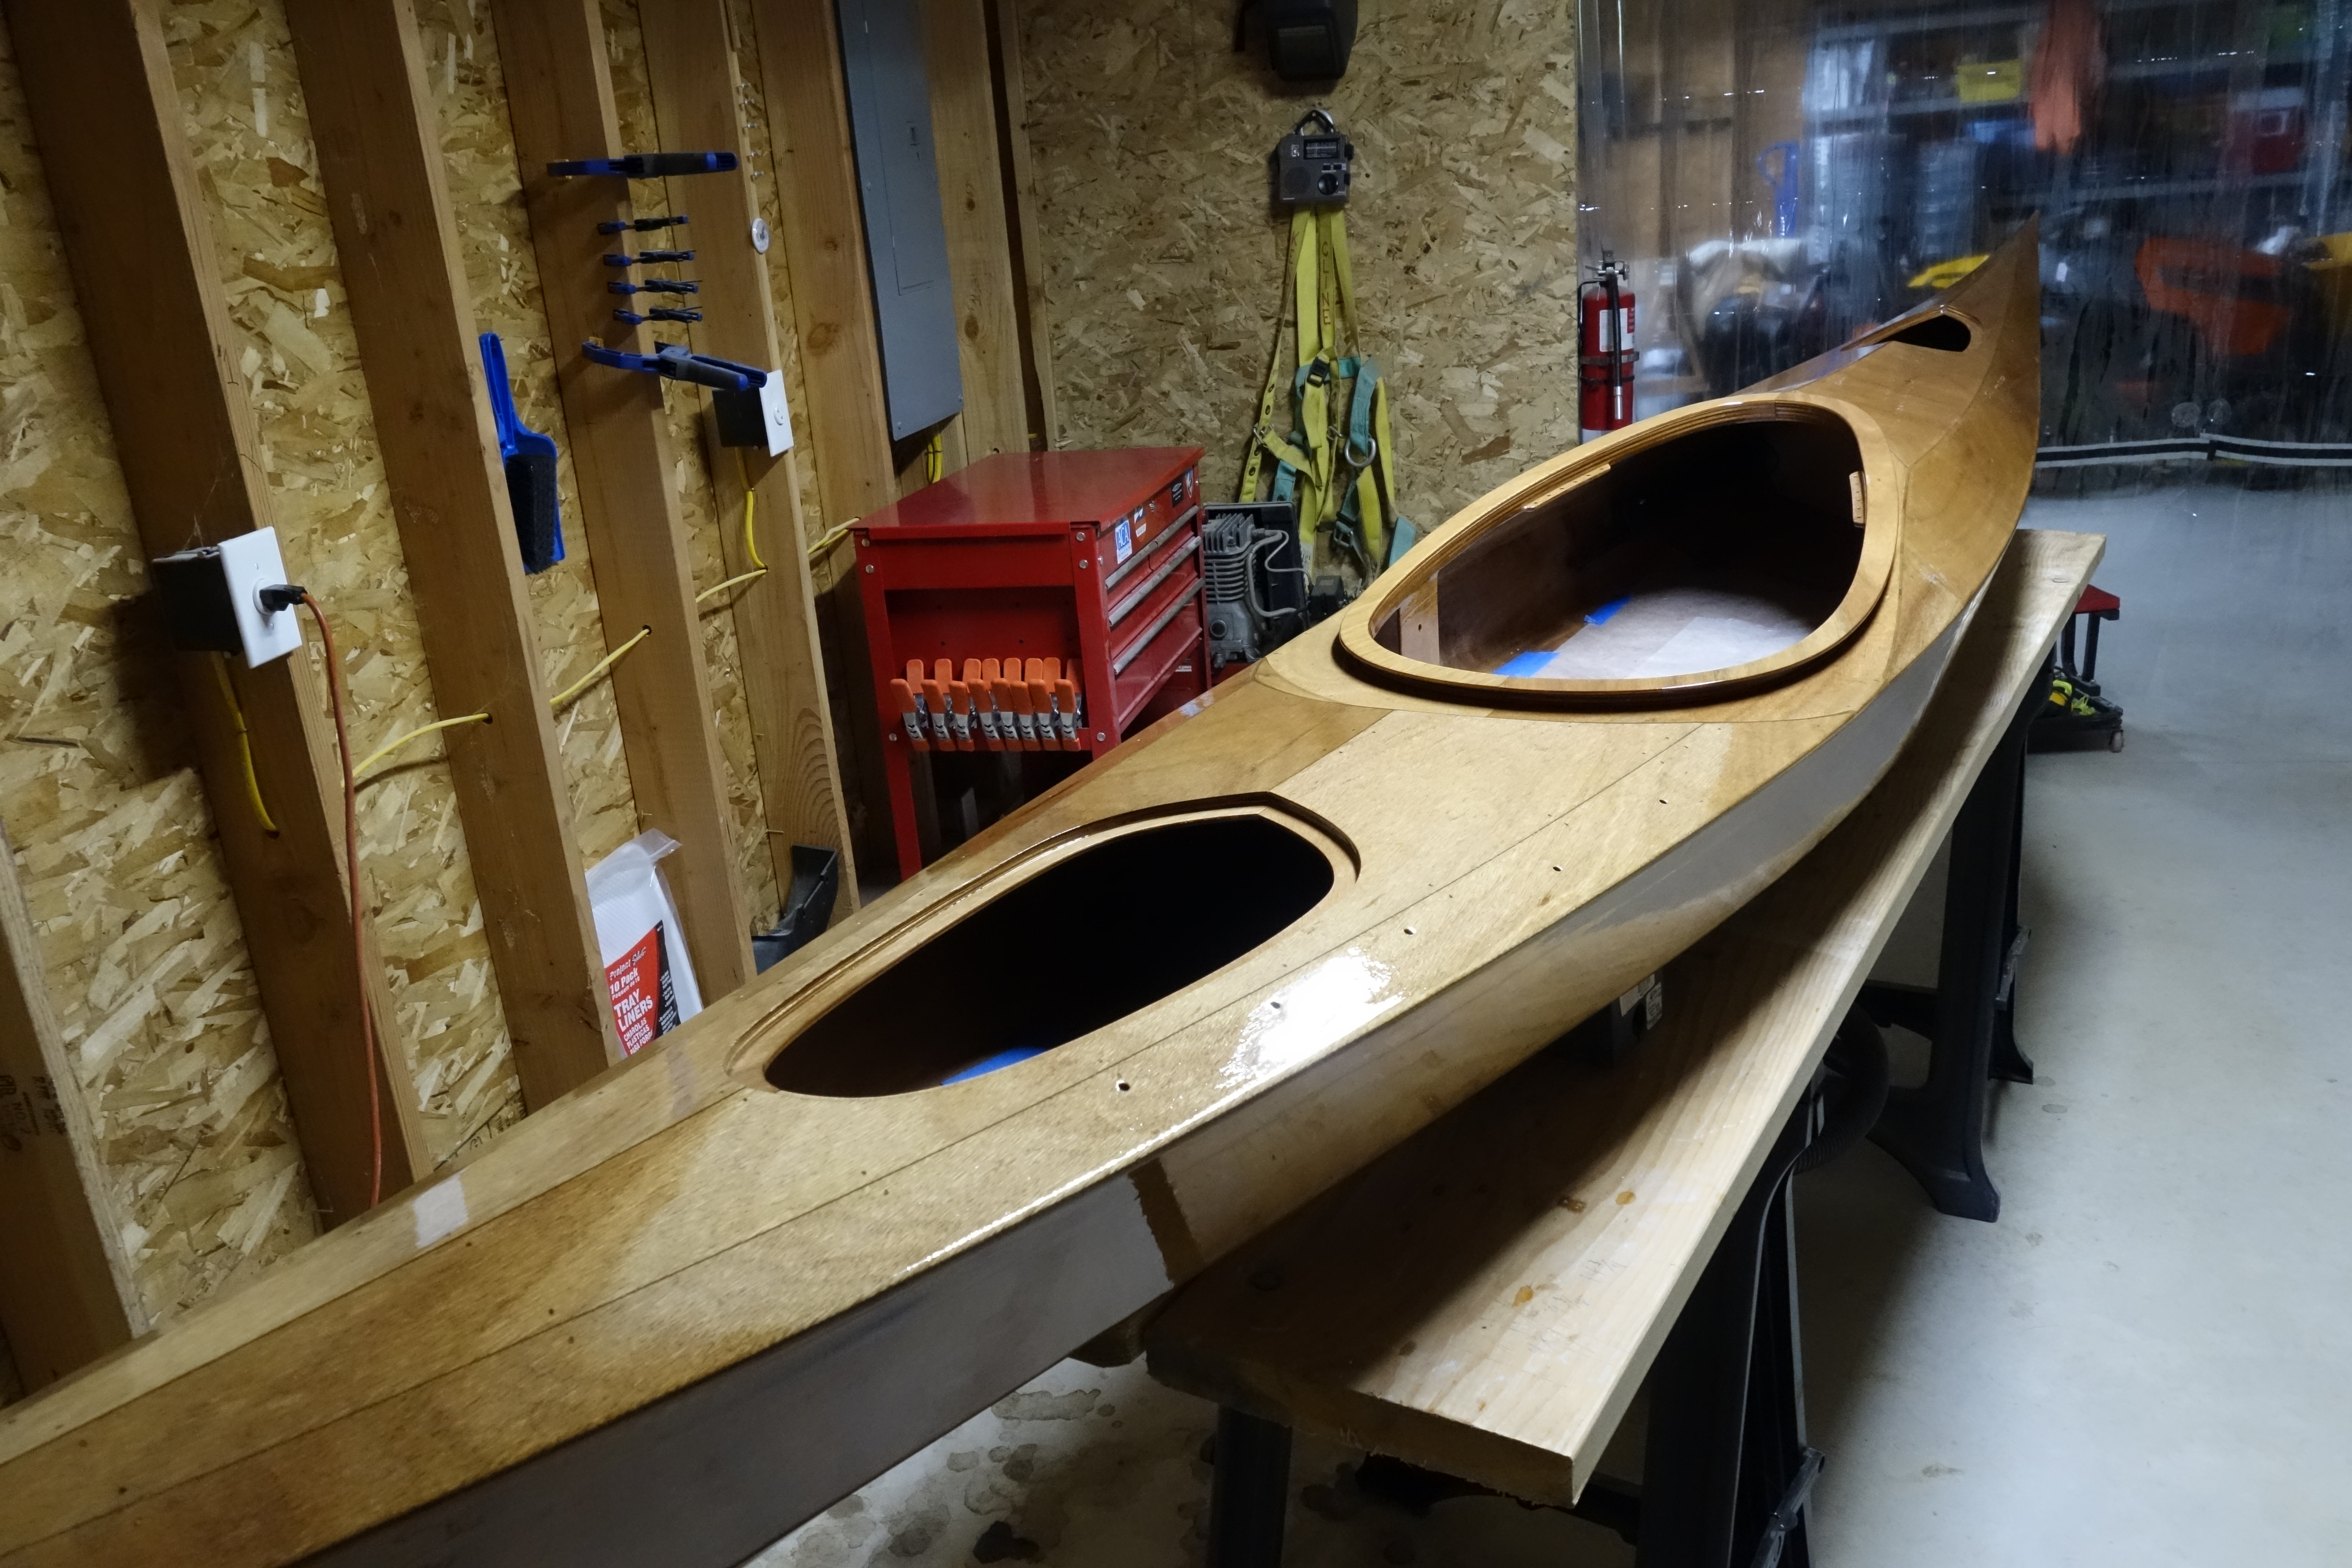
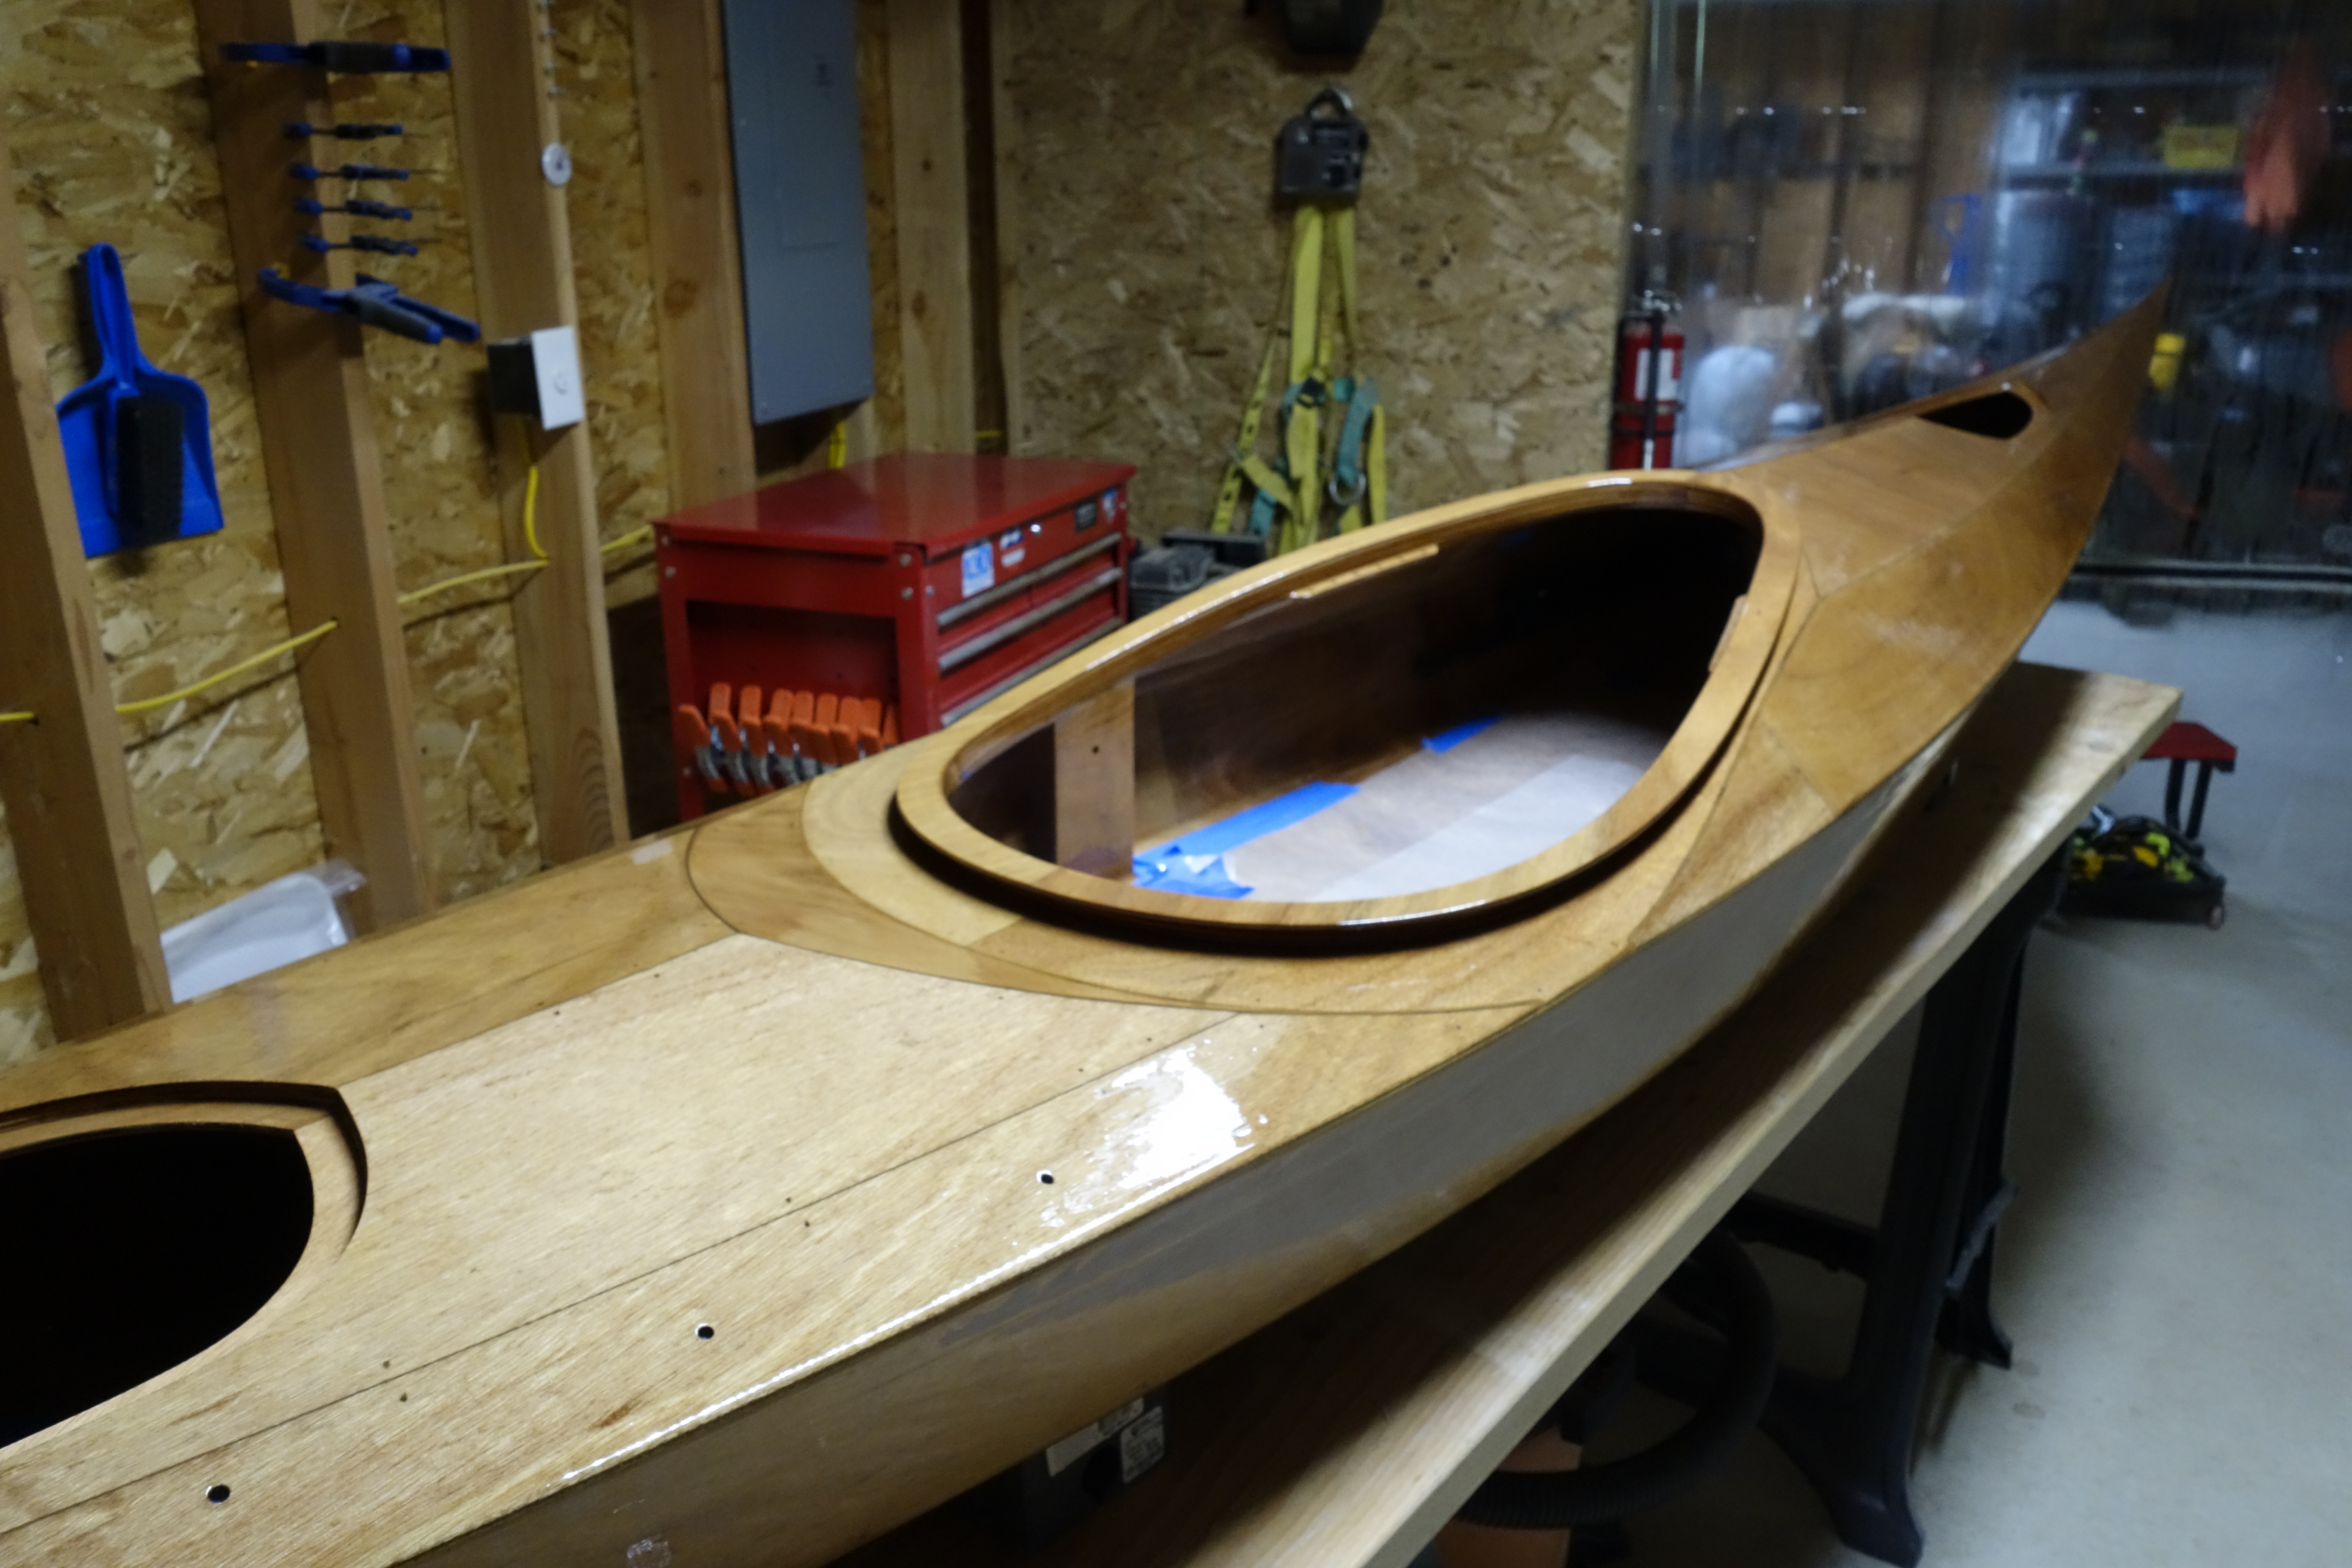
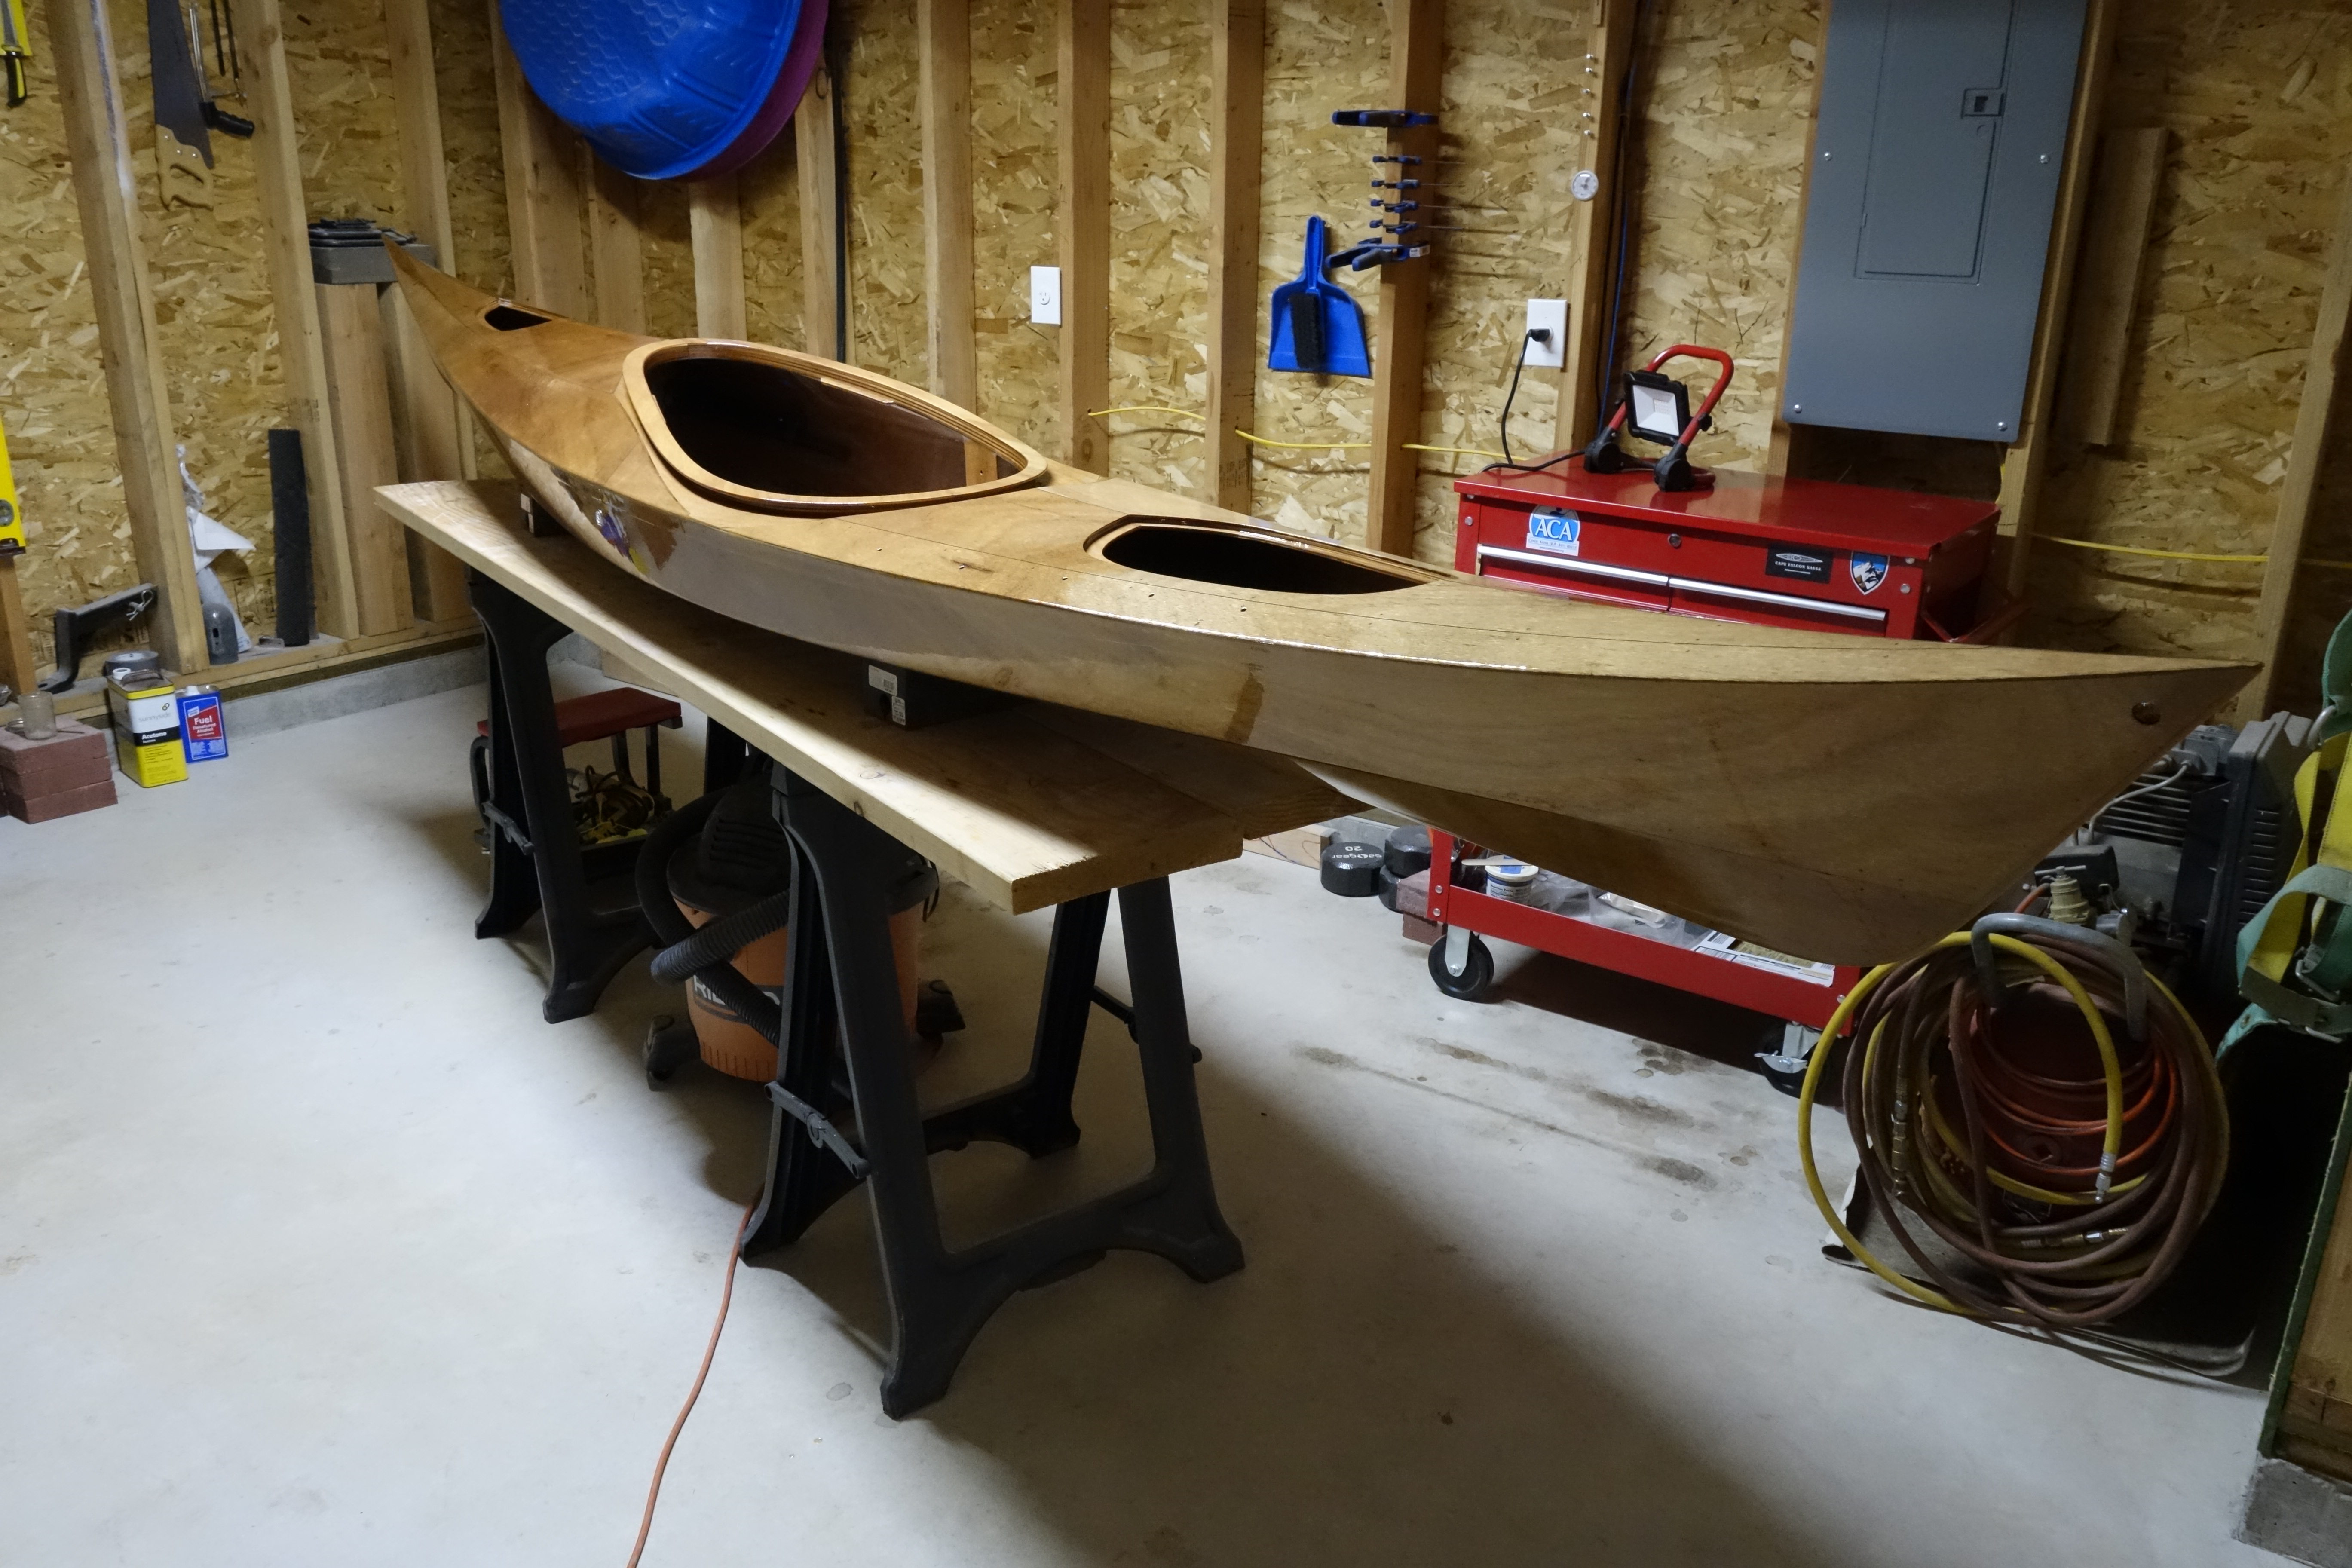
During my lunch hour today I was able to finish the deck rigging. All that remains is the seat installation, after which the Ronan is finished and ready for her maiden voyage! I still have to make the removable thigh braces, but those are an accessory to help me roll, and I can certainly paddle without them. I can finish those anytime.
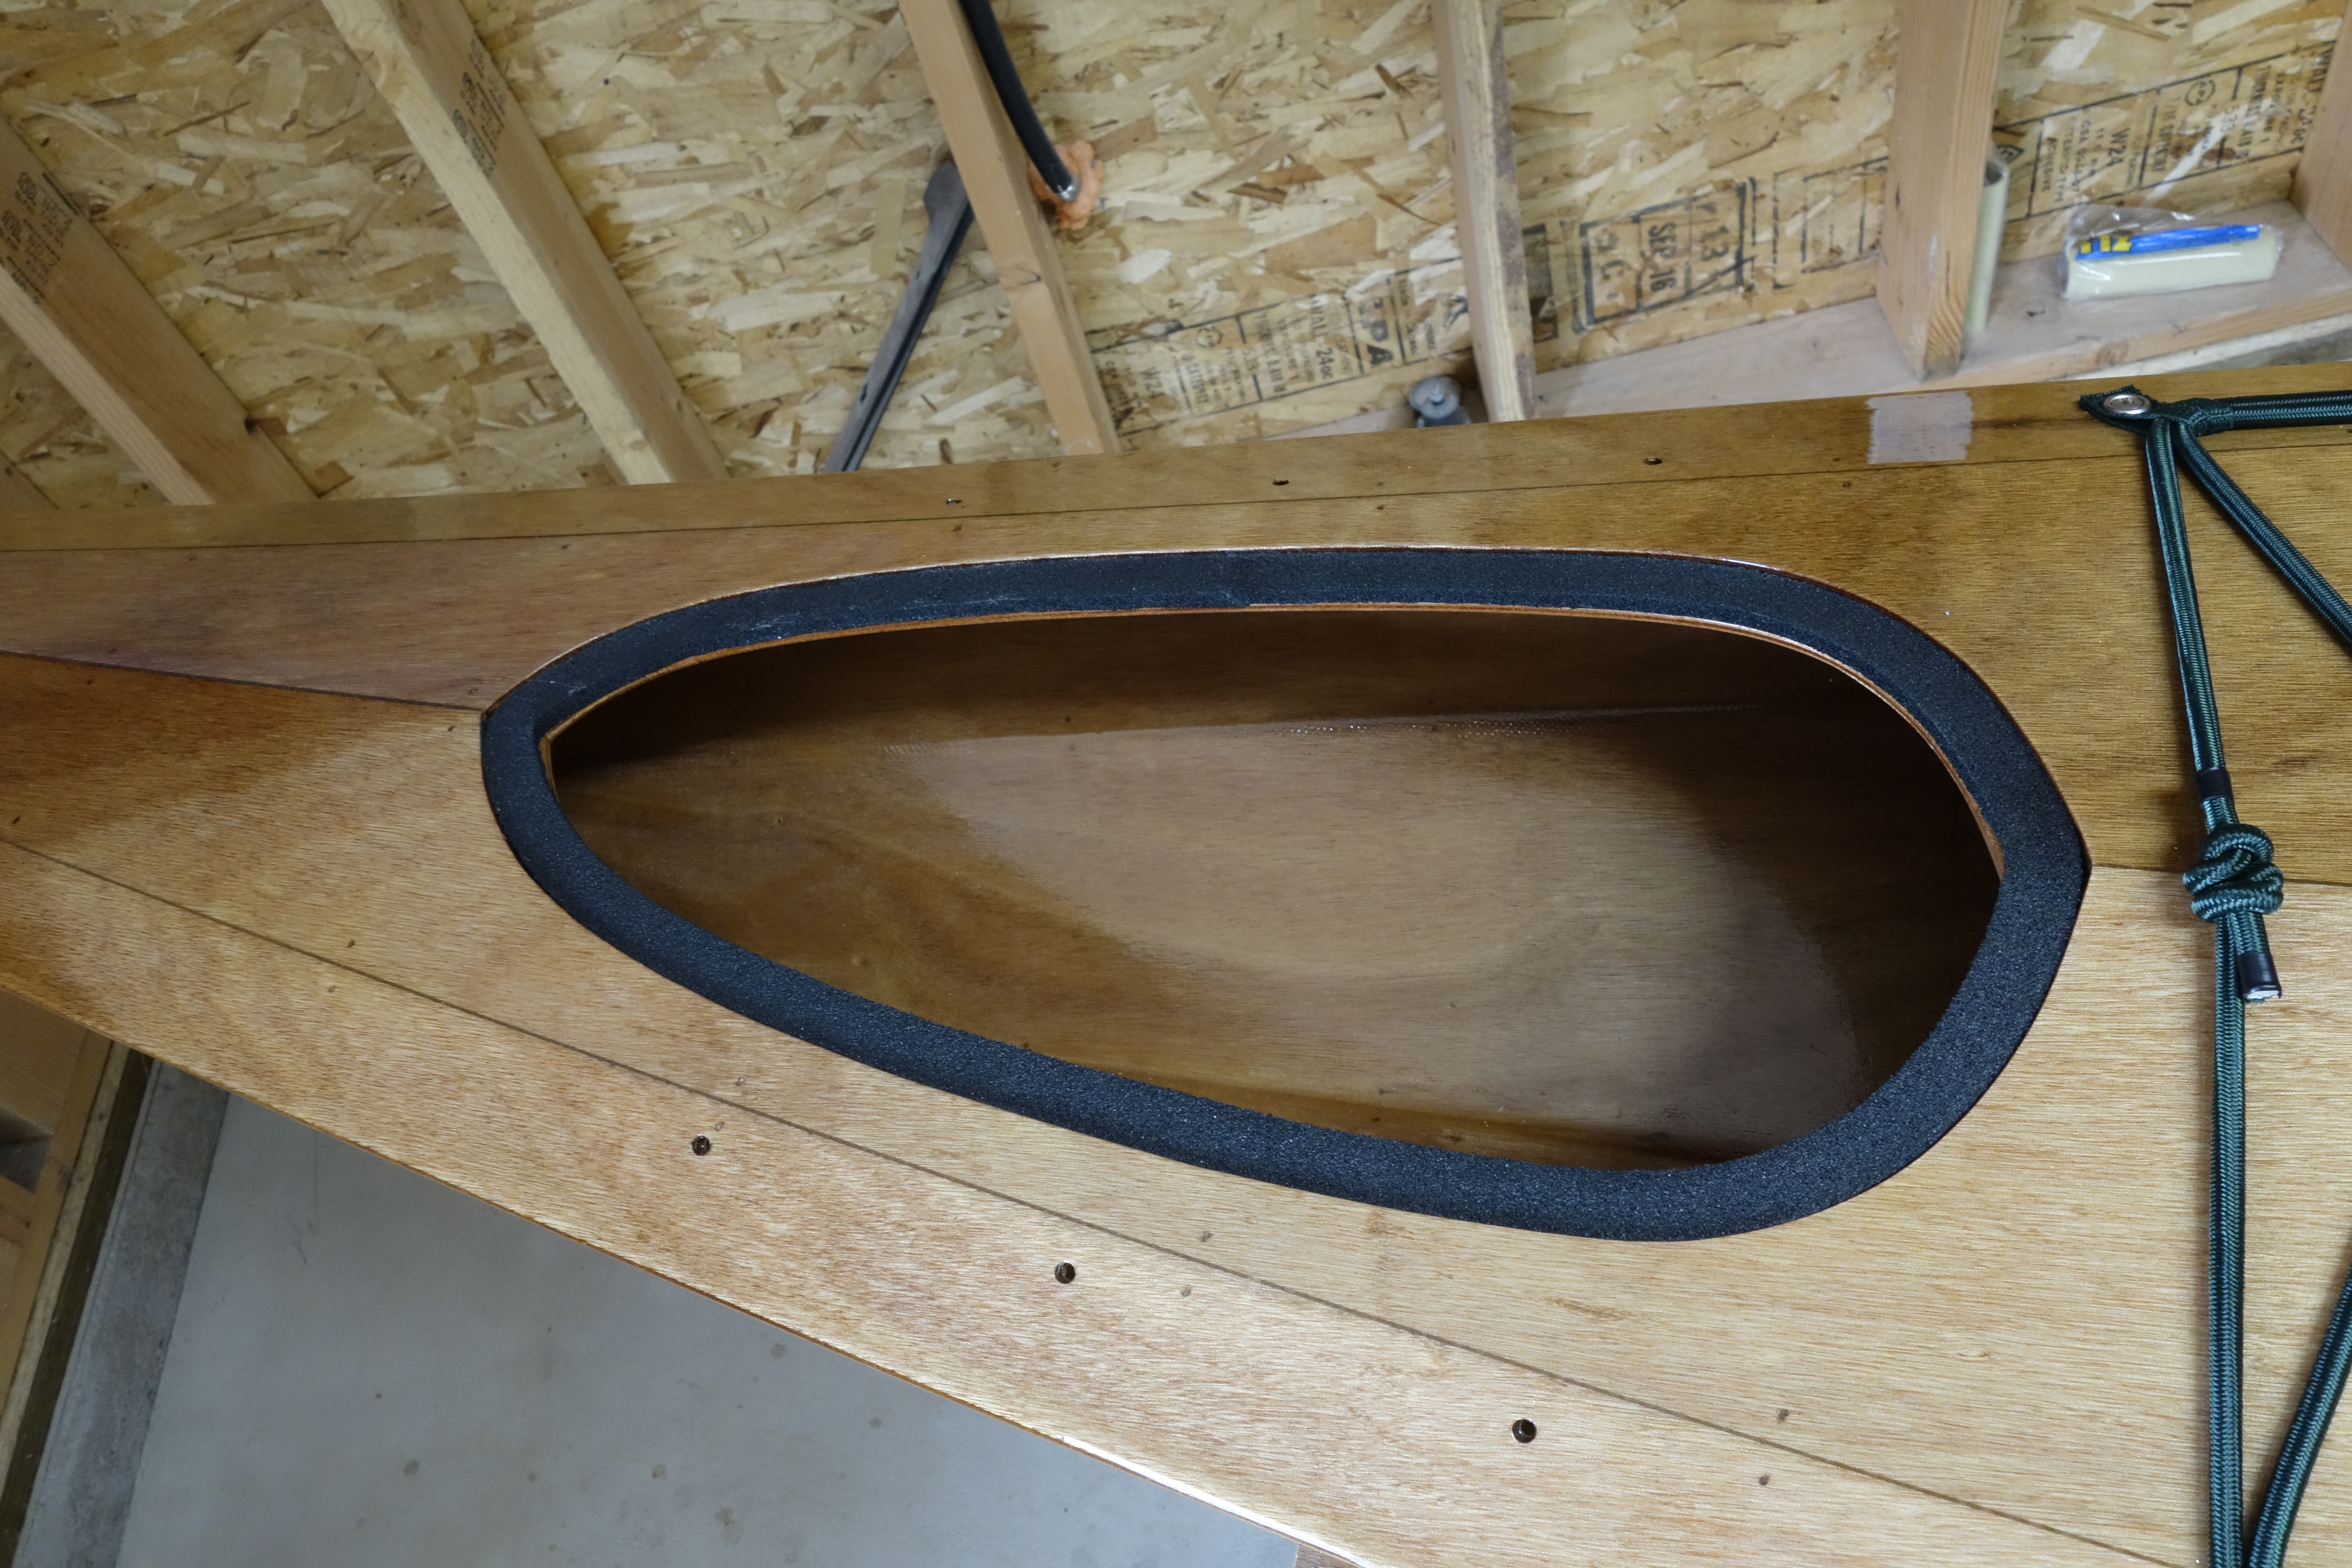
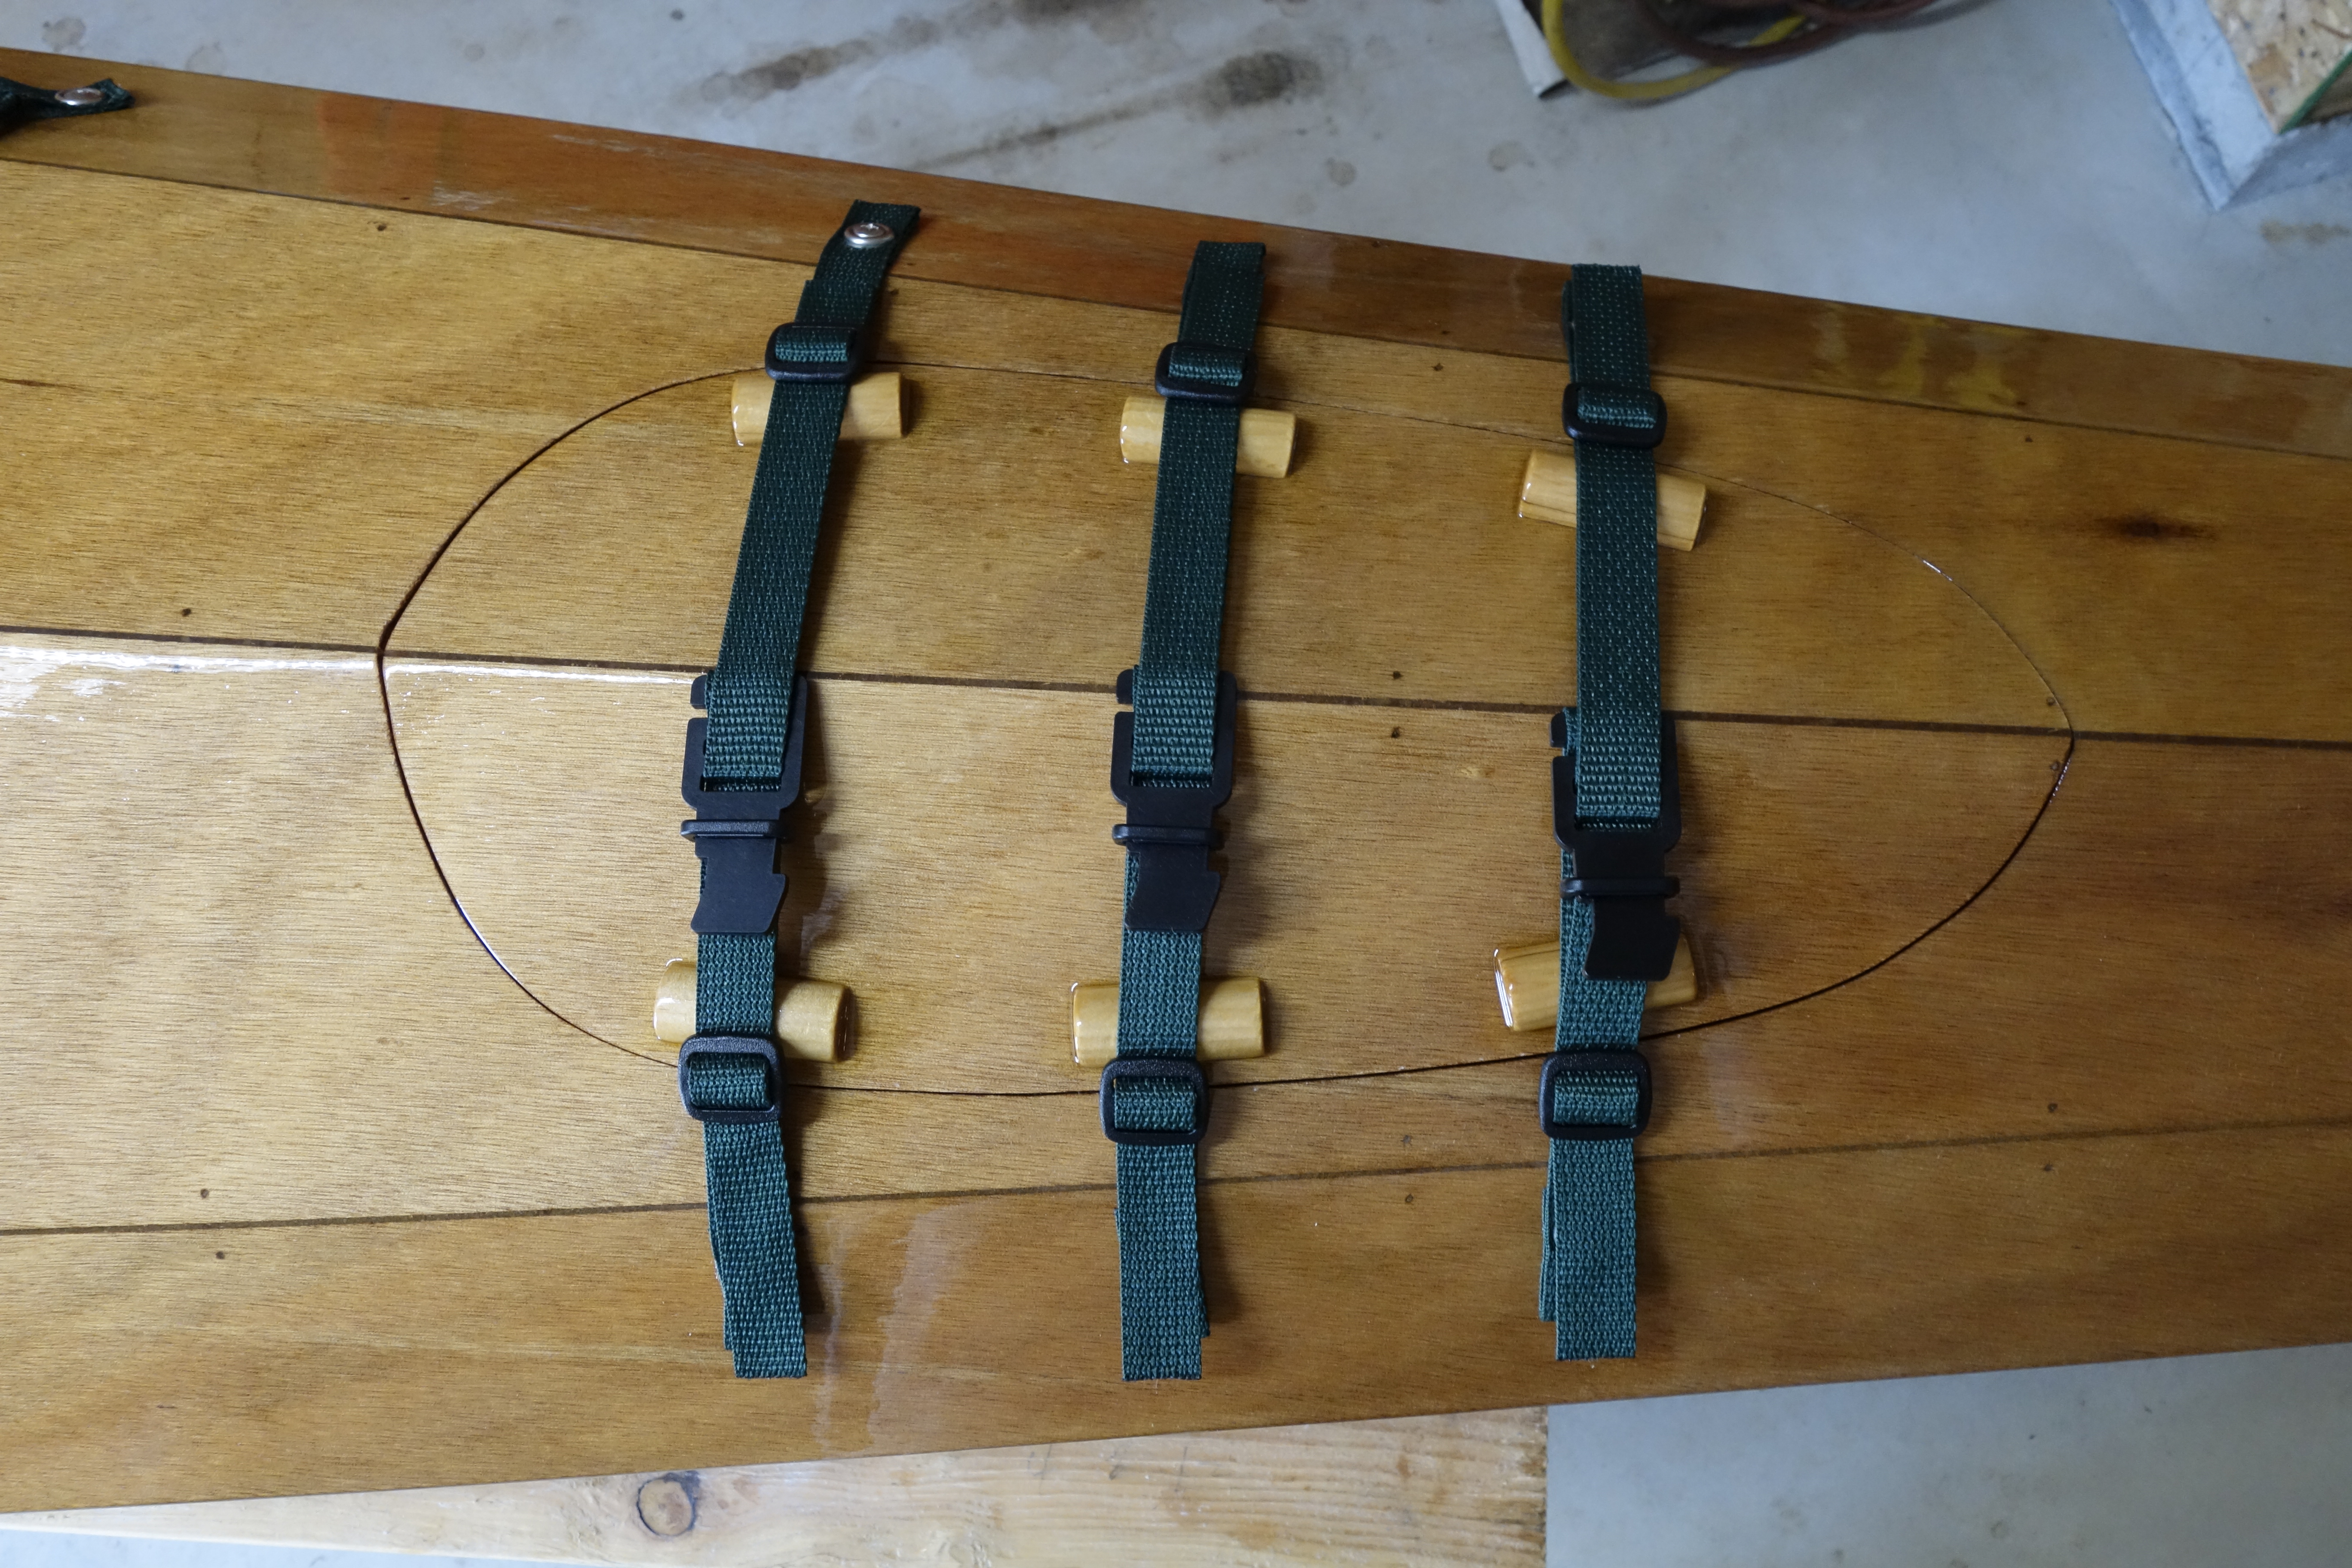
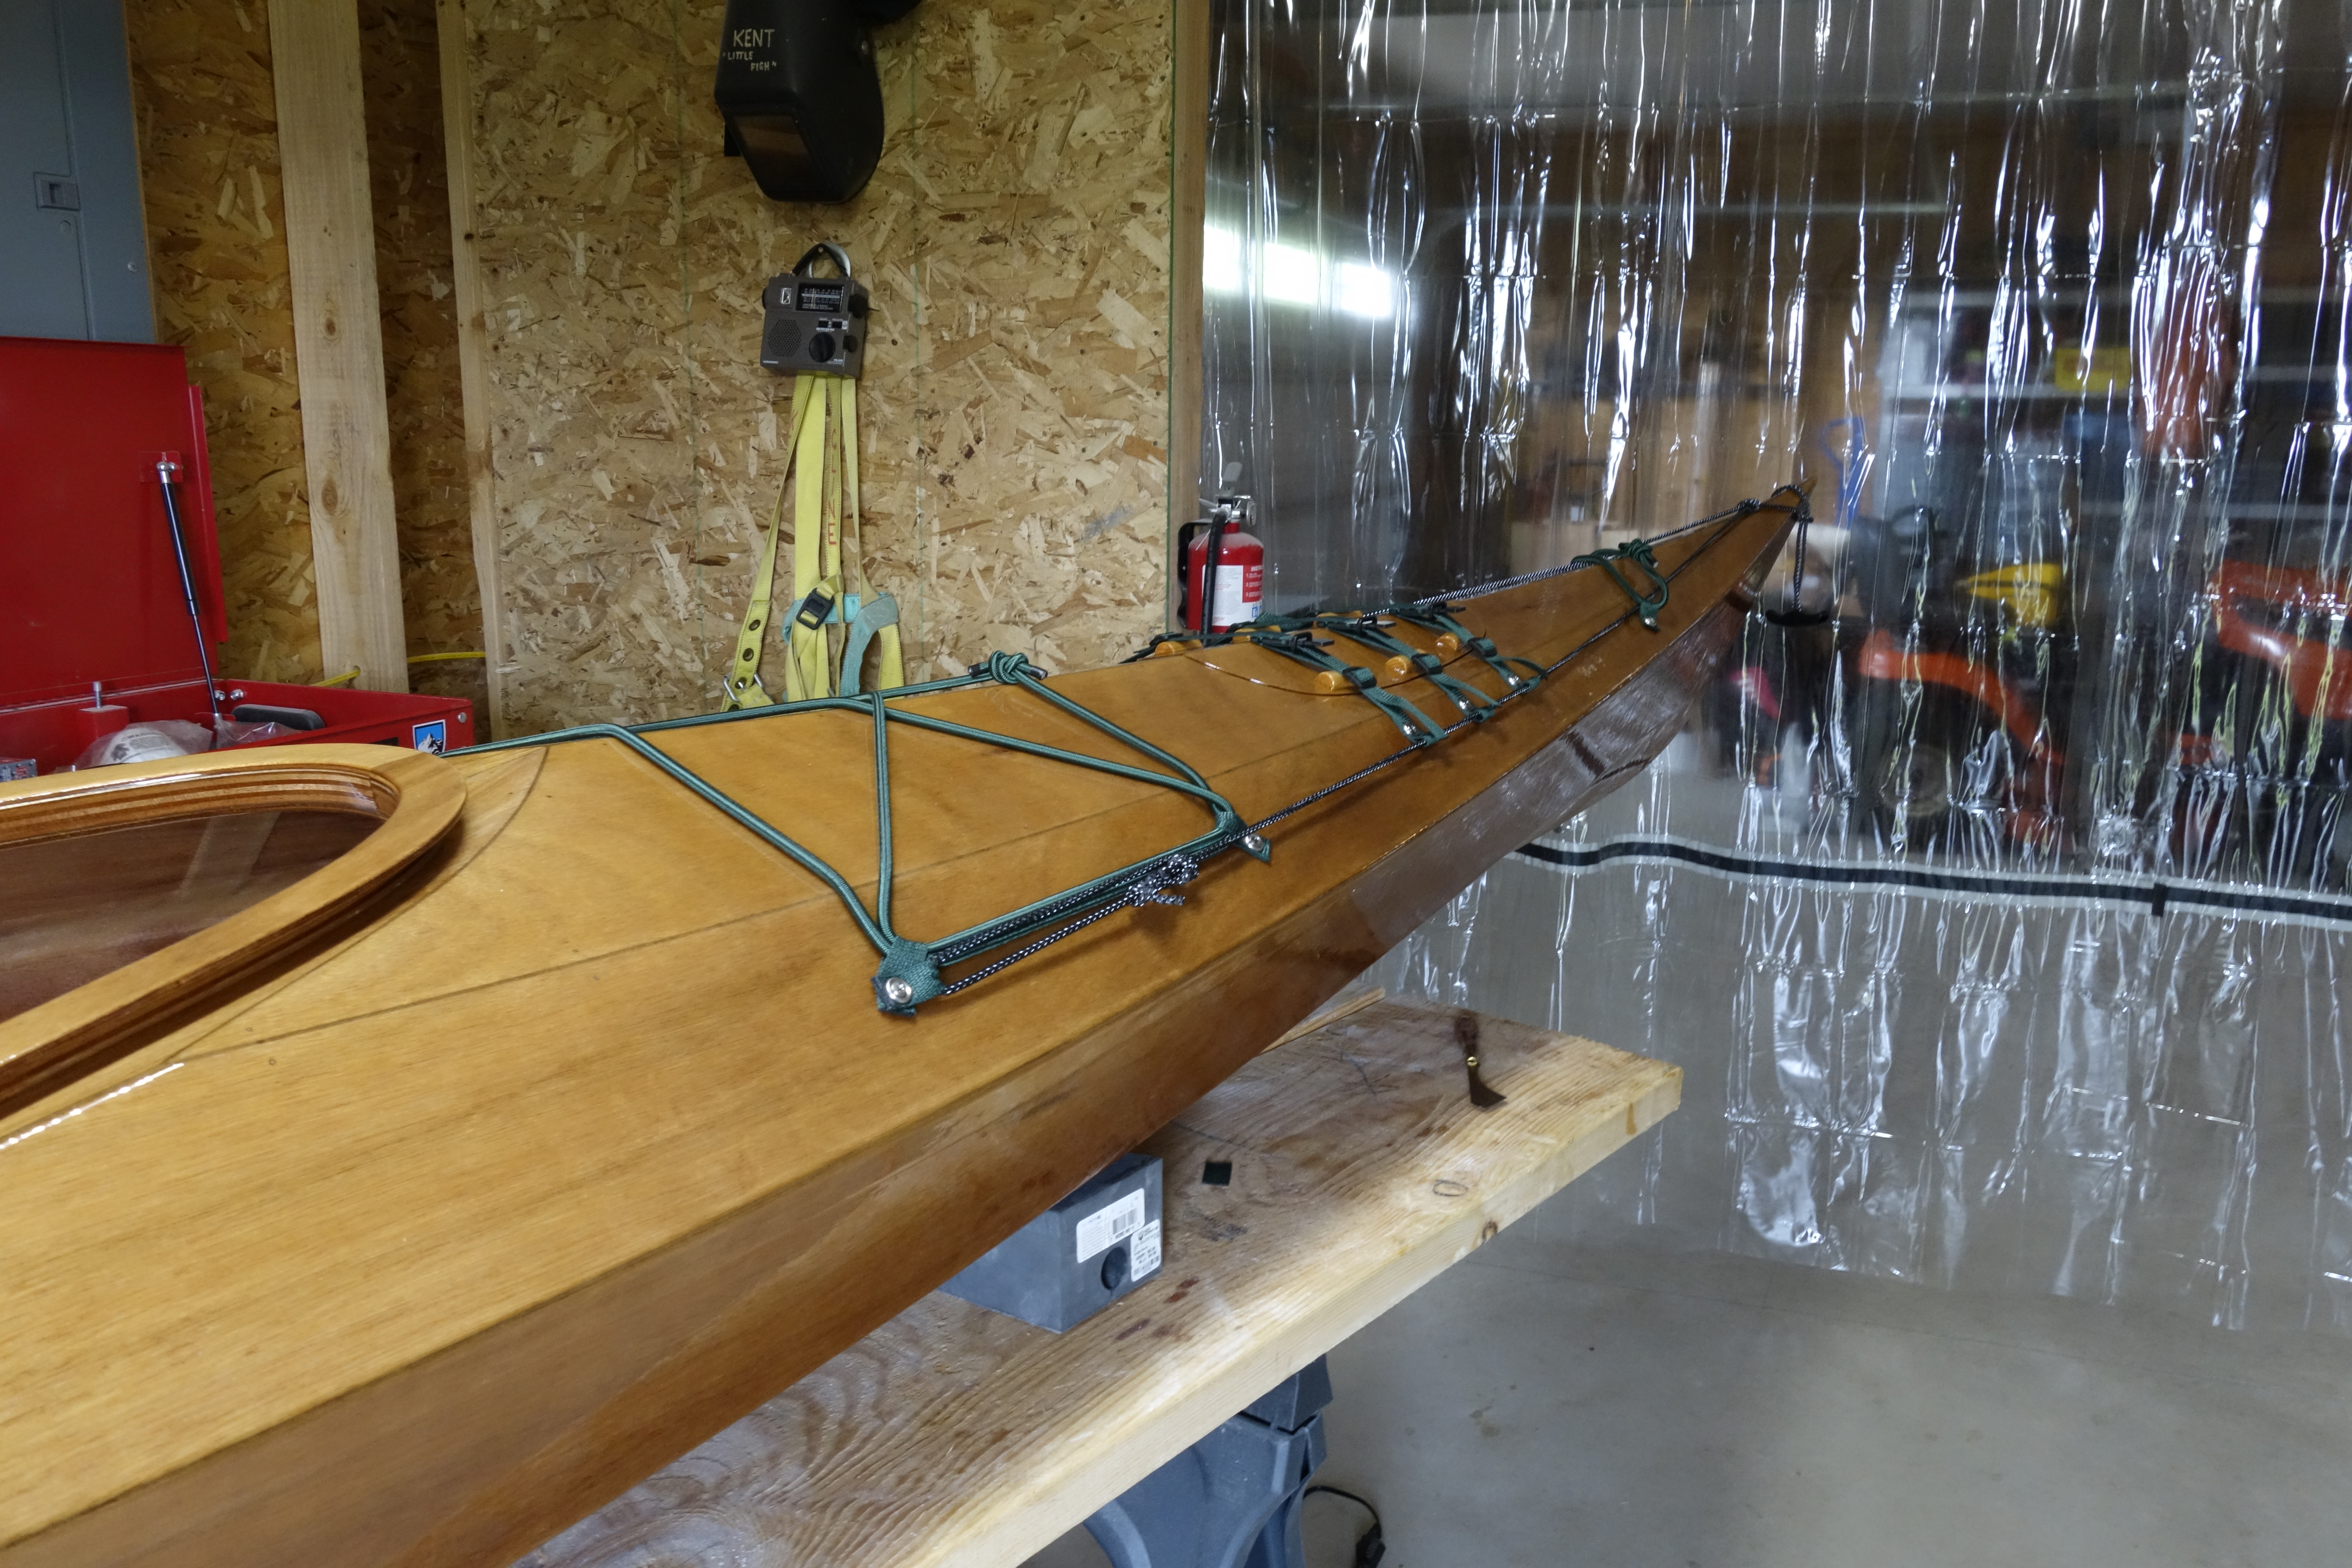
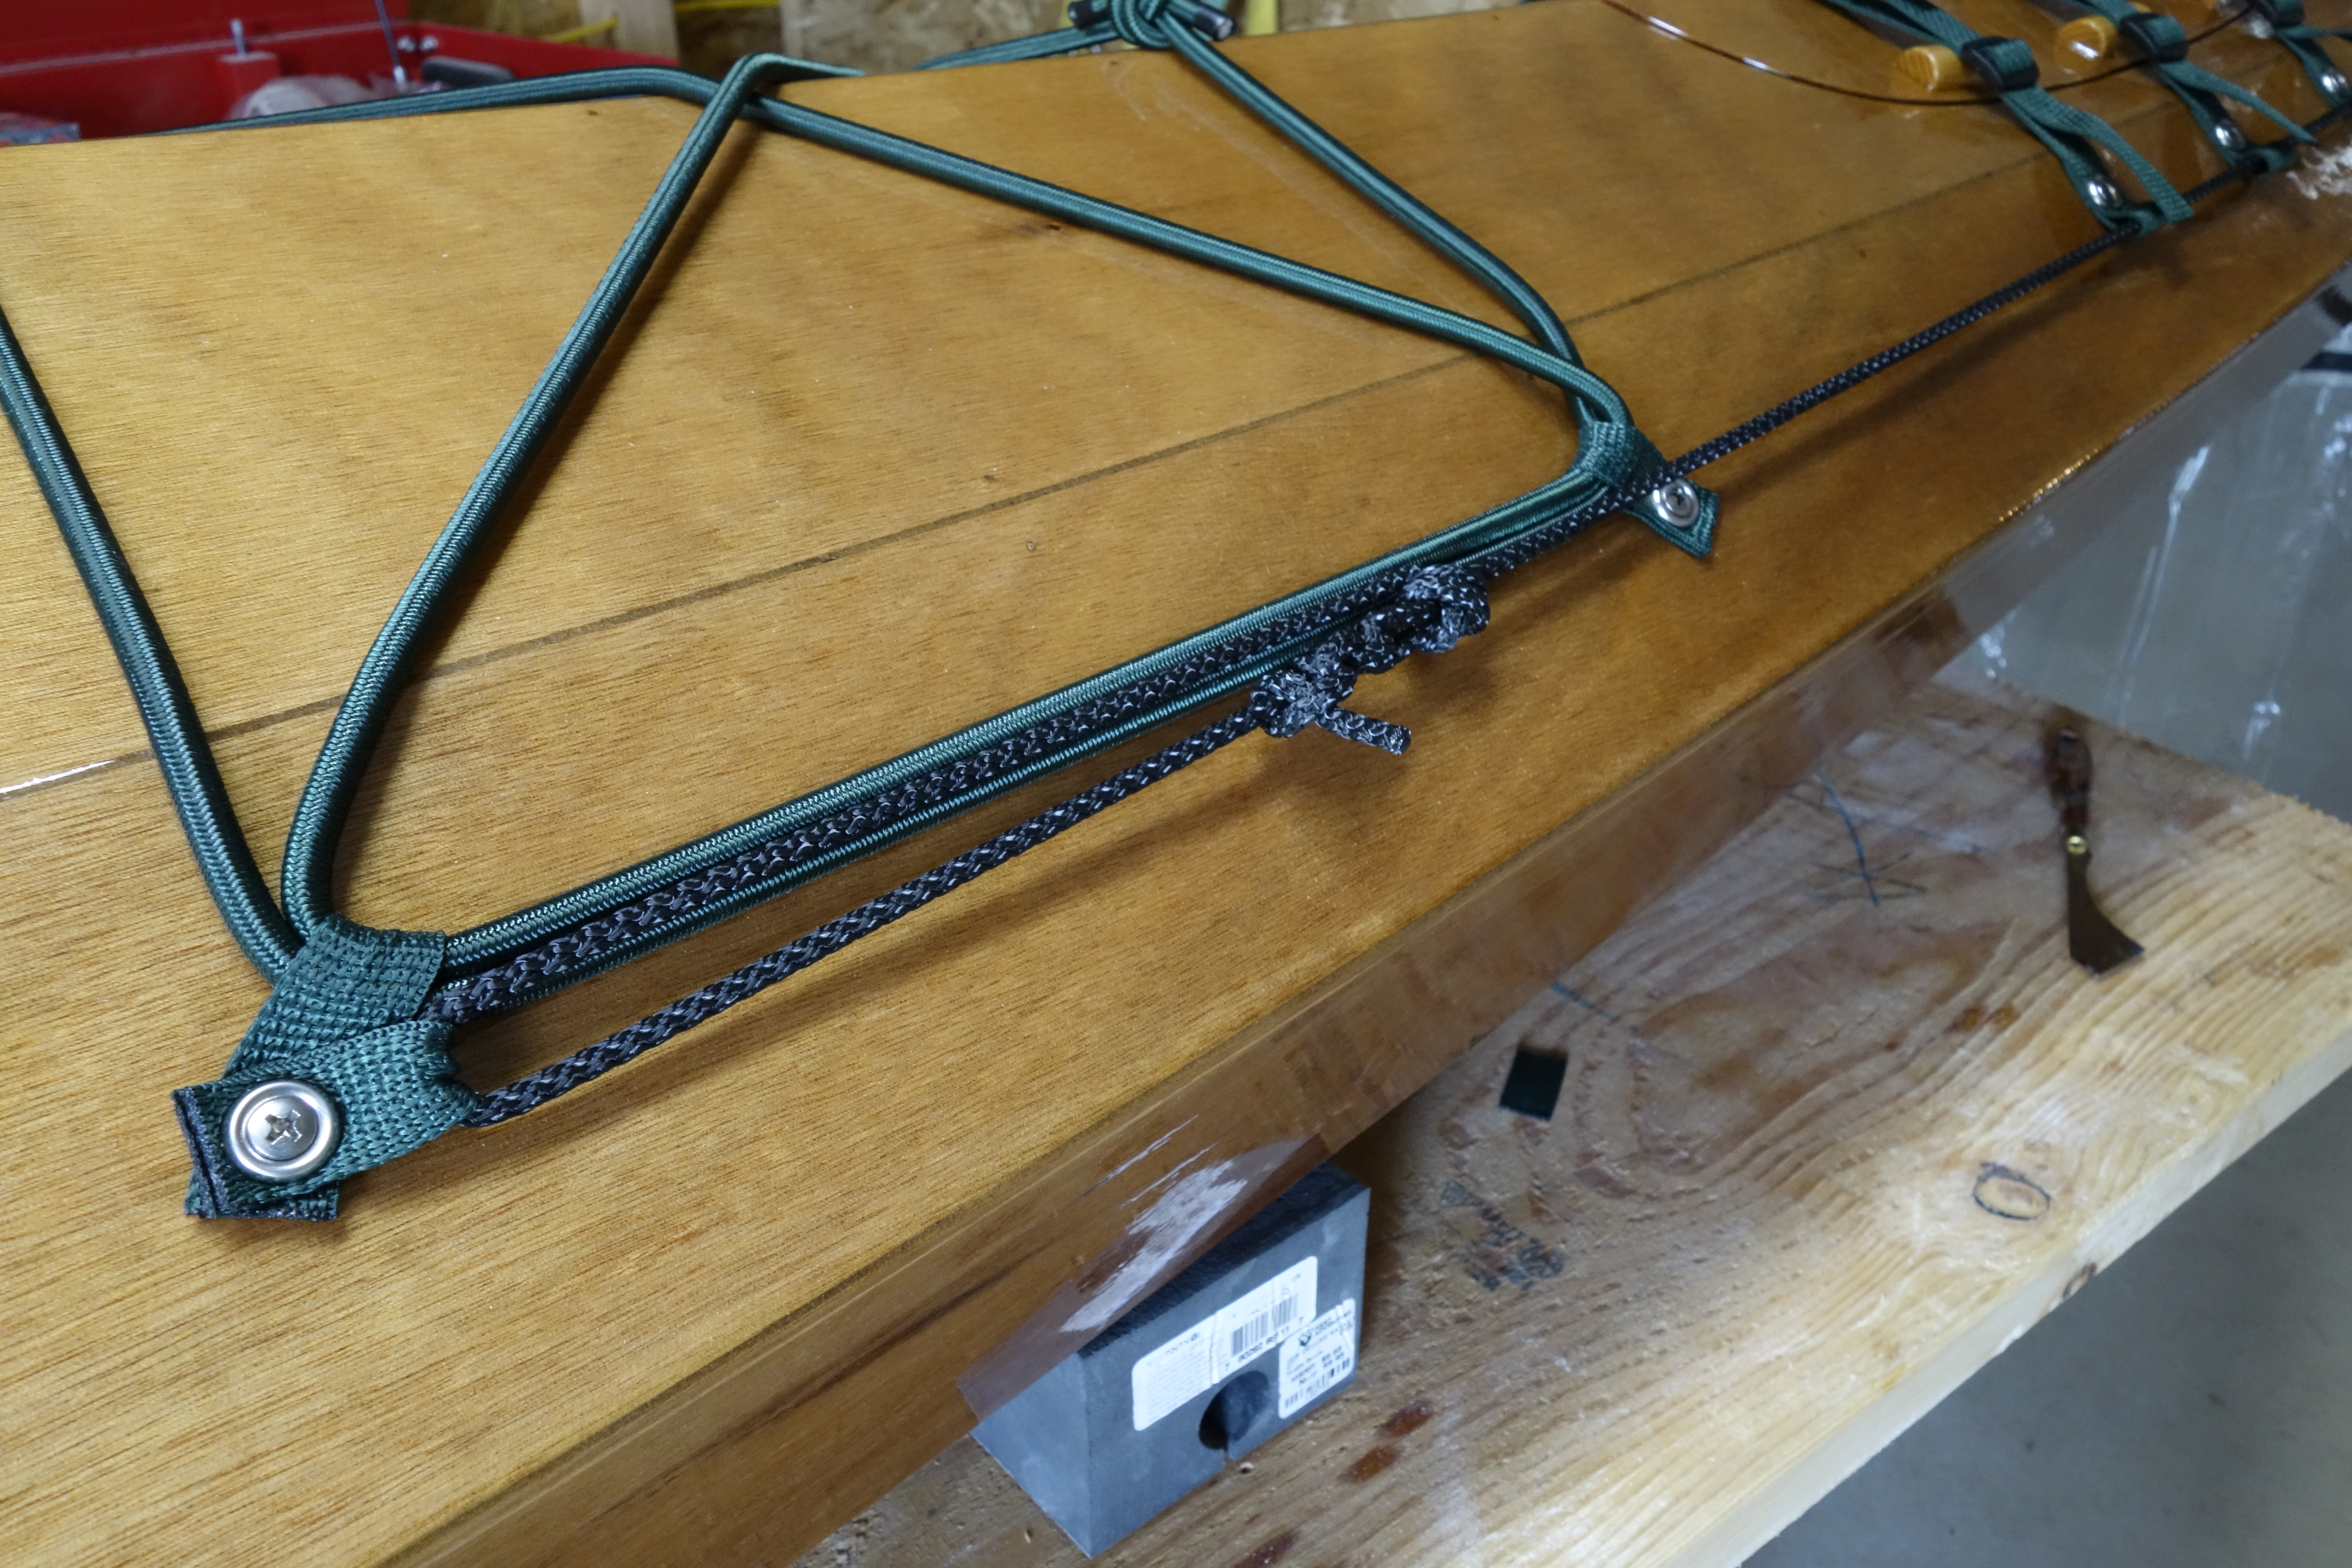
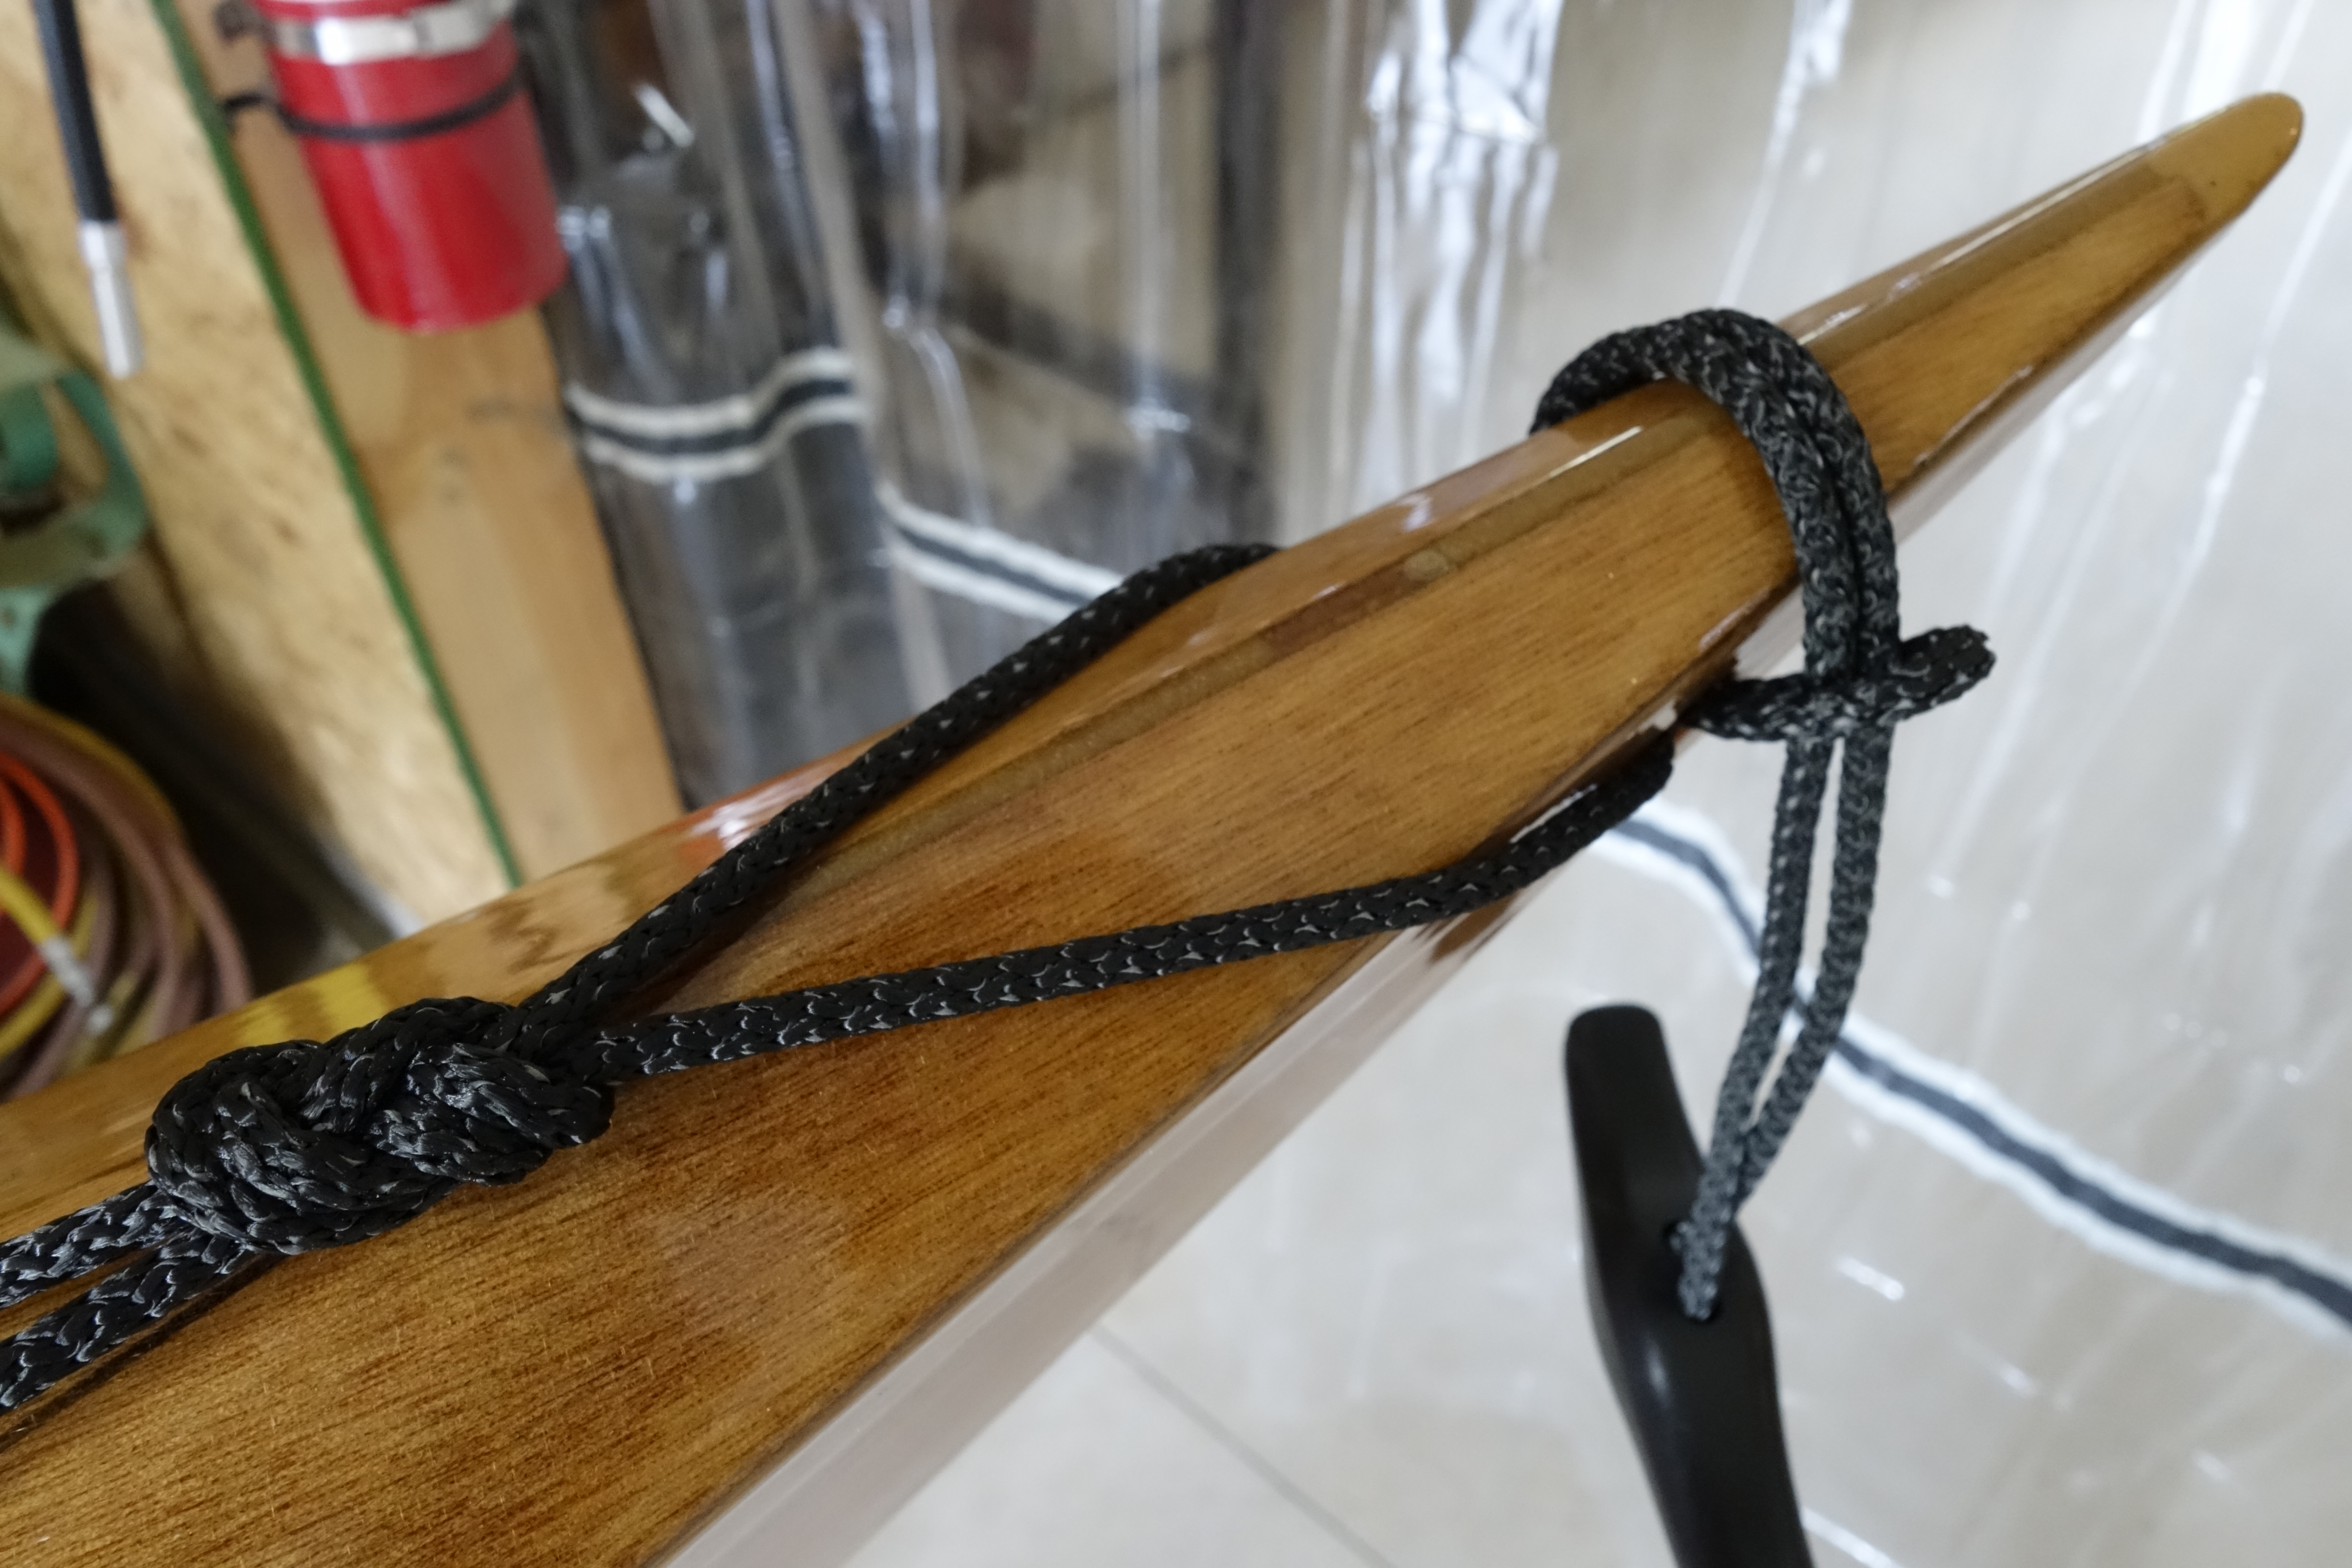
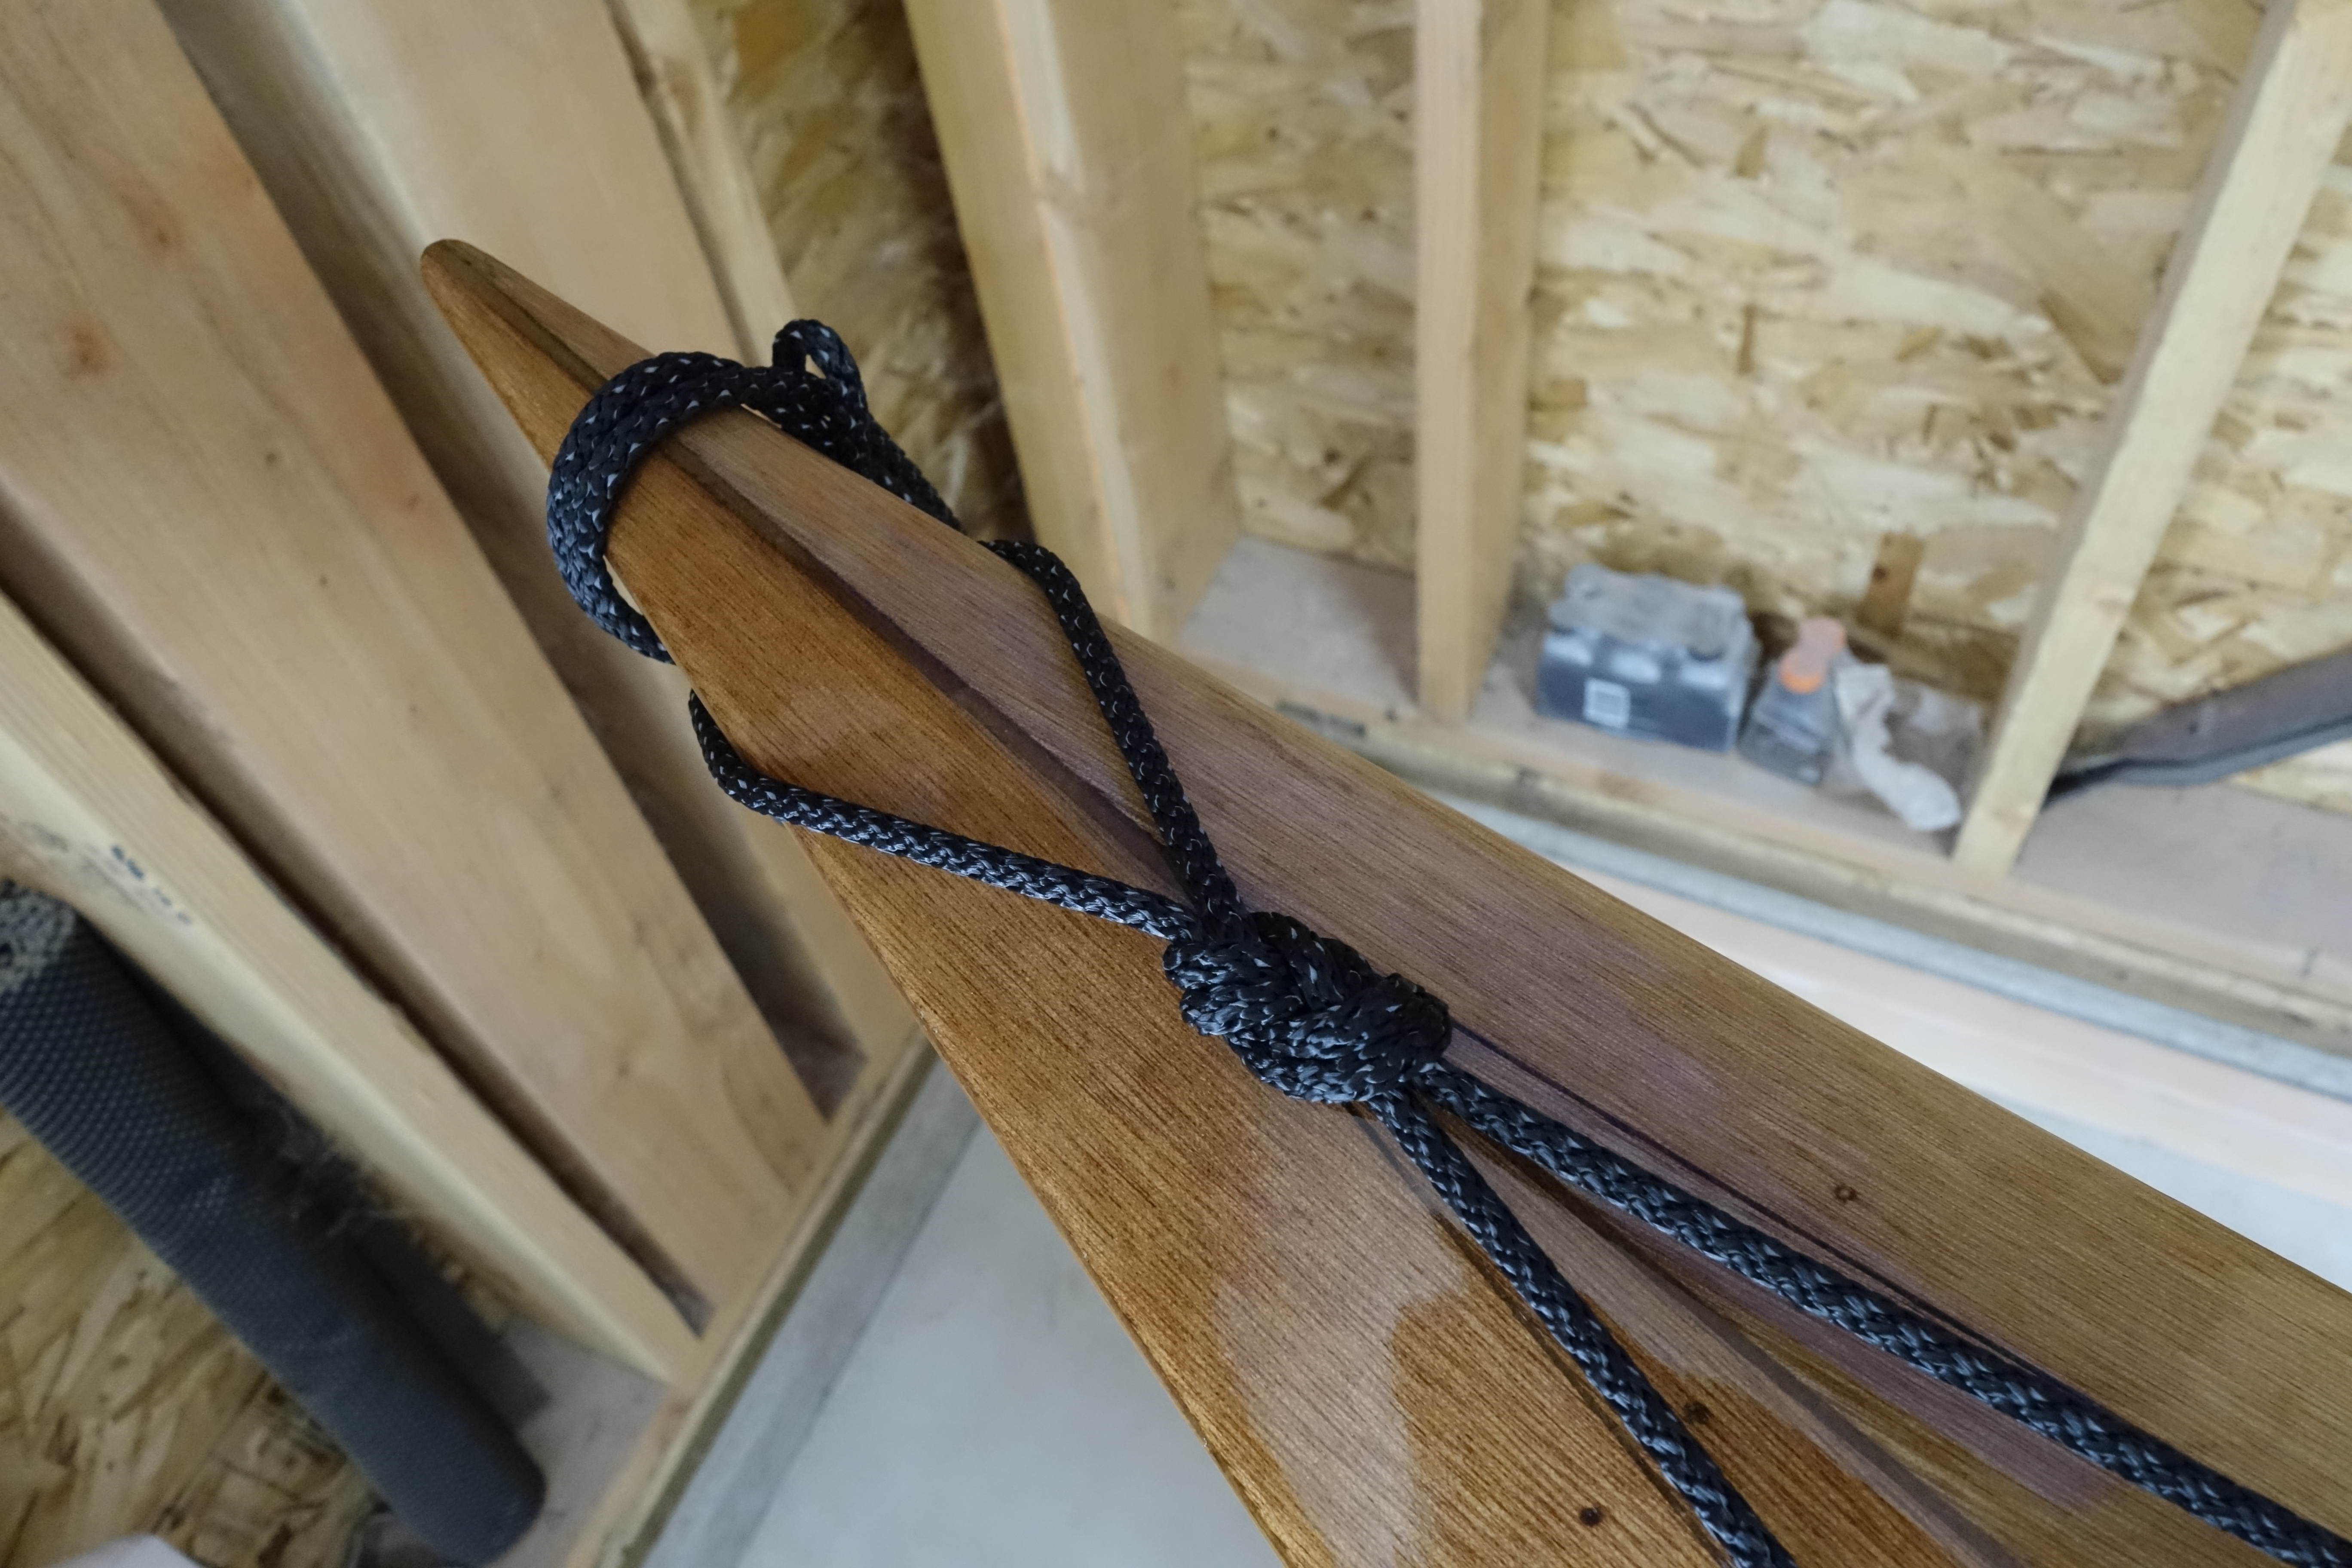
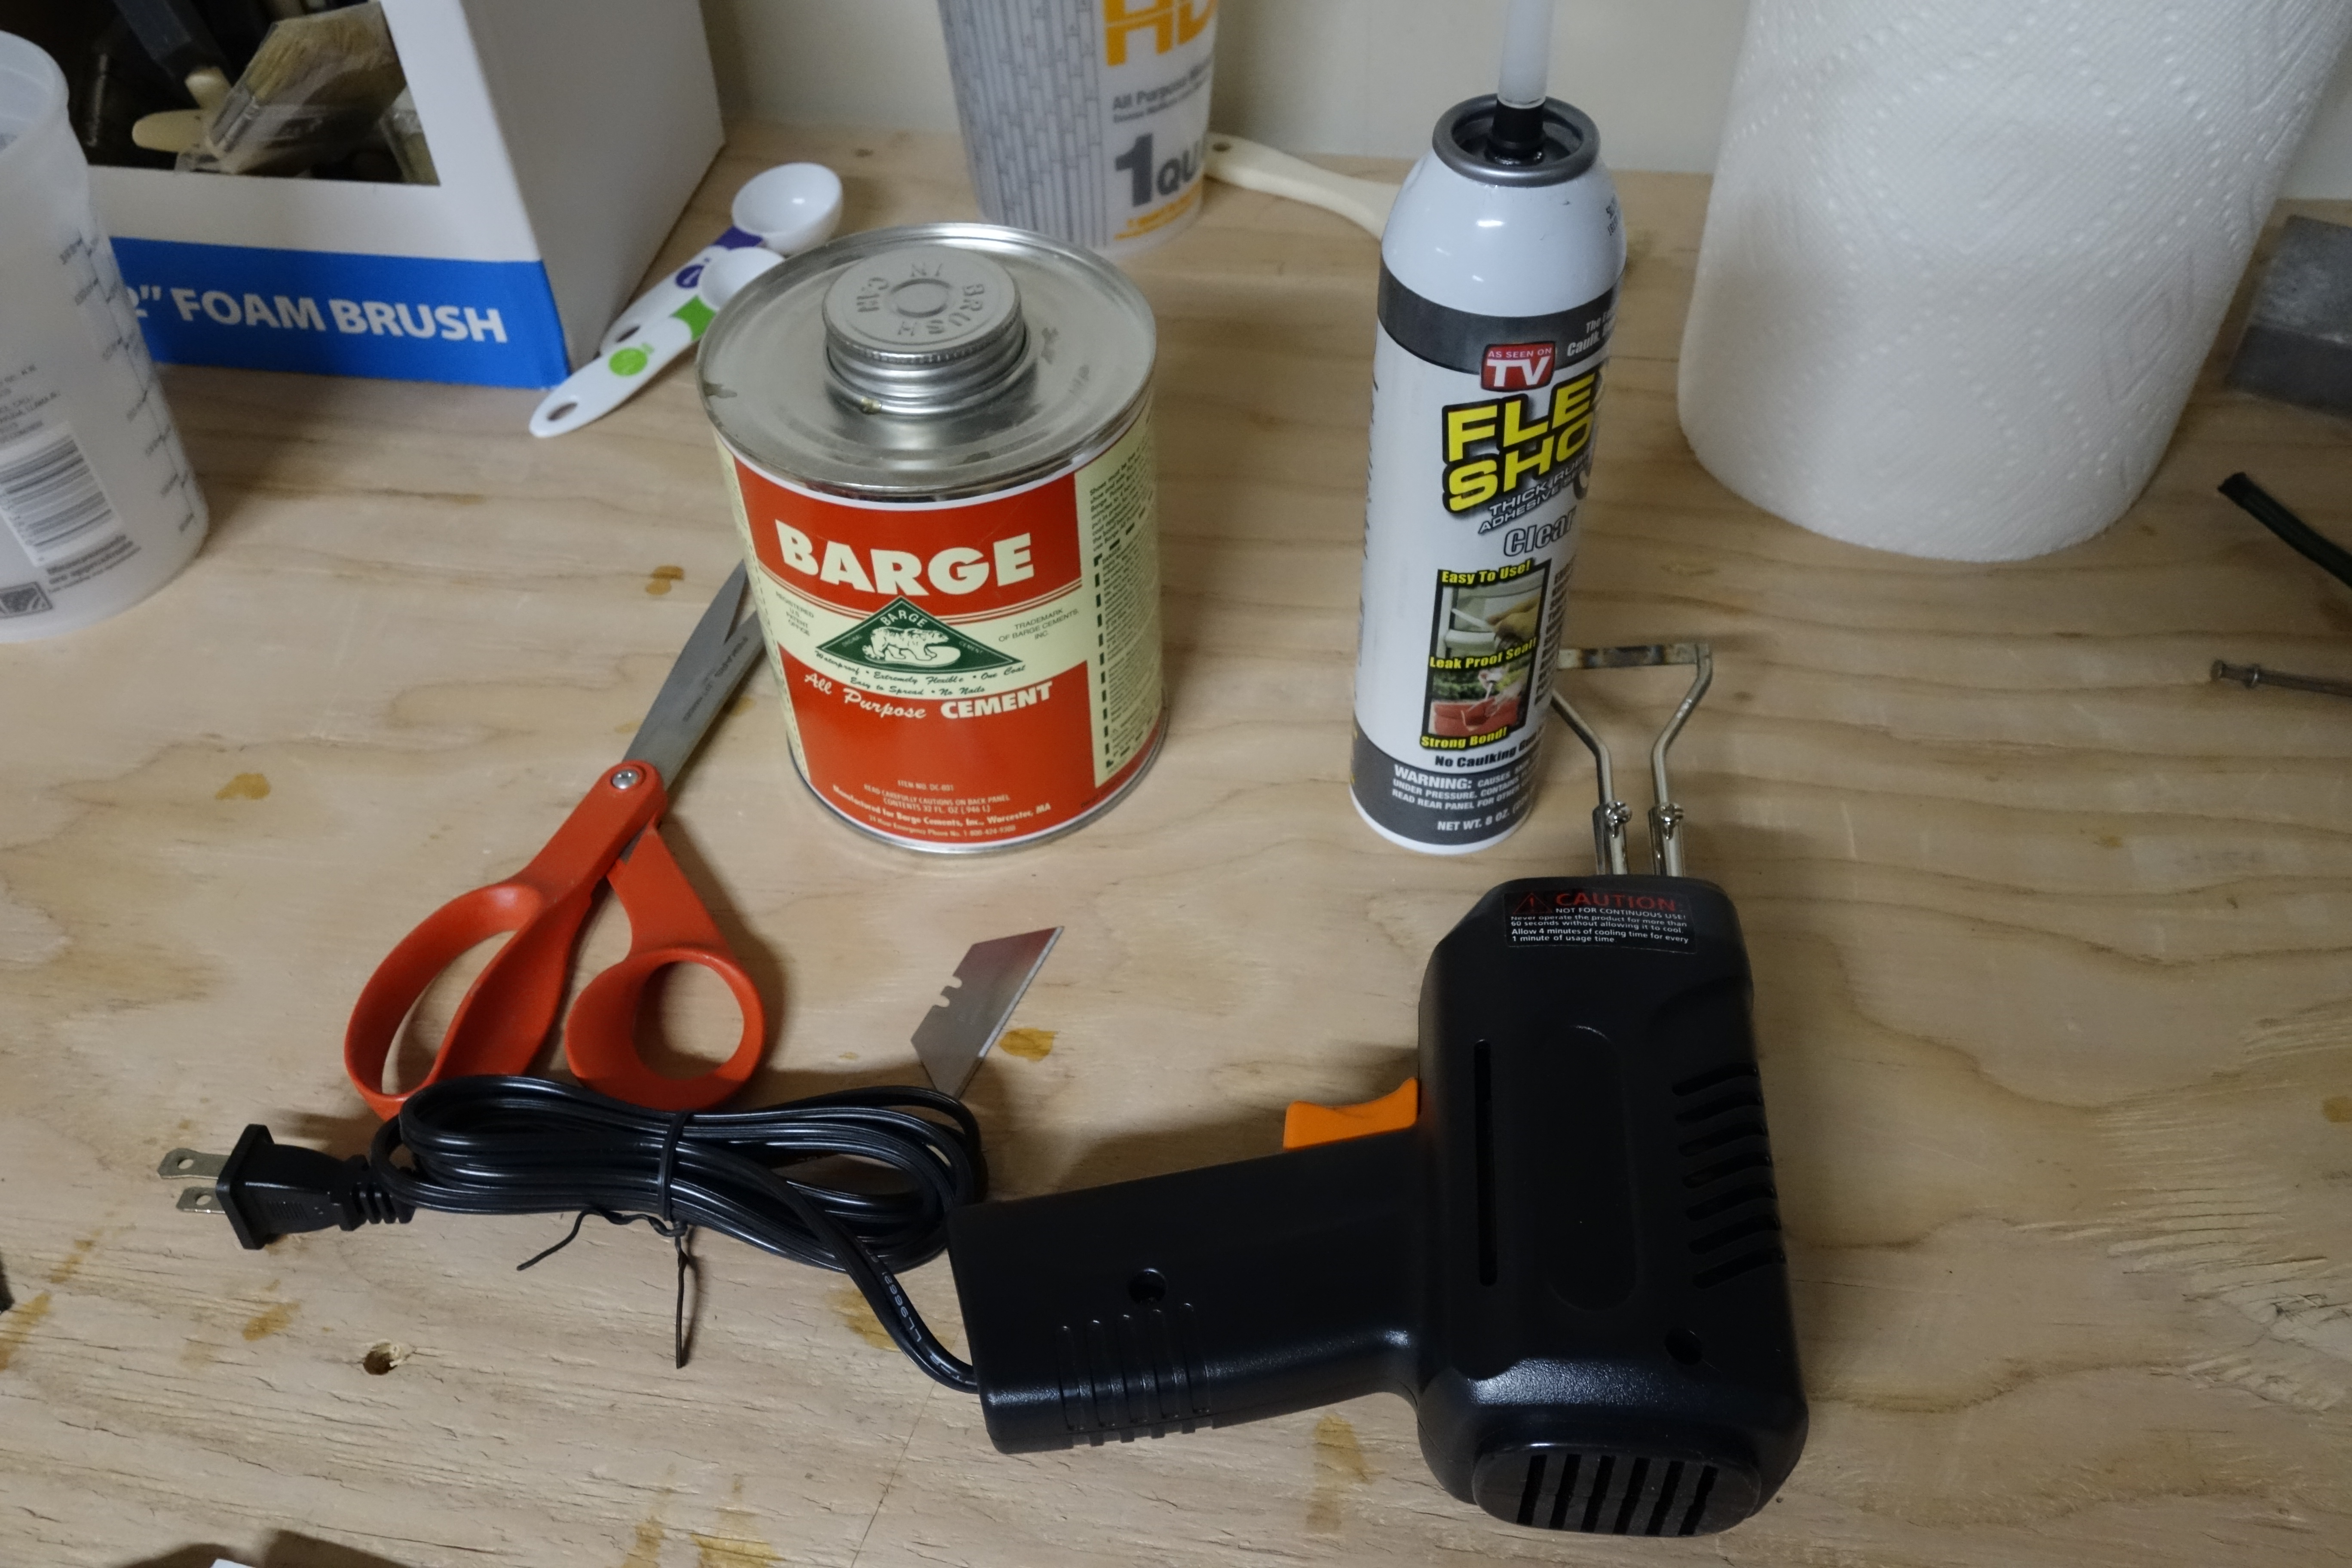
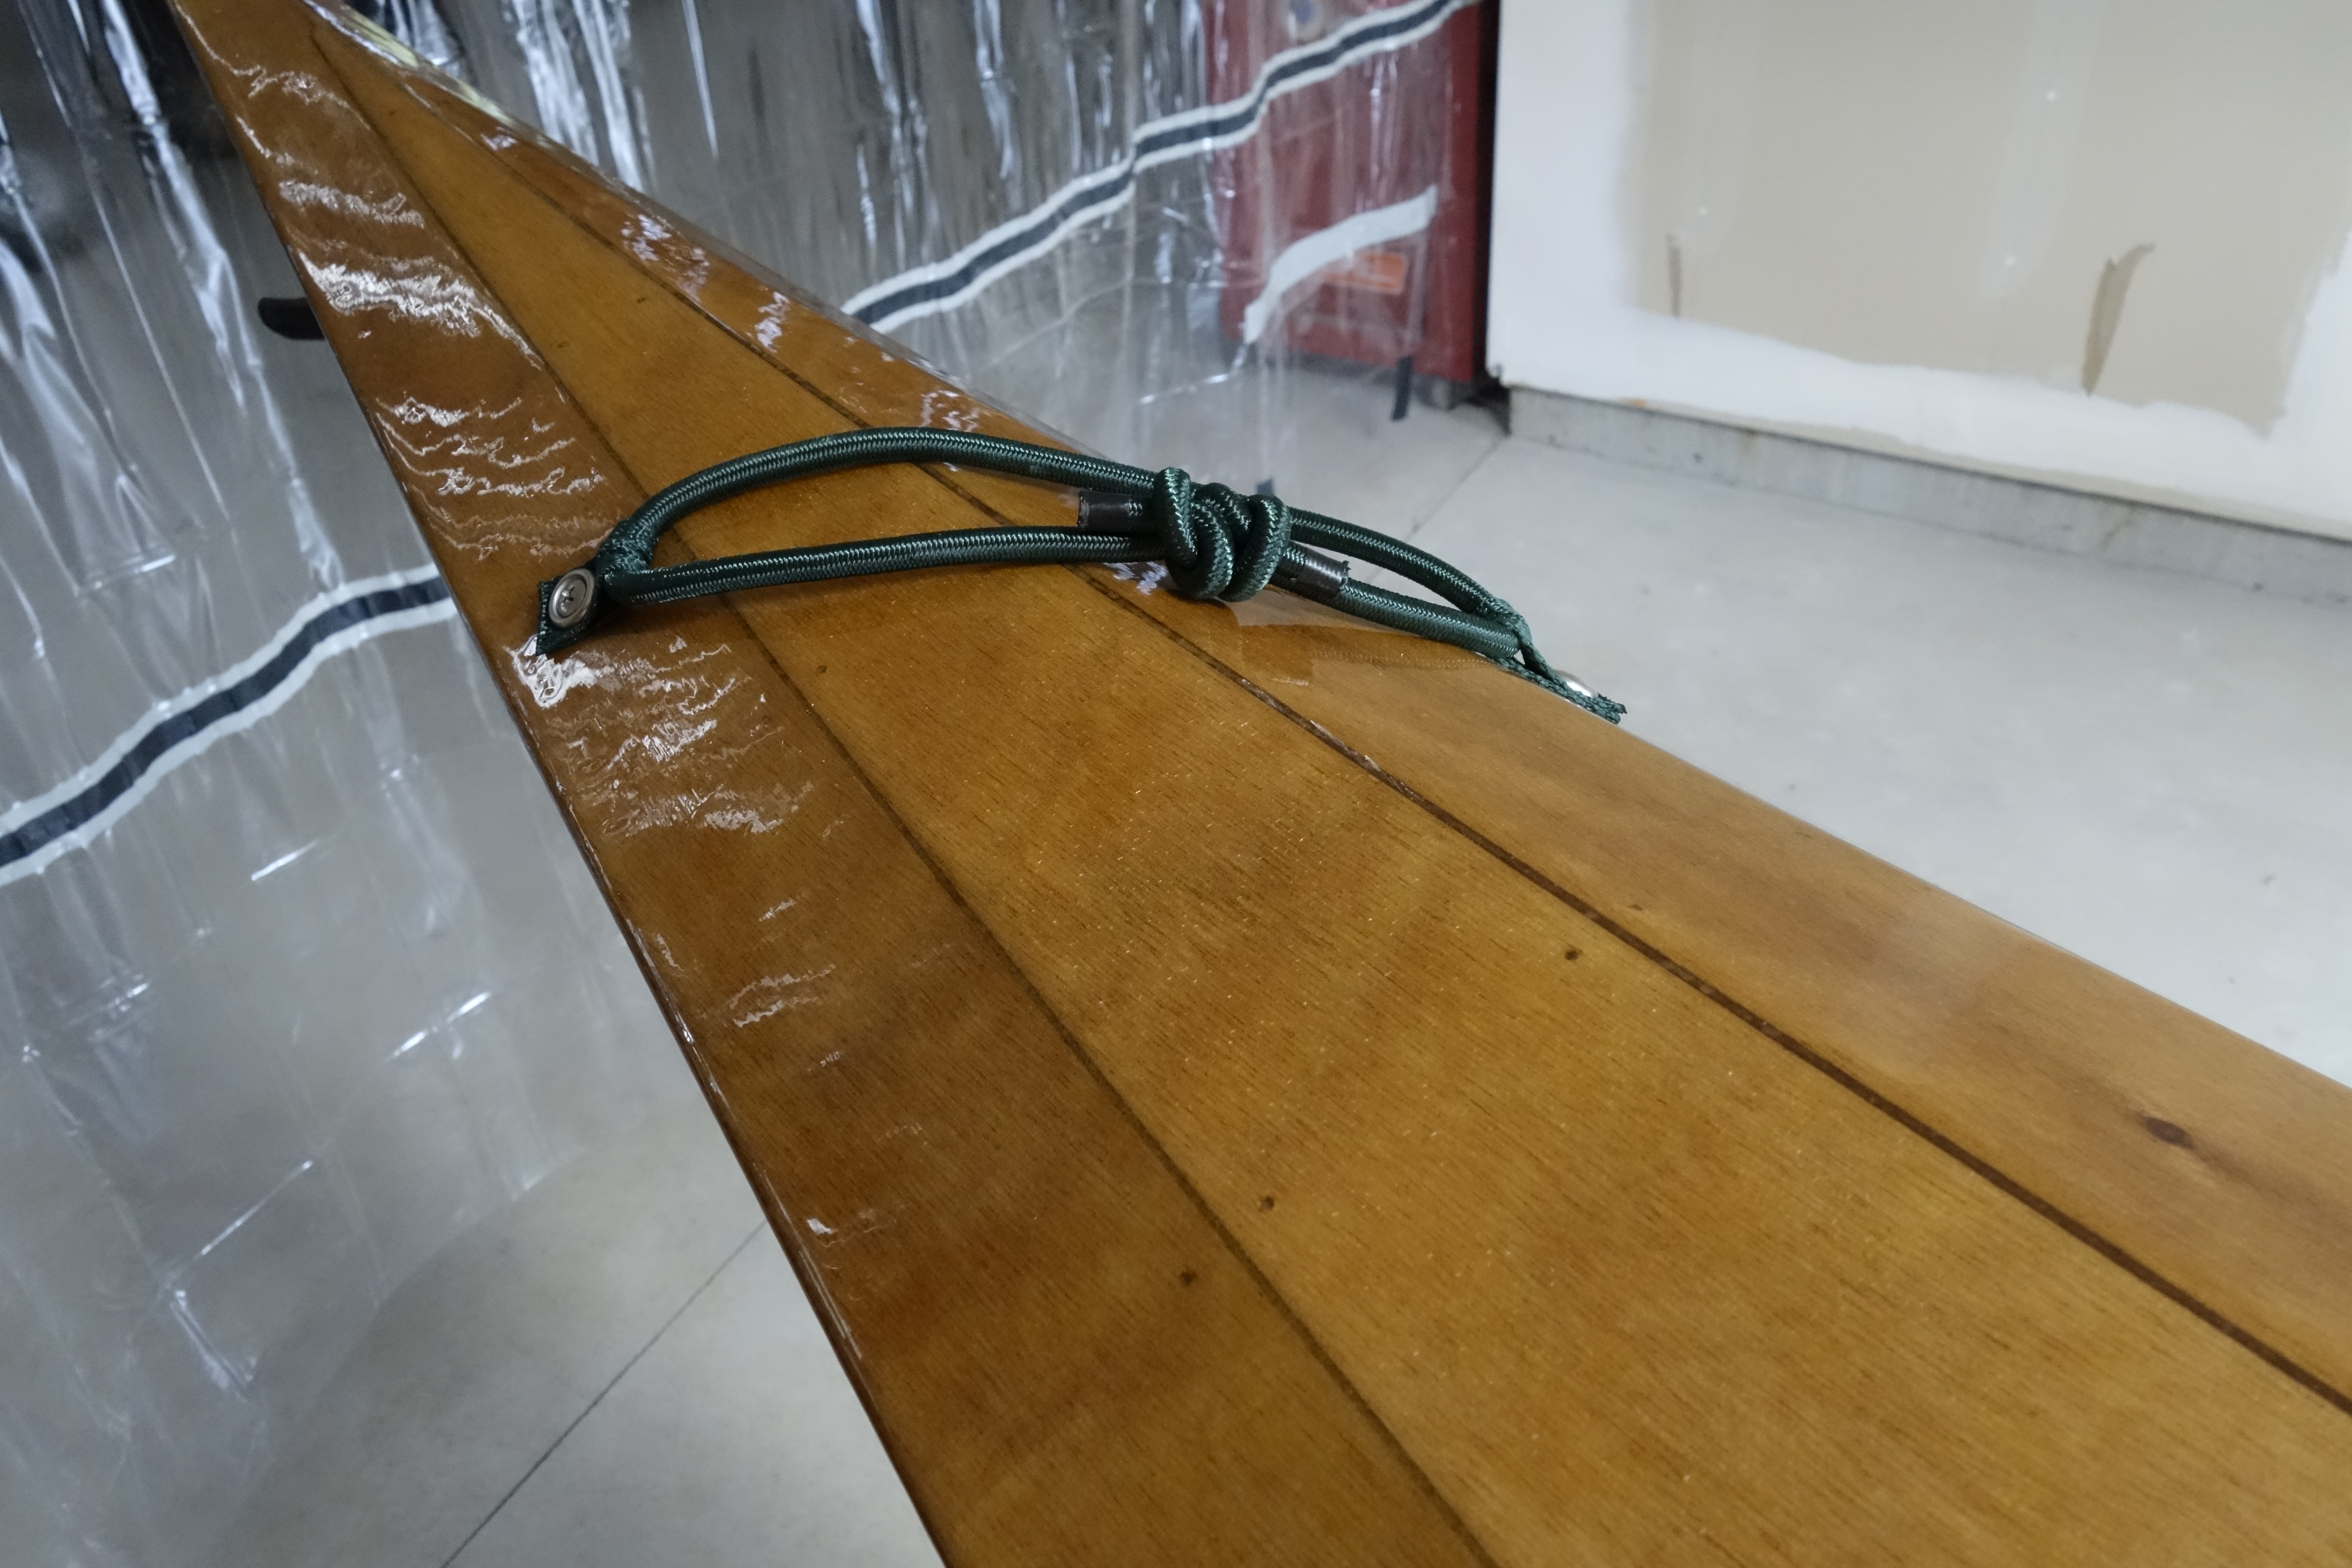
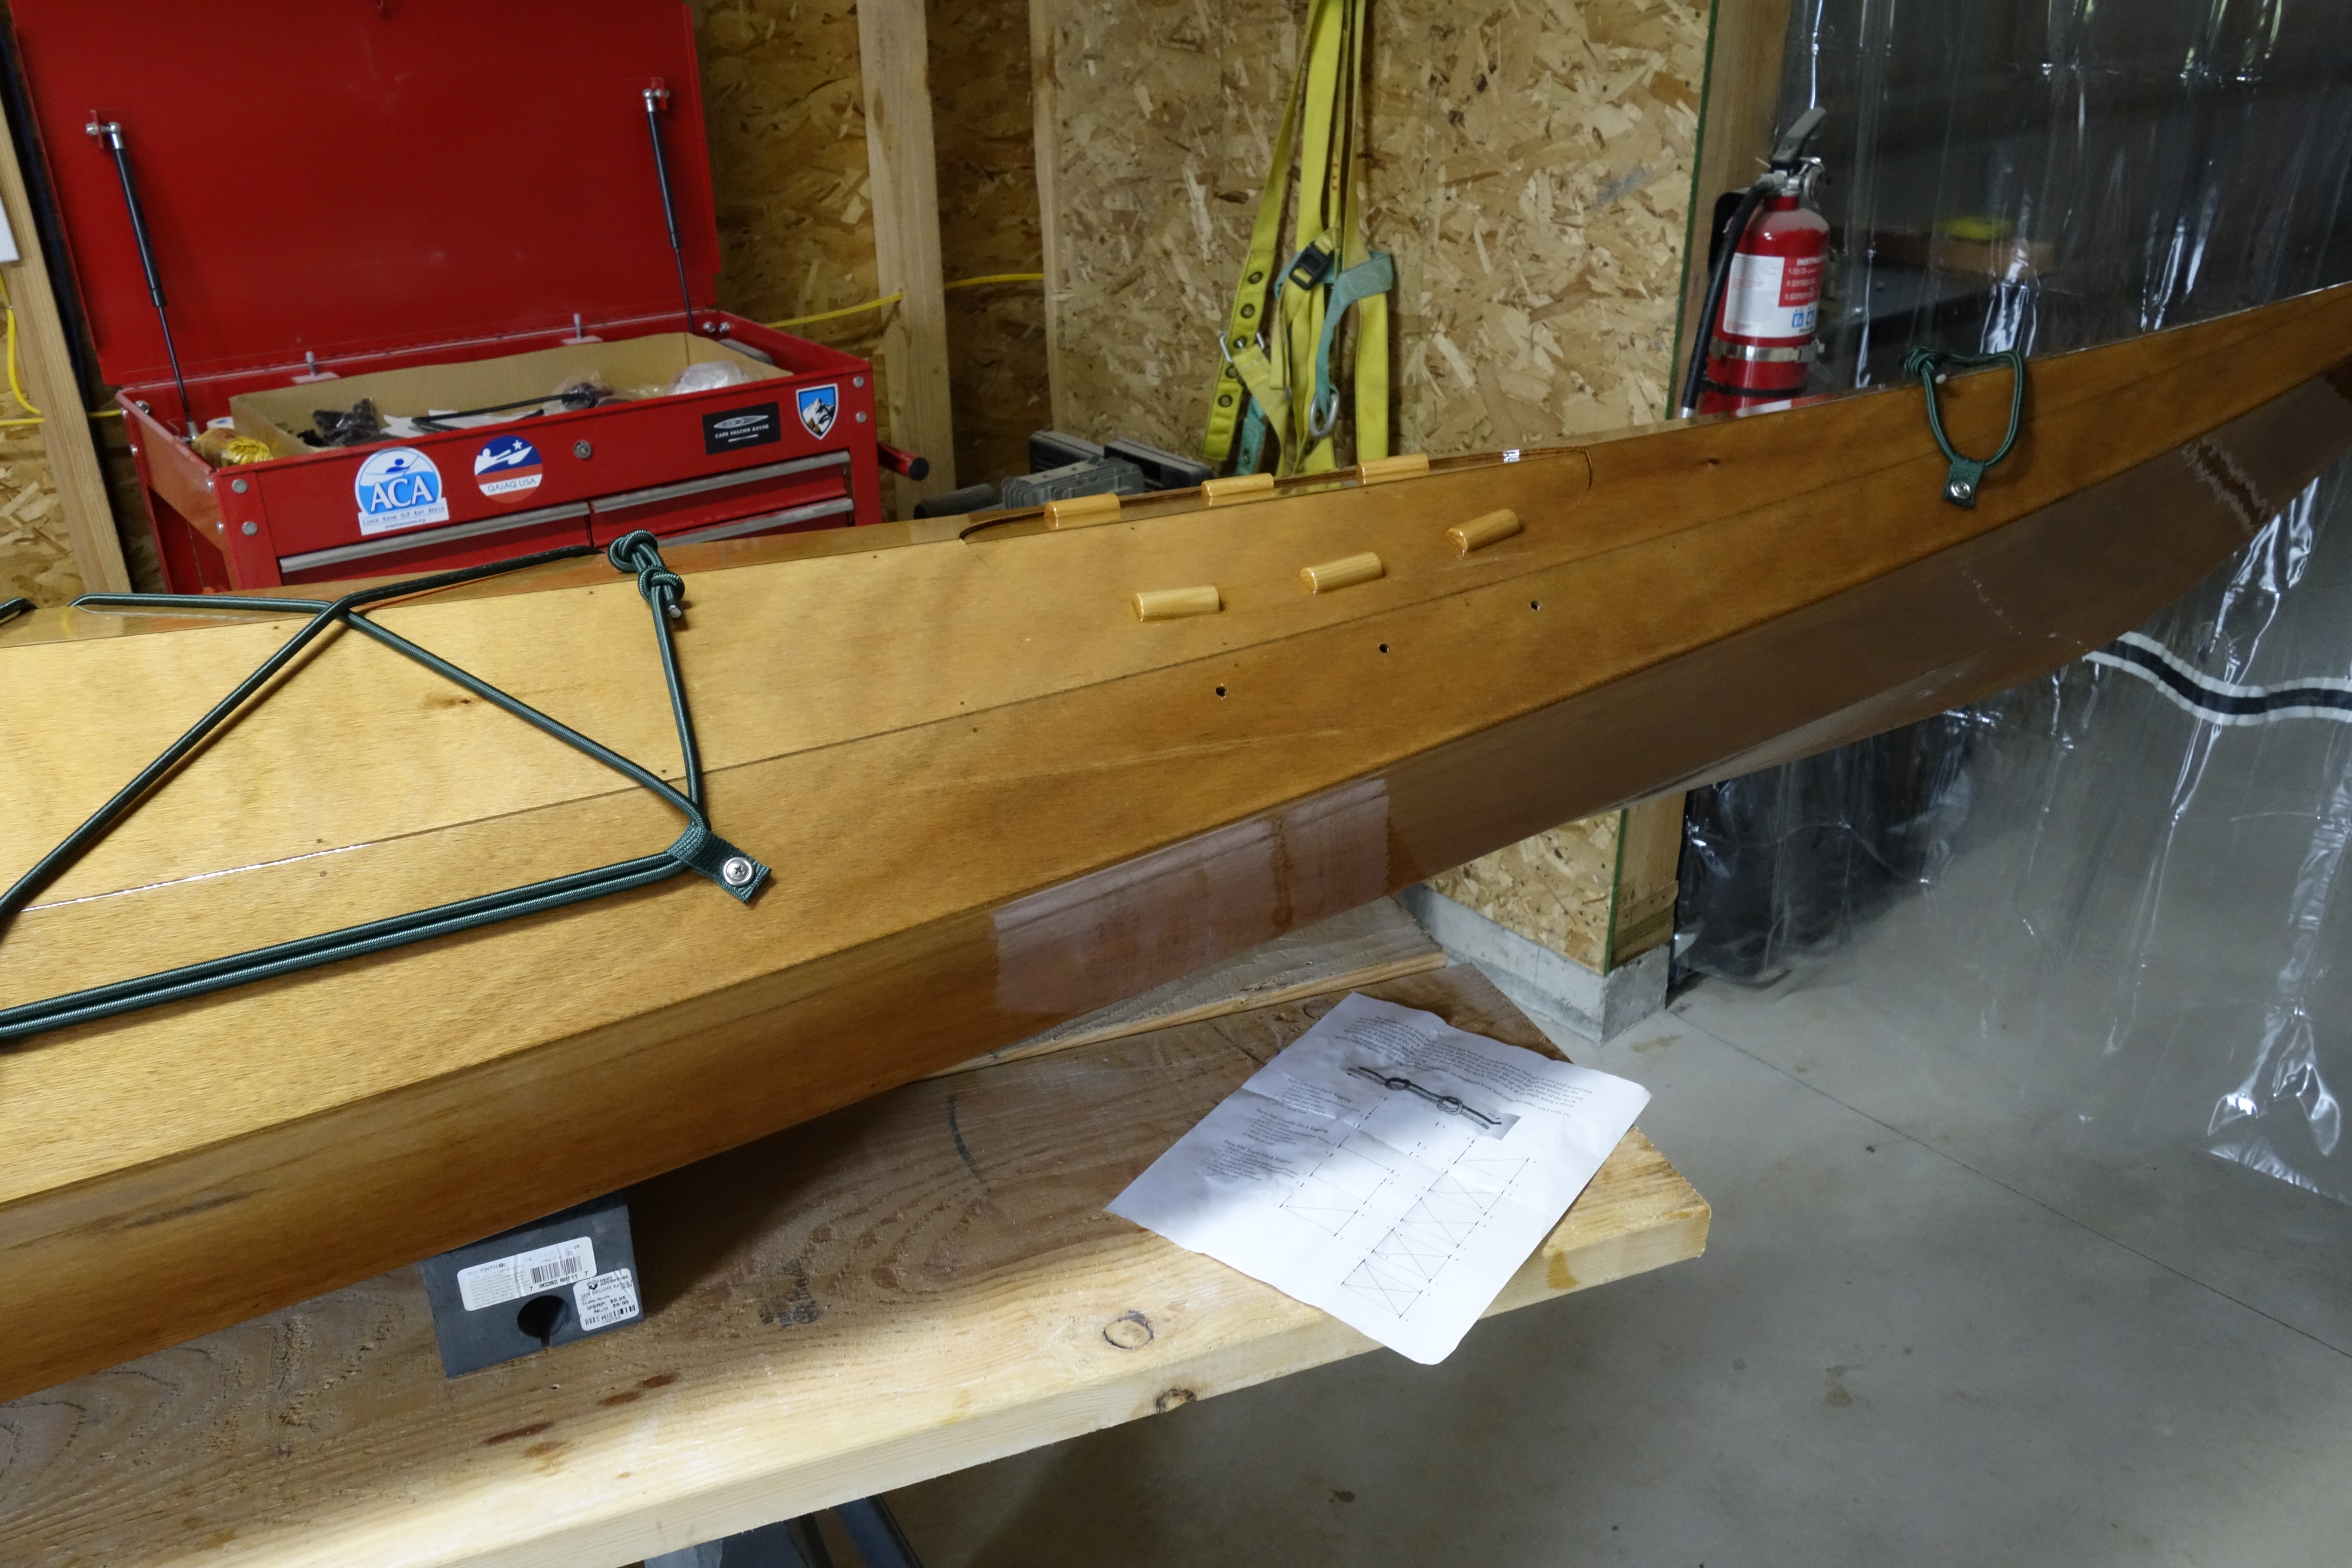
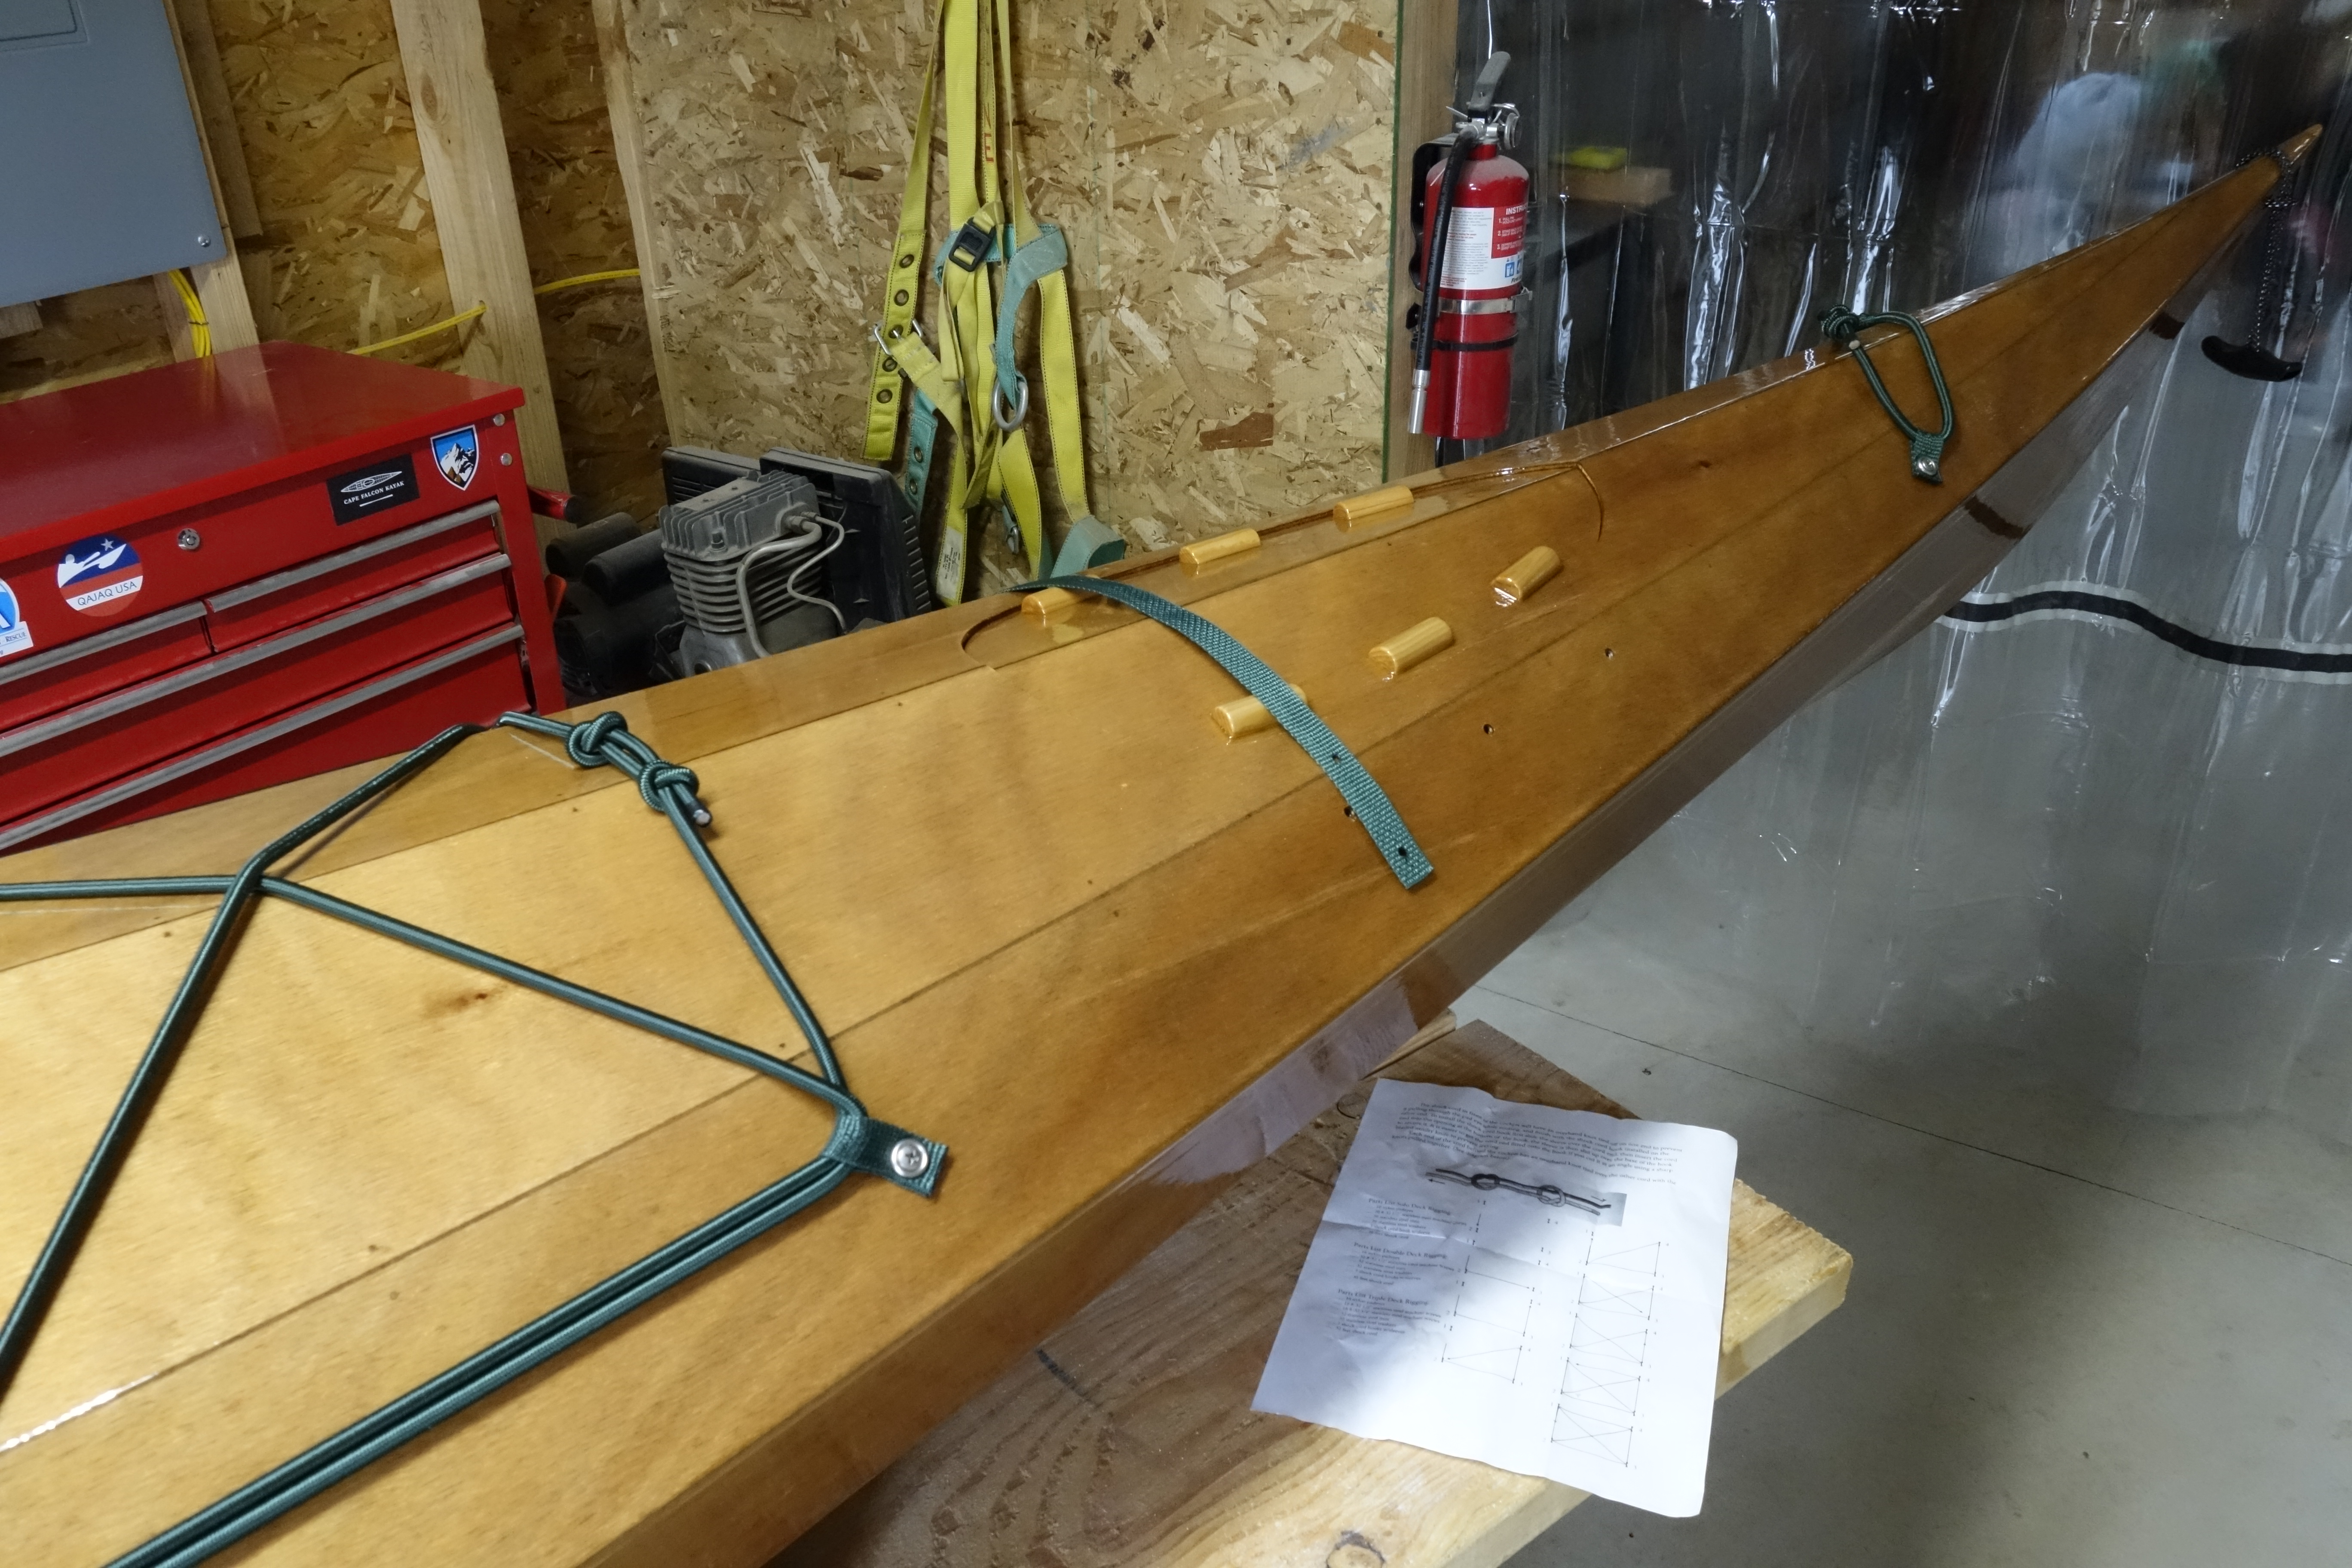
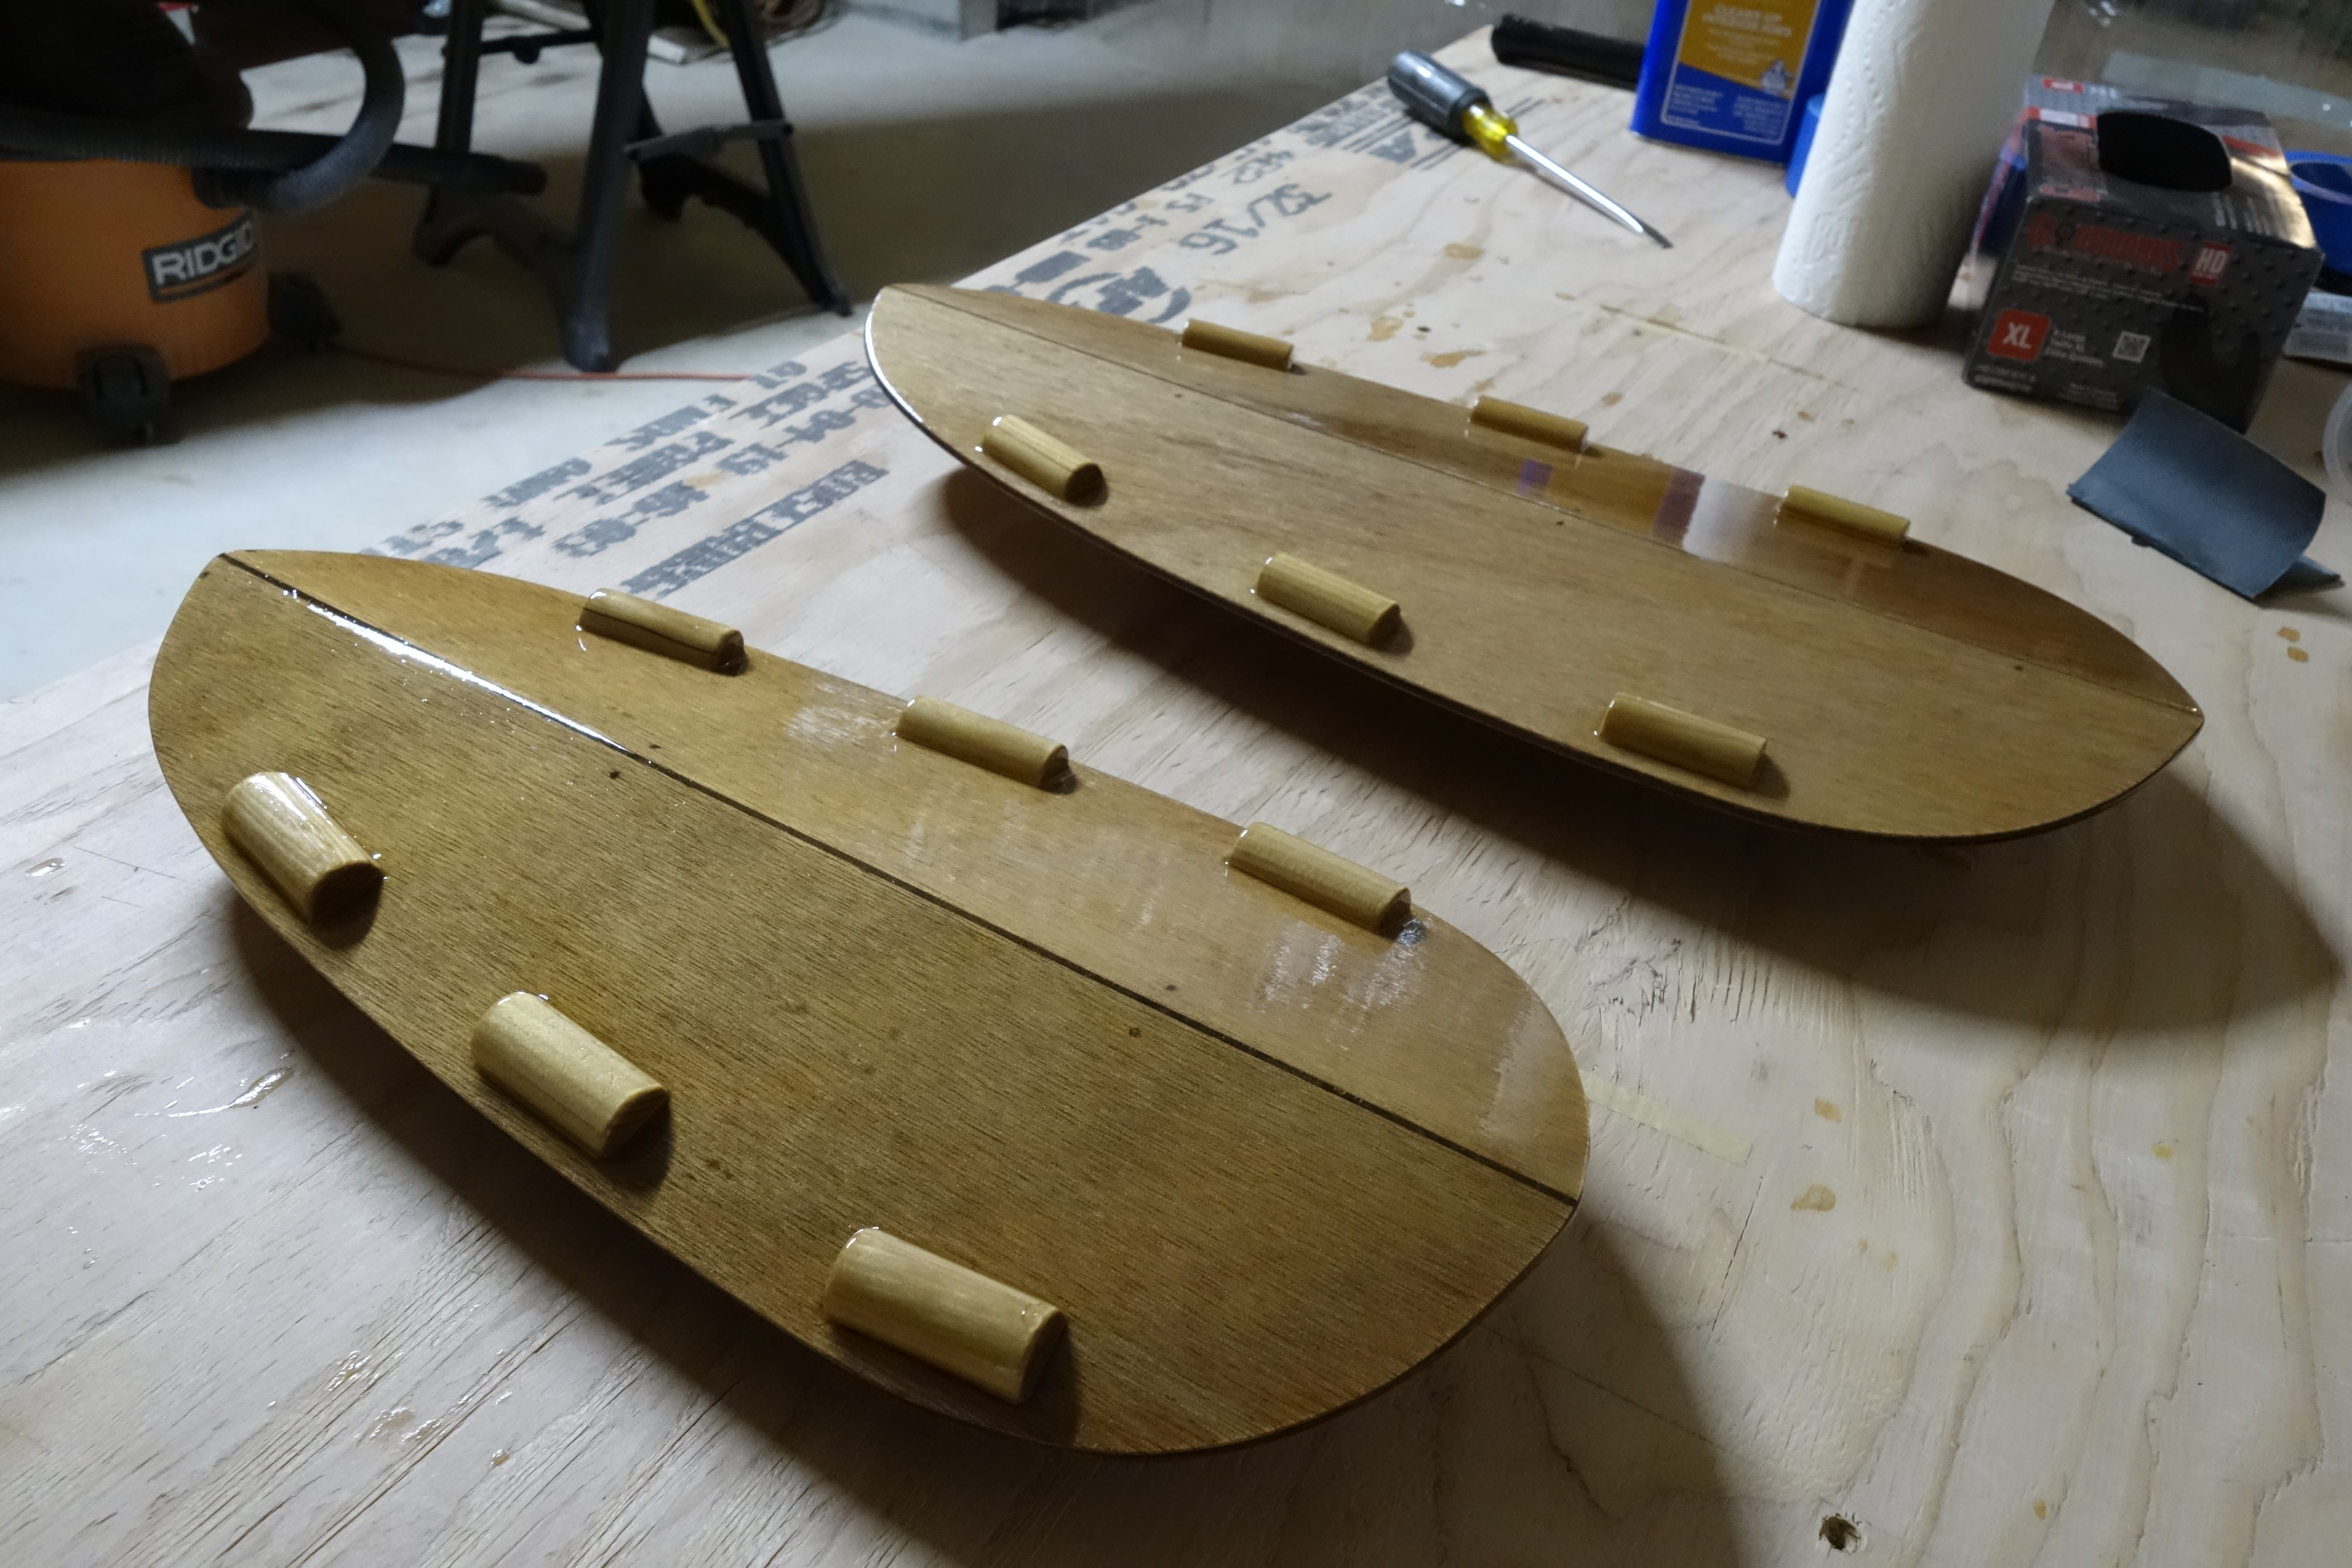
I didn’t make a photo of the foam on the bow hatch. Not sure why. But they both look the same, so you’re not missing anything.The perimeter line is the fancy, retro-reflective stuff that Pygmy sells as an option. I really like it. It looks black until light hits it, and then it is super reflective and bright! If you click on the above photo to zoom in you can see that even in ambient light it reflects brightly. I had plenty left over so I used it to make my hand toggles too. :^)Figure eight knot in the bow perimeter line.Figure eight knot in the aft perimeter line.Above: Deck rigging complete! Today’s tools. The Barge Cement was used to glue the foam to the hatch lips, and even though I made sure to get epoxy and varnish in all the holes that I drilled through the deck for the deck rigging, I also put a tiny blob of the Flex Shot silicone goop in each hole, around the base of each of the machine screws that went through the deck. Just a little added insurance against water infiltration. I think that any silicone caulk or adhesive would have worked fine. I just used the Flex Shot stuff because that’s what I had on hand. YMMV. The line cutting gun makes a very clean cut on nylon webbing and seals the ends so that they don’t need any further attention. Well worth the money in my opinion.
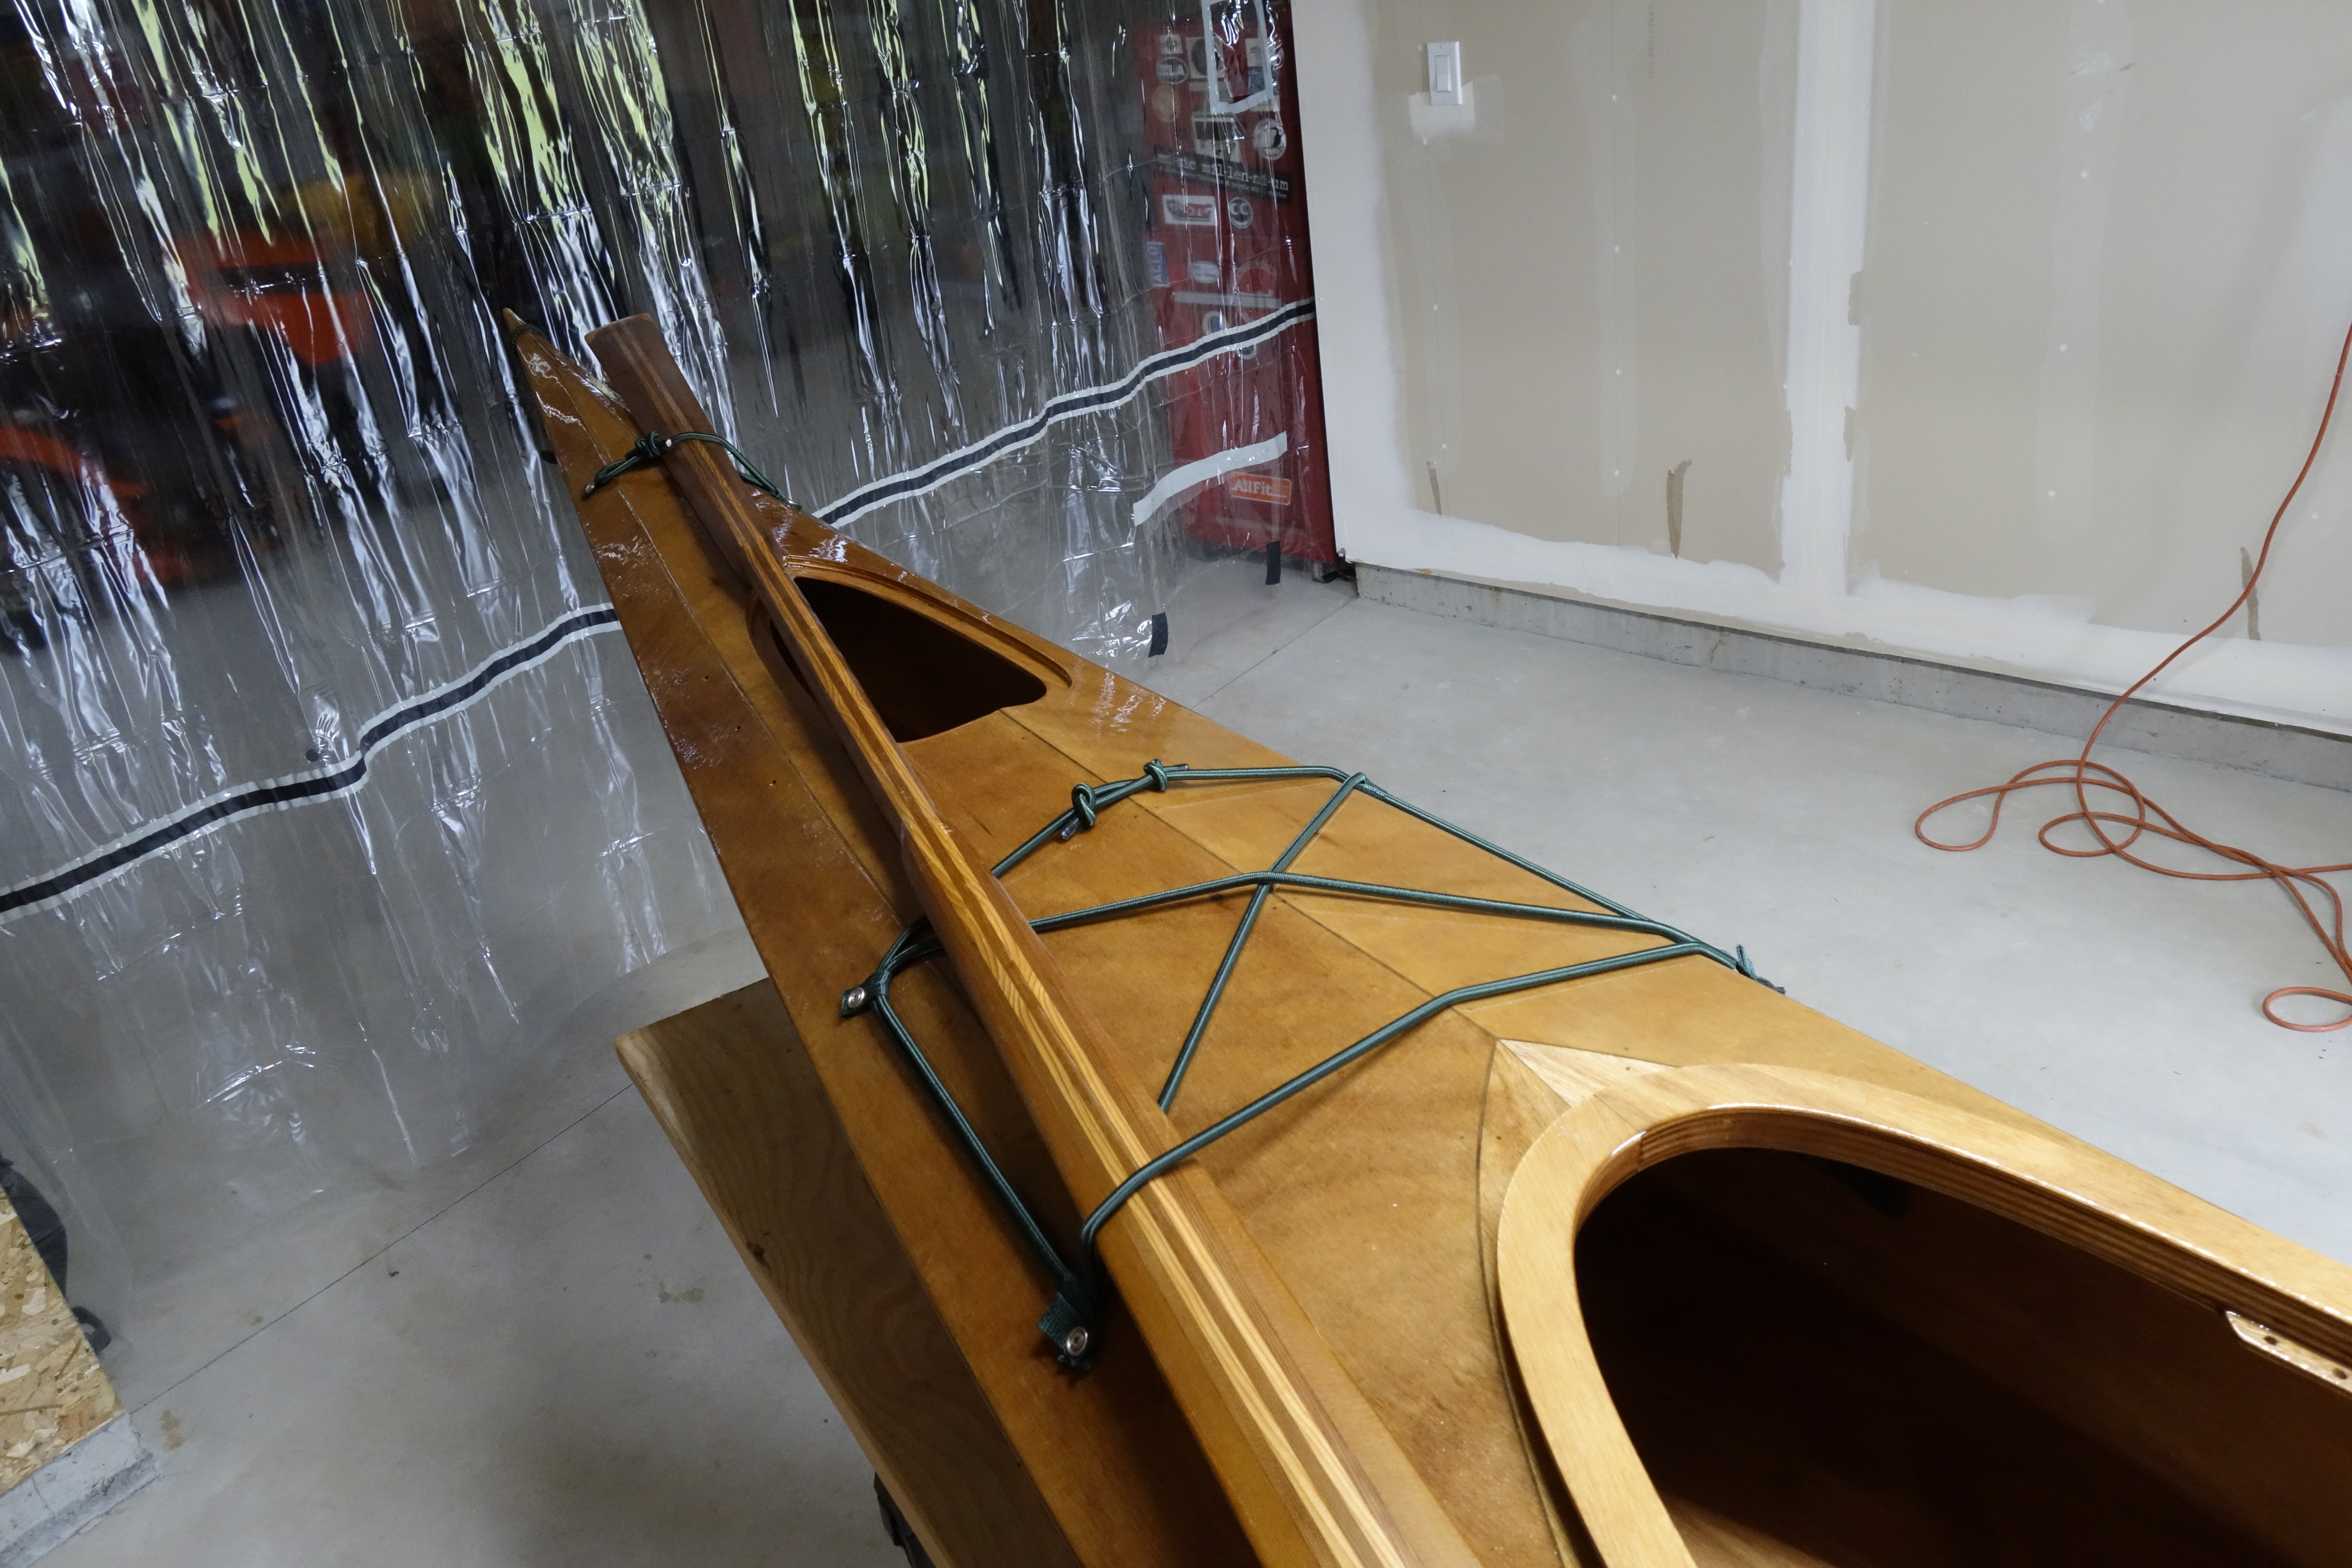
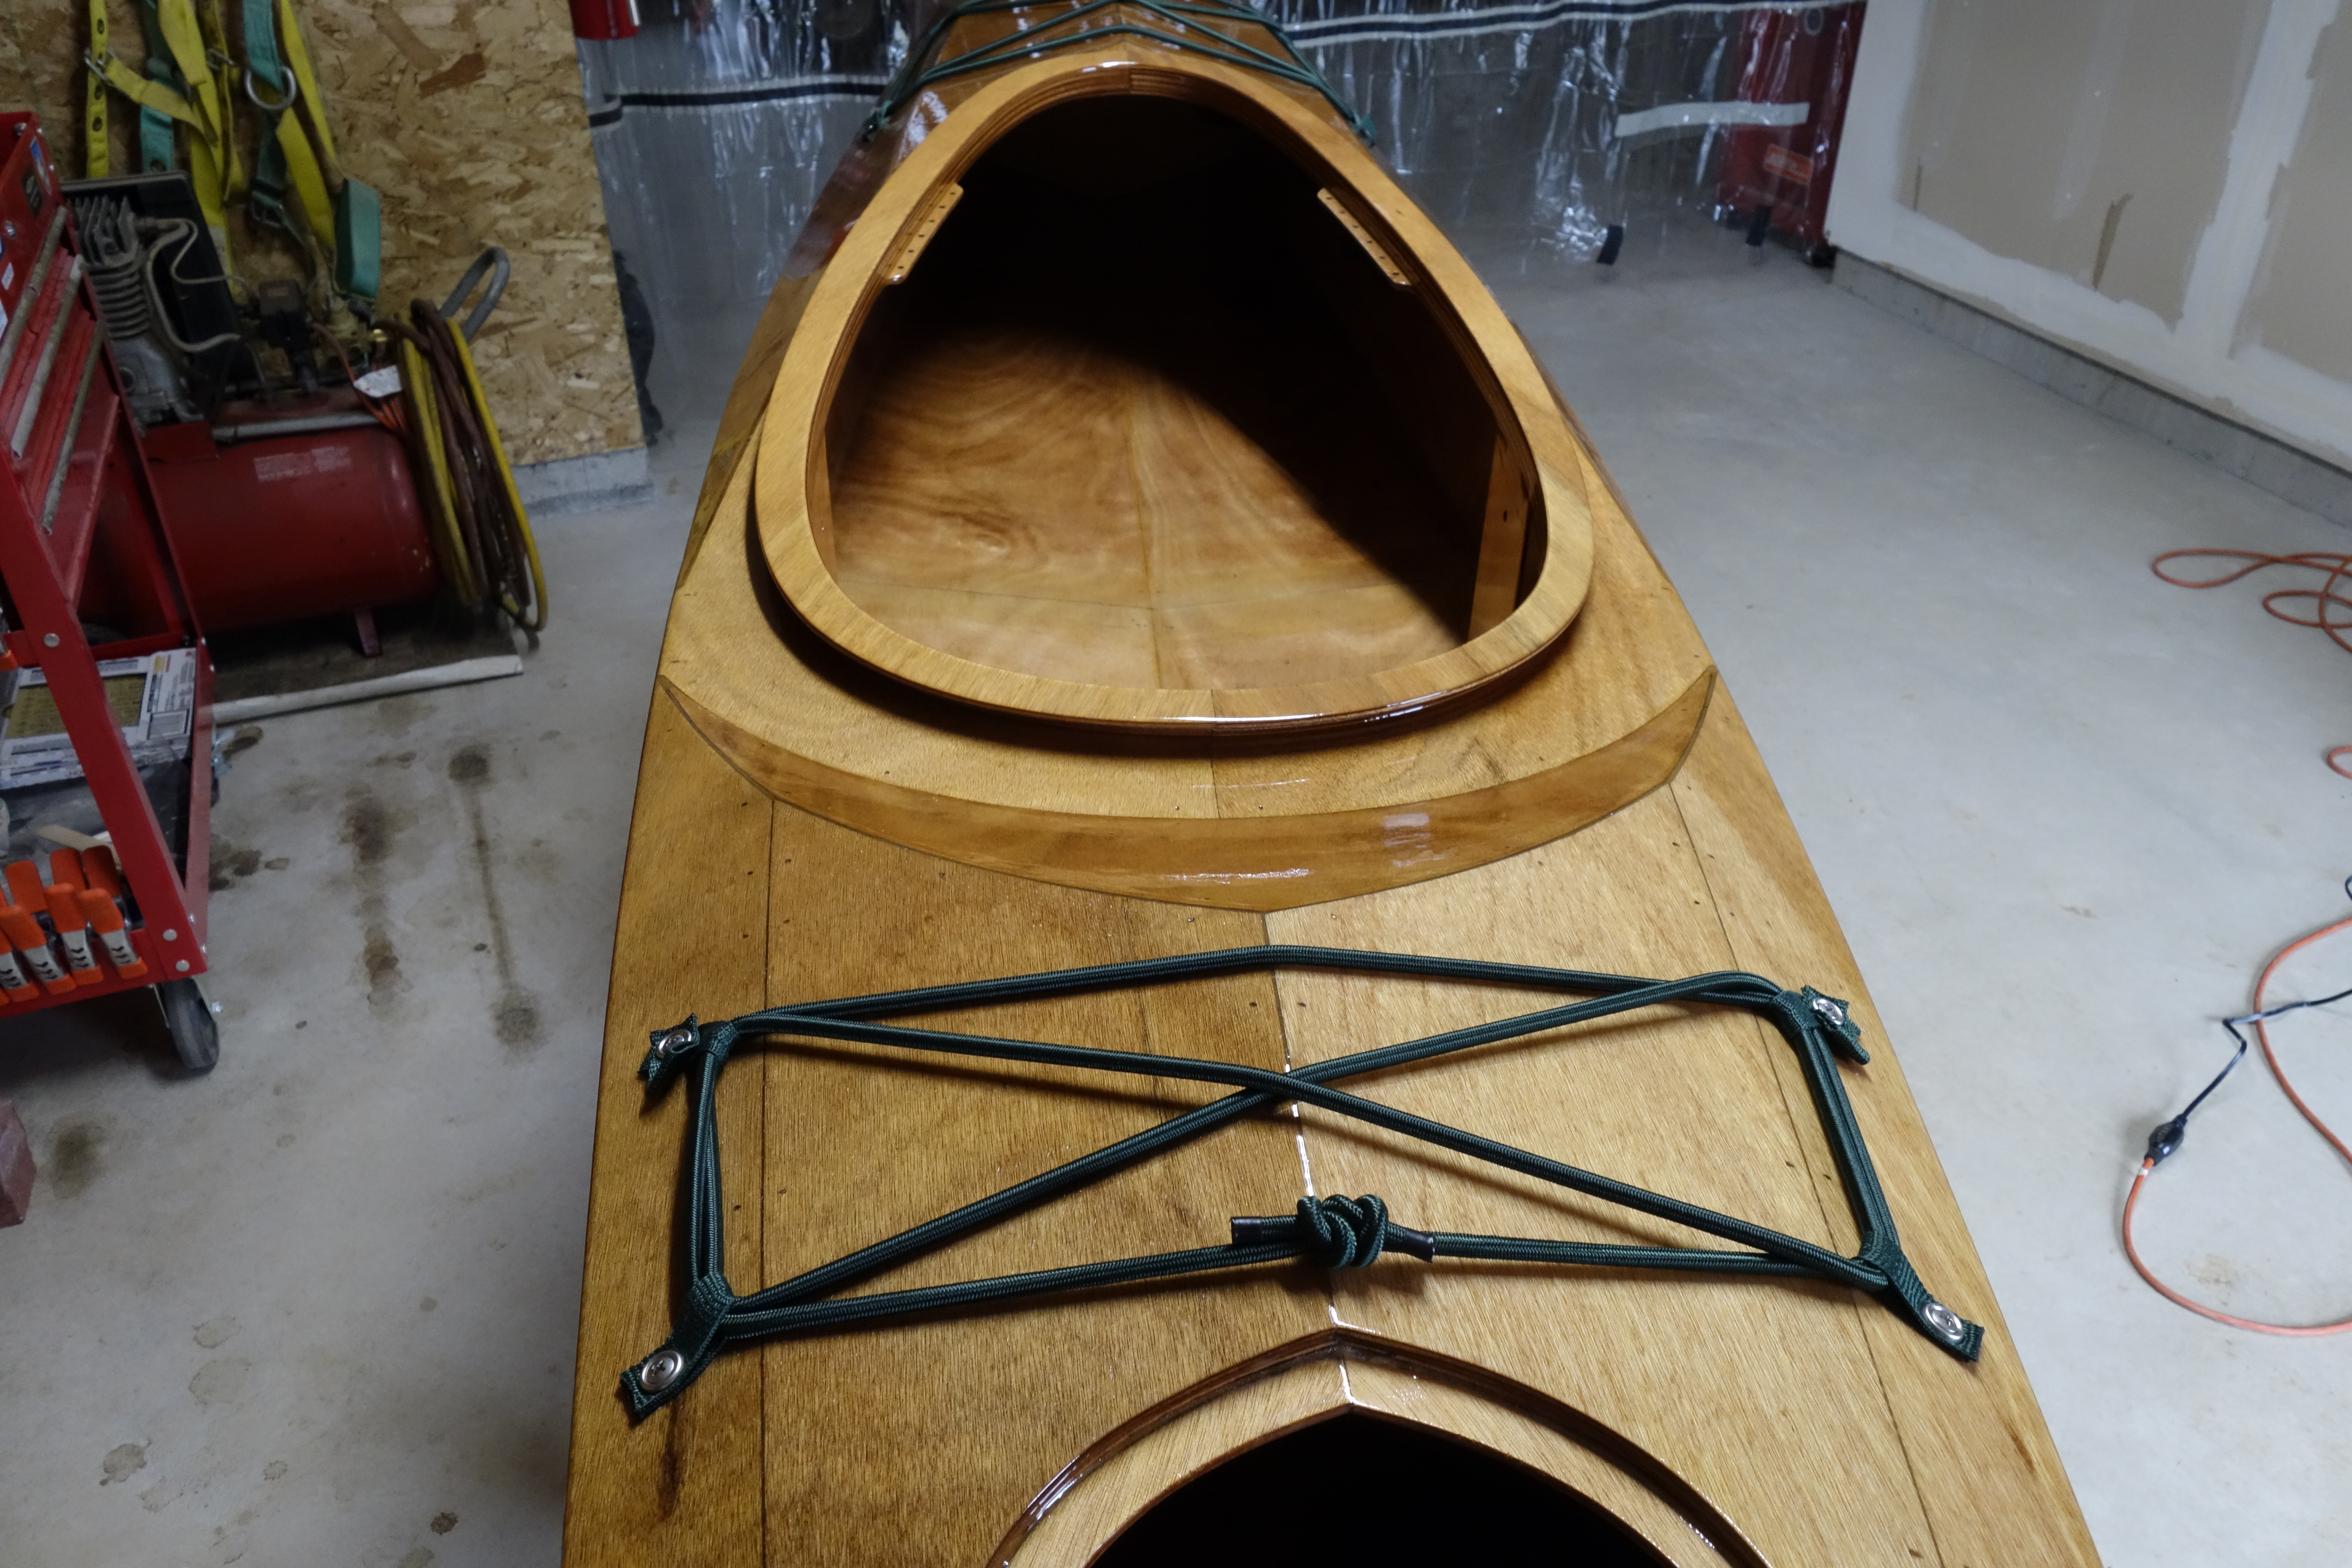
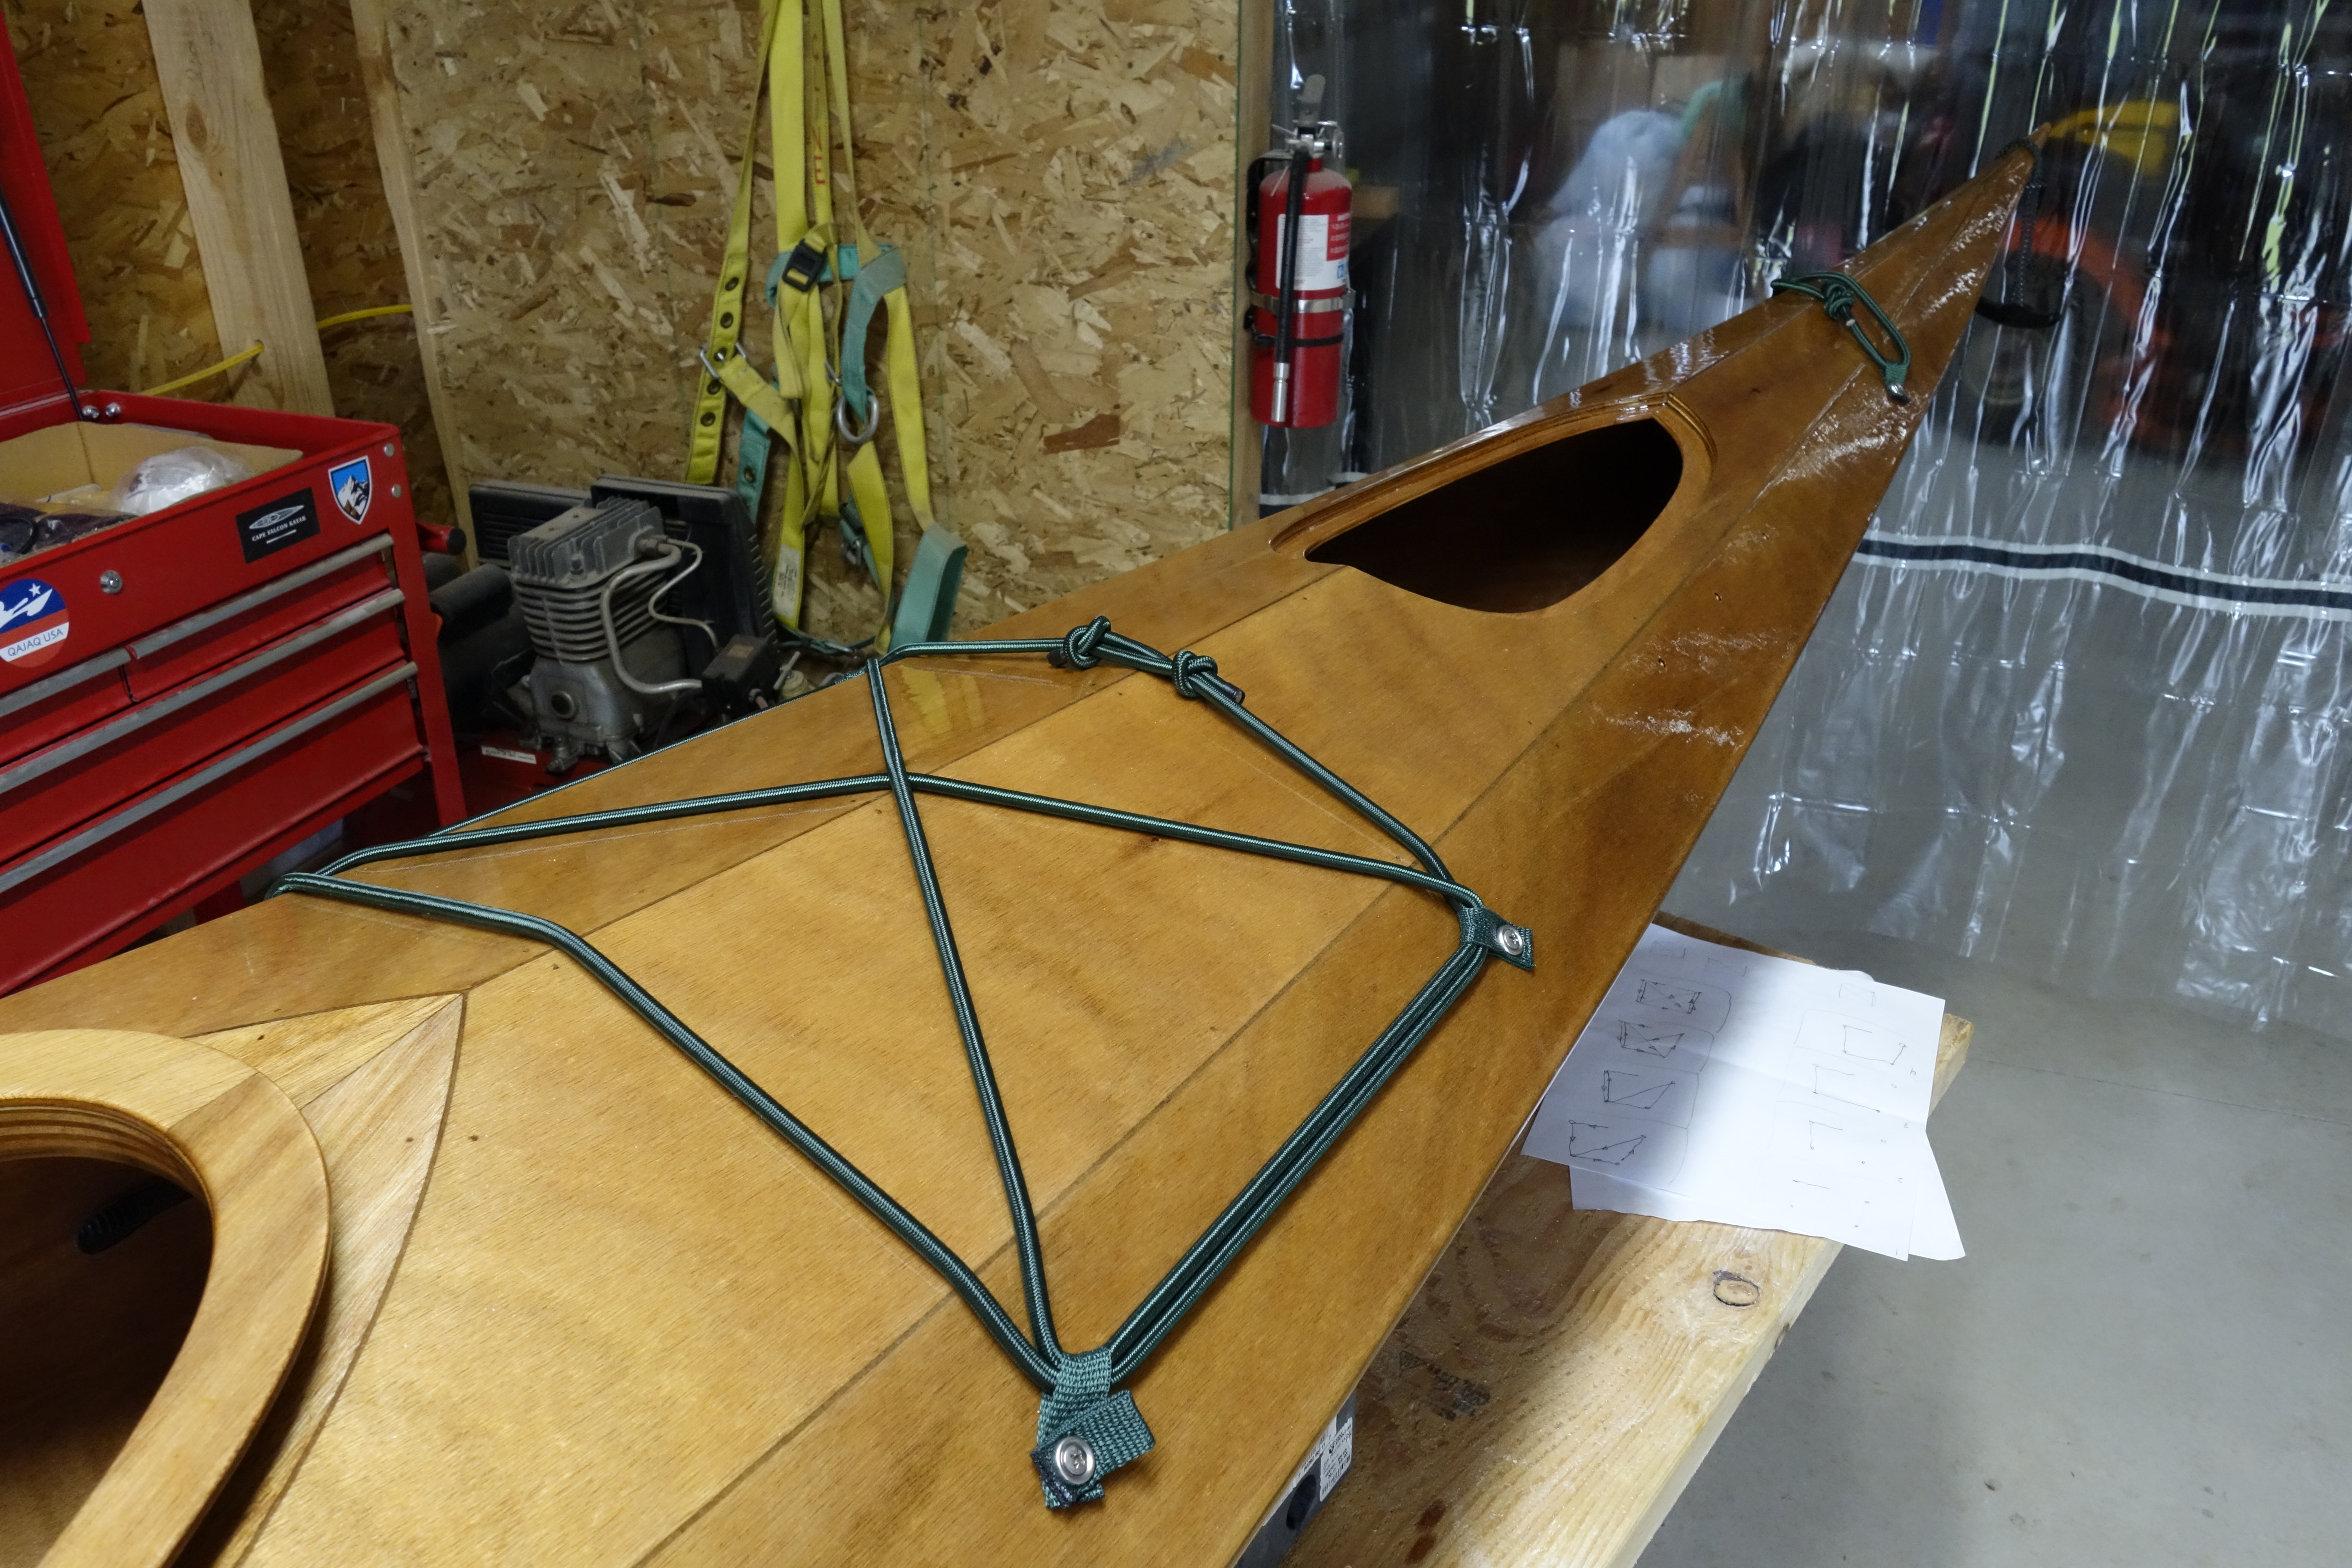
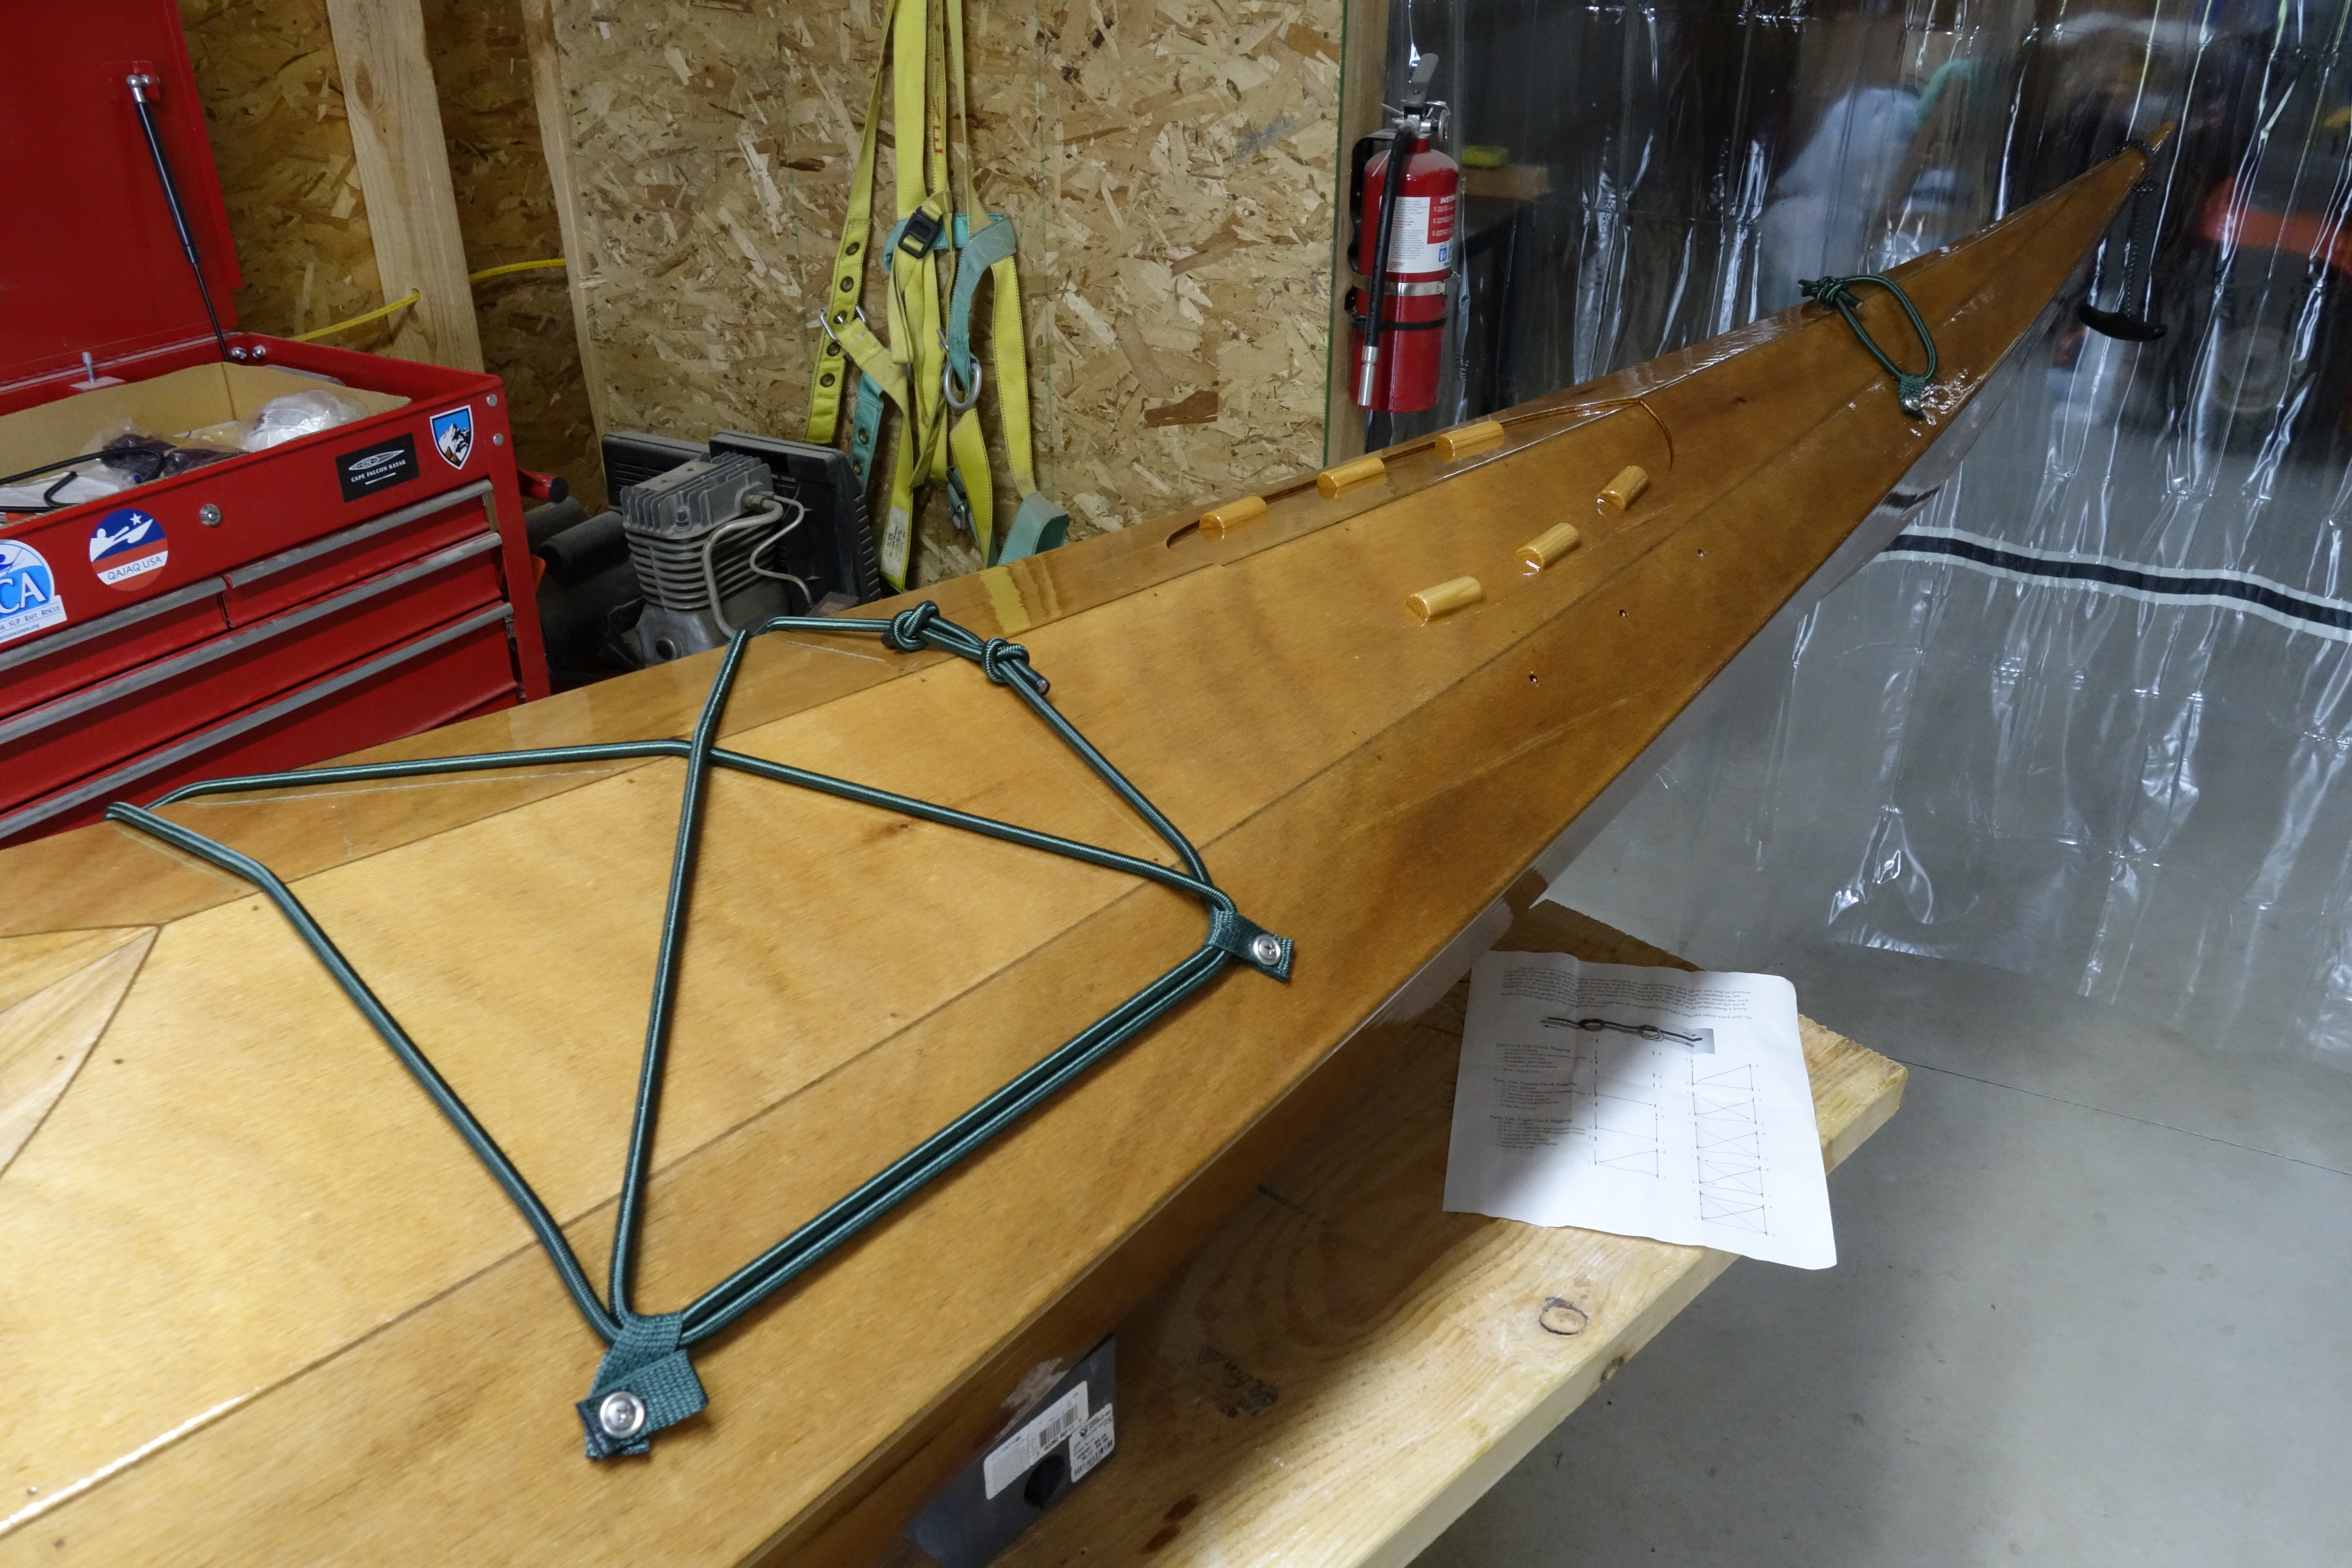
Yesterday evening, and this morning I had some time to start the deck rigging. I was able to get the soft pad eyes installed, and get the shock cord installed fore and aft. I also made a paddle park. Pygmy provided plastic pad eyes, but I chose to make soft, polypropylene pad eyes as I have seen on some Pygmy Boats. As you can see in the photos, I did not use the black nylon webbing or the shock cord provided with the kit. Nylon/polypropylene webbing is available in almost any size and color you can imagine, and it’s surprisingly inexpensive. One bit of advice: If you are going to buy your own nylon webbing, be sure to order “lightweight” 3/4″ webbing. I first bought the heavyweight webbing, but had to send it back as it is too thick to go through the hardware. I bought 50 feet of the webbing for less than $15.00 shipped, and 25 yards of shock cord cost about the same. I found forest green, 3/4″ polypropylene webbing and with a little searching I was able to find 1/4″ shock cord that was a very good color match. I thought that a forest green color would look good and I am very happy with it, and now my Ronan will stand out a bit from the rest of the crowd! I still have to get the foam glued to the hatch lips, and then install the tie down straps for the hatch lids. After that I’ll install the perimeter lines and the deck rigging will be done. Then on to the seat.
:^)
The paddle park seems to work!Aft shock cordsForward shock cords.The forward hatch cover is just there for show. I still have to install the foam on the lips. Aft hatch cover, just for show.Above you can see the color of the polypropylene webbing I bought. Pretty good match for the shock cord I think.It’s getting there! Hatch foam, straps, and the perimeter lines to do yet.
Today at lunchtime I got the final coat of varnish on the hatch covers. So like the rest of the kayak, they have gotten two coats of Pettit Flagship Varnish, and one coat of Pettit Captain’s Varnish. Right now they look pretty good. As I have mentioned several times already, I usually make these photos right after I varnish so the varnish hasn’t had a chance to level out yet. The other edge of that sword is that there hasn’t been time for sags or runs to develop yet either. I’ll know how the final finish is going to look in a couple of hours.
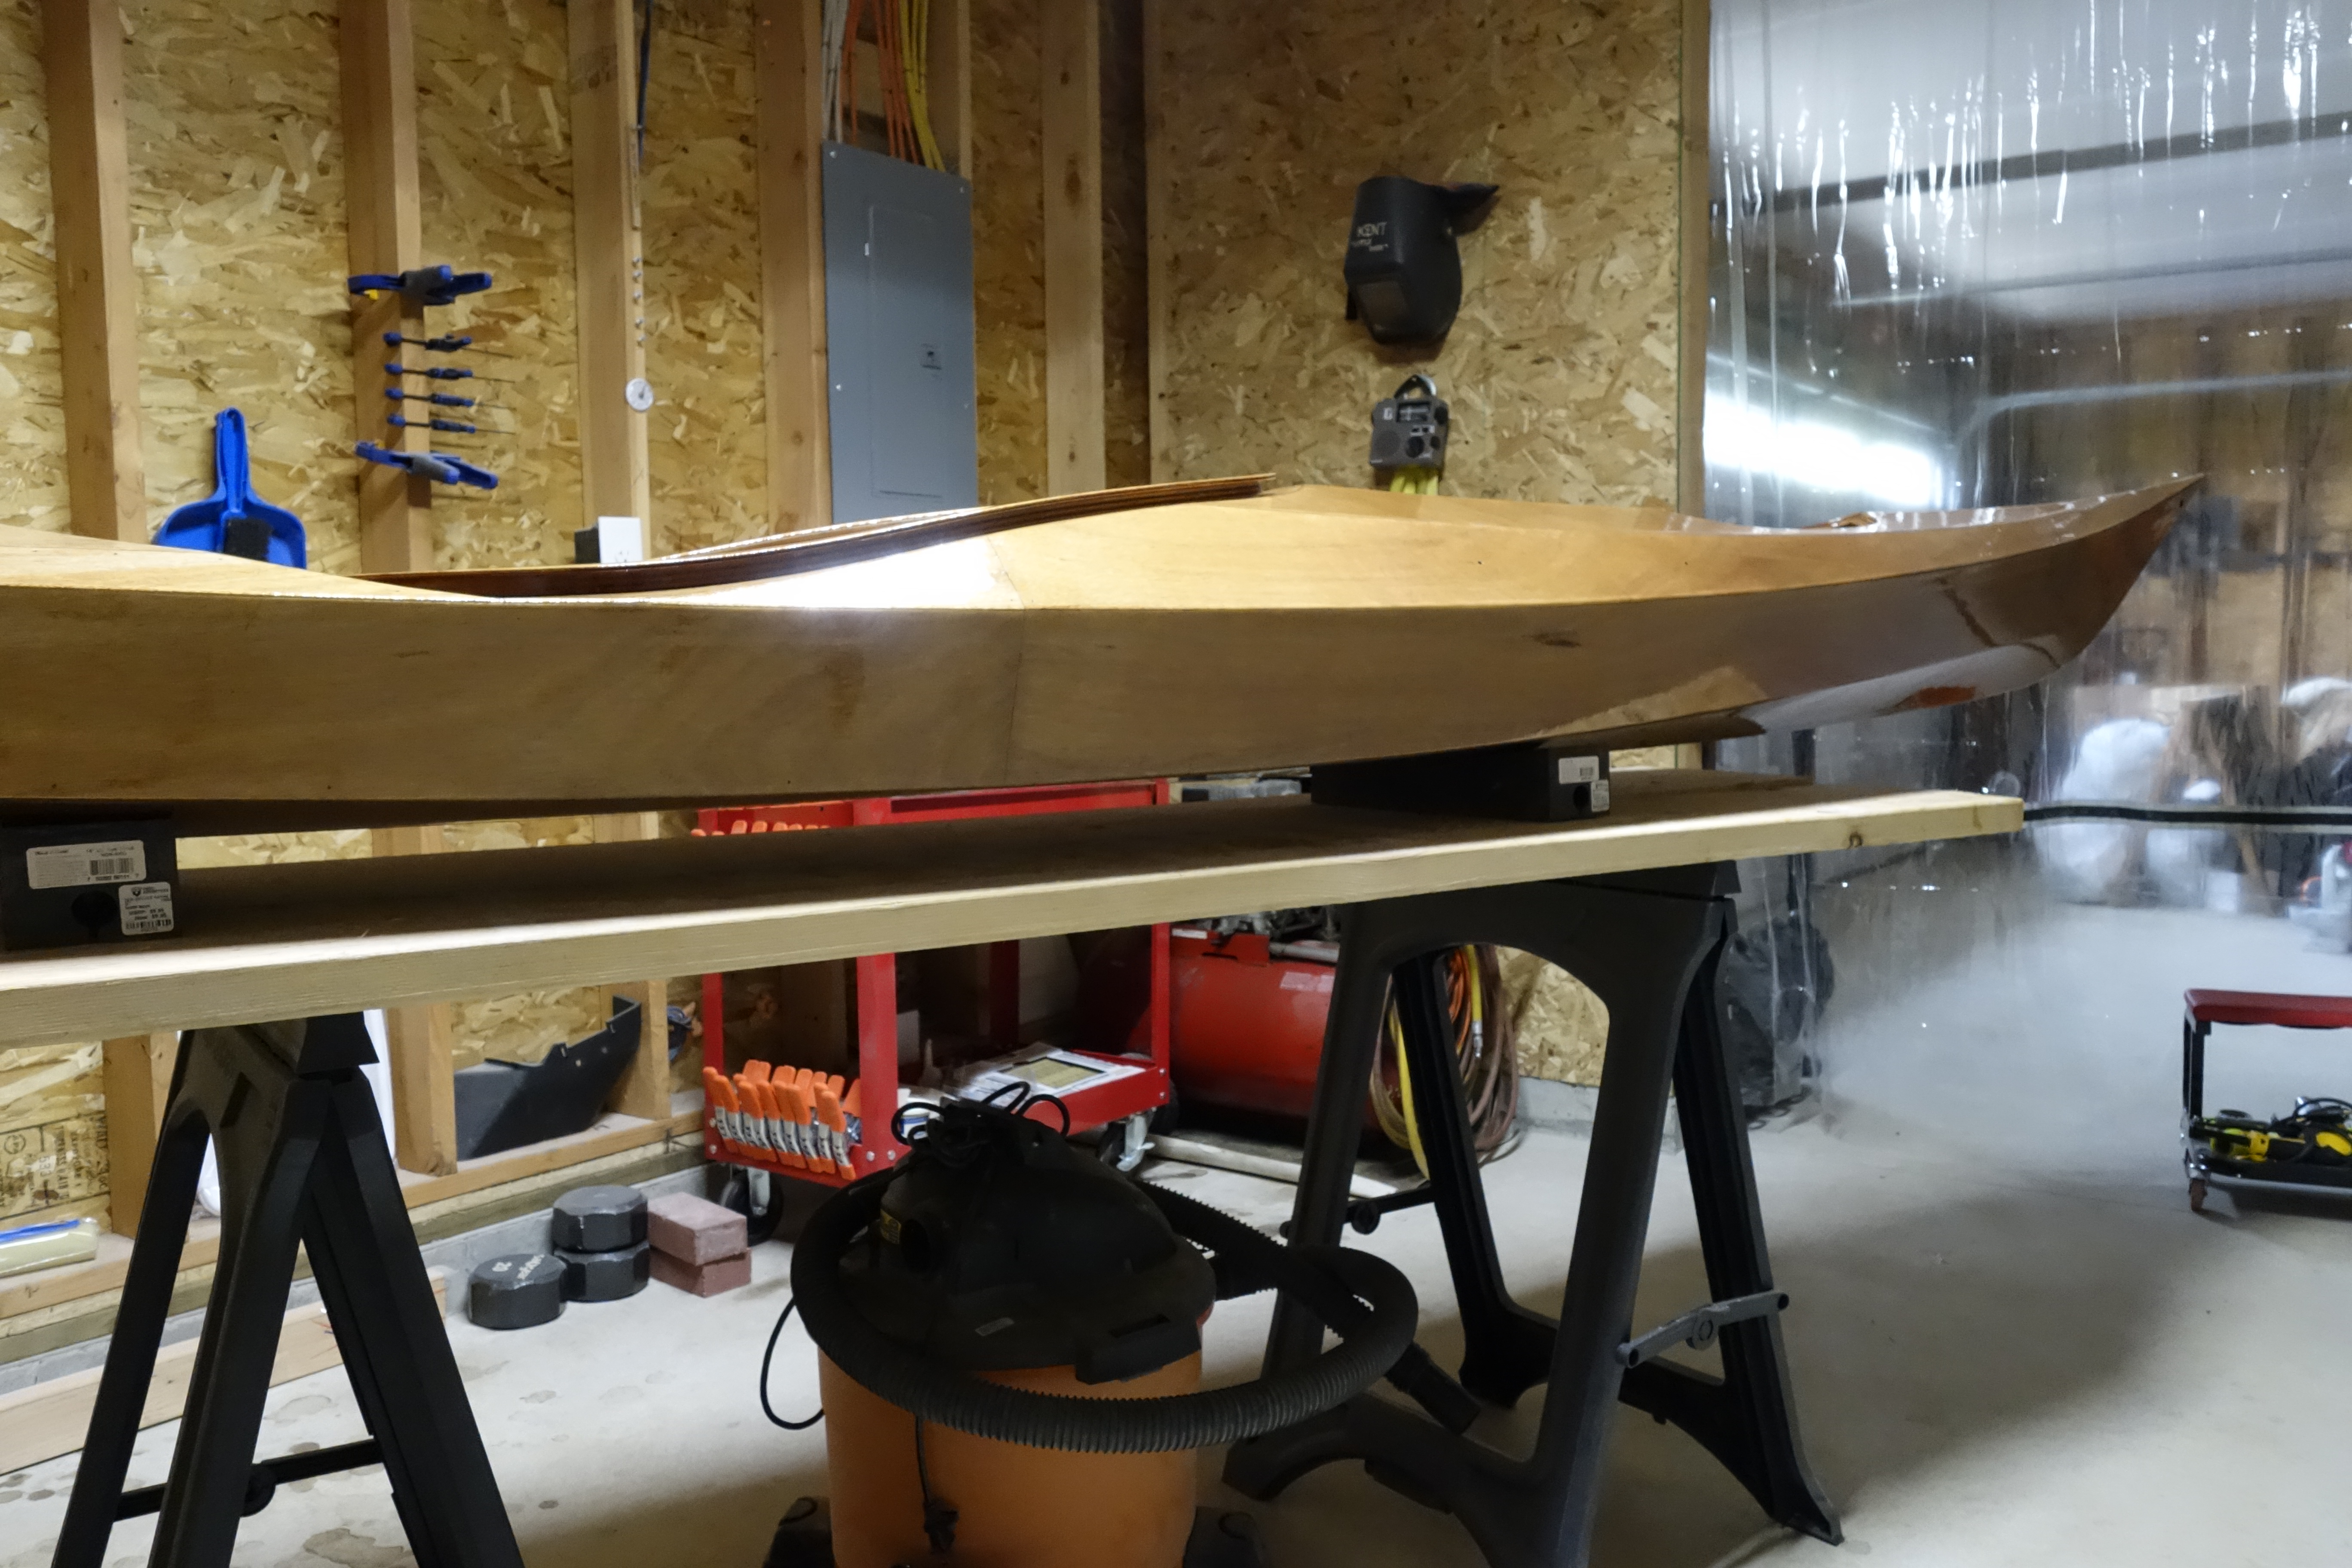
That’s two coats of Pettit Flagship Varnish, and one coat of Pettit Captain’s Varnish on the kayak. I still have the last coat of Captain’s Varnish to put on the hatch covers, but the Ronan construction is otherwise complete. I describe in detail the method I used to apply all of the varnish, in the earlier post about the first coat of varnish on the hull. I was going to do one more coat of the Captain’s Varnish so that the Ronan would have a total of four coats of varnish, but I just don’t have it in me. Pygmy says that three coats is sufficient for UV protection, and while I usually don’t stop at “sufficient”, this time I will. I figure that I’ll paddle it for a year or two as is, and then it will be time to re-varnish anyway. I’ll give this a couple of days to cure really well and then start putting on the deck rigging, foam on the hatch lips, back band and seat, etc. Exciting!
Same reminder as with the hull, the varnish will self-level over the next couple of hours and will look much smoother than it does in these photos, which were made immediately after I finished varnishing. There are a couple of little runs/sags around the cockpit coaming, but I have to let them go. I’ve done my best.
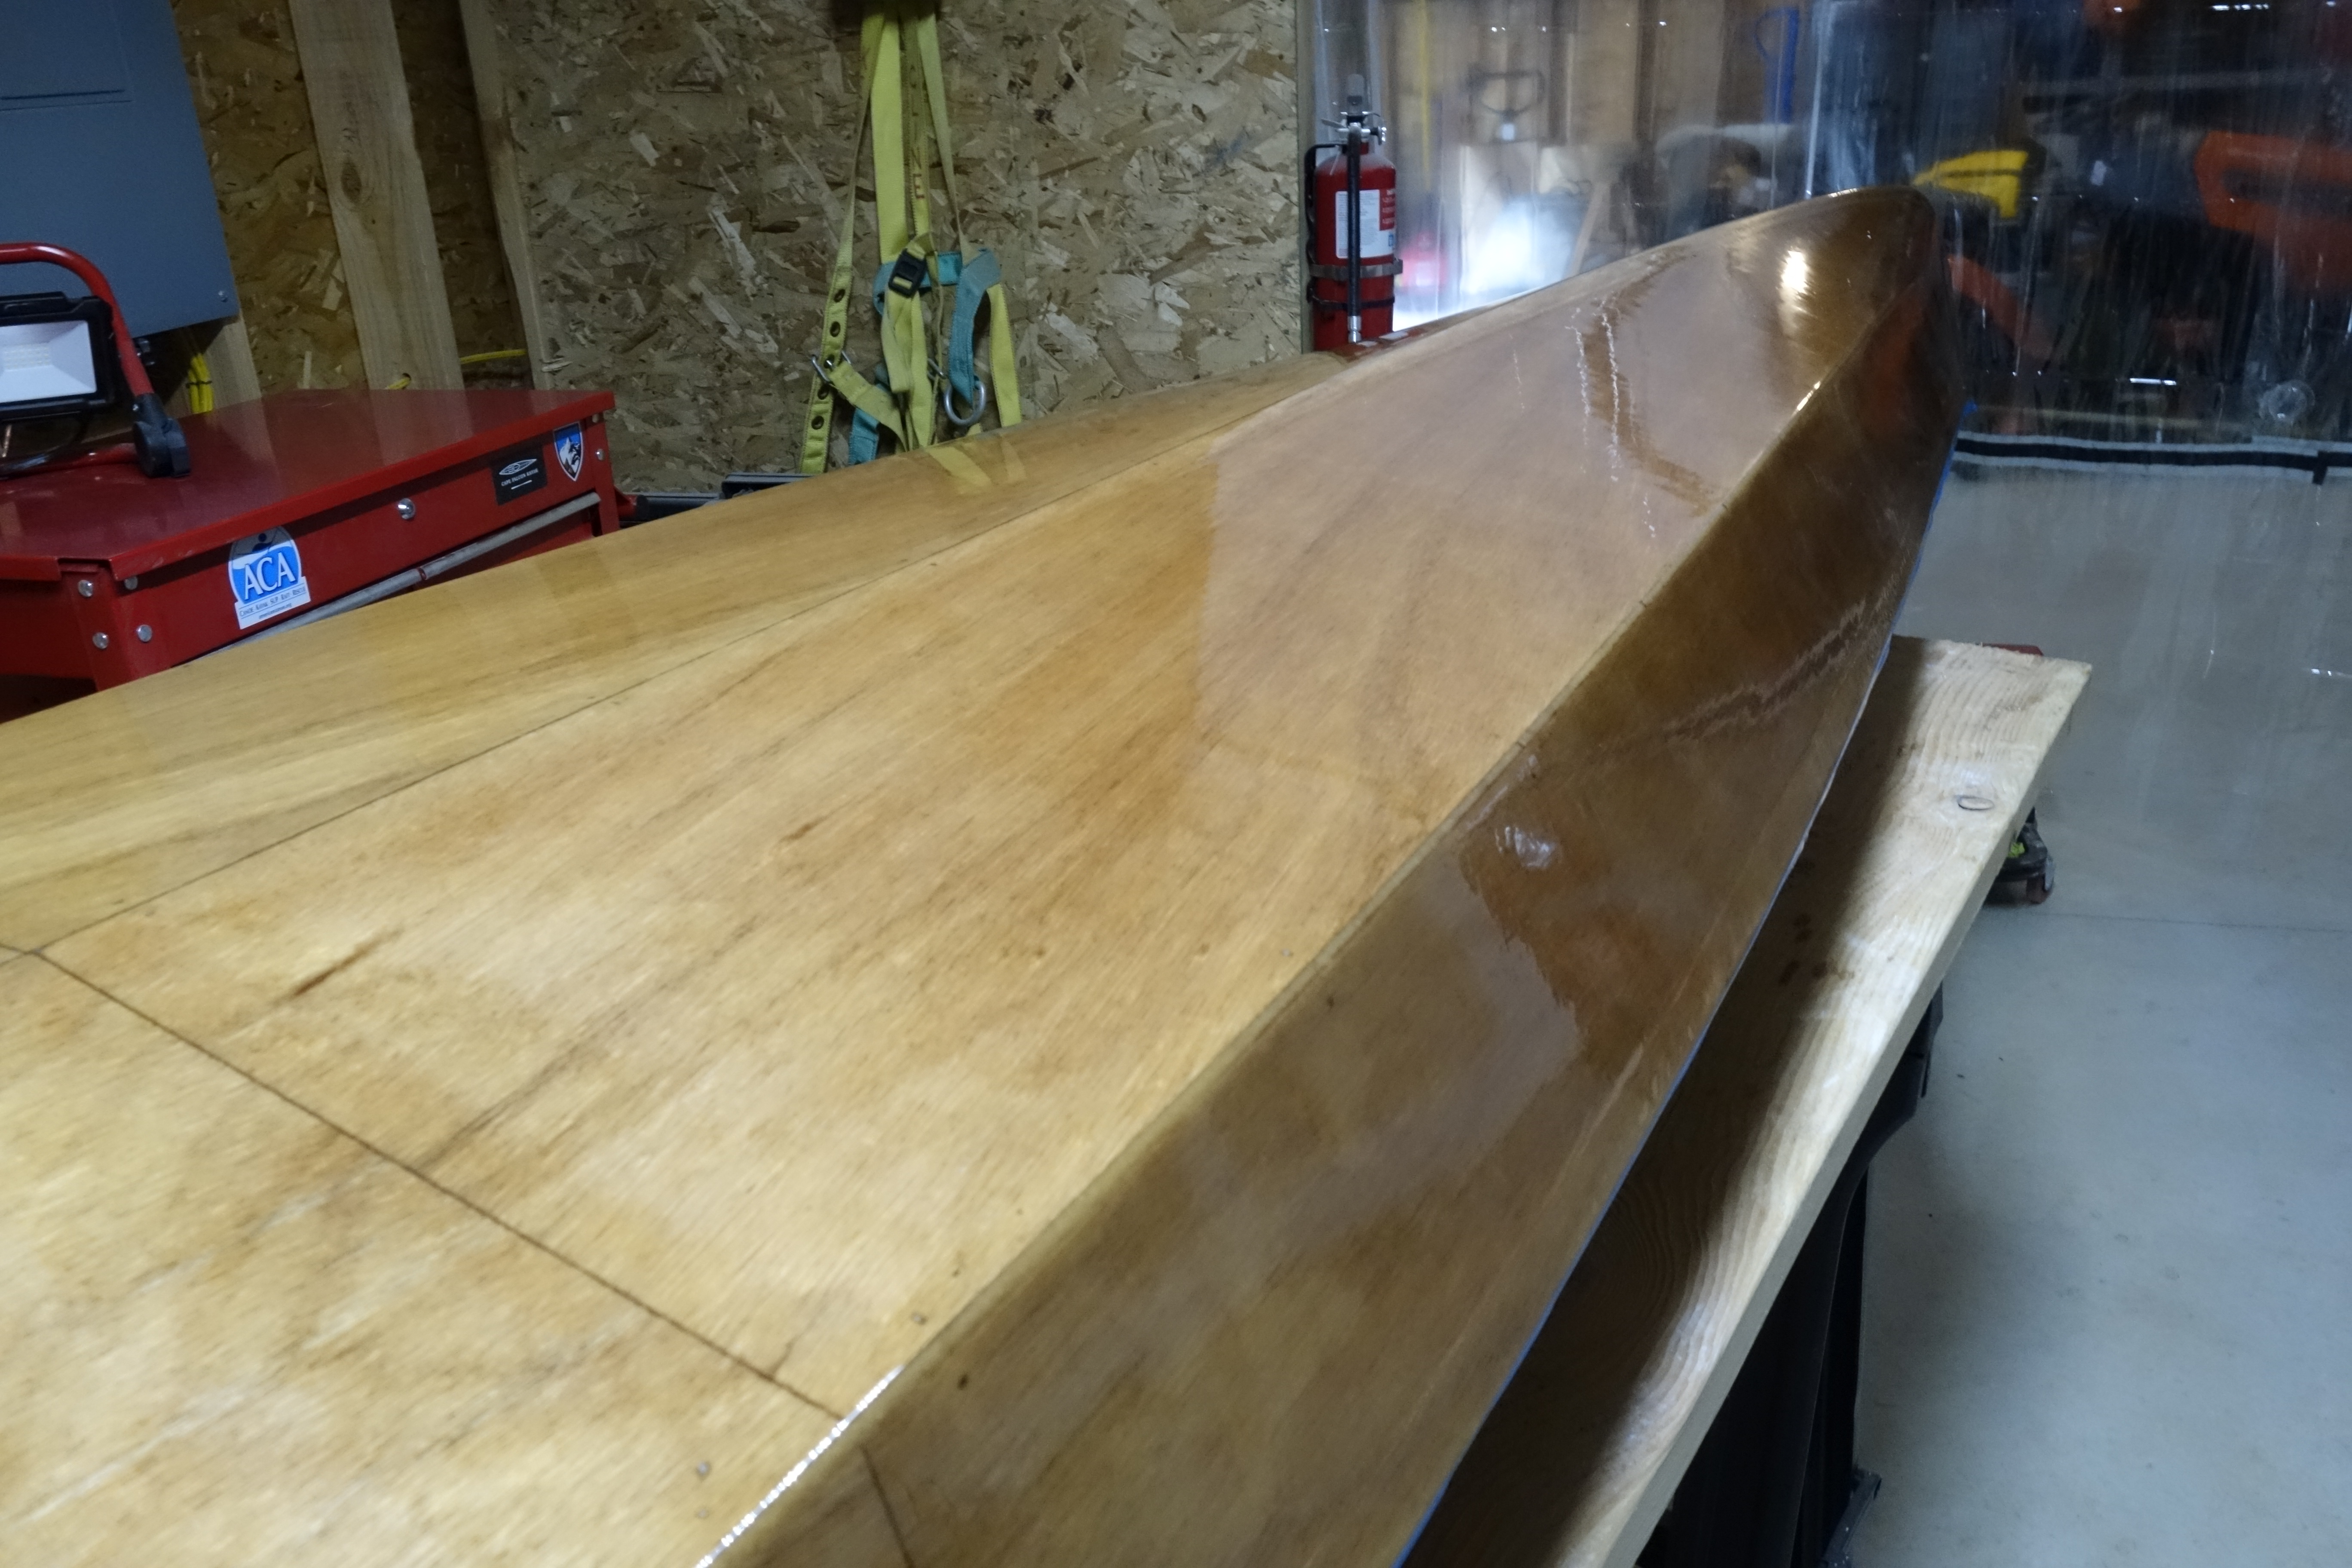
Because this is the last coat of varnish that I am going to put on the Ronan I was very careful to try to avoid sags and runs, and to get good coverage over the entire hull. I walked around kayak several times with a bright LED shop light, and so far, so good. Of course, after I was finished I did a ridiculously boneheaded thing. I was cleaning up my varnish cup and I was putting the paper towels that I wiped the cup out with into the small, steel rubbish bin that I keep in the shop, and seeing that the can was pretty full, shoved everything down into the bin to compact it. Of course, it didn’t occur to me until I was in the act of smashing the stuff down that it would almost certainly to force a bunch of dust out of the can and into the air around my freshly varnished kayak!
Pro tip: If you are building a kayak, DON’T DO THAT!
The kayak still looks fine, but I’m sure there would be fewer dust specks in the varnish if I hadn’t done that.
A reminder that these photos were taken immediately after I finished varnishing. The varnish will self-level and be much smoother in a few hours.
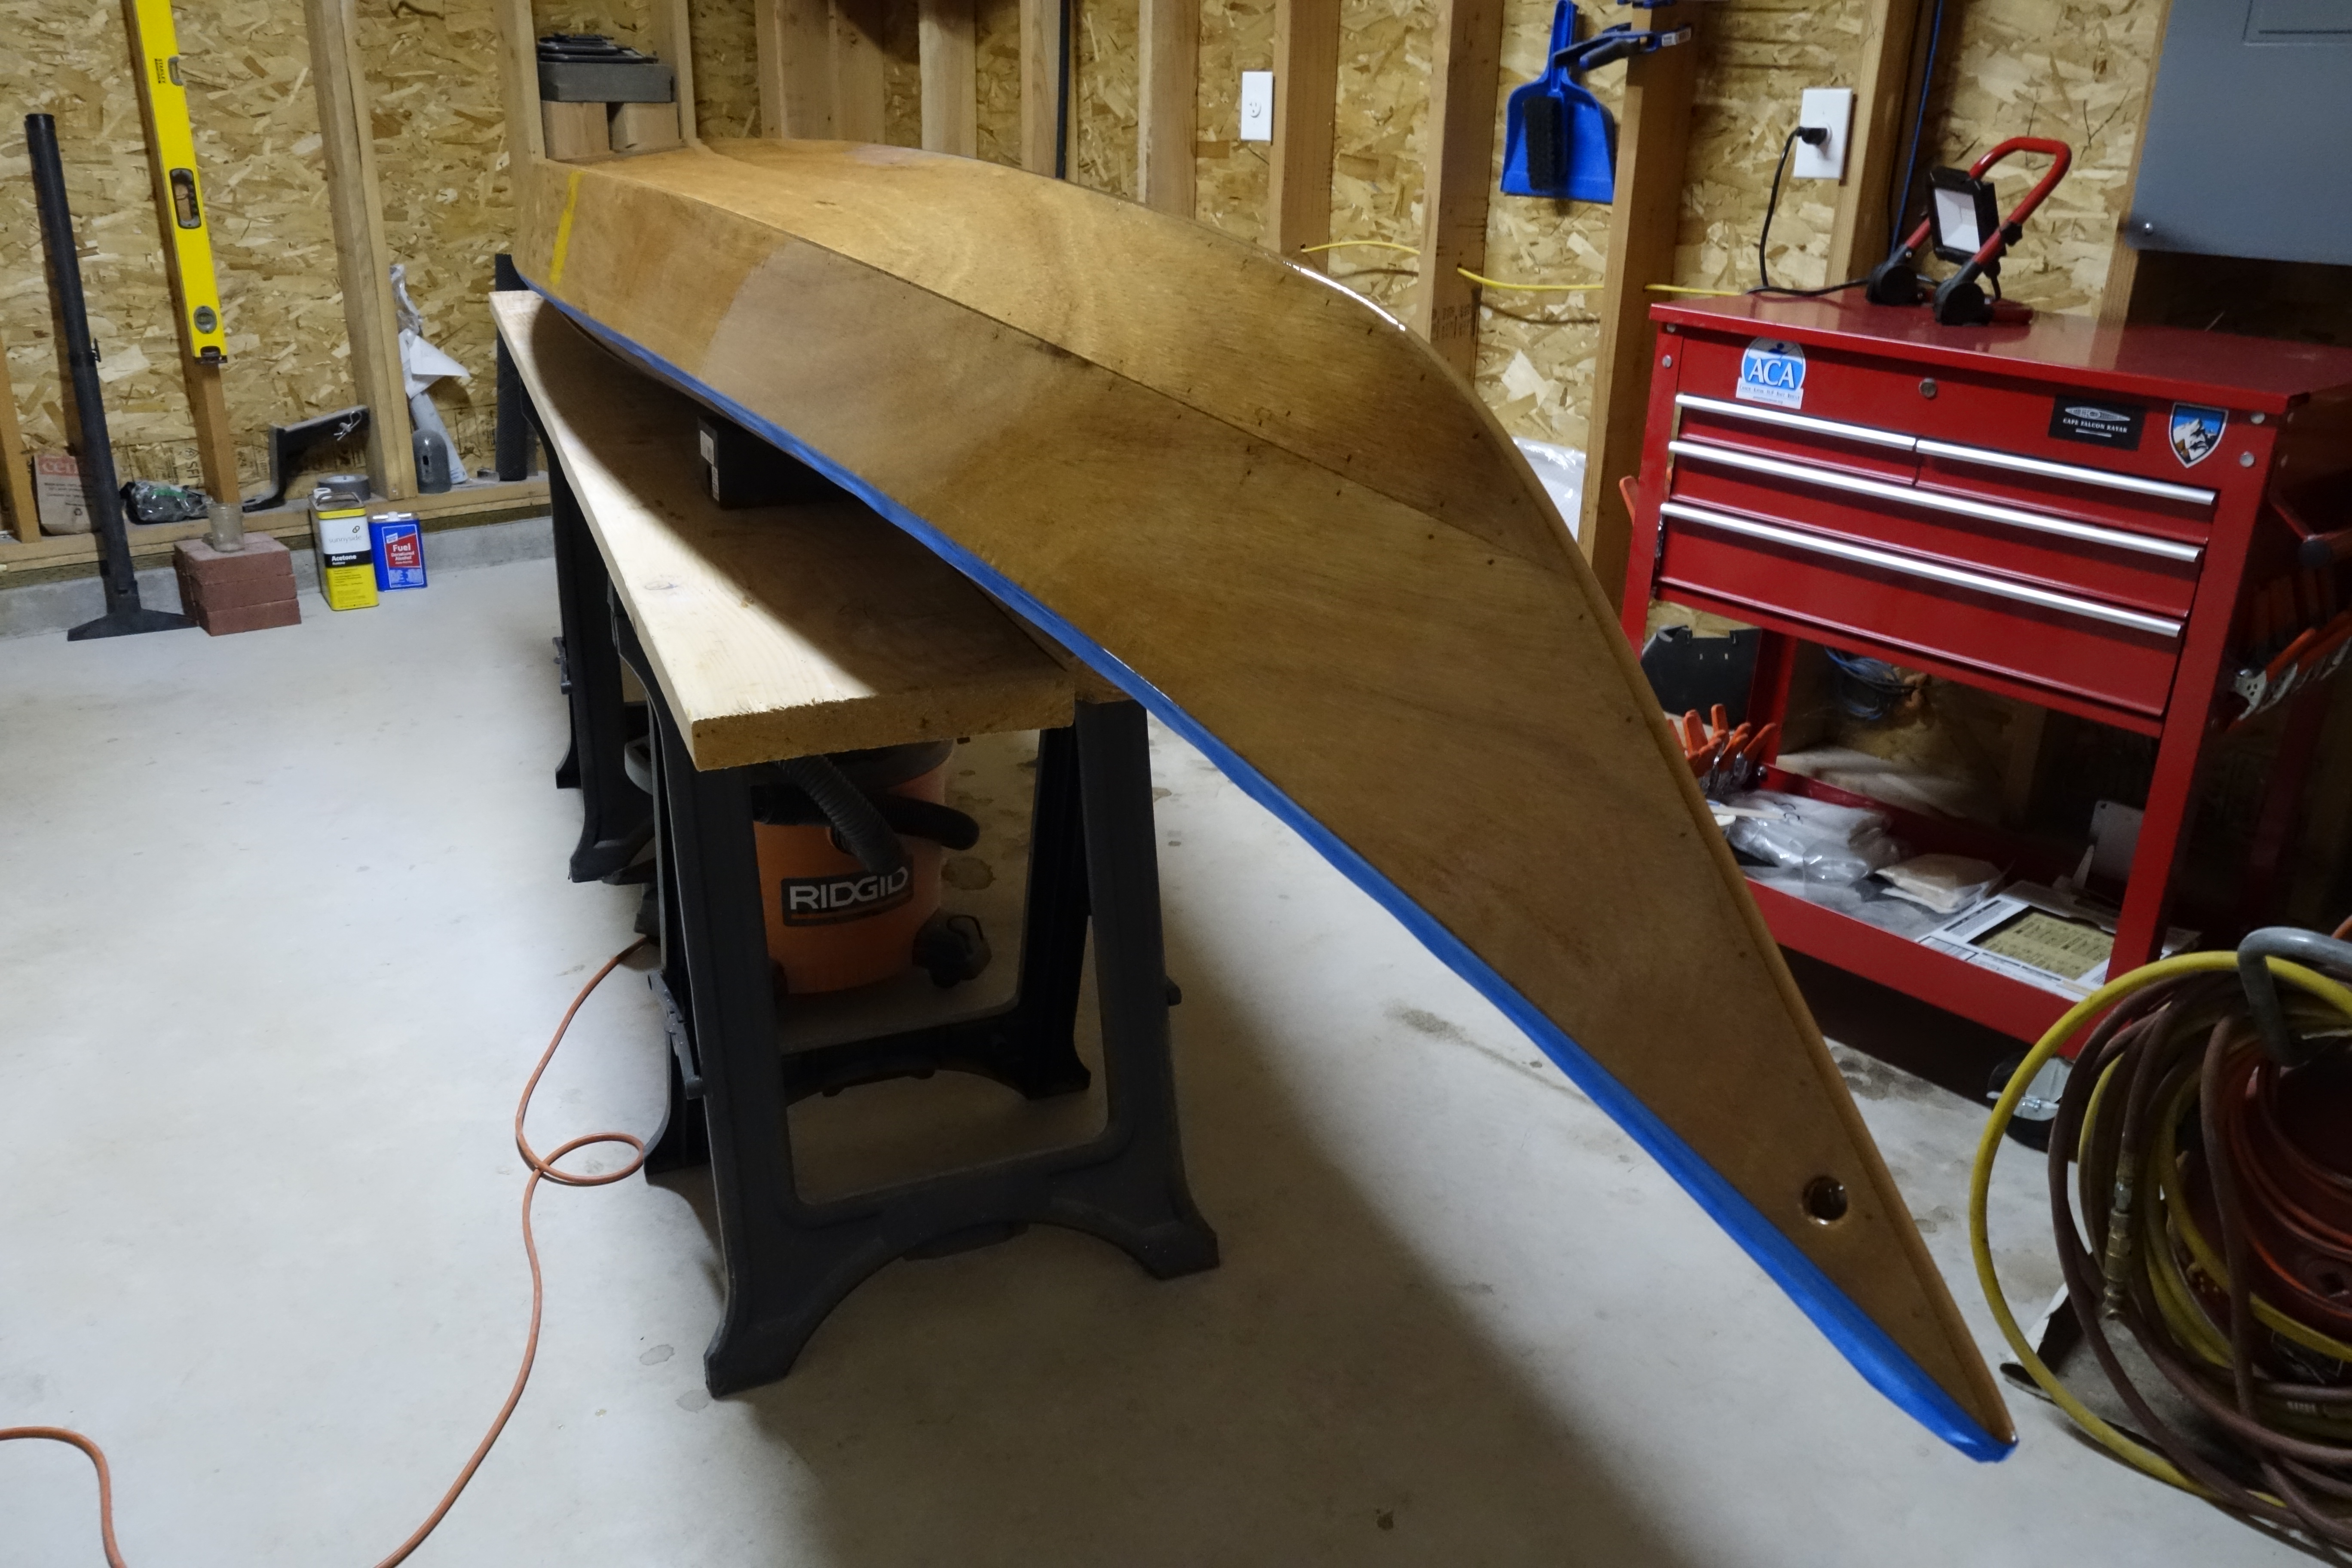
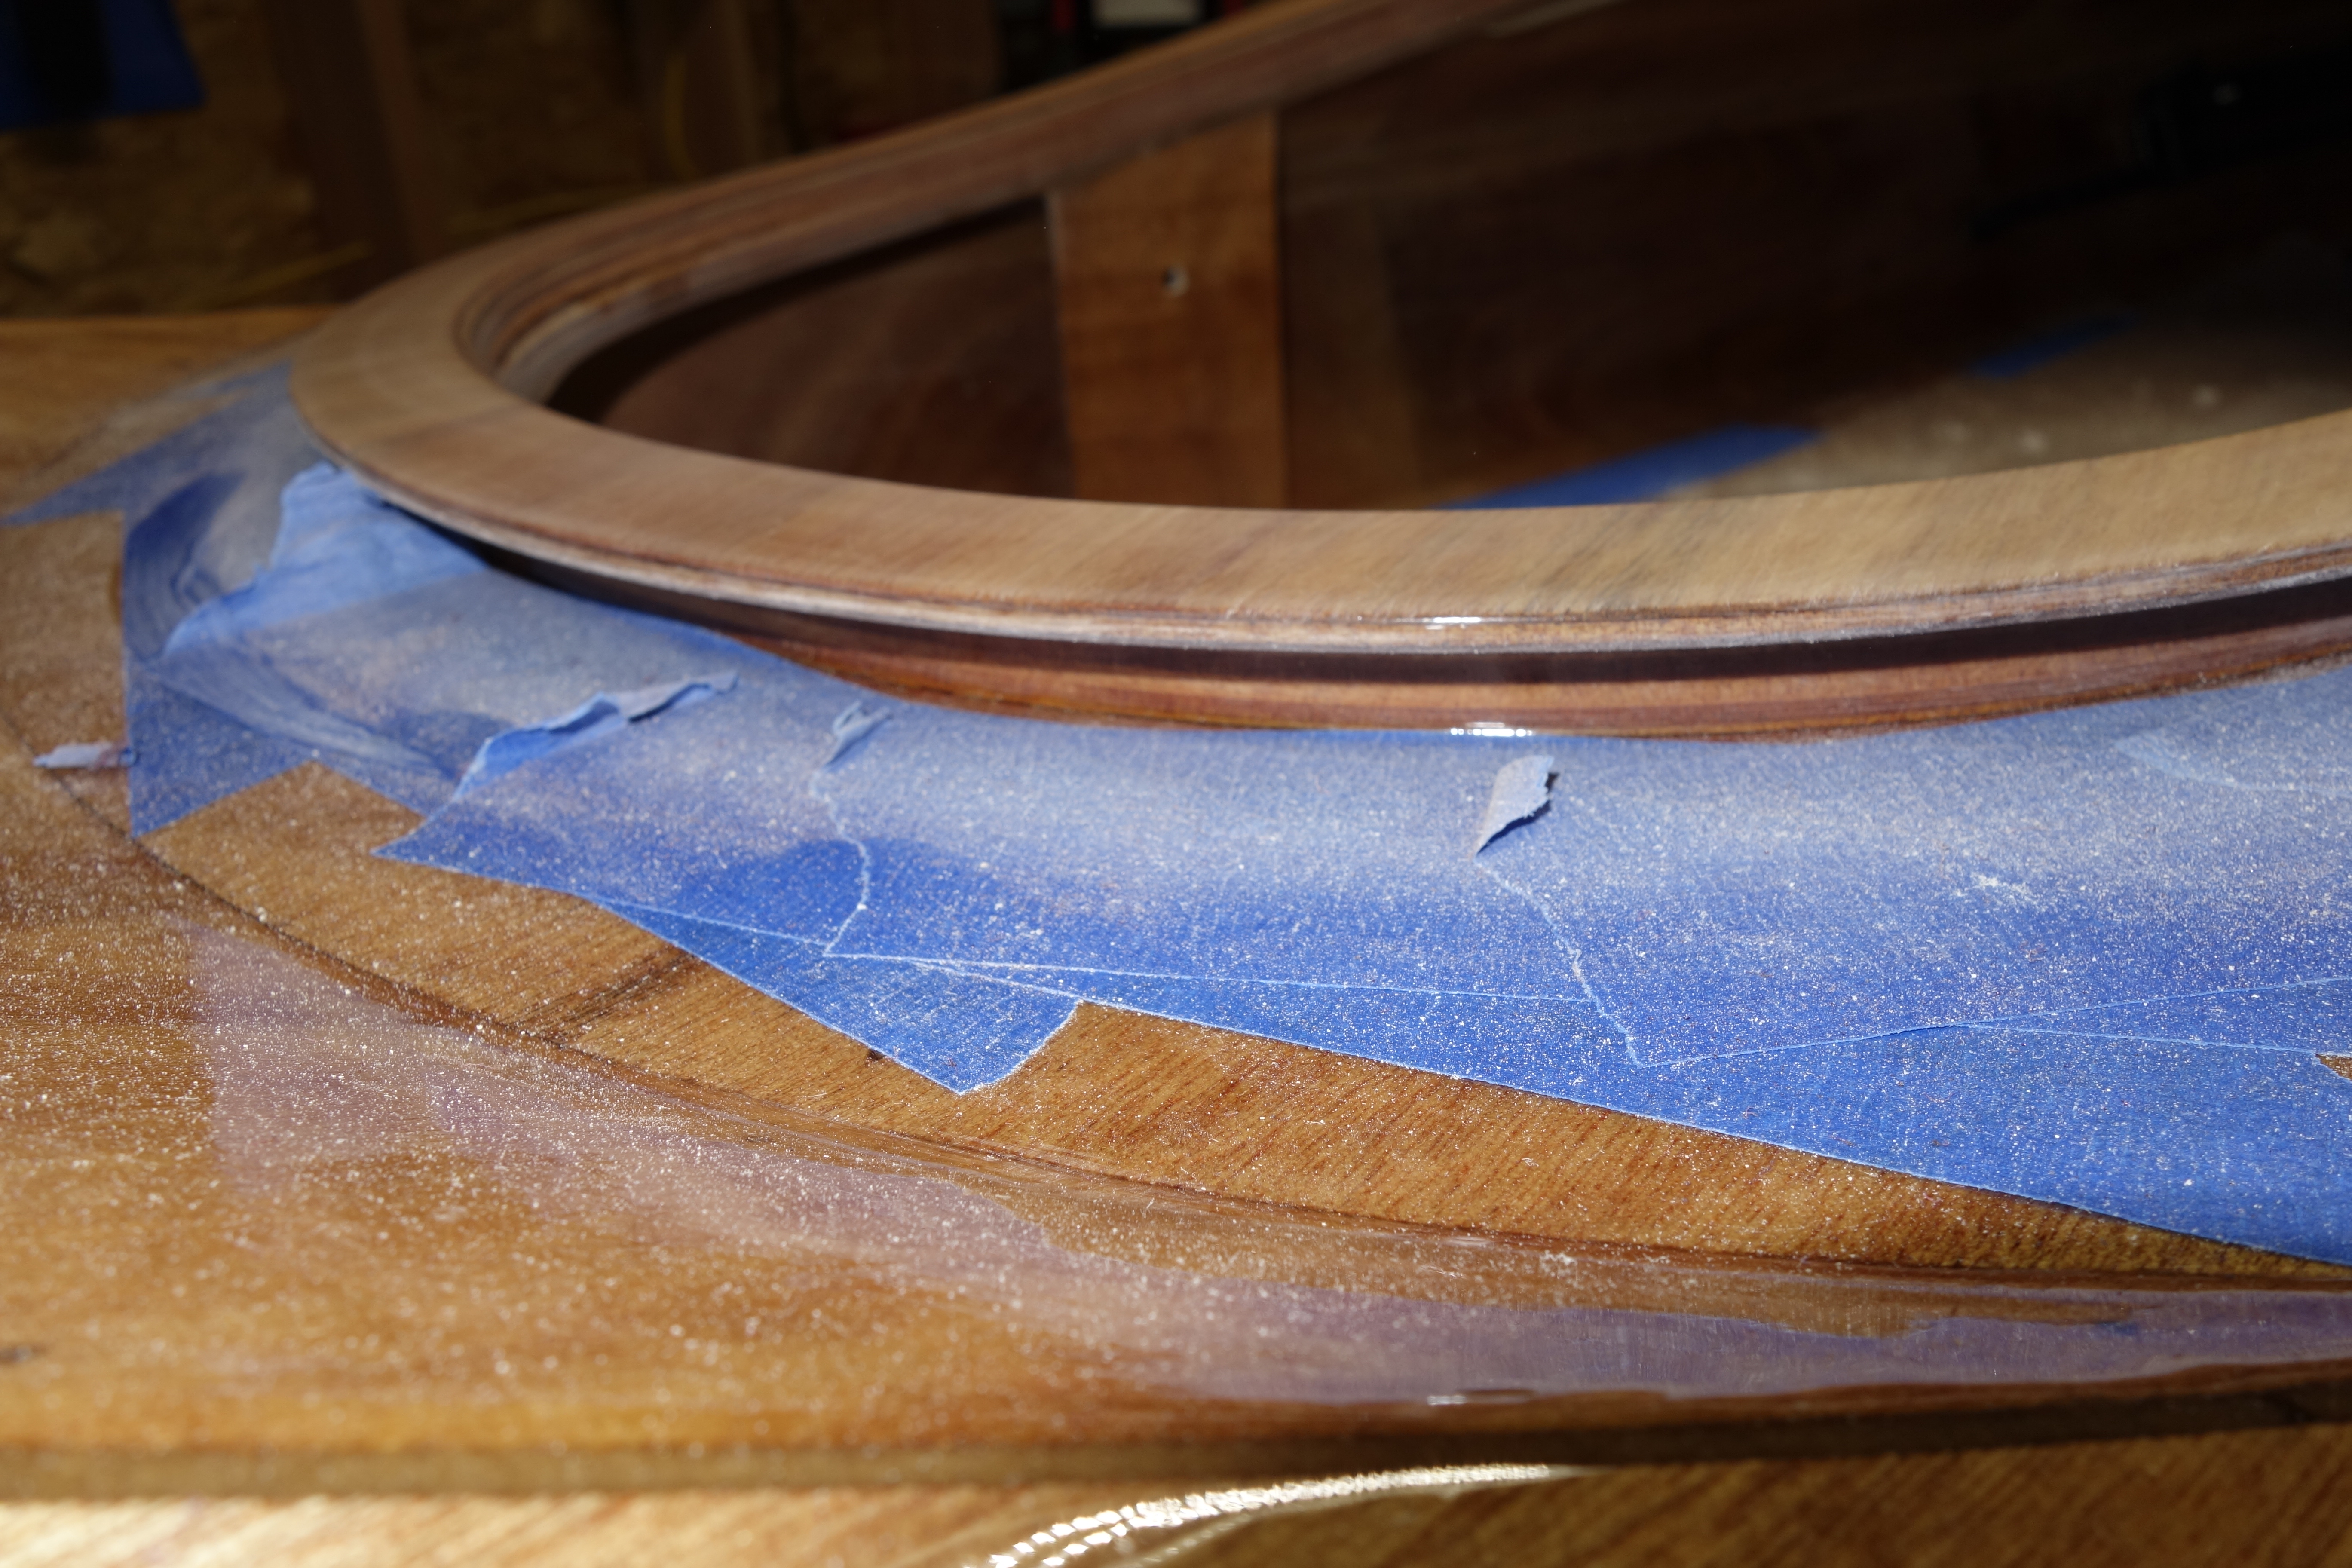
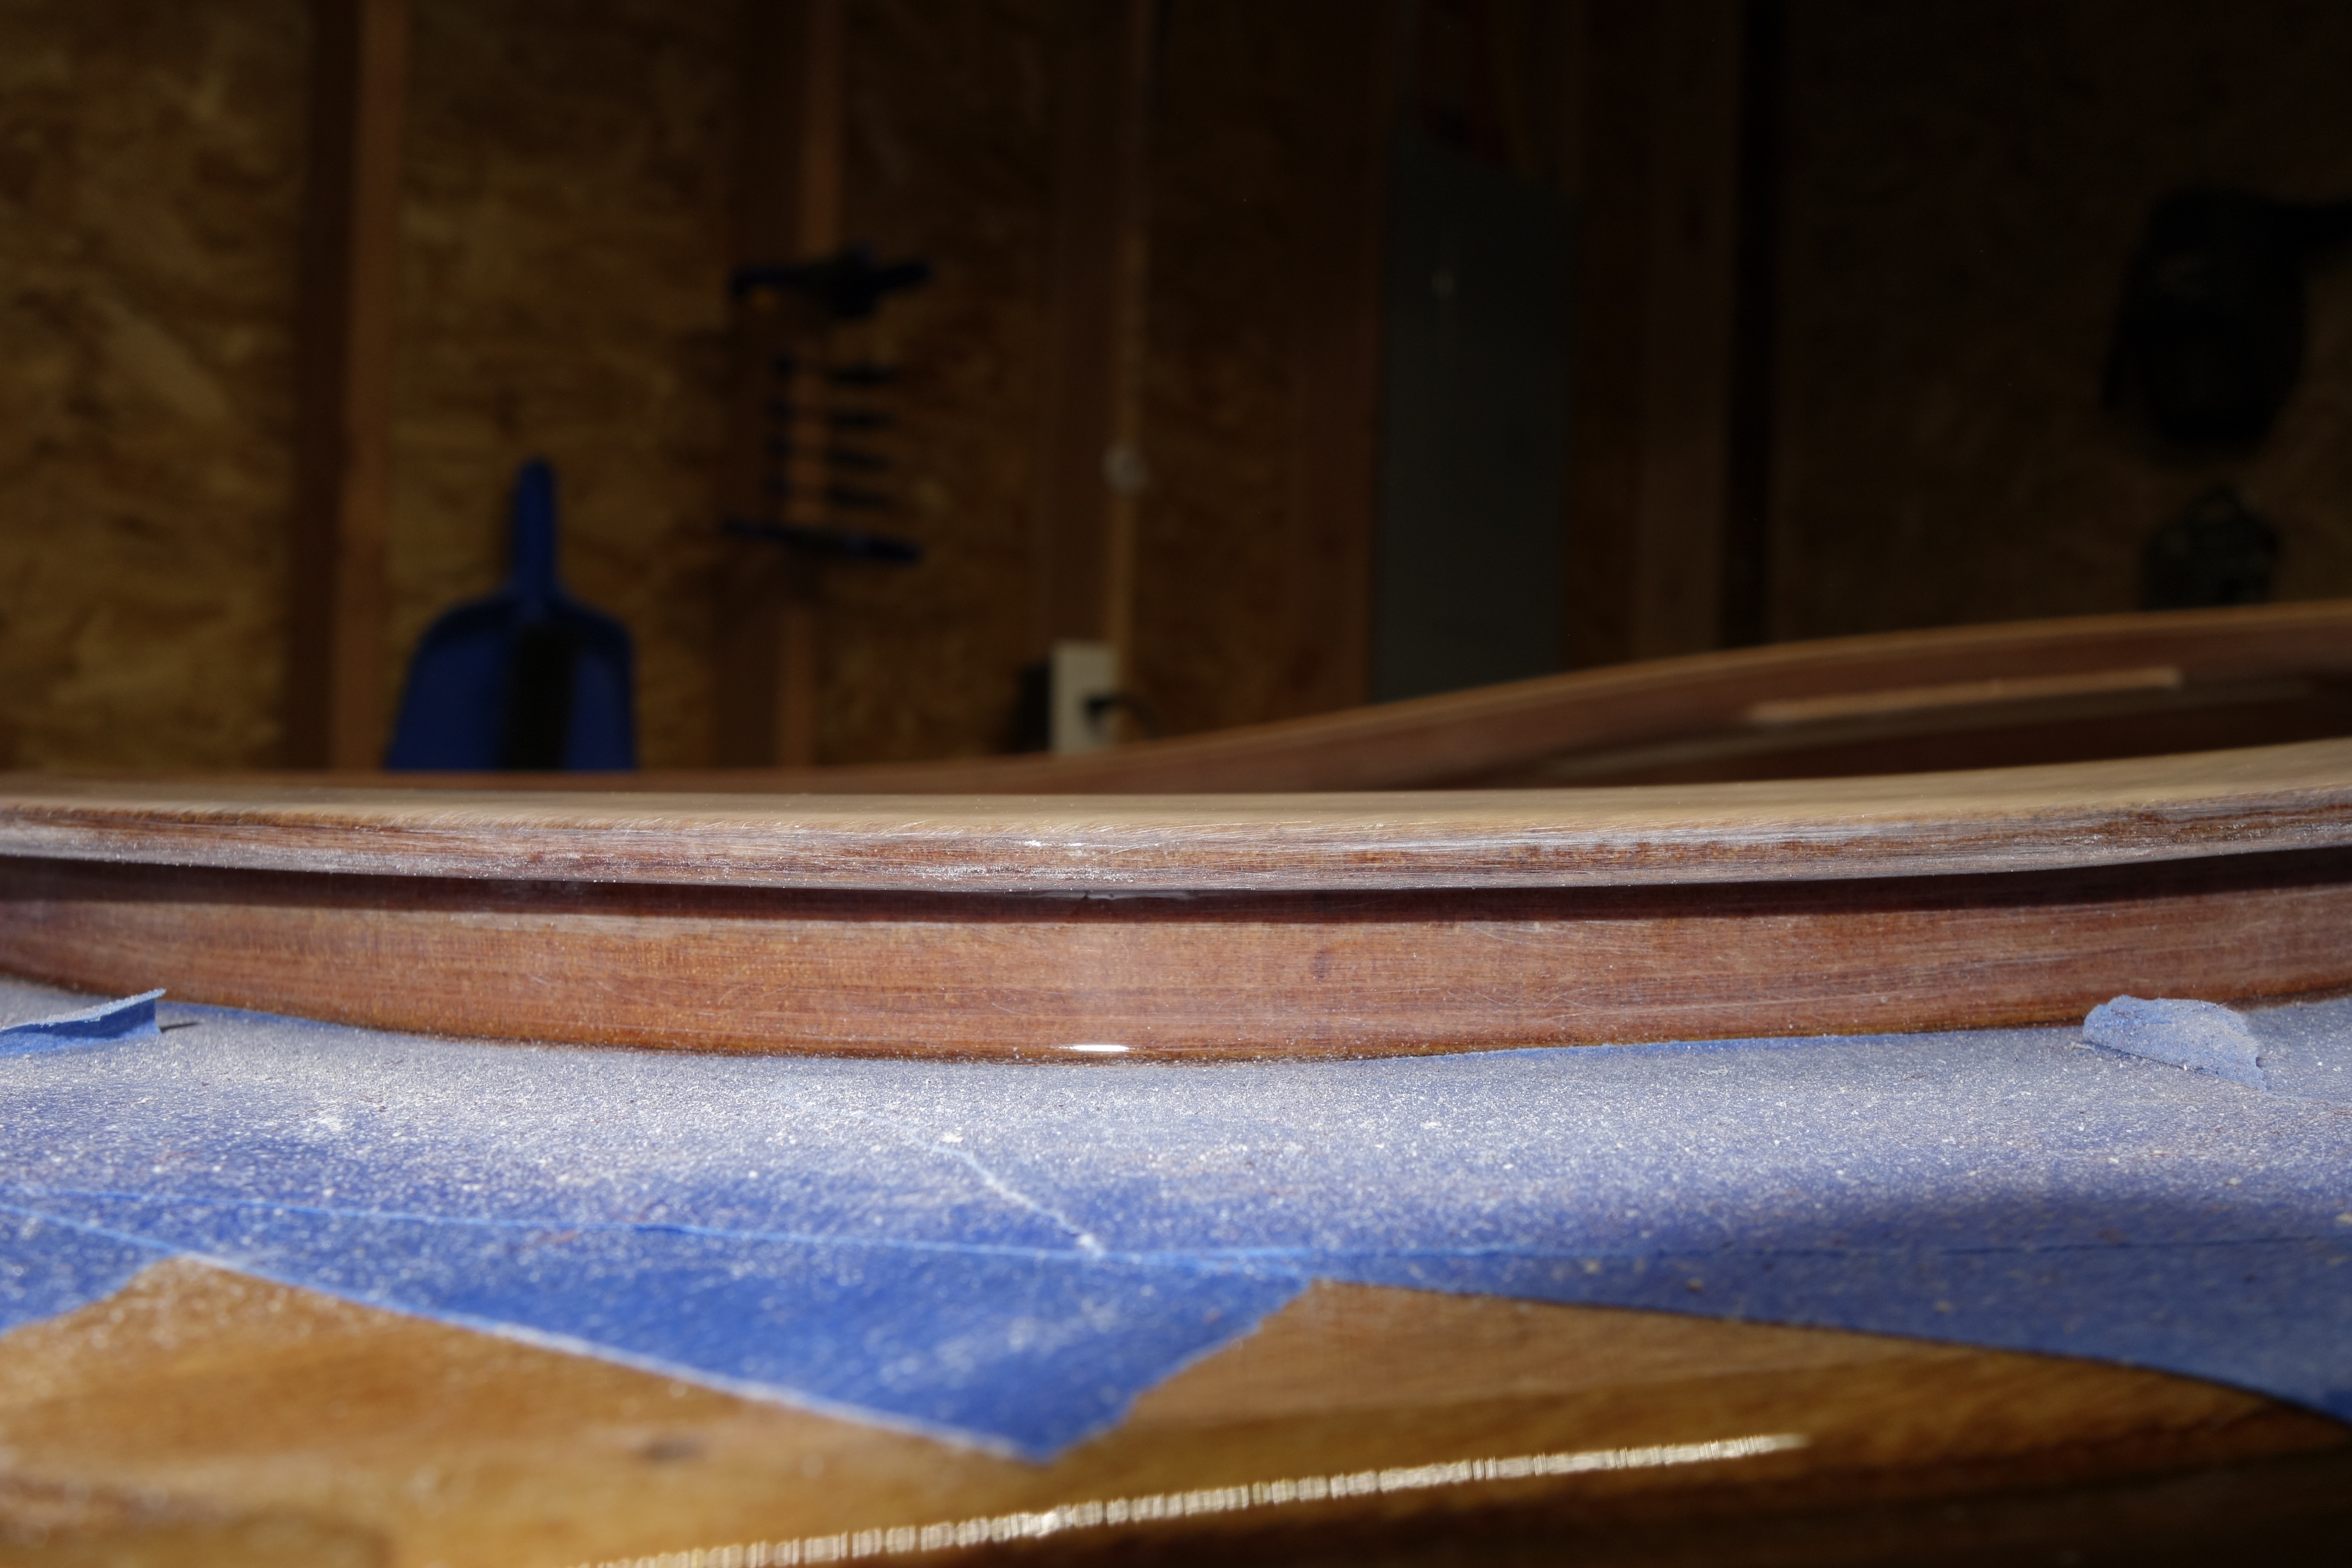
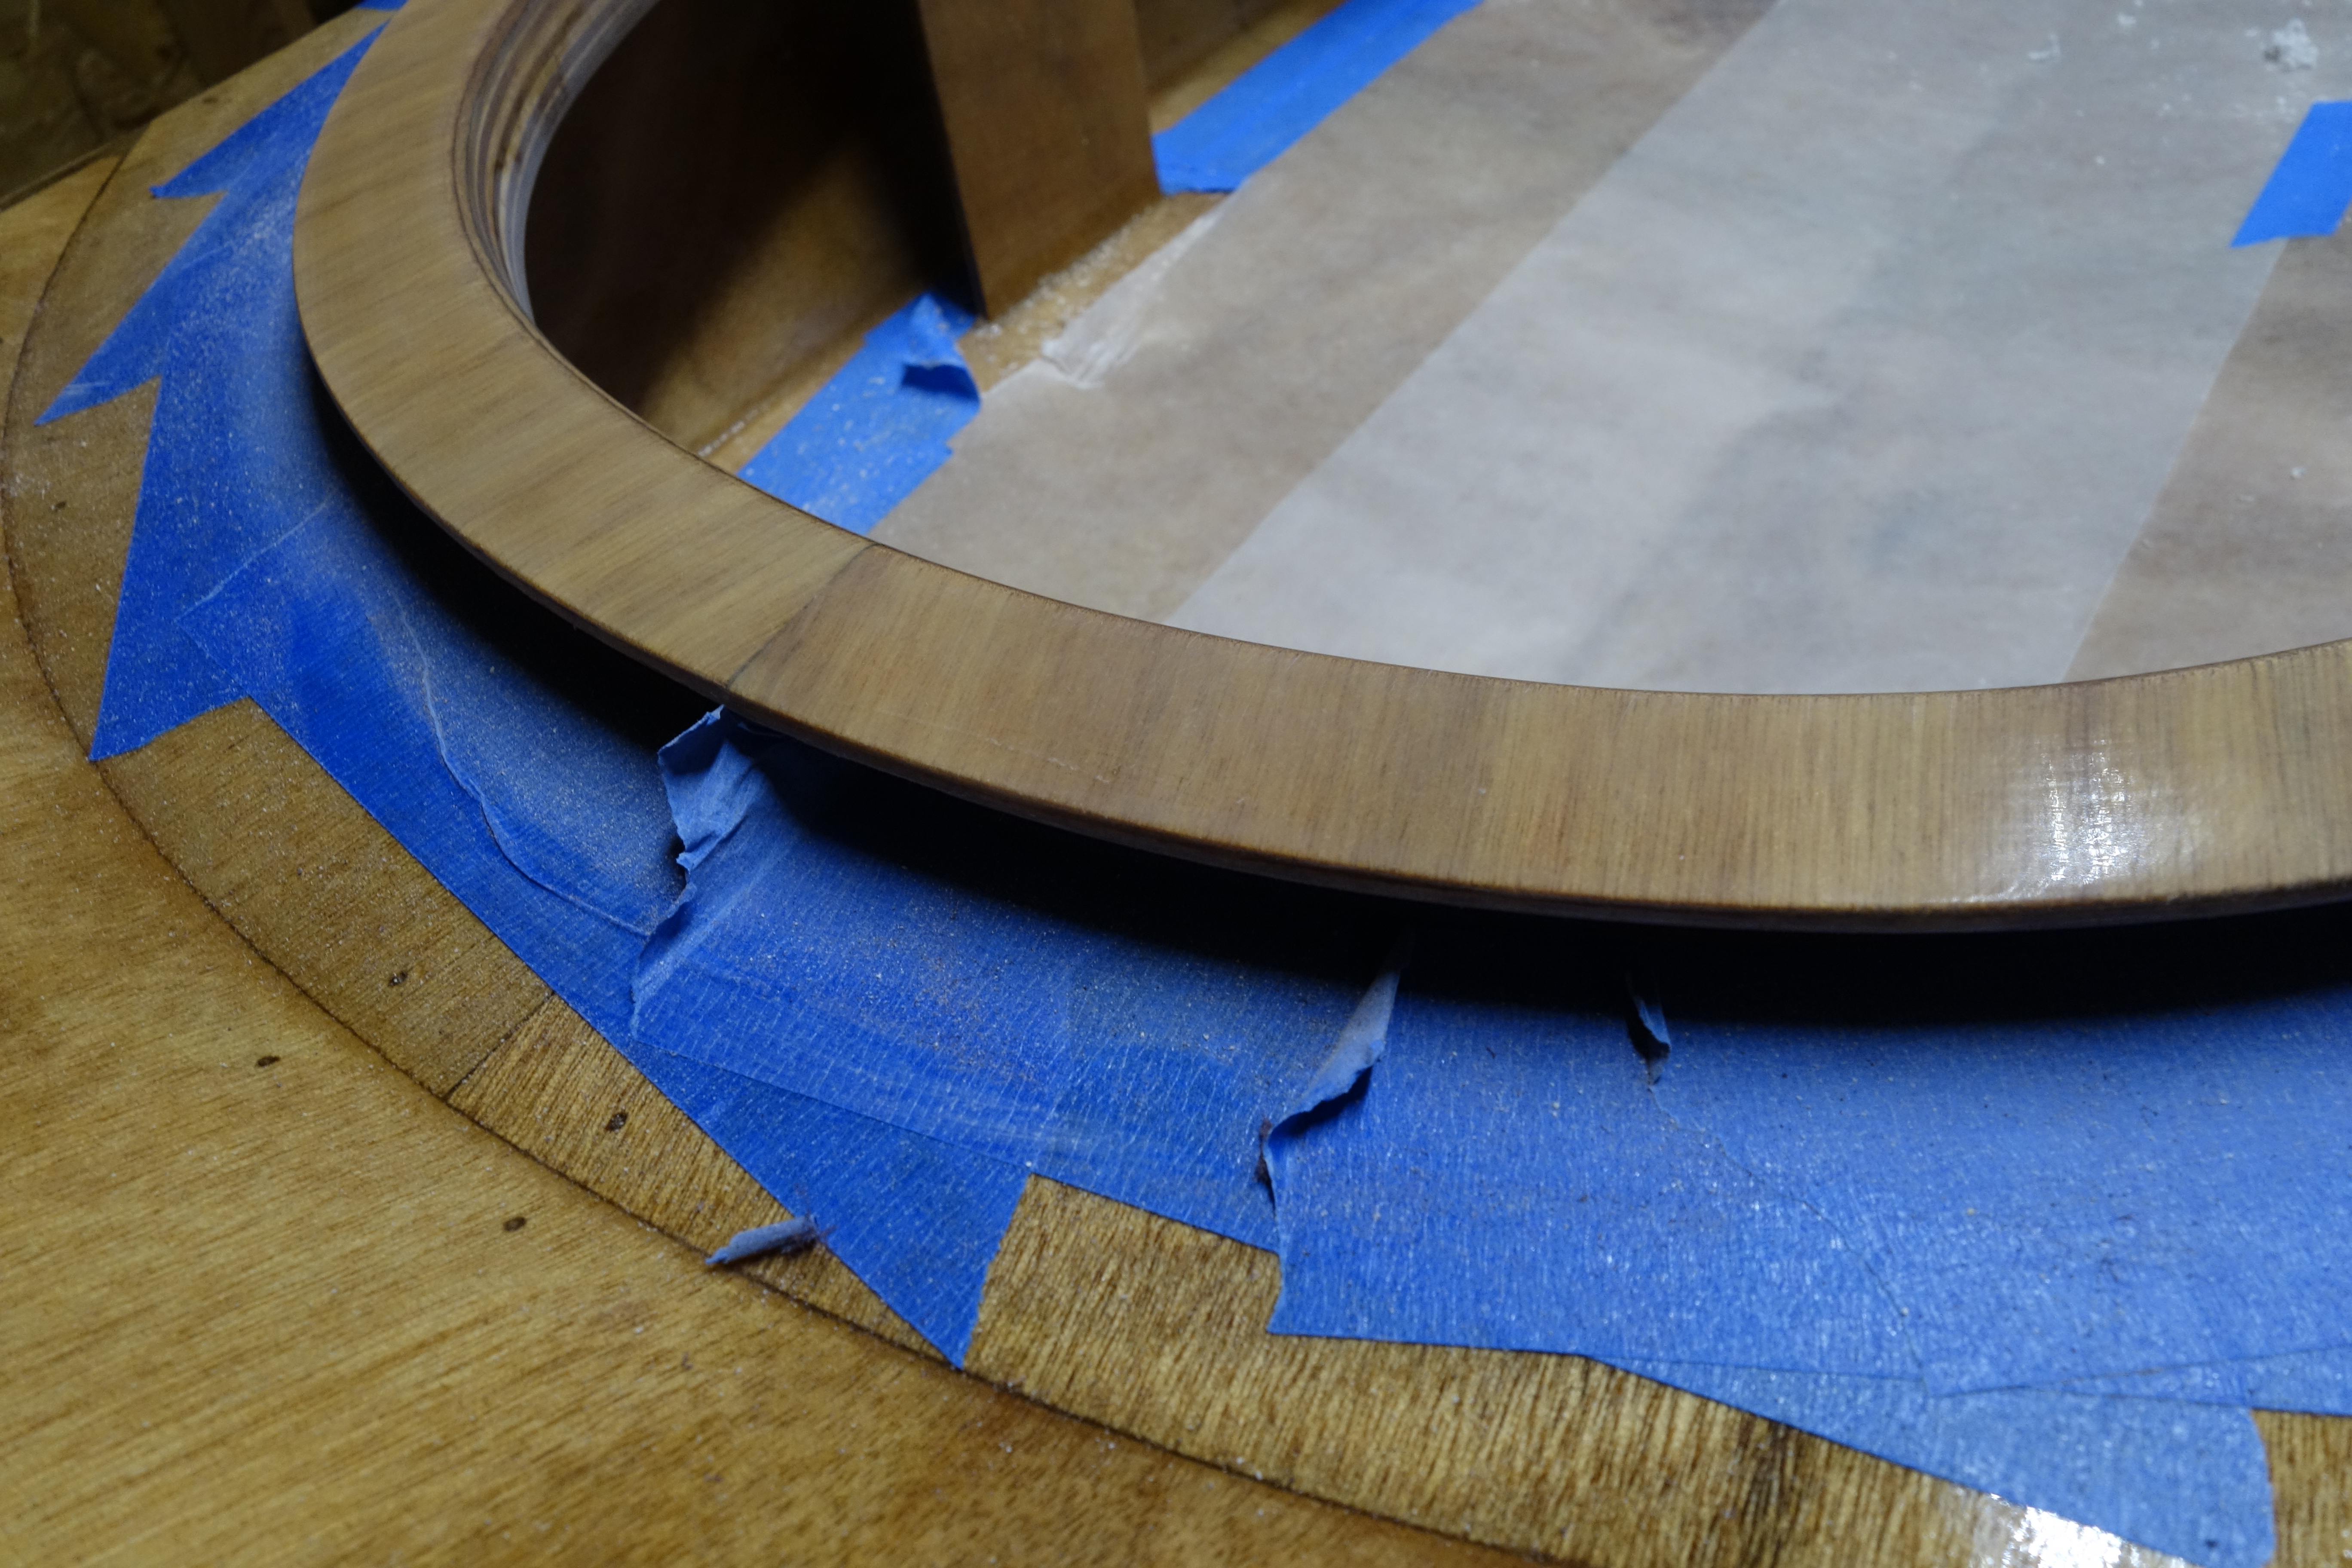
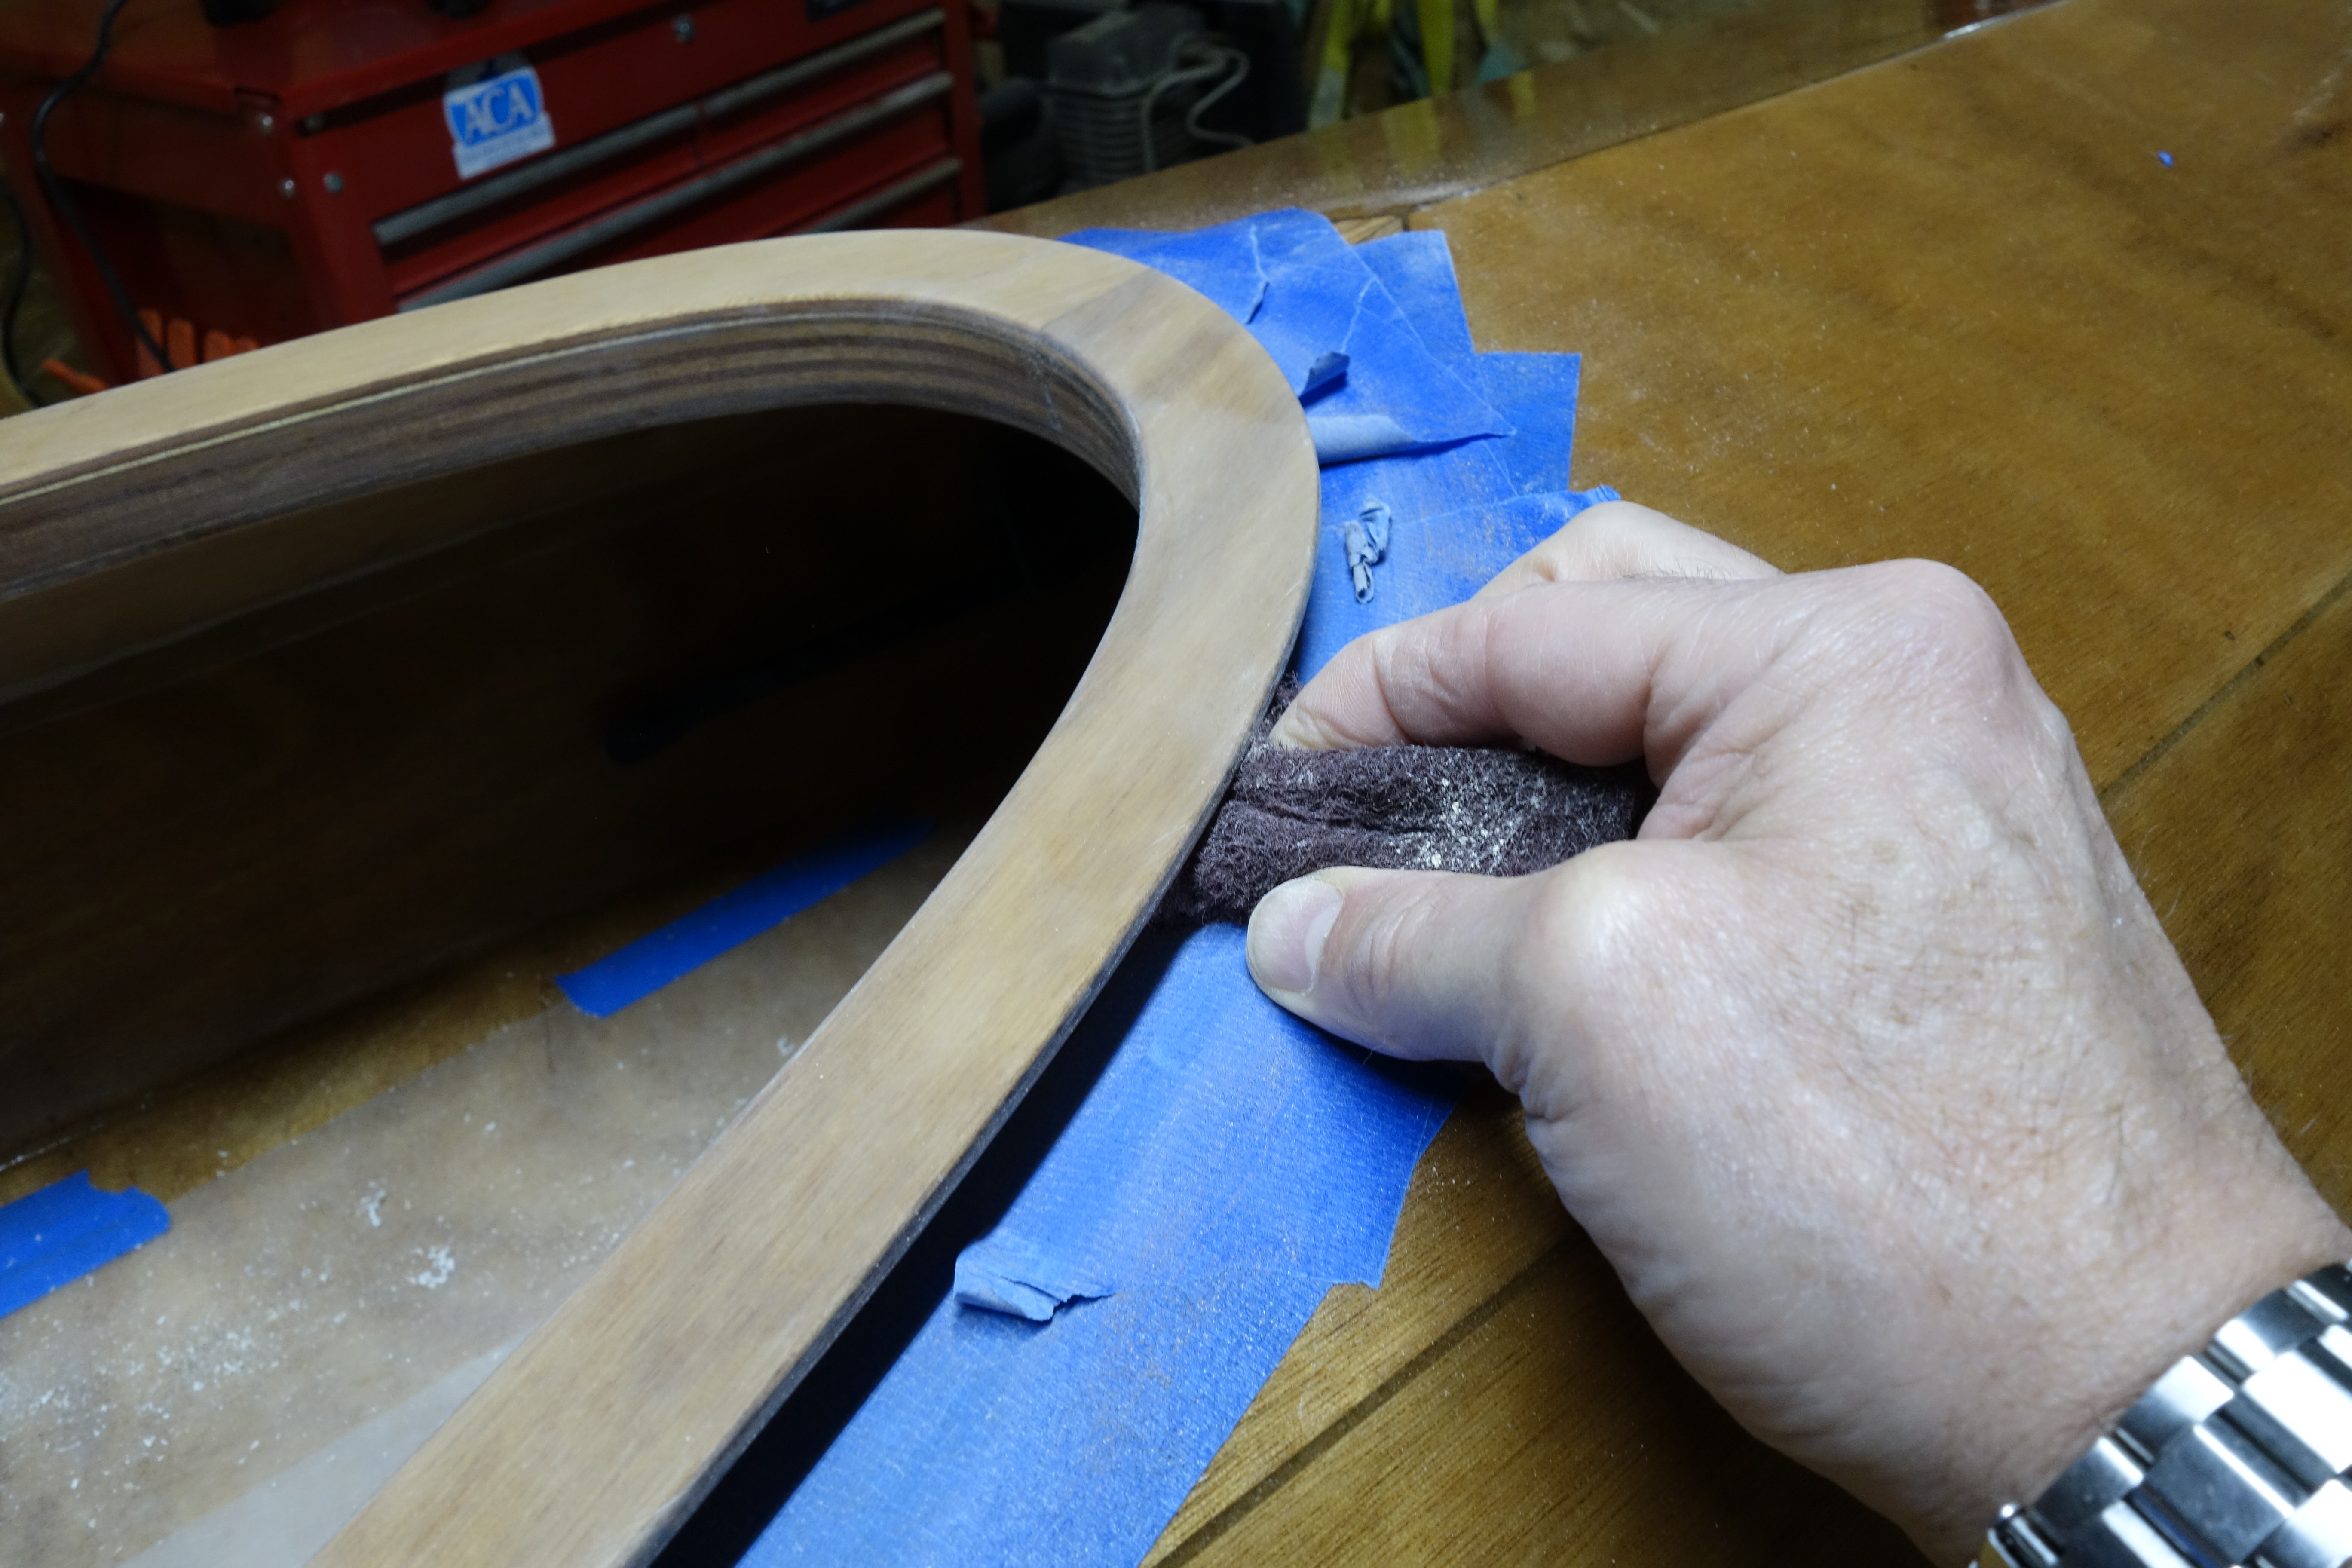
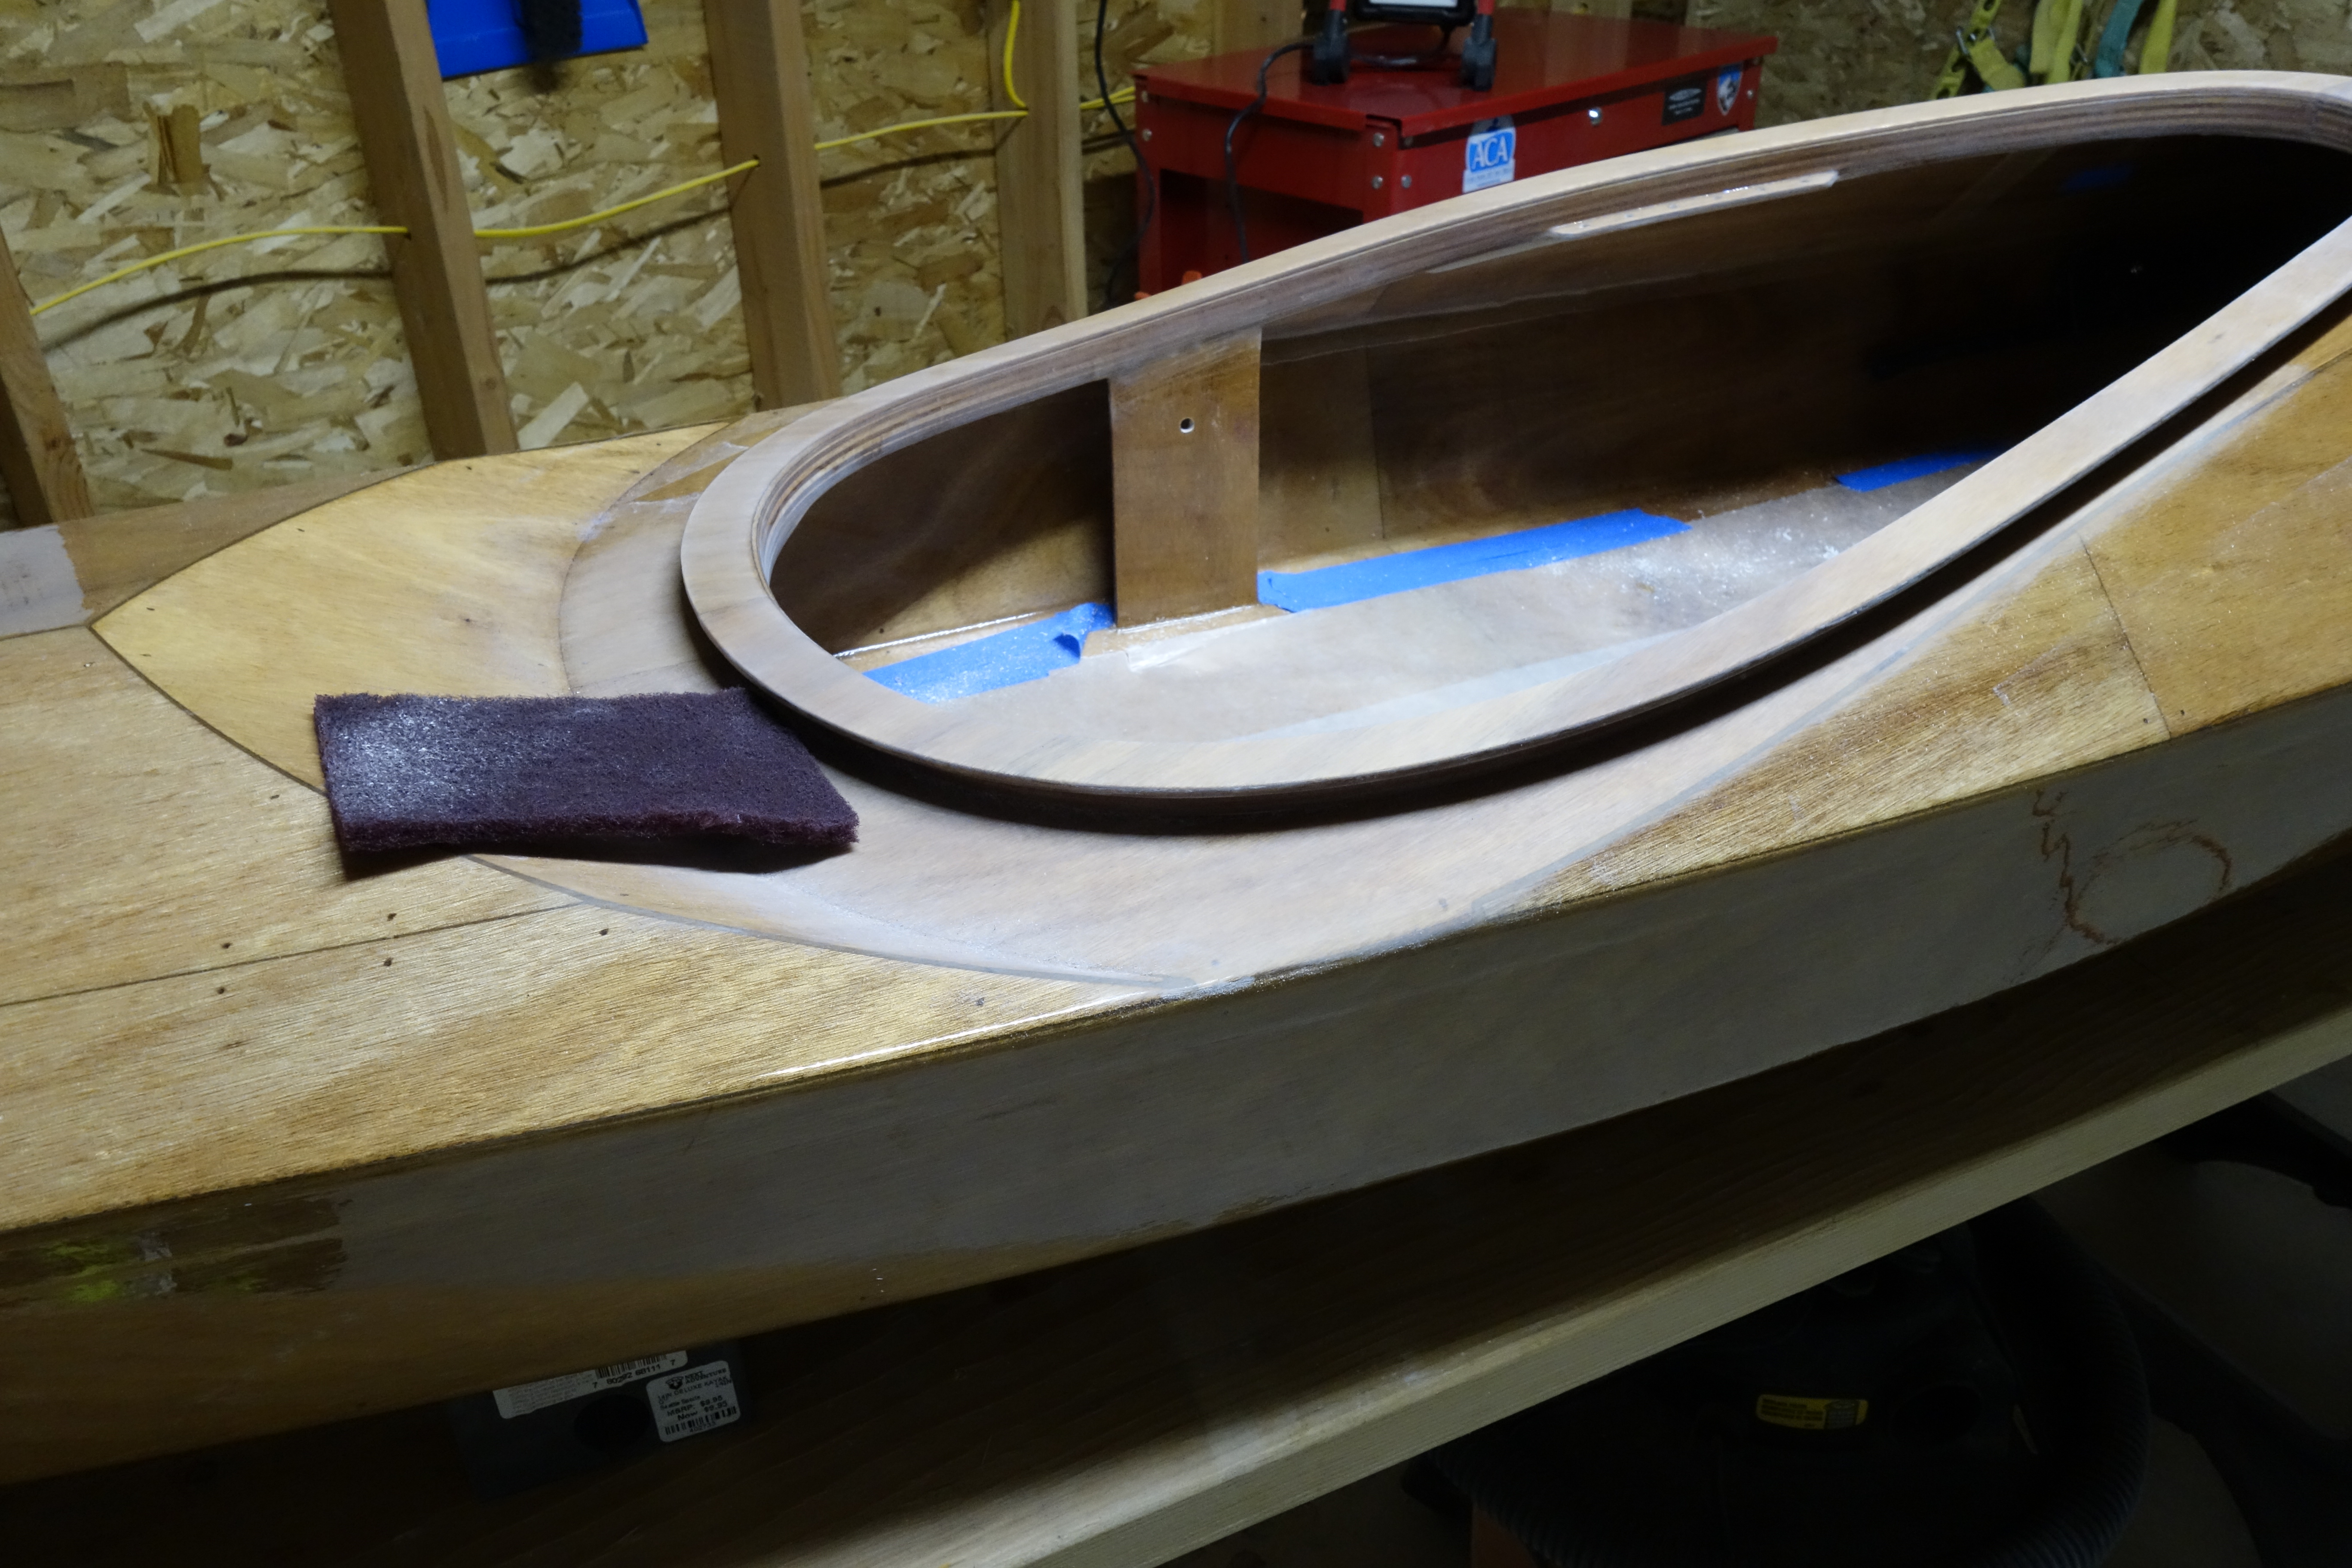
Over the course of the kayak construction I have found that it saves me a ton of work later if I mask around the cockpit coaming before sanding the underside of the coaming. When I didn’t mask I scratched up the cockpit apron badly and had to spend a bunch of time getting the scratches out of the apron before I could move on with the rest of the sanding.My sanding Achilles heel, the hatch covers. Above: My tool of choice for sanding before varnish. Your mileage may vary.Above you can see how torn up the masking tape gets when I sand under the coaming. Those scratches would be on the cockpit apron if I hadn’t masked.Rare action shot!Masking tape removed and moving on to the apron.Hull sanded and ready for the final coat of varnish (unless I screw it up and have to do a fourth coat to fix it).
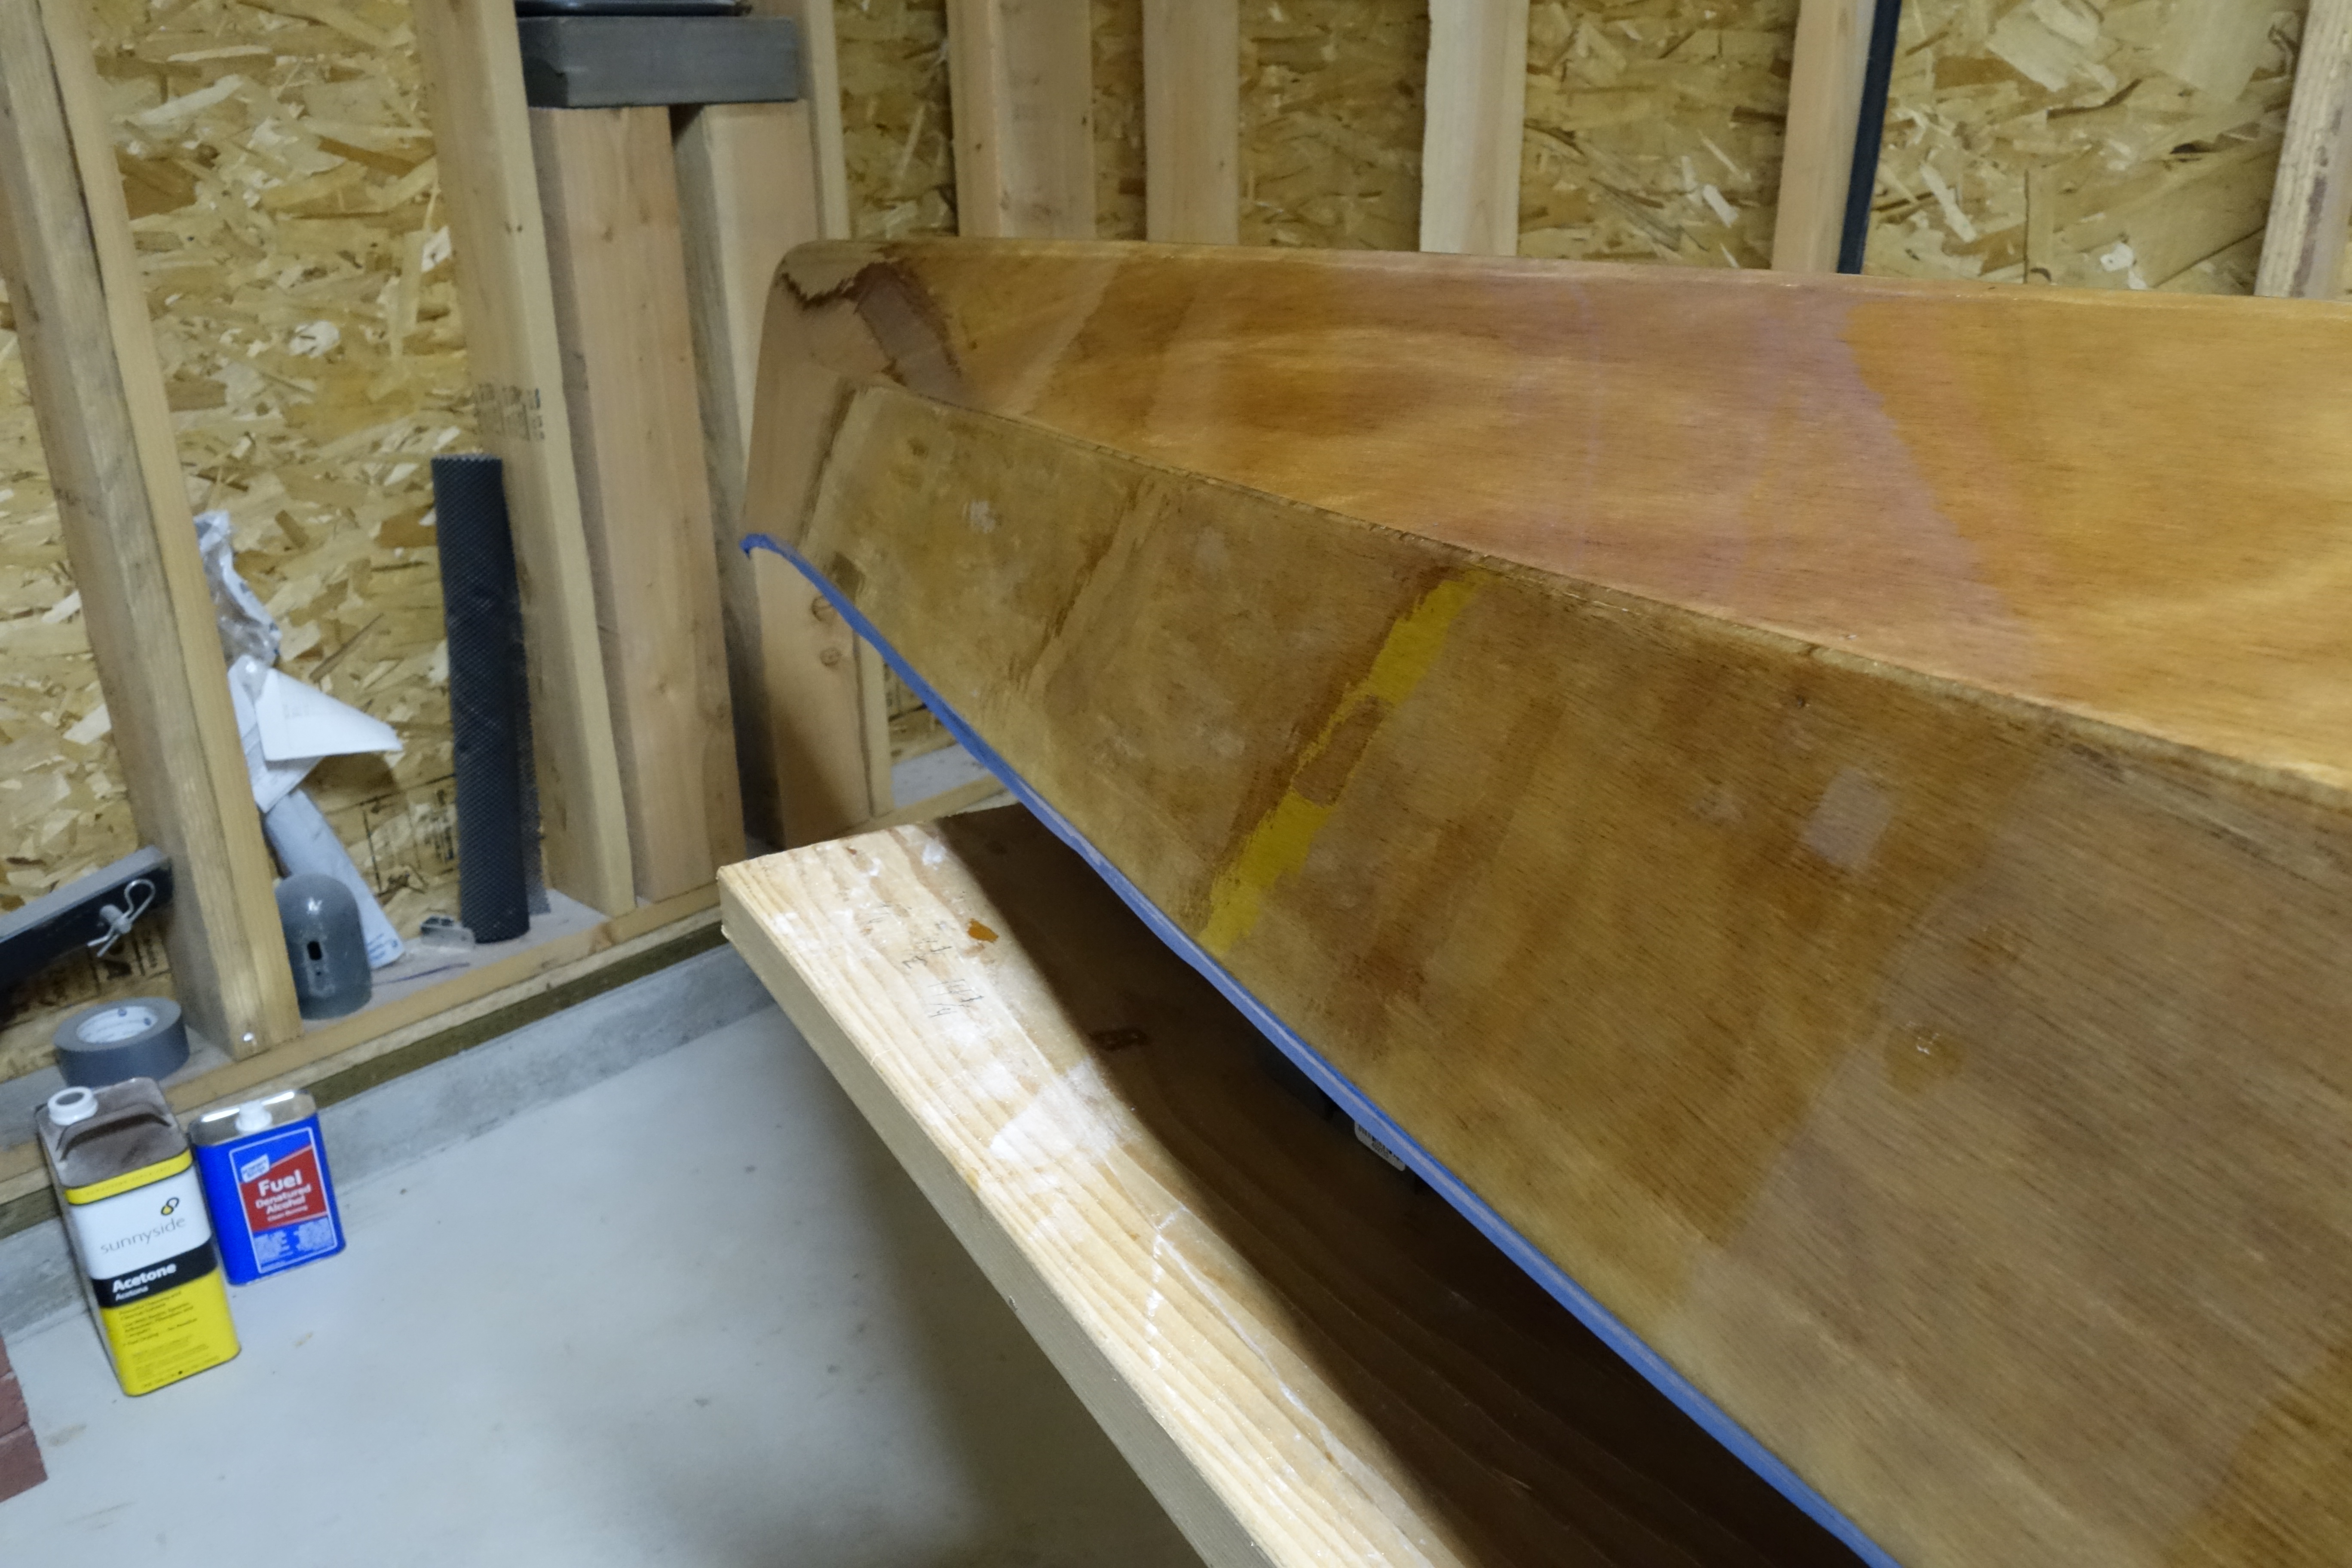
I was able to get the second coat of varnish on the deck this morning. There were a couple of small areas that I didn’t get great coverage on. The hatch covers have also been challenging for me to varnish so far. The varnish wants to pool around the stand-off blocks, no matter how careful I am when I am tipping the varnish off. This makes sanding for the next coat a real chore. The best advice I can offer about how to avoid this is that after you have carefully varnished on and around the stand-off blocks and the rest of the hatch covers, go back and tip off with a new (completely dry) foam brush. This helped suck up the excess varnish that pools around the blocks and makes a more uniform finish overall. I still didn’t get perfect results, but I certainly got better results than when I used the same brush to apply the varnish and tip it off. I have also found that it is really easy to be too aggressive when sanding the small strip between the stand-off blocks and the edge of the cover. Anyone reading this who has any advice for me that would make this easier, I’m all ears. Please leave a comment and let me know. I am considering revising my original plan to use two coats of the Flagship Varnish, followed by two coats of the Captain’s Varnish. The sanding is giving me enough trouble that I am worried that I am going to screw up my finish in a way that will be hard (or impossible) to fix. So much so that I am considering just putting on one coat of the Captain’s Varnish. We’ll see how the next round of sanding and the first coat of Captain’s Varnish goes on I guess, and I’ll decide then if I want to follow with a fourth coat. Pygmy says that “three coats are generally sufficient for protection”, but I know that more coats are better. That said, I also need to finish the kayak with my sanity intact, so…